

Appearance
Posting Photos & the Photo Viewer
Photos make a community feel alive. FluentCommunity shows the photos in a post as a gallery, lets members open each one in a full-screen viewer, and lets you decide the order and describe what each photo shows.
This guide walks you through adding photos to a post, changing their order, adding descriptions, and using the photo viewer.
How Photos Appear in a Post
When a post has more than one photo, FluentCommunity picks a gallery layout based on how many photos there are and what shape they are:
- Two wide photos stack on top of each other.
- Two tall photos sit side by side.
- Three or four photos show one large hero photo with the rest beside it.
On a wide screen, a post shows up to five photos at once. On a phone, it shows up to three. If a post has more, the last tile shows a small badge such as +2 for the photos that are left. Click or tap any photo to open it in the photo viewer.
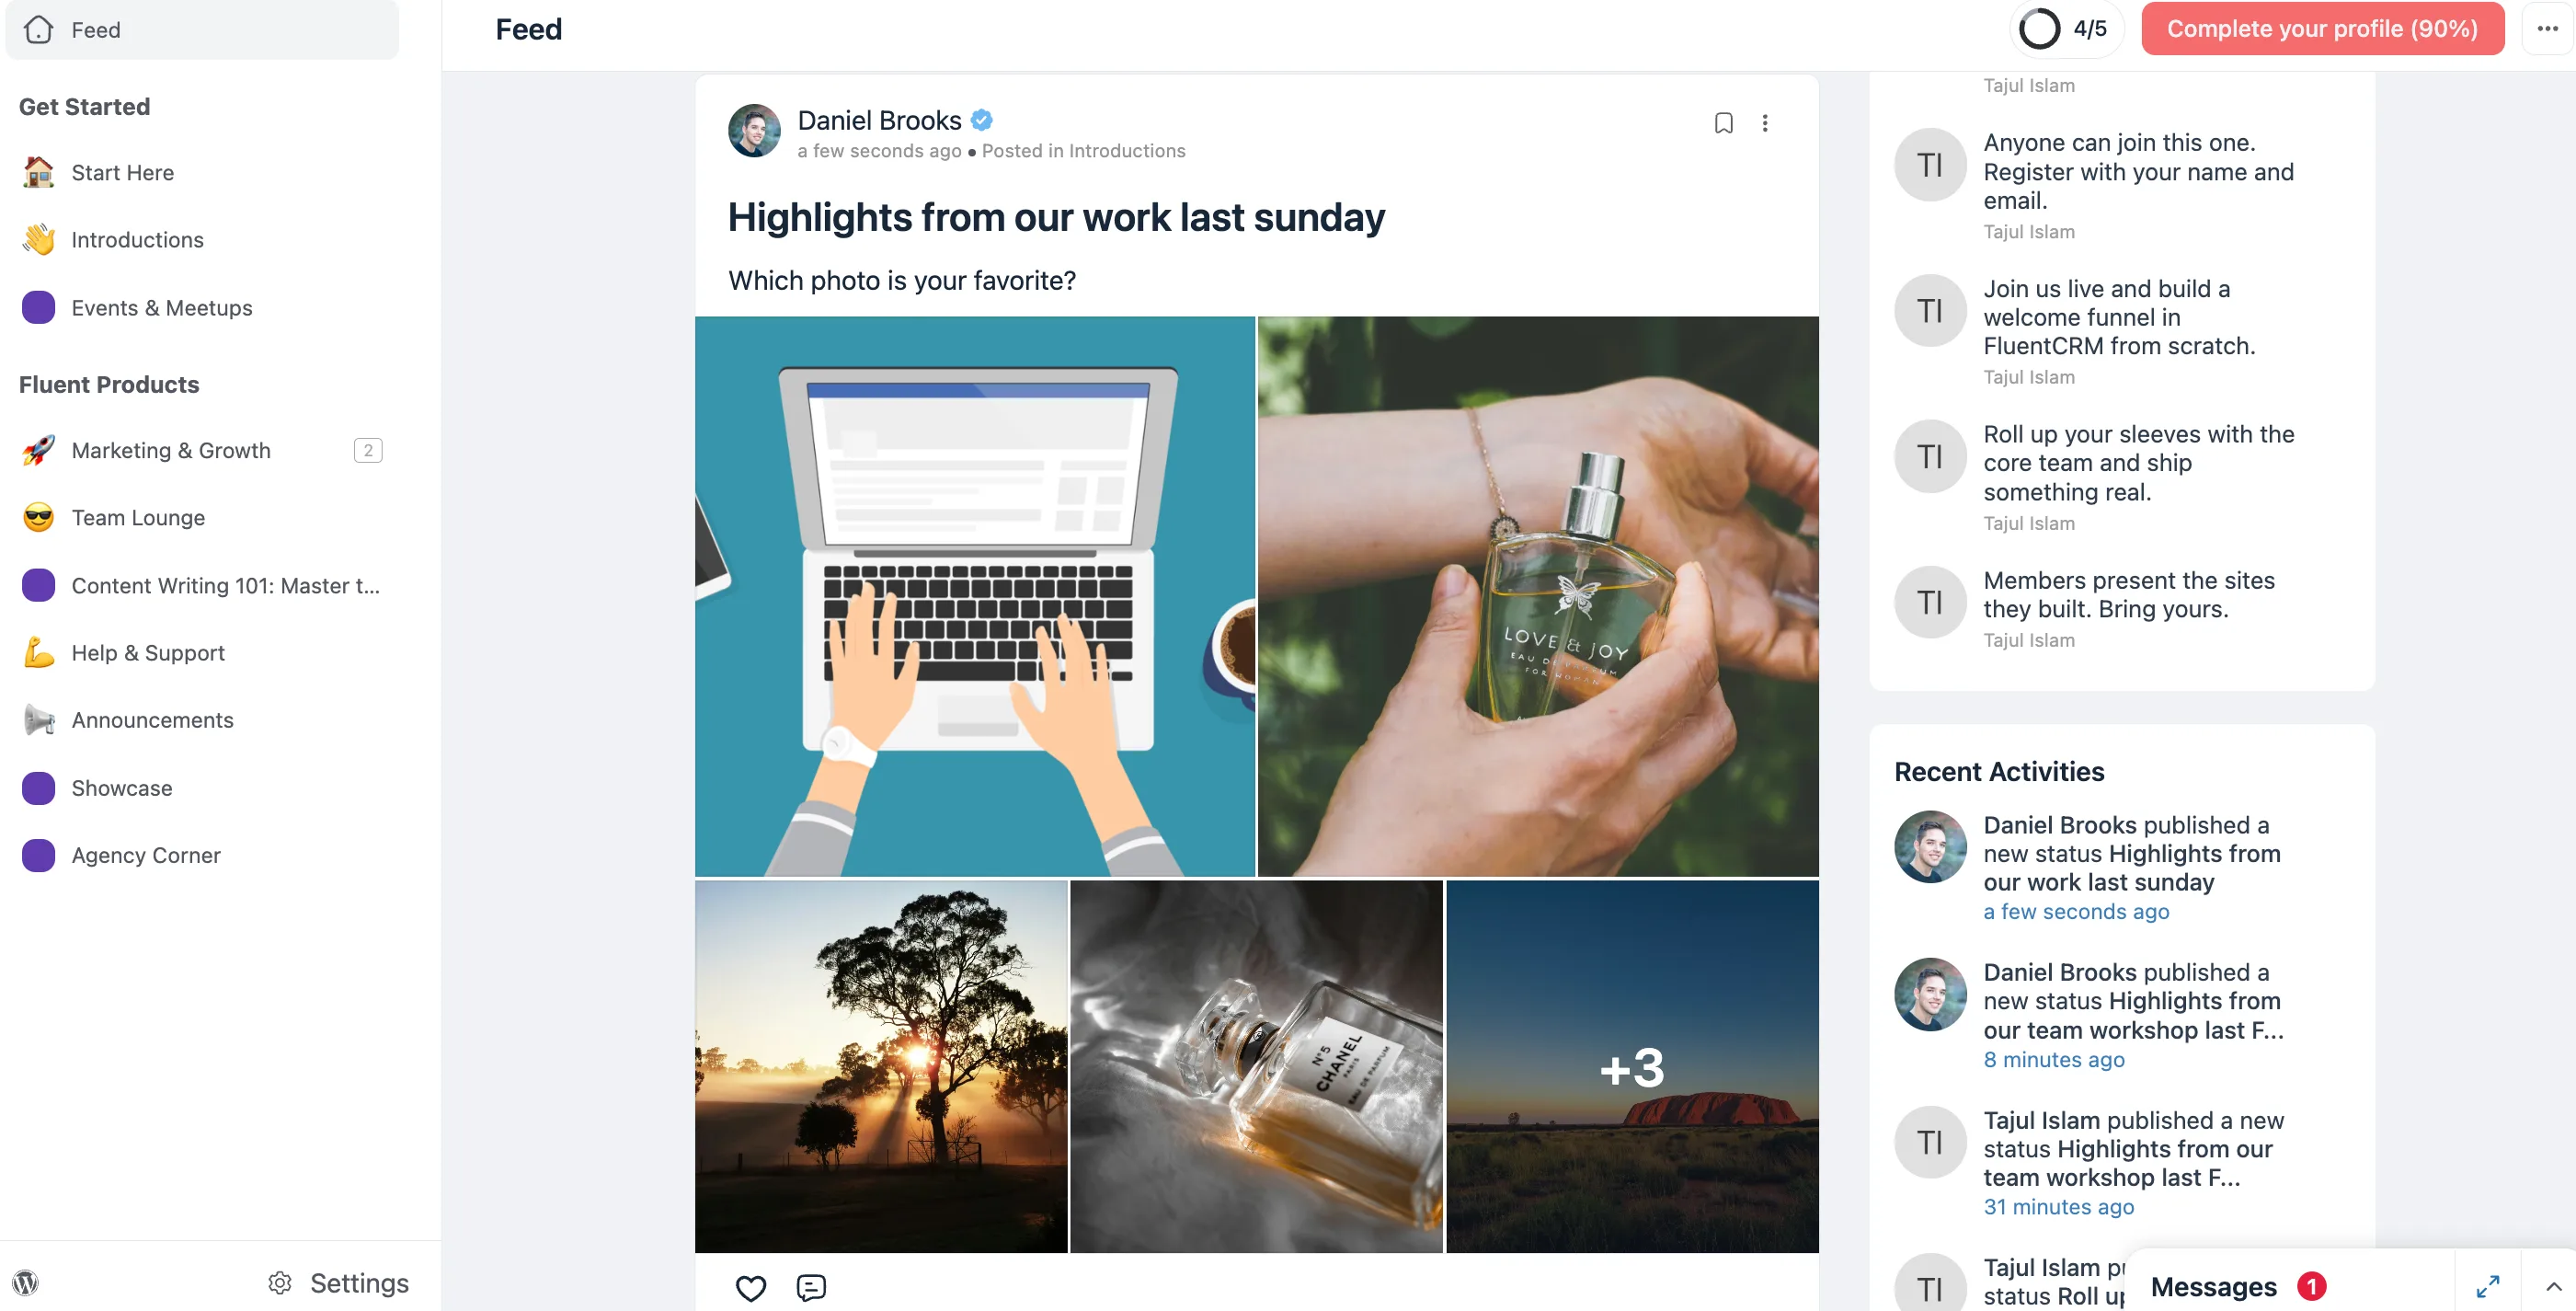
The first photo sets the layout
The first photo is the hero photo, and it decides the whole layout. Put your best photo first. See Reorder Your Photos below.
Add Photos to a Post or Comment
- Open the post or comment composer.
- Click the photo icon in the toolbar under the text box, then choose a photo. Repeat for each photo you want to add.
- Wait for each photo to finish uploading. Your photos appear as small thumbnails in the composer.
- Click Post.
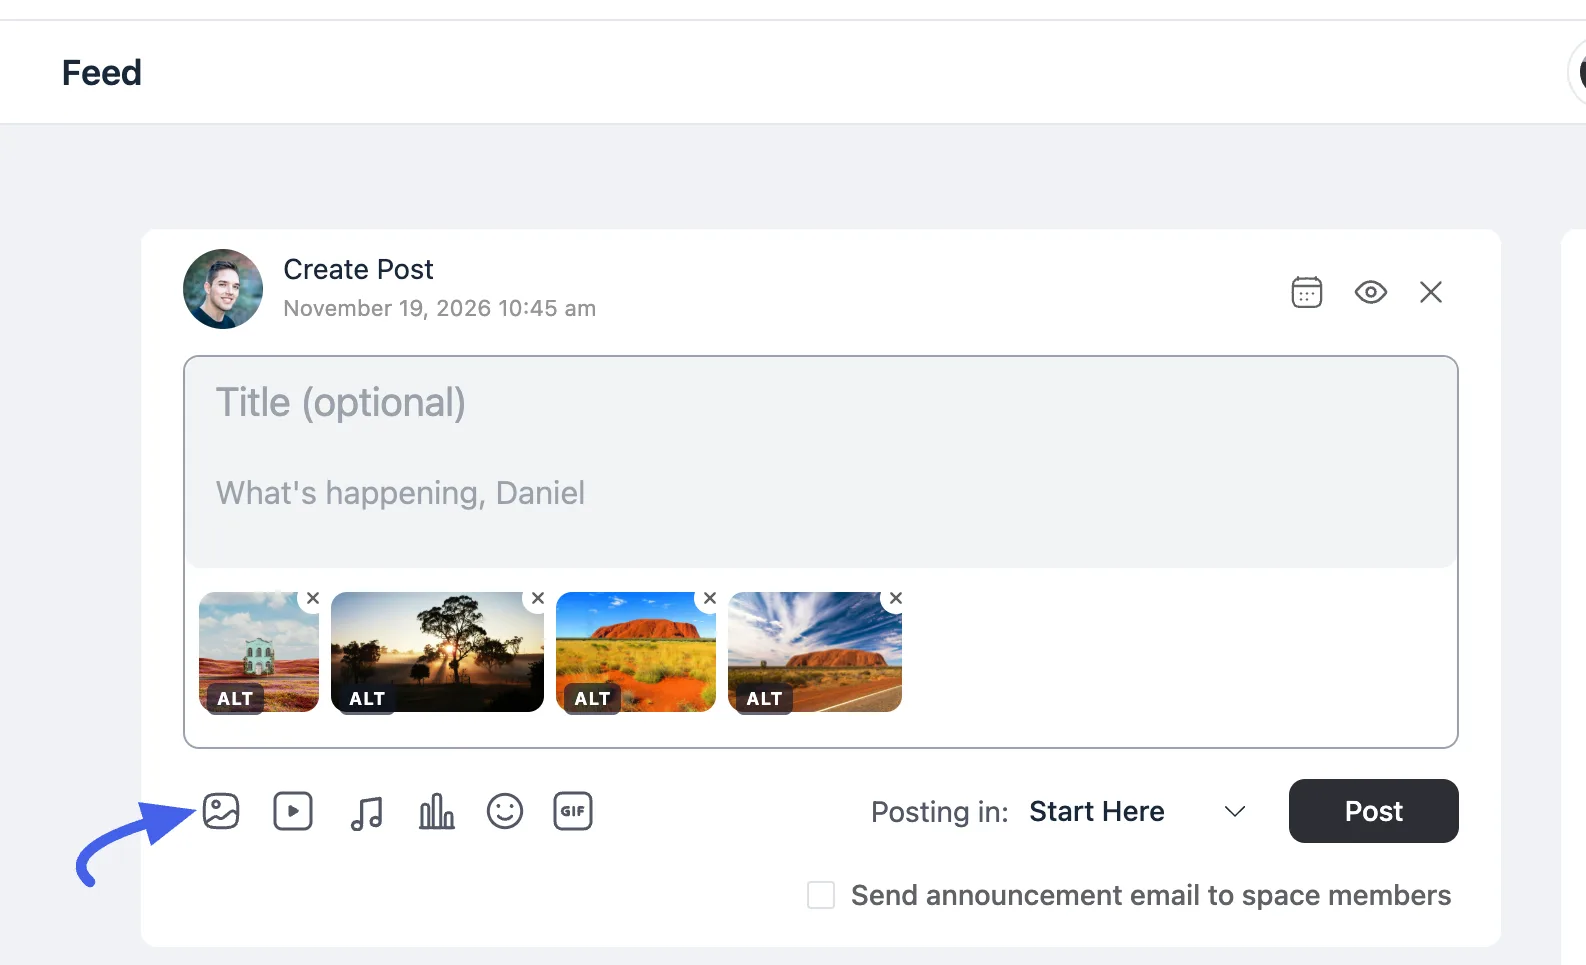
You can add photos the same way when you write a comment.
Photo Limit
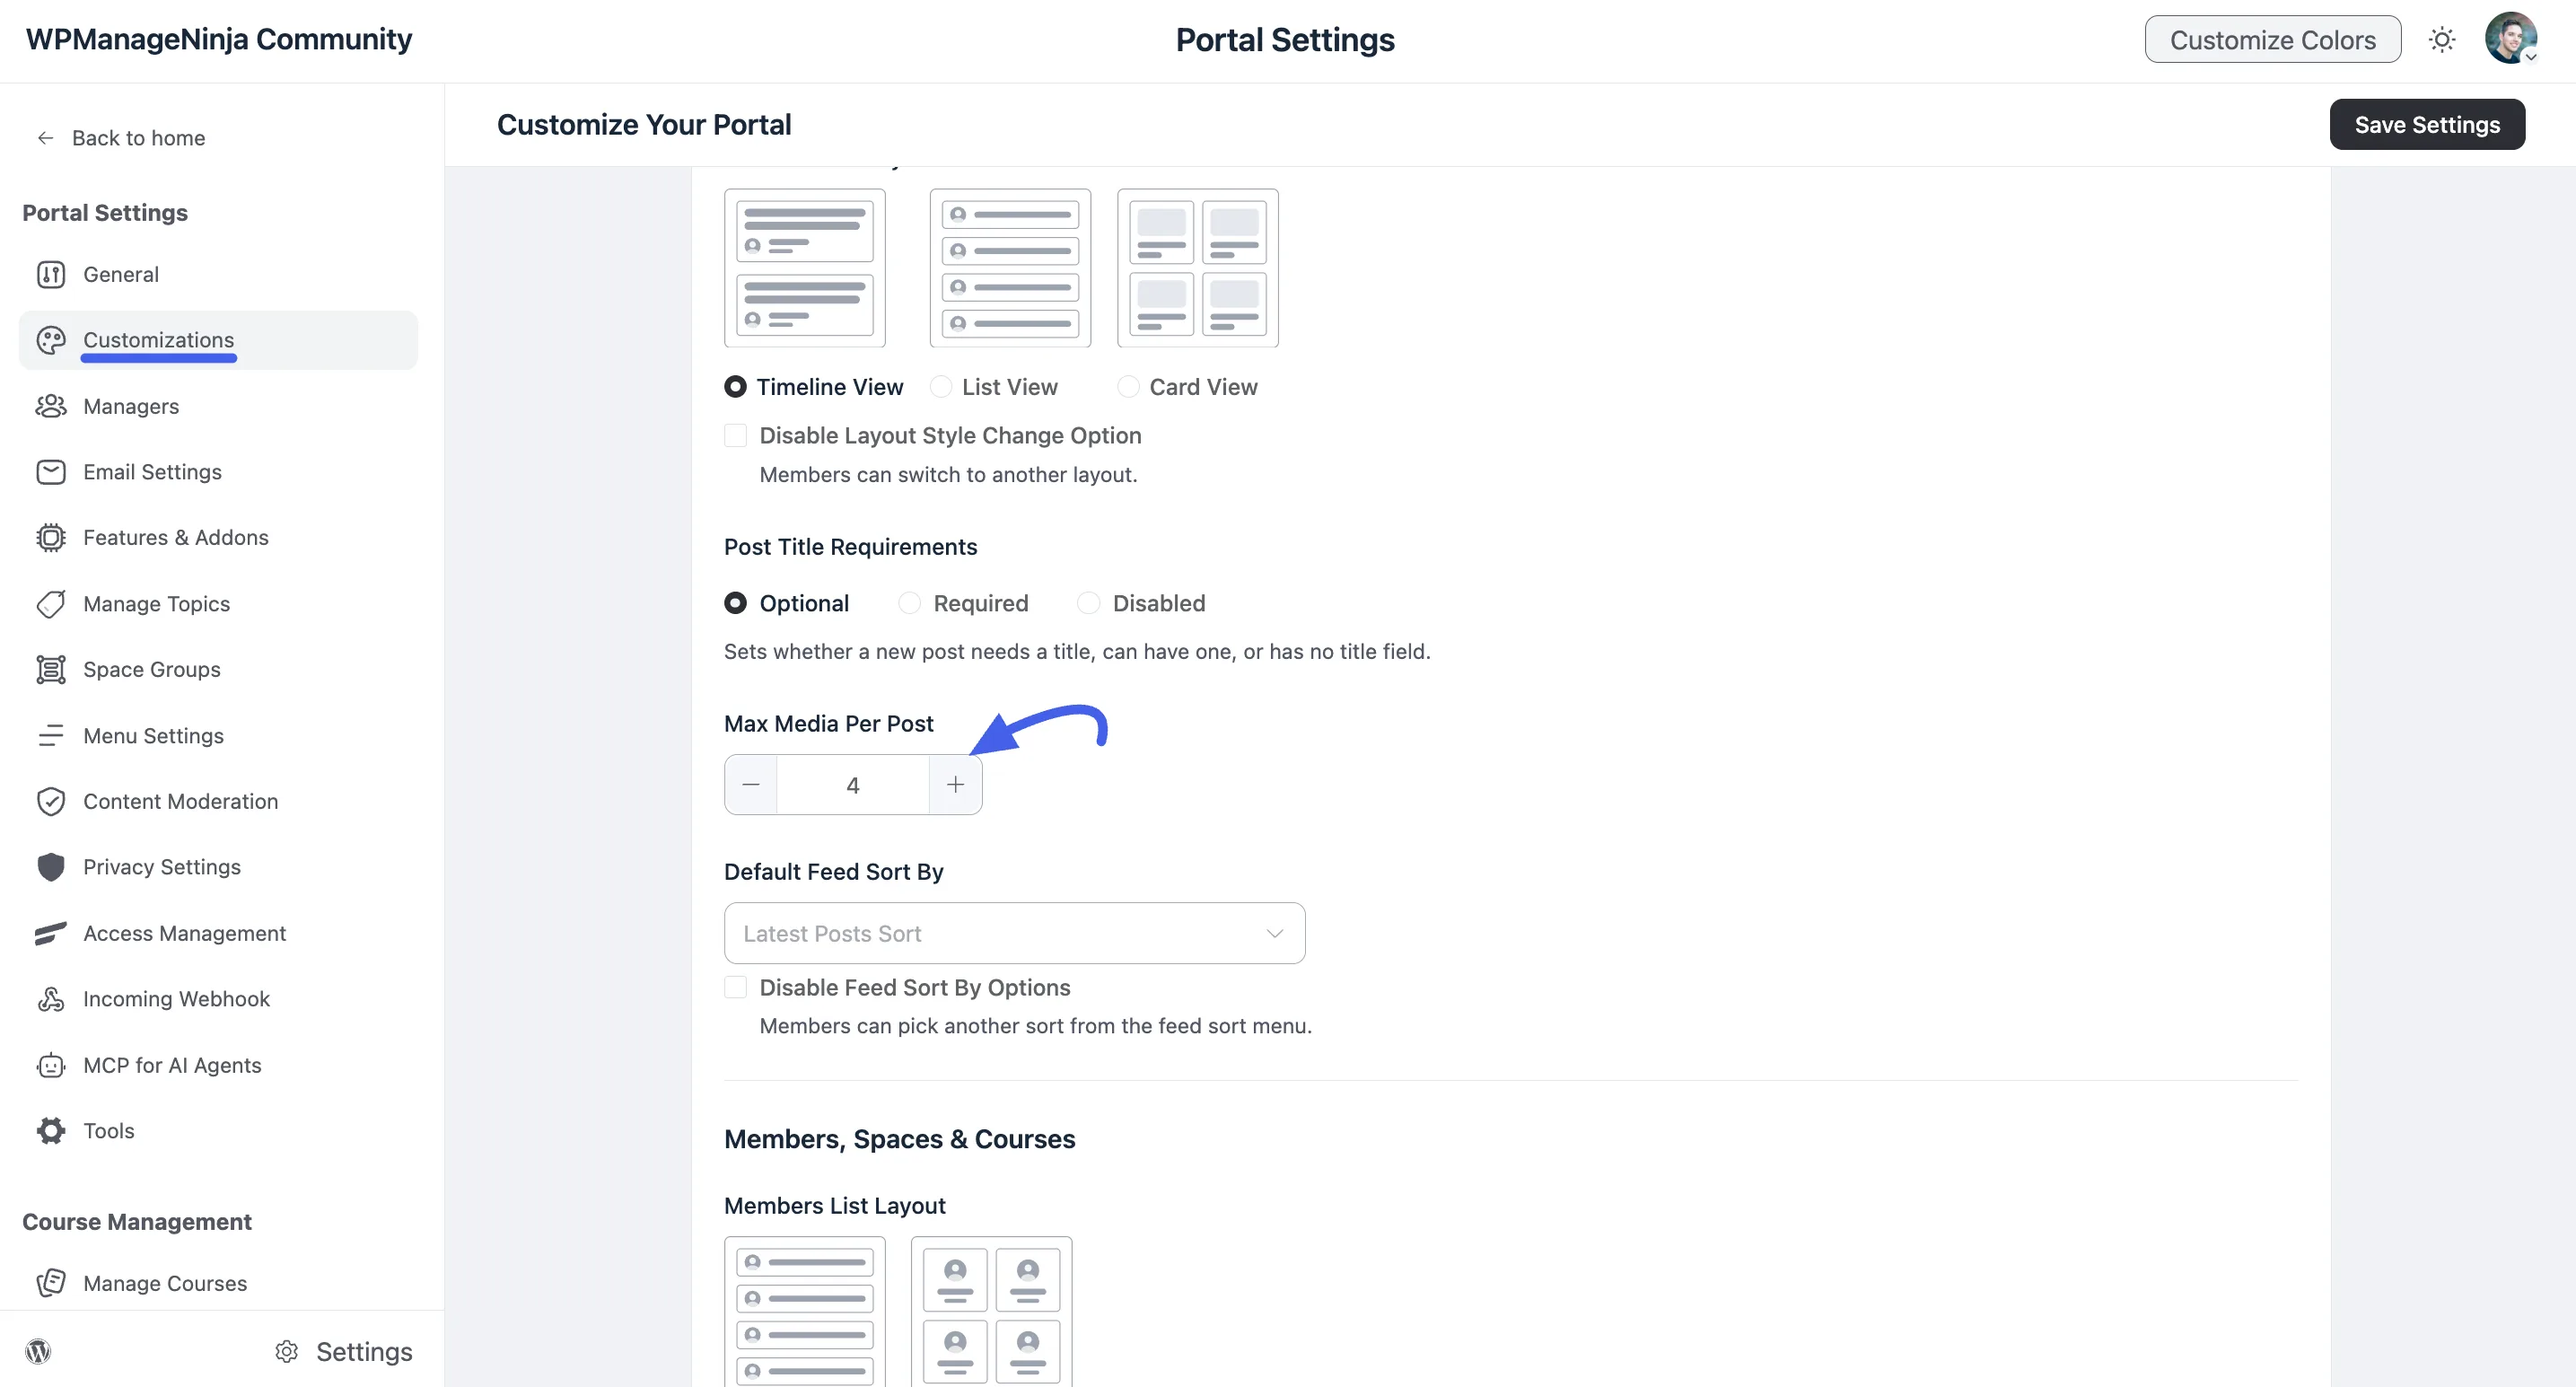
Each post has a limit on how many photos and videos it can hold. The default is 4. If a member goes over the limit, FluentCommunity tells them they can upload a maximum of that many images per post.
The limit applies to posts and comments, and inline images count toward it. Site admins and community moderators have no limit.
To change the limit, go to Portal Settings → Customizations, find Max Media Per Post under Feed & Posts, and set a new number. You can set any number from 1 to 100. Then click Save Settings.
Reorder Your Photos
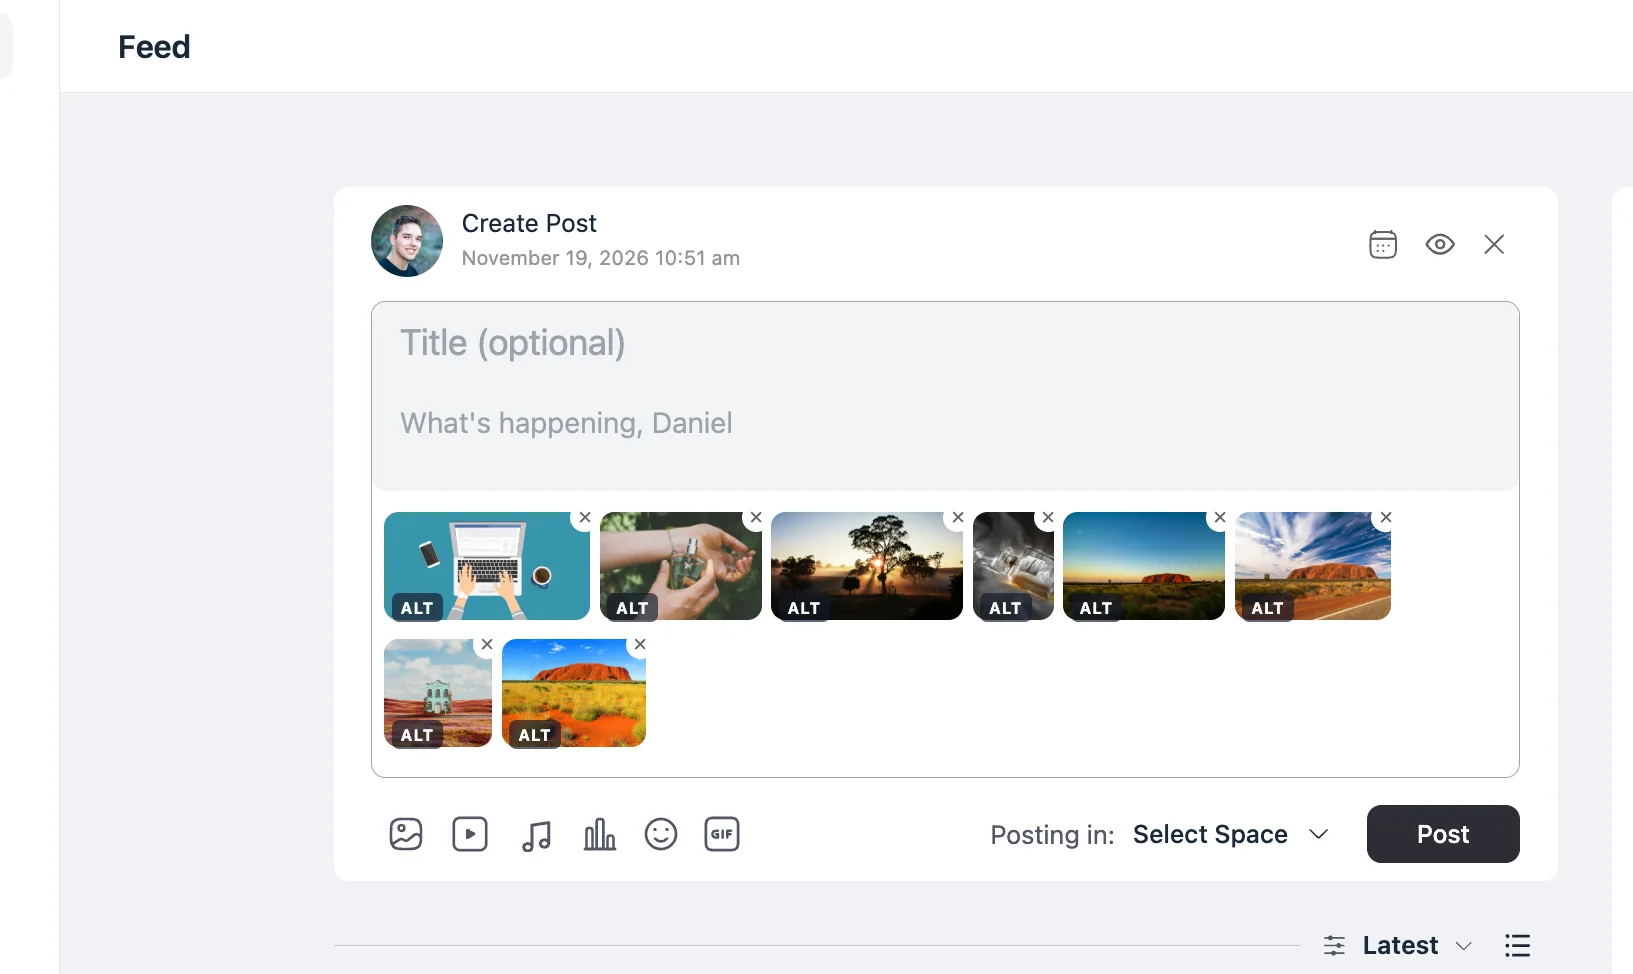
Before you post, you can drag your photos into a new order in the post and comment composer.
- On a computer, drag a photo to a new position, or move it with the up and down arrow keys.
- On a phone, press and hold a photo, then drag it. A normal swipe still scrolls the page.
Screen readers announce the new position as you move a photo, so everyone can reorder photos.
Describe Your Photos
Each photo in the composer has a small ALT button. Click it to open one optional field: Describe this photo.
Type a short sentence about what the photo shows, for example, "Sunrise over the ridge before the workshop kicked off." Then click Done.
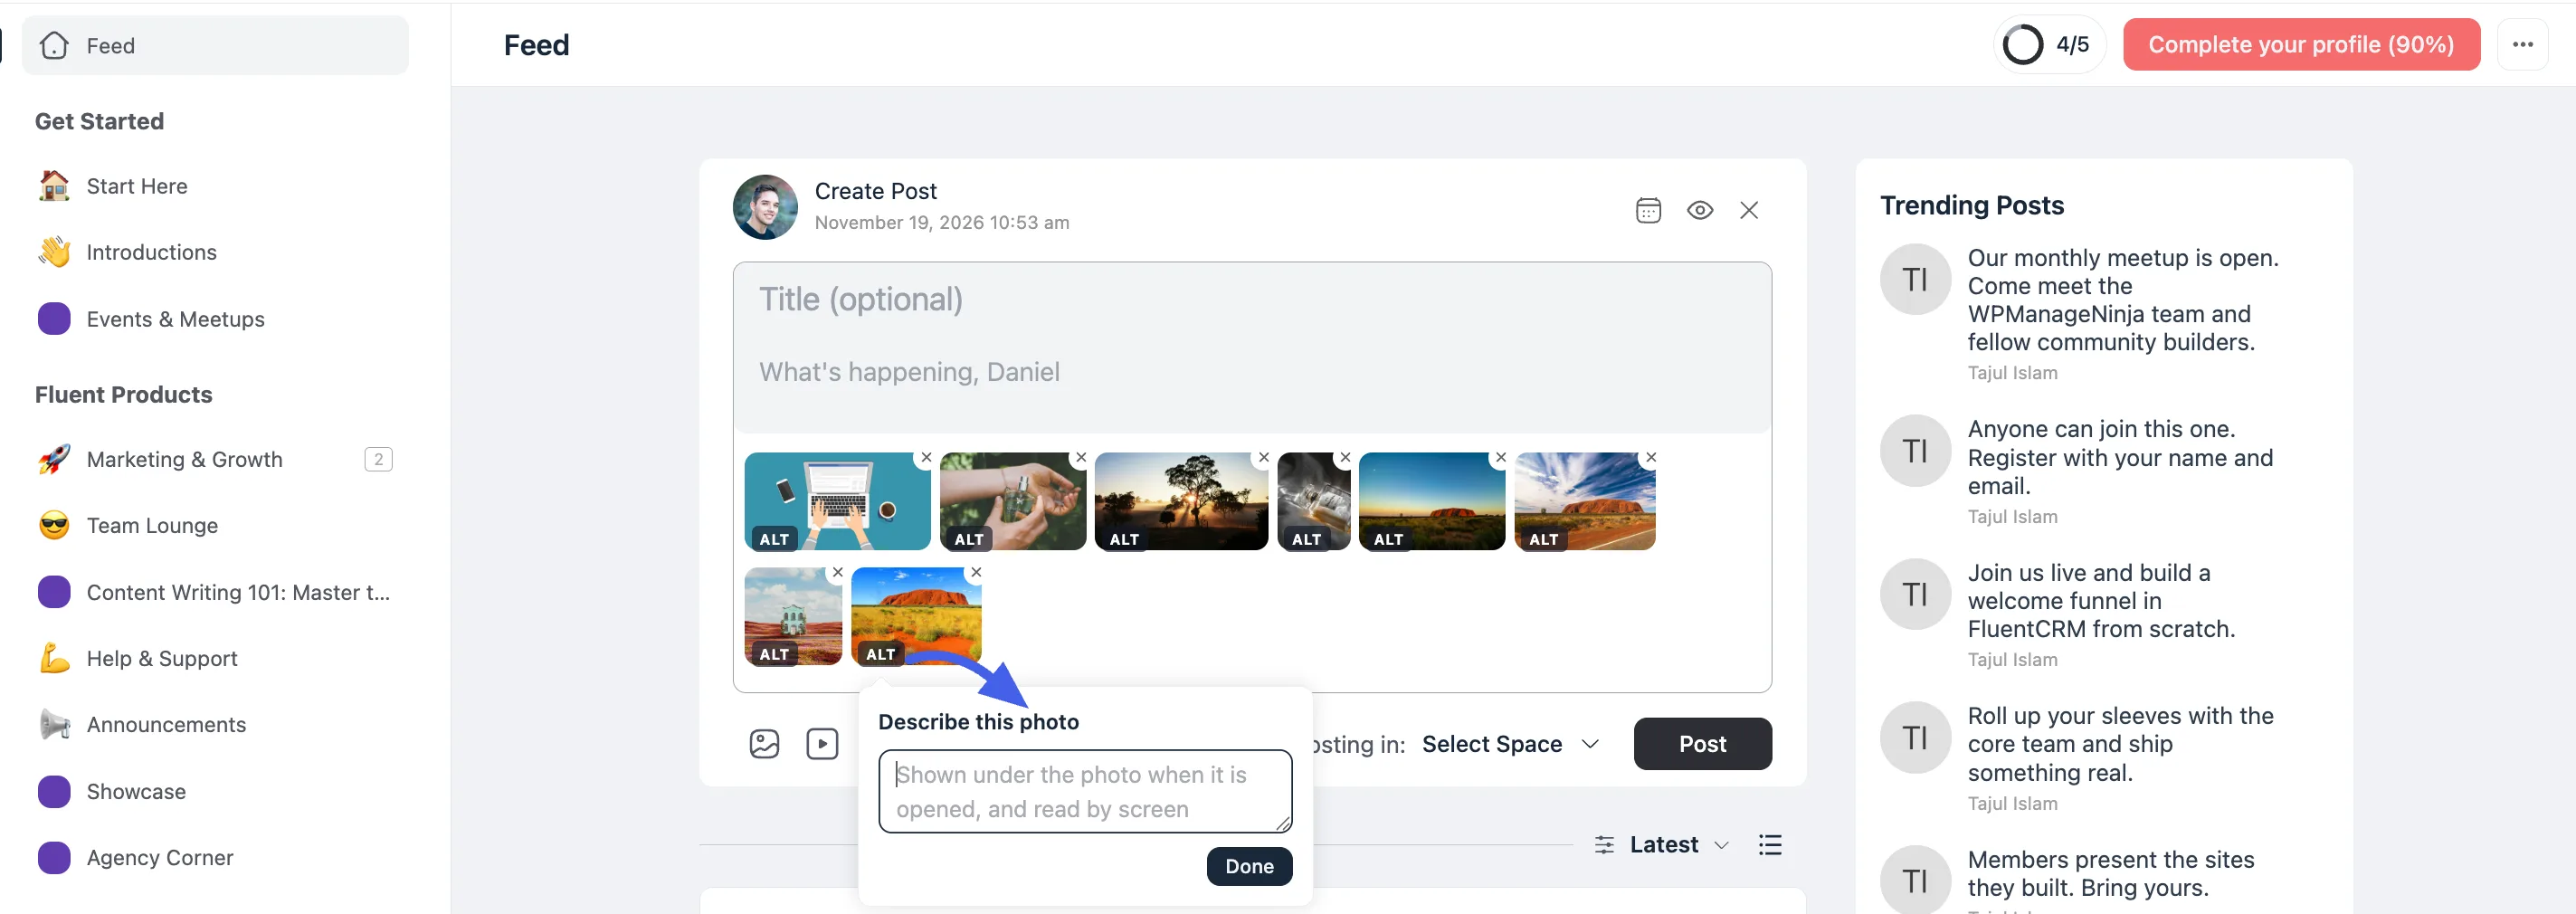
The description does two things:
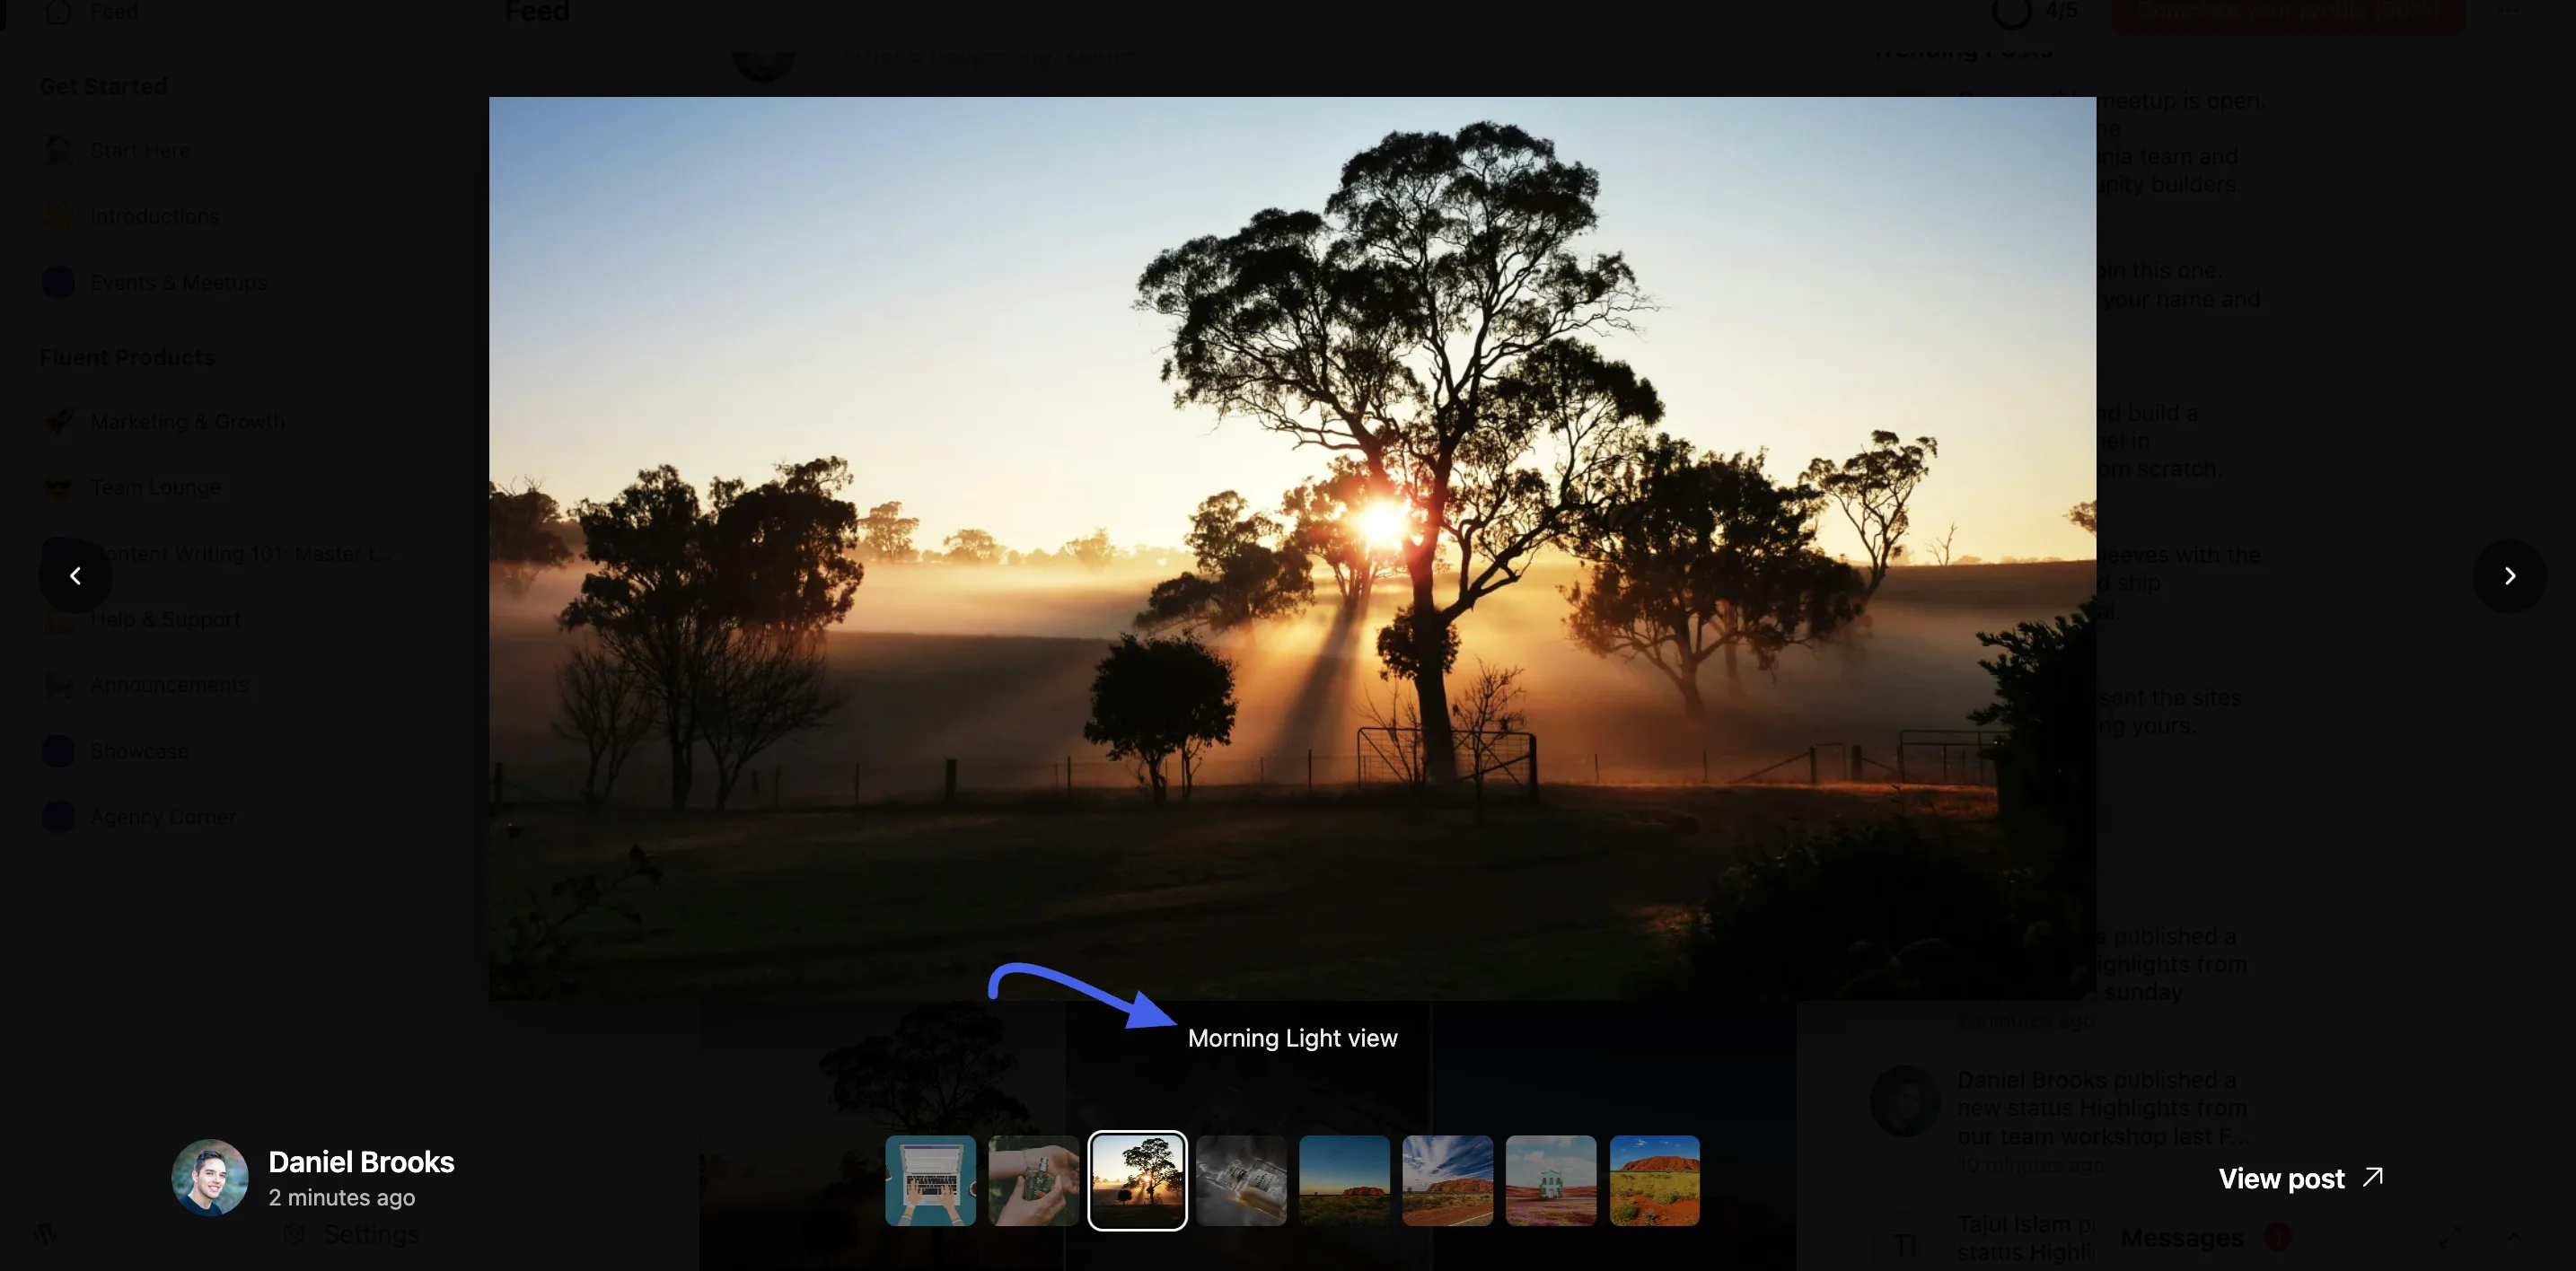
- It shows as a caption under the photo when someone opens it in the viewer.
- It is read out by screen readers, so members who can't see the photo know what it shows.
If you skip it, nothing changes. A screen reader then reads the photo only by its number, such as "Photo 3 of 7."
To change a description later, open the ALT button again and select Edit photo description.
Use the Photo Viewer
Click a photo in any post to open the viewer. From there you can:
- Move between photos. Use the left and right arrows, the thumbnails along the bottom, or swipe on a phone. Photos slide as you move. A counter at the top left, such as 3 / 7, shows where you are.
- Zoom in and out. Use the zoom buttons at the top right, or pinch on a phone. Zoom follows your cursor, or your fingers, instead of jumping to the middle of the photo. The third button fits the photo back to the screen.
- Drag a zoomed photo to see a different part of it.
- Read the caption. The description you added shows under the photo.
- See who posted it. The author's name and time show at the bottom left. Click View post at the bottom right to go to the full post.
- Close the viewer. Click the X at the top right.
The viewer closes on its own when you move to another page, so it never stays on top of the next page.
Tips
- Add a description to the photos that matter most. It helps everyone, and it makes your community easier to use with a screen reader.
- Put a wide, clear photo first. It becomes the hero photo in the gallery.
- If members can't add more photos, check the Max Media Per Post setting.