

Appearance
Connecting with FluentSocket
FluentSocket is a high-performance socket server built specifically for the Fluent ecosystem. It's one of the real-time drivers that powers your community's group chat — connecting it lets messages and notifications reach your members the exact moment they happen, with no page refresh required.
Use Case: Your members chat in real time across several Spaces, and you want a self-hosted socket server that keeps conversations instant and reliable without relying on a third-party cloud service.
This guide walks you through creating a FluentSocket app and connecting it to your community.
How to Connect FluentSocket
Step 1: Create Your FluentSocket App
To get the credentials for the integration, first create an "App" within your FluentSocket account.
- Sign in to your FluentSocket account.
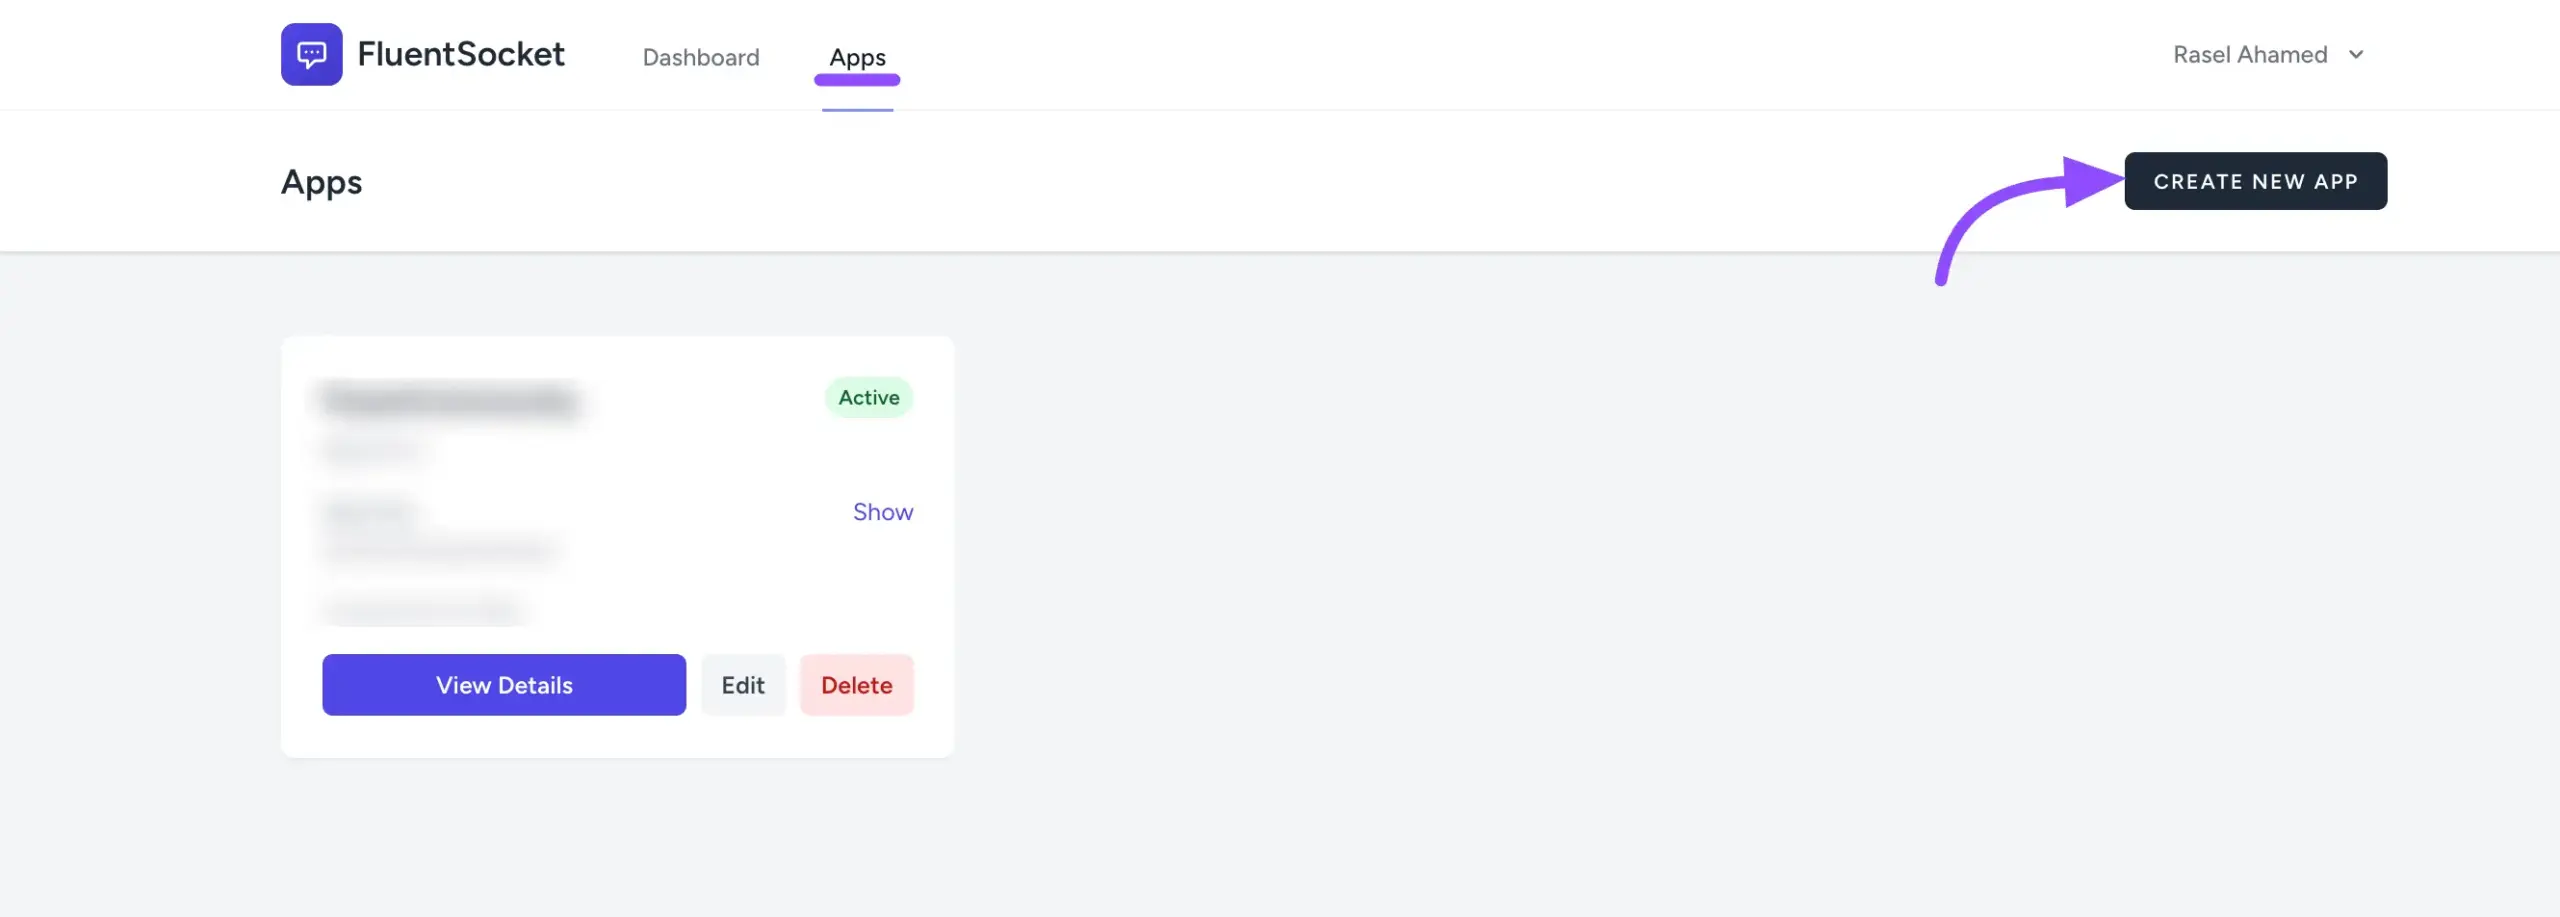
- Click the Apps button in the top navigation bar.
- Click the Create New App button to open the configuration window.
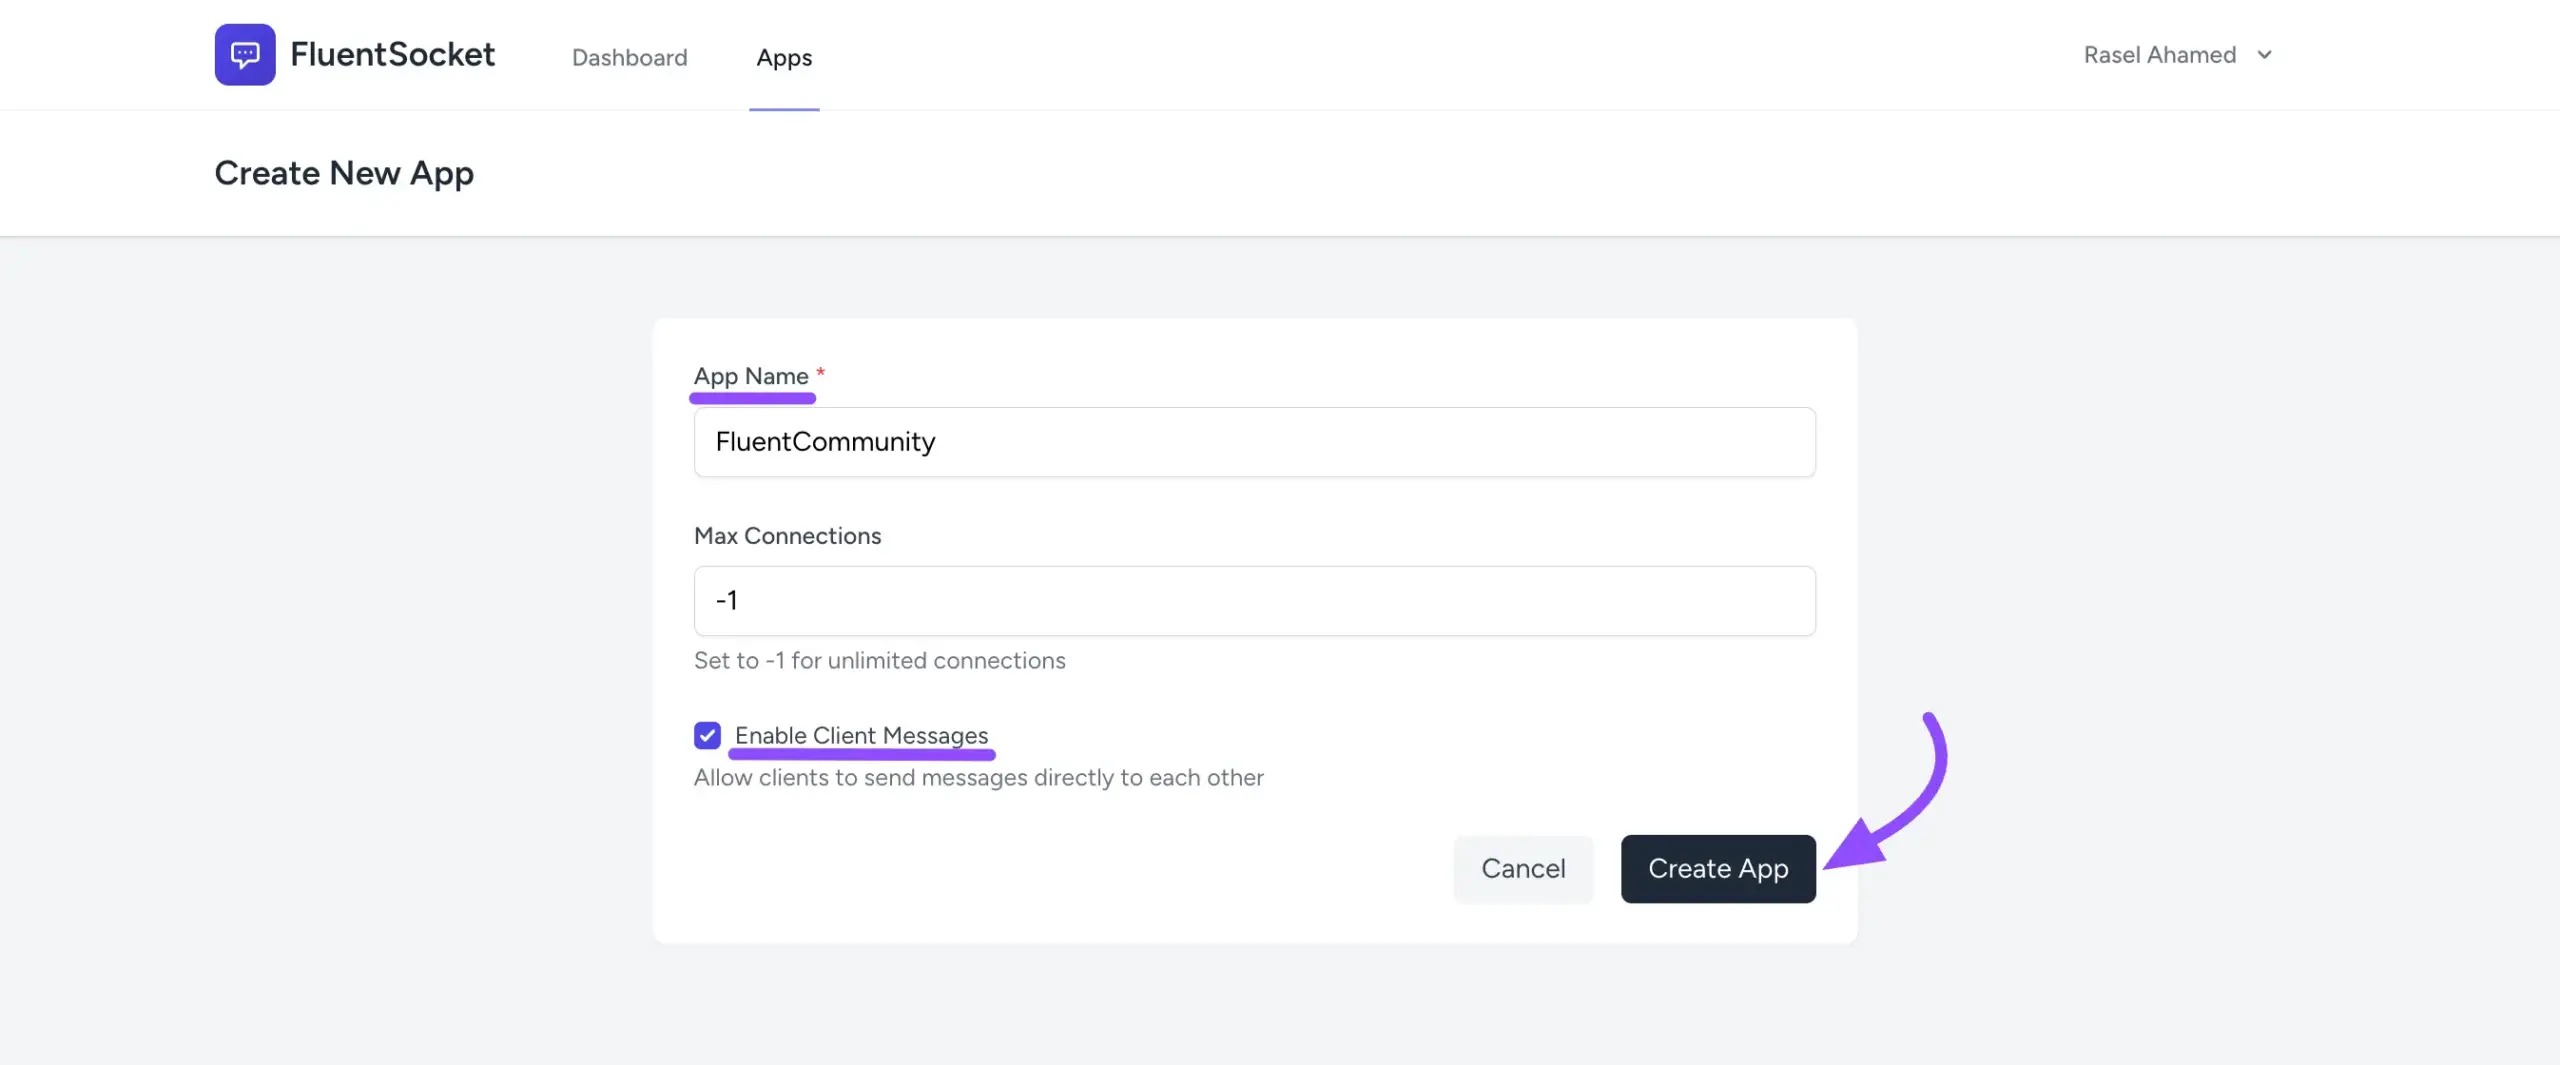
Now configure your app:
- App Name: Give your app a clear name (e.g., "My Community Chat").
- Max Connections: Set your preferred limit for simultaneous connections.
- Enable Client Messages: Check this box. It's a recommended setting for real-time chat to function correctly.
Click the Create App button to finalize.
Step 2: Collect Your Credentials
Once your app is created, FluentSocket generates unique keys to secure the connection.
- Locate your newly created app in the list.
- Find and copy the following three pieces of information: App ID, App Key, and App Secret.
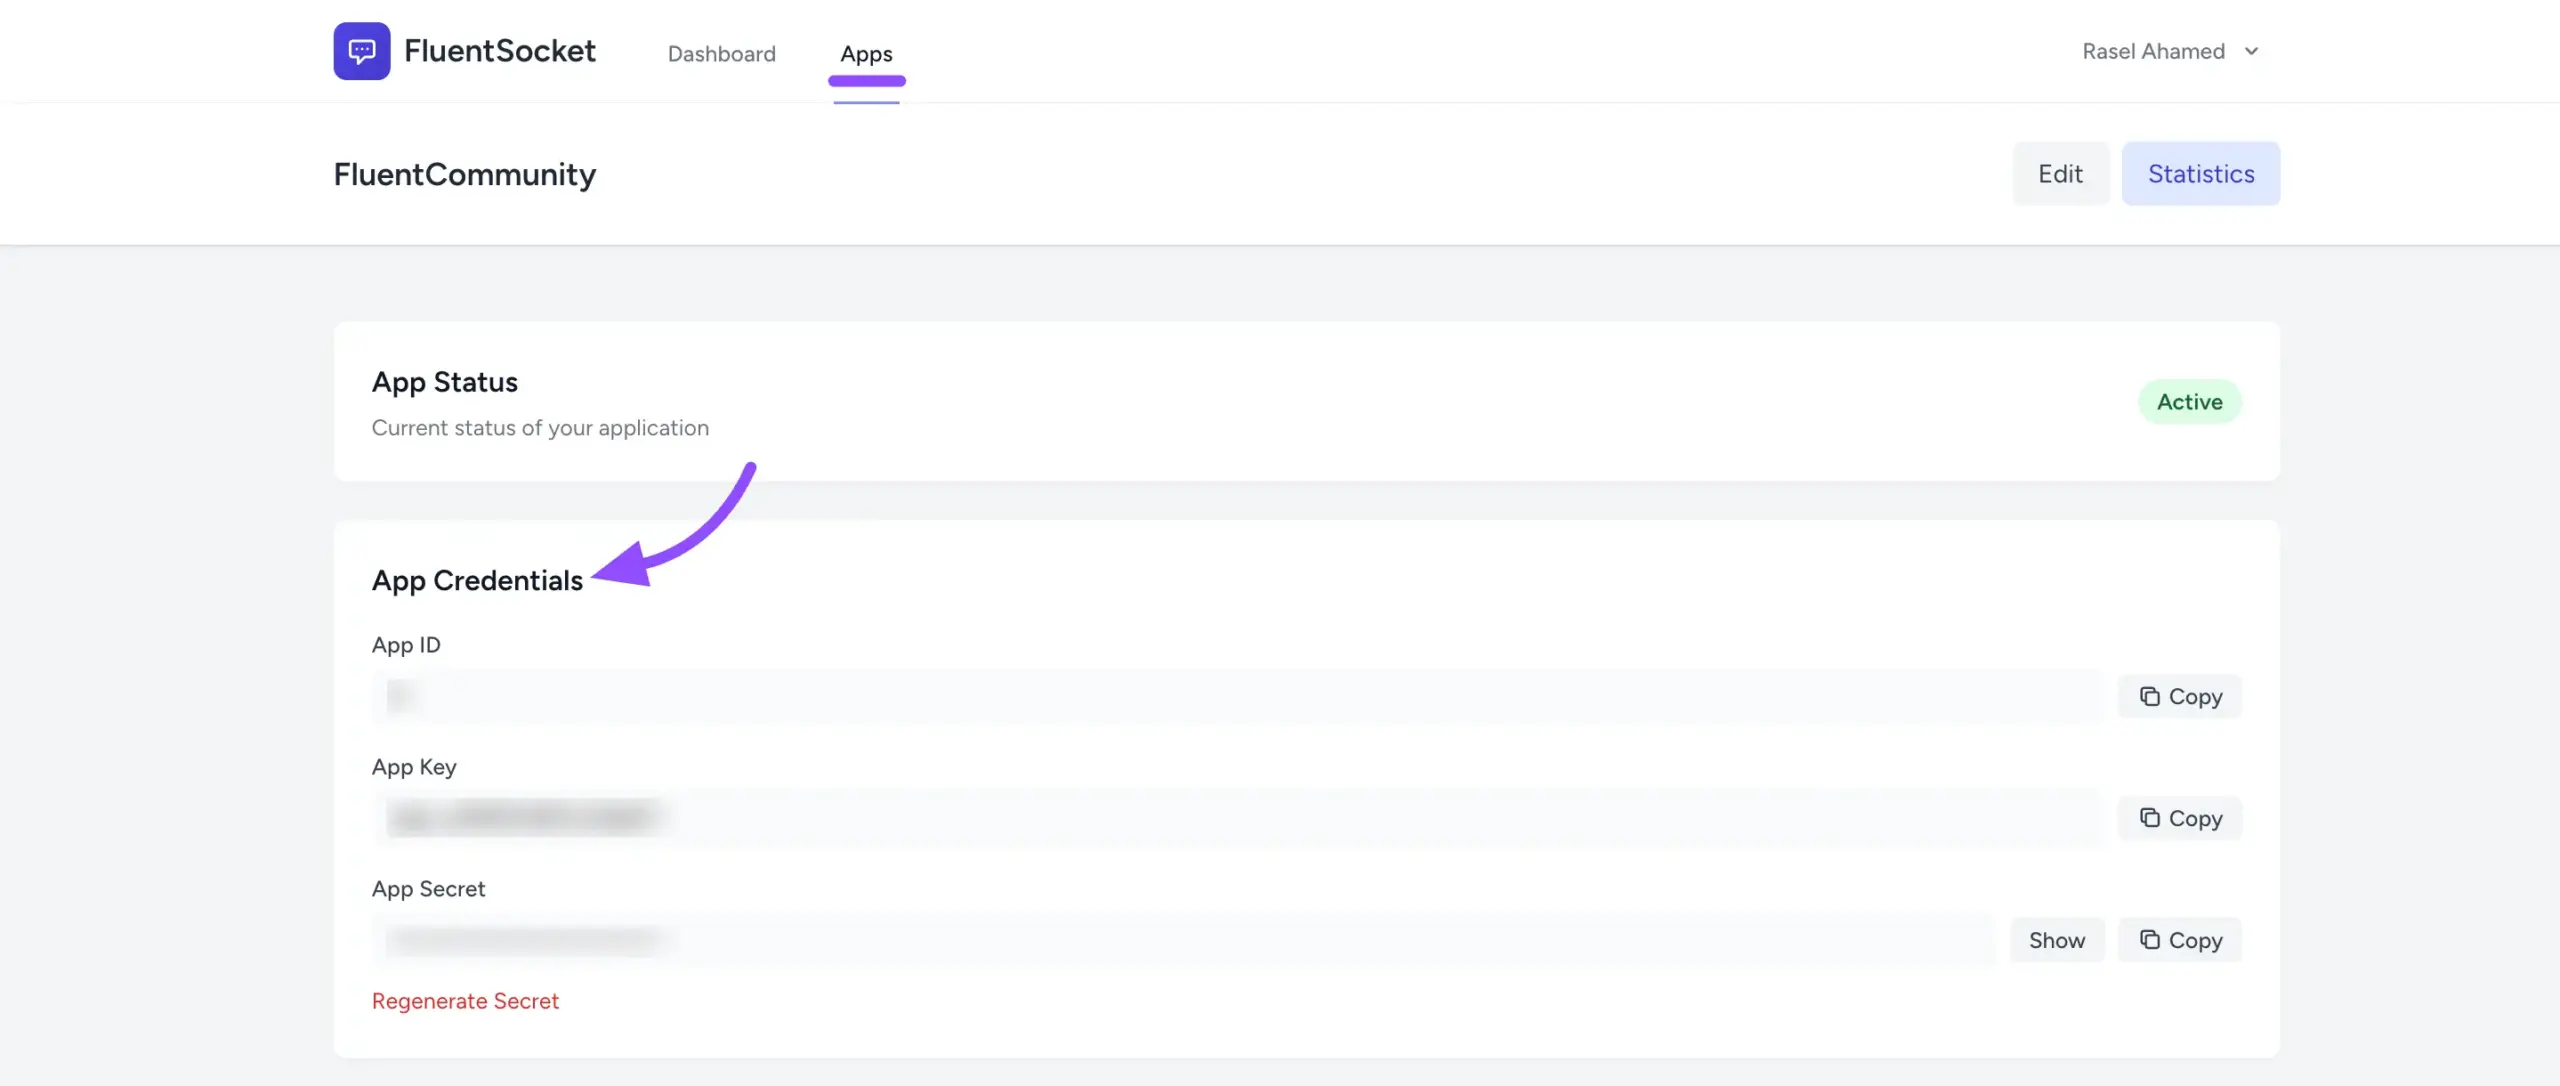
✨ Note: Keep these credentials private — they allow your website to communicate securely with the socket server.
Step 3: Connect FluentSocket to FluentCommunity
Now plug your credentials into your WordPress site.
- Go to your WordPress dashboard and navigate to FluentCommunity > Settings.
- Click Features & Addons in the left sidebar.
- Find the Group Chat module and click the Messaging Settings button.
- Locate the Enable Real-Time Messaging toggle and turn it On.
- Select FluentSocket as your real-time driver.
- Paste the App ID, App Key, and App Secret into their respective fields.
- Click the Save Settings button.
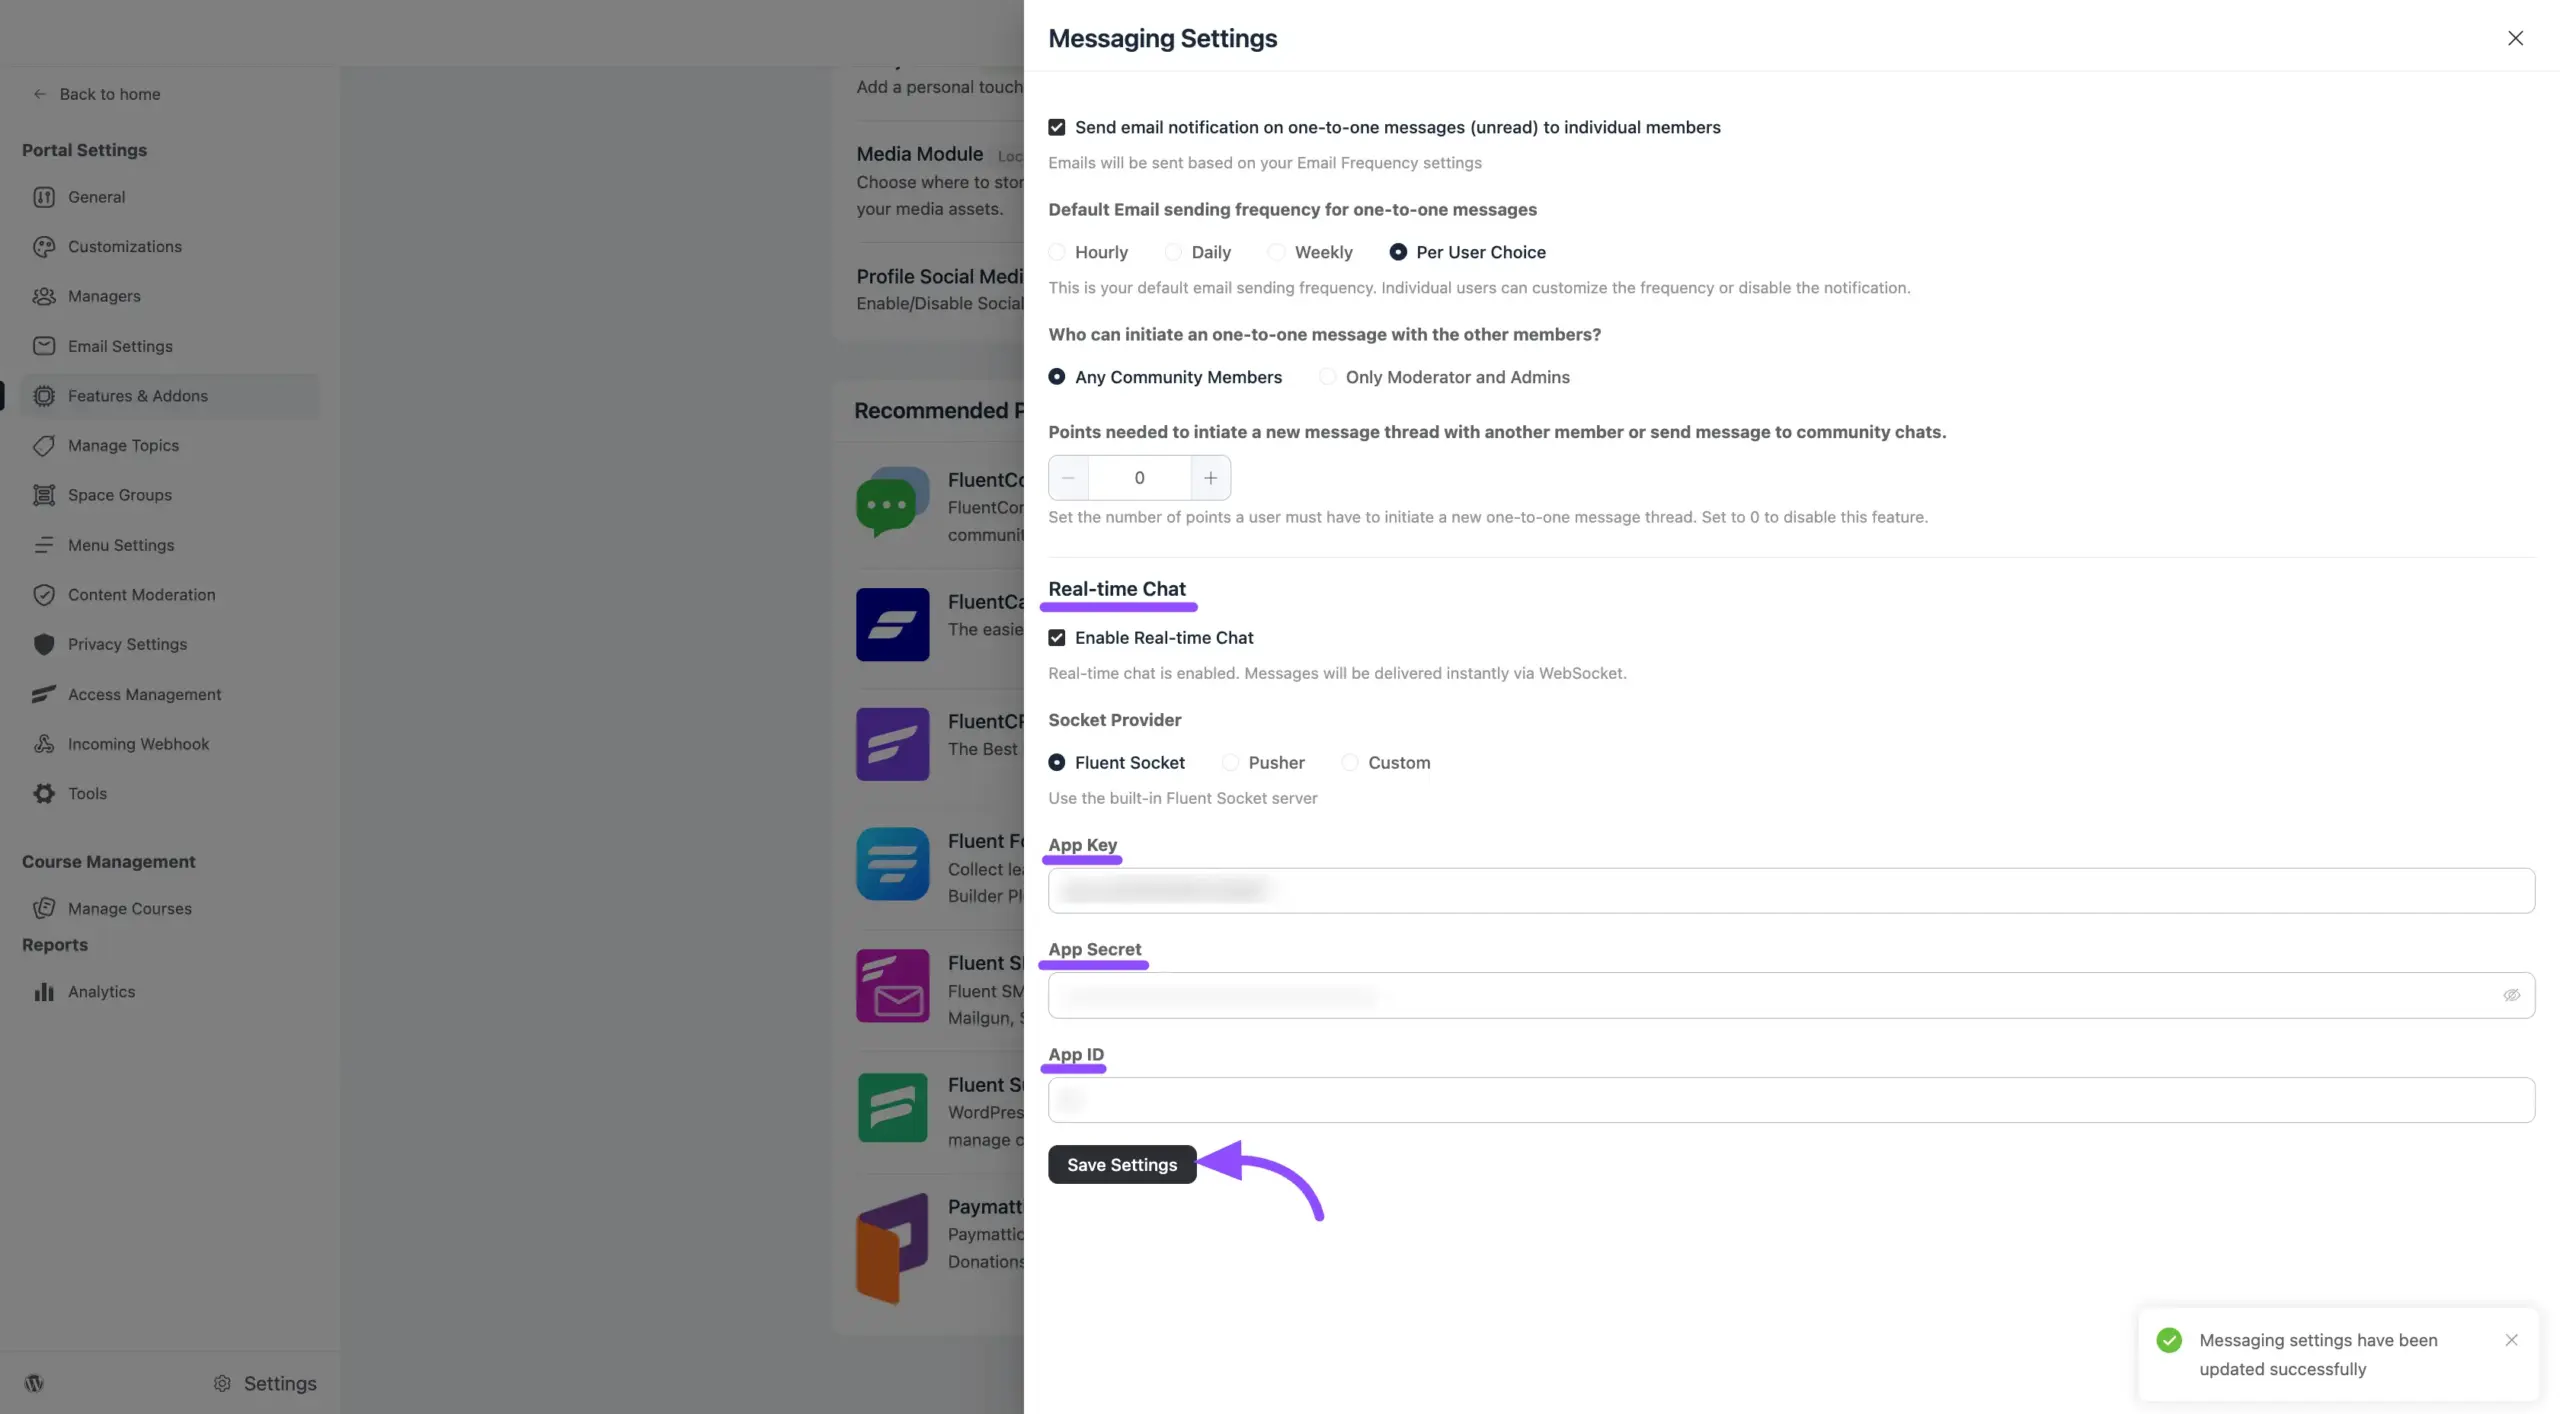
After saving, you should see a success notification — your community is now powered by FluentSocket. To test it, open your portal in two different browser windows; a message sent in one should appear instantly in the other, with no lag.