

Appearance
Enabling & Disabling Push Notifications
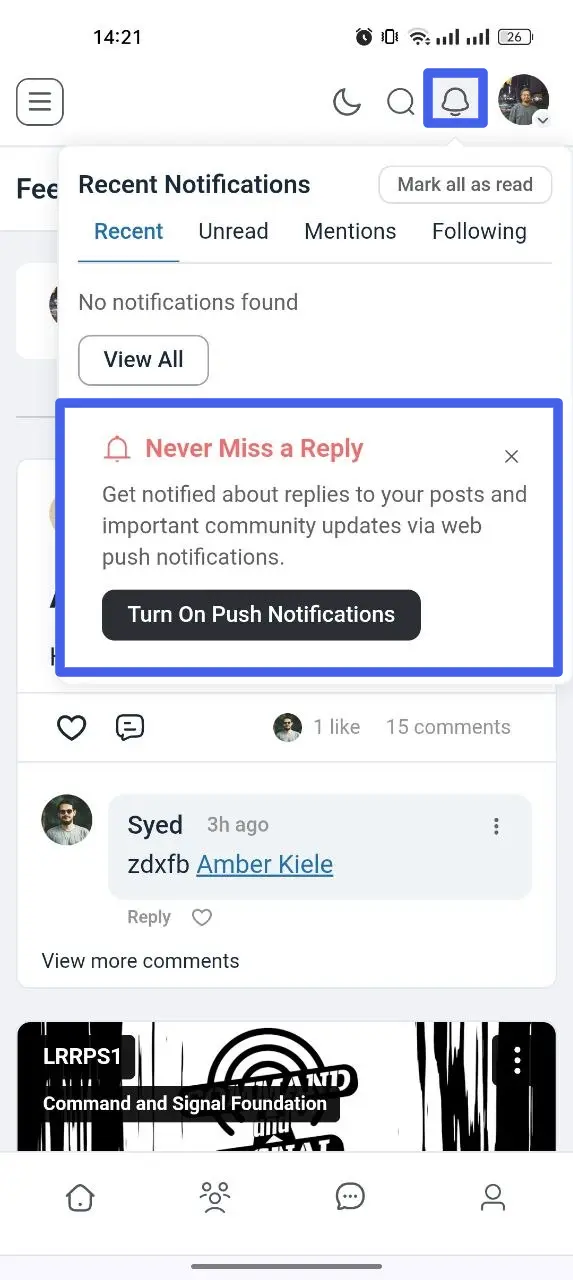
When you use the community, you can turn on push notifications to stay updated on replies, mentions, and other activity. Turning them on always takes two steps: first the community itself asks whether you want notifications, then your device or browser shows its own official permission prompt.
IMPORTANT
If you click Block or Don't Allow on that official prompt, the community can't change this for you later, you have to manually turn notifications back on from your device or browser's own settings. The rest of this guide covers exactly how to do that for the device and browser you use.
Apple iOS (iPhone & iPad)
Using the Installed App (Home Screen PWA)
NOTE
Web notifications on Apple devices require iOS 16.4 or newer.
- First-time setup: Open the website in Safari, tap the Share button, and select Add to Home Screen. Open the new app from your home screen. When it prompts you to enable notifications, tap to allow, then choose Allow on the official Apple pop-up.
To turn notifications off or back on
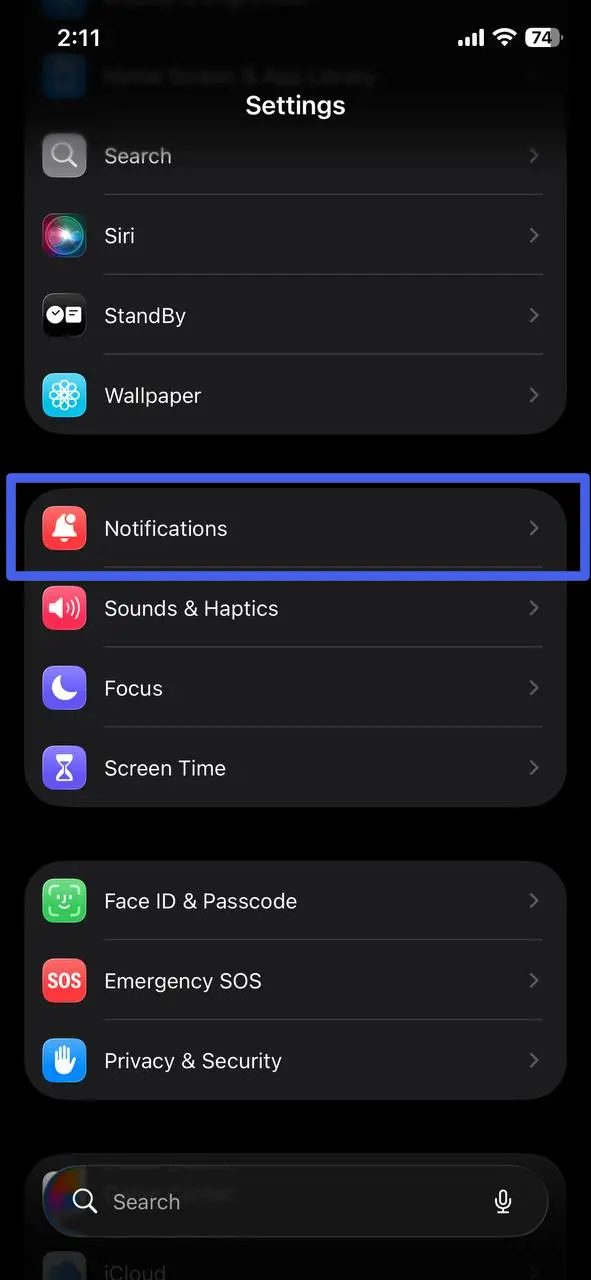
- Open Settings on your iPhone and tap Notifications.
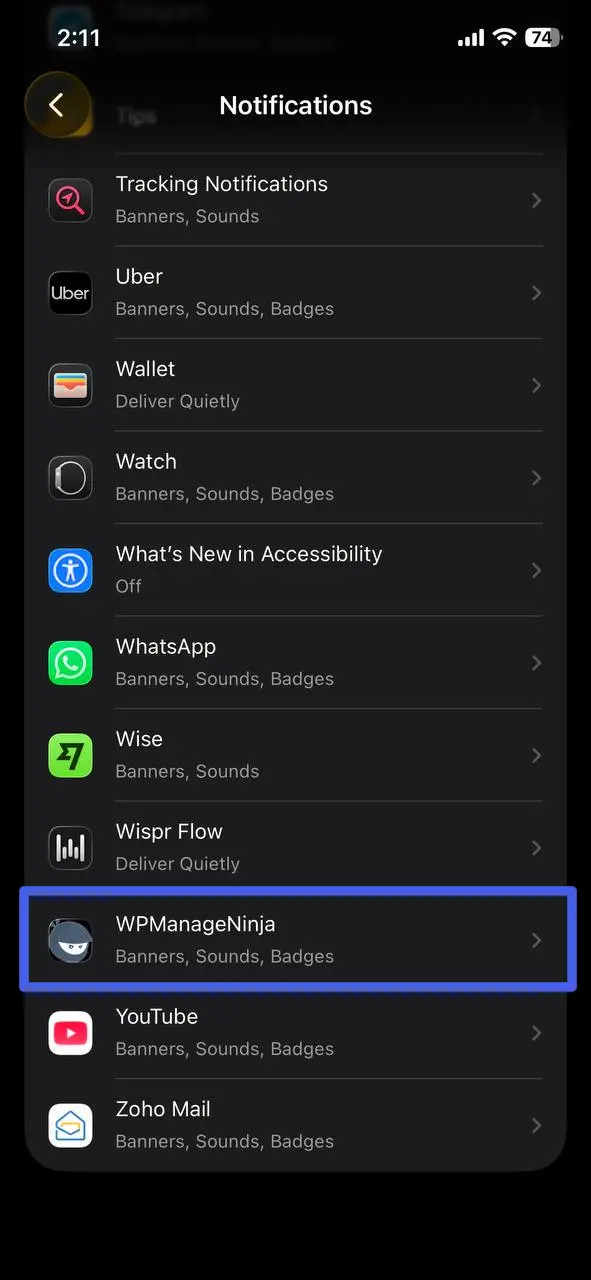
- Find your installed community app in the list and tap it.
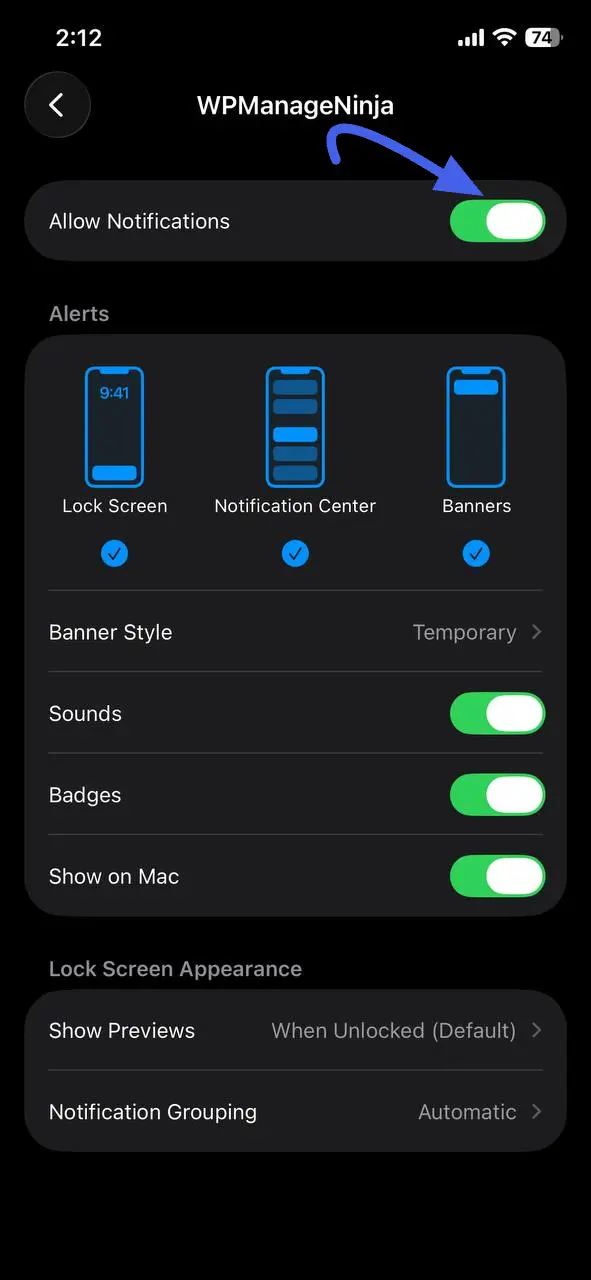
- Turn the Allow Notifications switch off to stop notifications, or back on to resume them.
Using the Safari Browser
First-time setup: Open the website in Safari. When the community asks to send notifications, tap to enable them, then select Allow on the official pop-up.
To change it later: If you block notifications in Safari, you have to manage them directly through your iPhone's Safari permission settings under Settings → Safari → Notifications. Unlike Chrome, Safari doesn't have a quick notification toggle next to the website address.
Android Devices
Using the Installed App (Home Screen PWA)
- First-time setup: Install the website as an app on your home screen and open it. When the community asks to send notifications, tap to enable them, then select Allow on the official Android pop-up.
To turn notifications off or back on
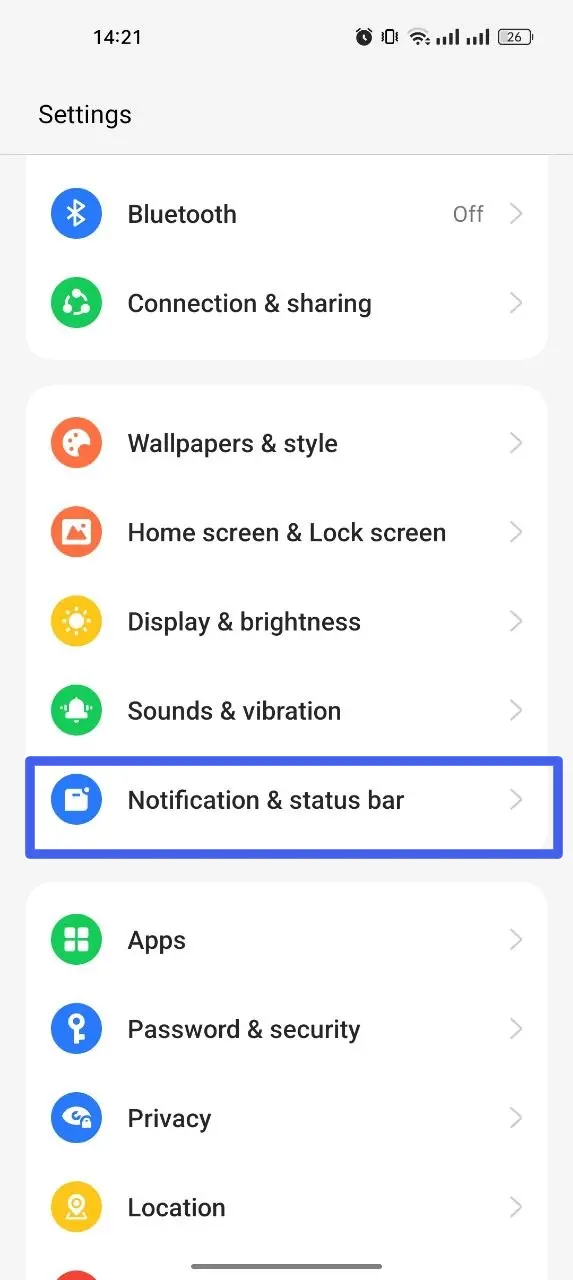
- Open your Android Settings, then go to Notification & status bar.
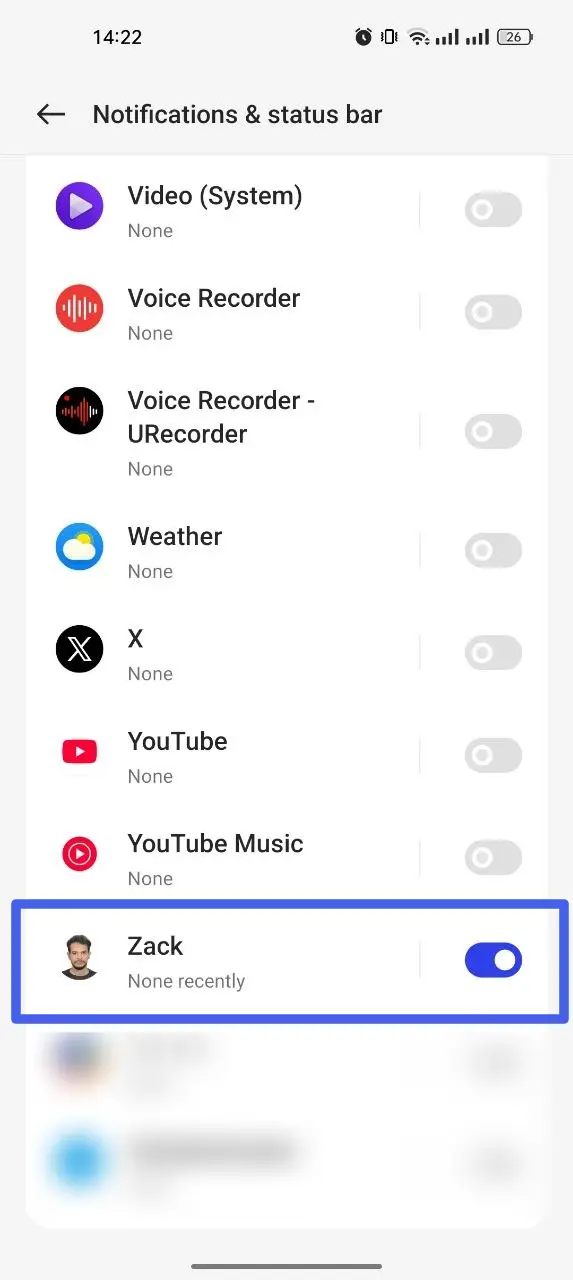
- Find your installed community app in the per-app list and turn its switch off or back on.
Using the Chrome Browser
- First-time setup: Open the website in Chrome. When prompted, tap to enable notifications, then select Allow on the official Chrome pop-up.
To turn notifications off
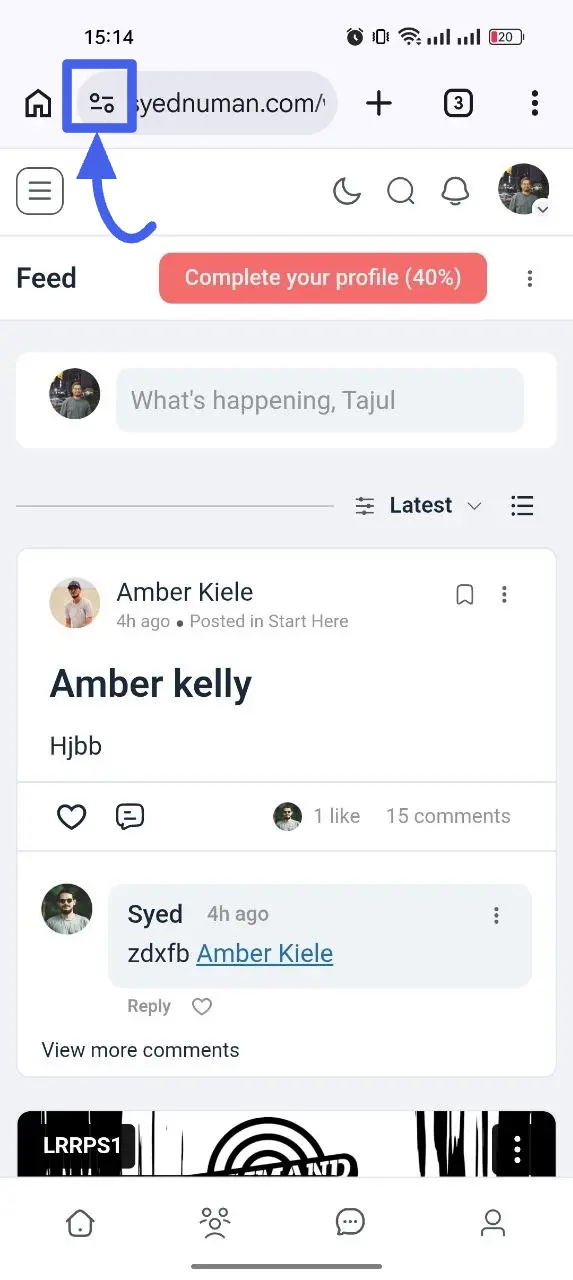
- Open the community website in Chrome and tap the Site Information icon next to the web address.
- Tap Permissions.
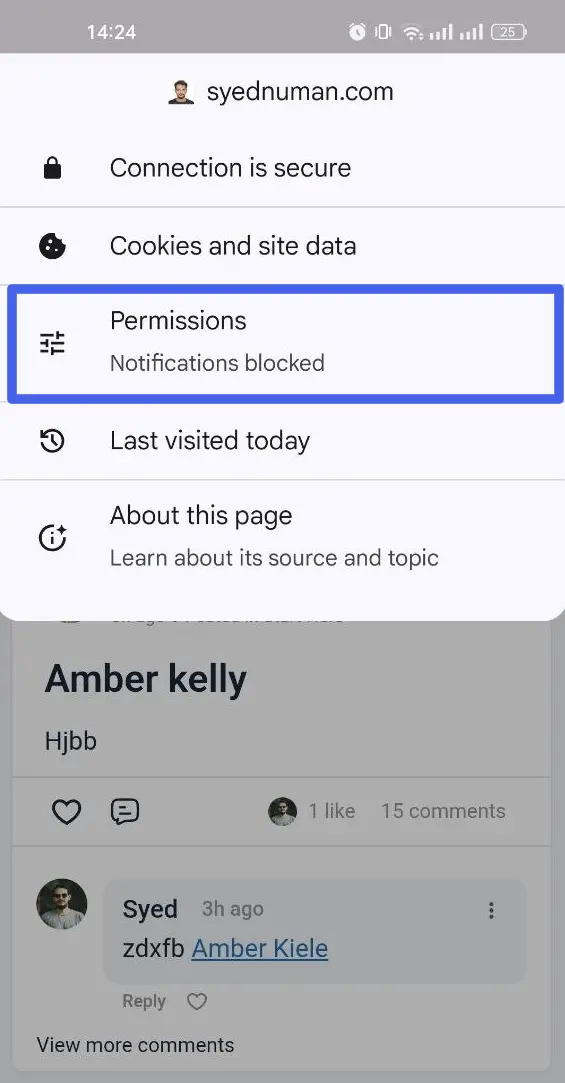
- Under Notifications, turn it off directly, or if it already shows Not allowed and you want to be asked again on your next visit, tap Reset permissions and confirm Reset. Resetting clears the block so the community's own prompt appears again the next time you visit.
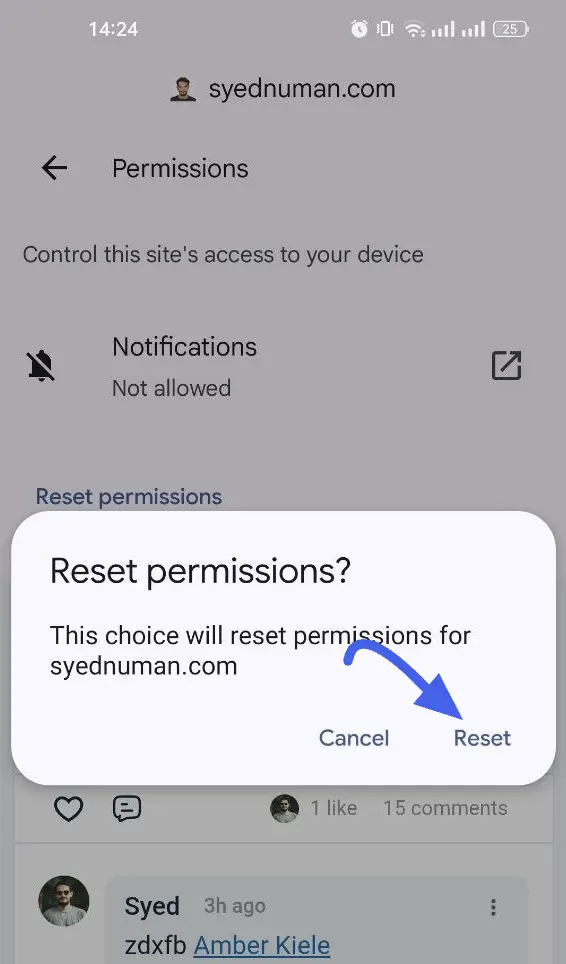
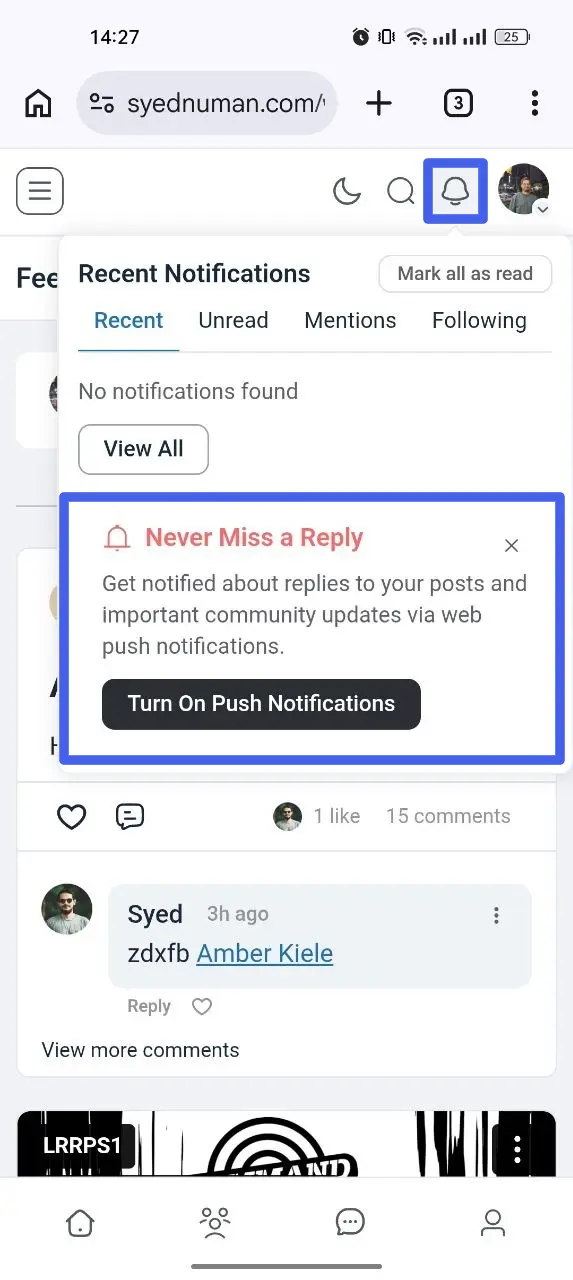
- To turn notifications back on: Open the community website in Chrome, tap the Site Information icon next to the web address, tap Permissions, then Notifications, and select Allow. Or, after resetting permissions, just click Turn On Push Notifications the next time the community's own prompt appears.
TIP
Alternative method: open Chrome, tap the ⋮ menu, go to Settings → Site Settings → Notifications, find the community website in the list, and select Allow.
Quick Reference Summary
| Platform & View | Initial Setup Prompt | How to Change Settings Later |
|---|---|---|
| iOS Installed App | Website prompt → iOS prompt | iOS Settings → Notifications → App name |
| iOS Safari Browser | Website prompt → Safari prompt | iOS Safari permission settings |
| Android Installed App | Website prompt → Android prompt | Android Settings → Apps → App name → Notifications |
| Android Chrome | Website prompt → Chrome prompt | Chrome → Site Settings → Notifications → Website |
NOTE
Tapping a push notification opens the post or comment it's about and clears its unread mark in the community's bell dropdown at the same time. And once a push reaches your device, the community won't show you a pop-up toast for the same event, so you're never told twice.
TIP
This guide covers device- and browser-level permissions. For connecting the community to Firebase and configuring what triggers a push in the first place, see Push Notifications with Firebase (Pro).