

Appearance
Creating Your First Course
FluentCommunity includes a built-in Learning Management System (LMS) so you can publish structured courses inside your community—without a separate platform. This guide walks you through enabling the Course Module and setting up your first course shell before you add lessons and media.
Use Case: You are an expert in your field and want to offer a multi-part video series to members. Enable the Course Module, create a course with a strong title and visuals, then build out sections, lessons, and enrollments in follow-up guides.
Enable the Course Module
The Courses feature is a Pro module. Turn it on before you create or manage any course content.
- Navigate to Portal Settings from your community sidebar.
- Open the Features & Addons tab in the left panel.
- Find the Course Module row and click Settings.
- In the settings drawer, check Enable Course Module and click Save.
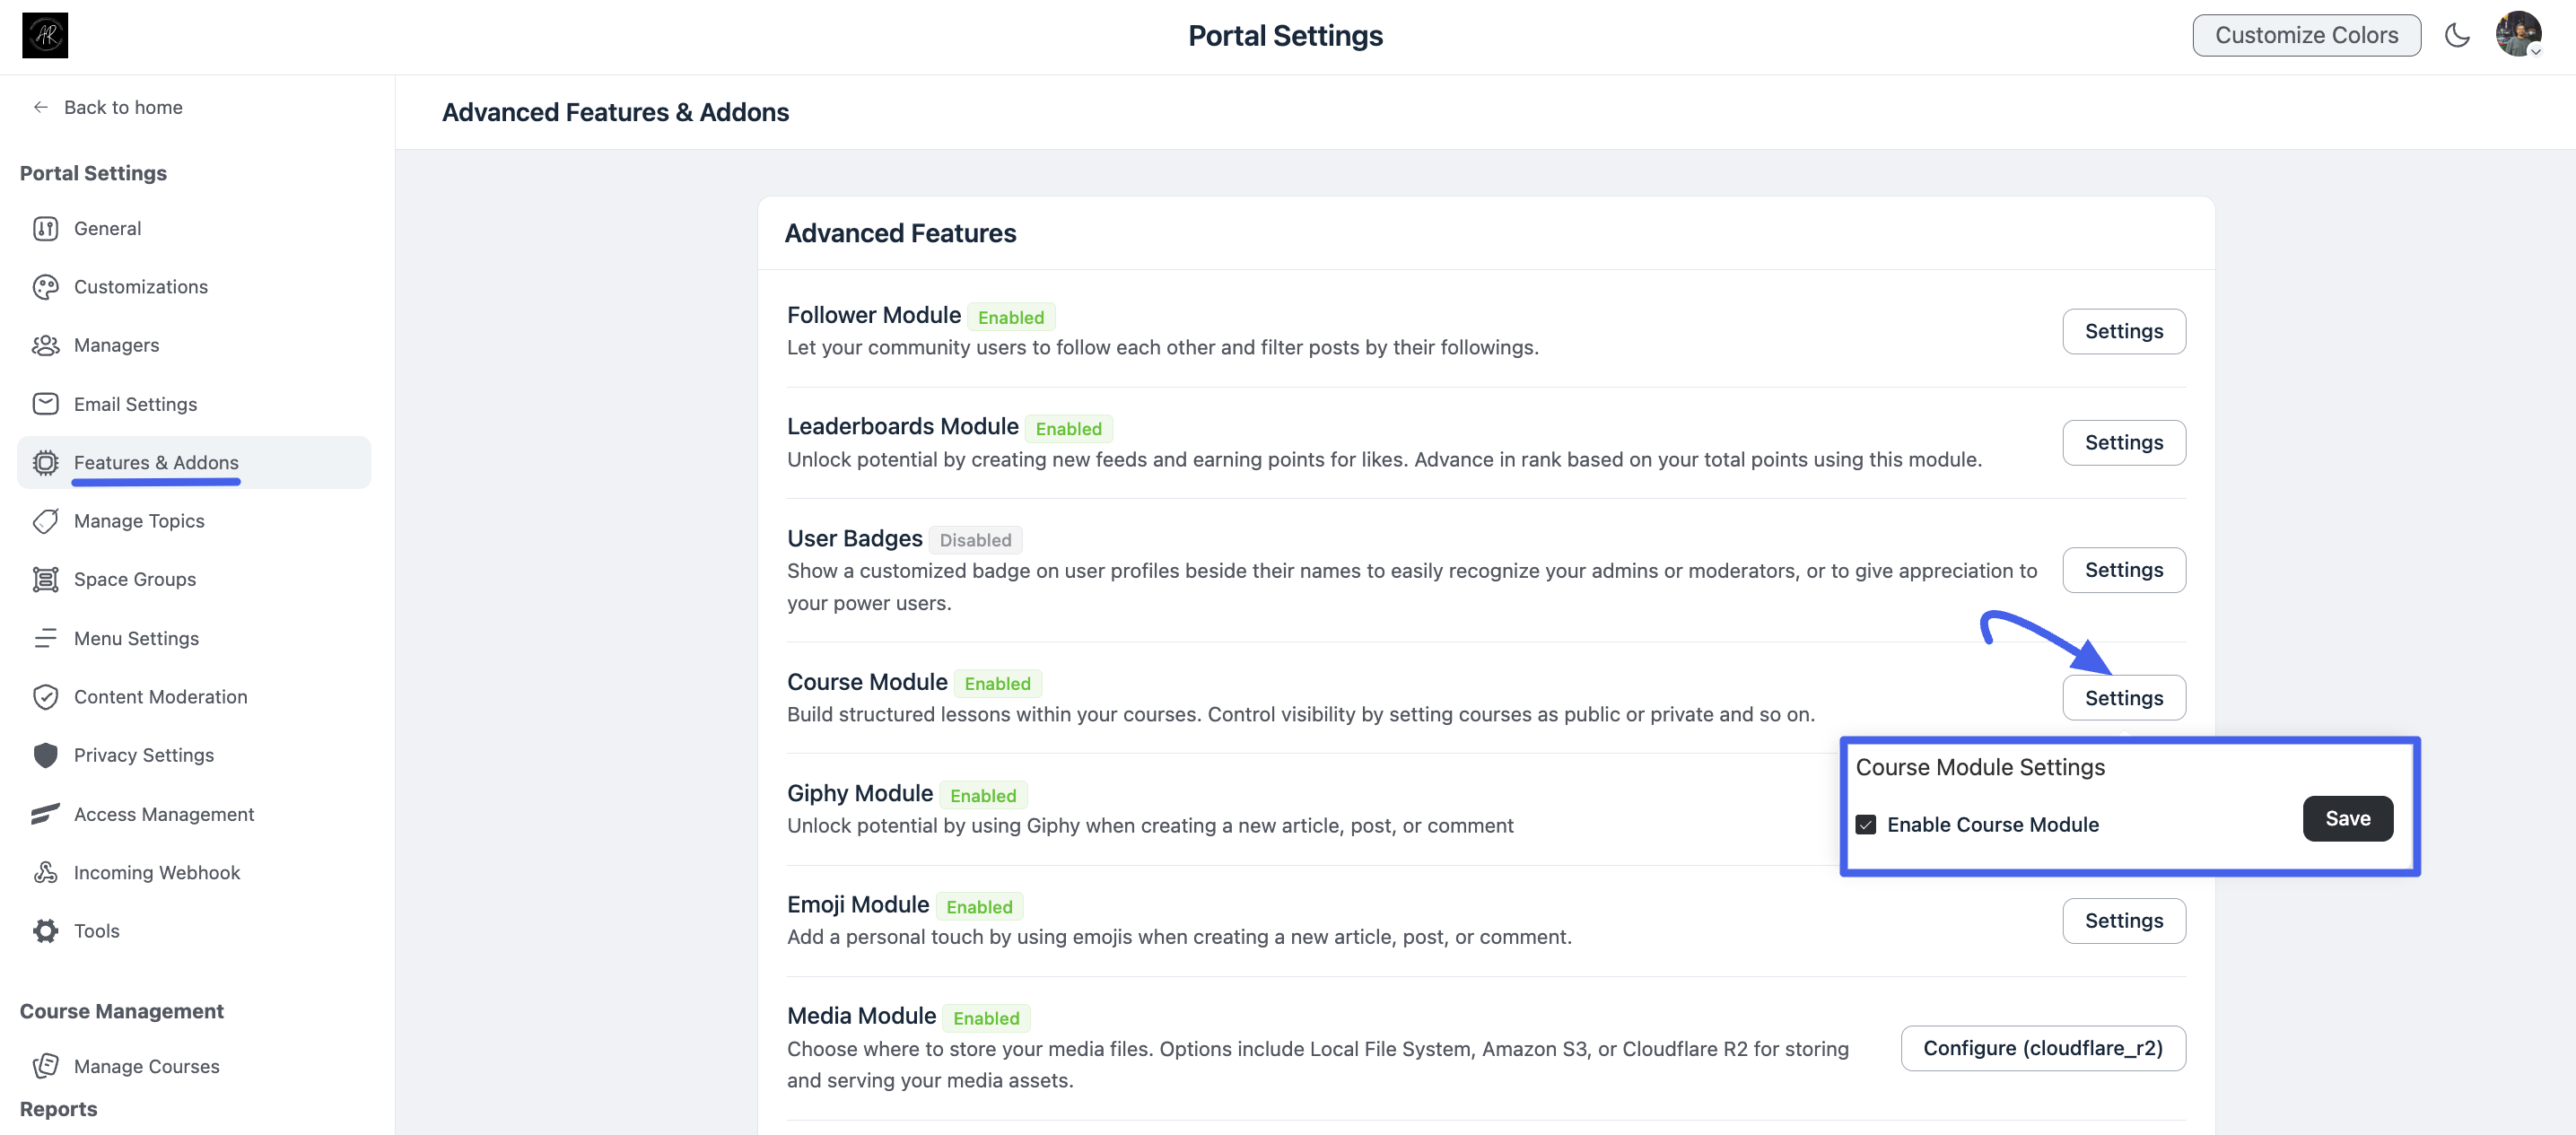
Once saved, course management options appear in your WordPress admin and on the community portal. You are ready to create your first course.
Note
If you do not see Courses in the portal or admin menu, confirm the module is enabled from the Features & Addons section and that FluentCommunity Pro is active on your site.
Create a New Course
After the module is enabled, create the course record and its main branding from the WordPress dashboard.
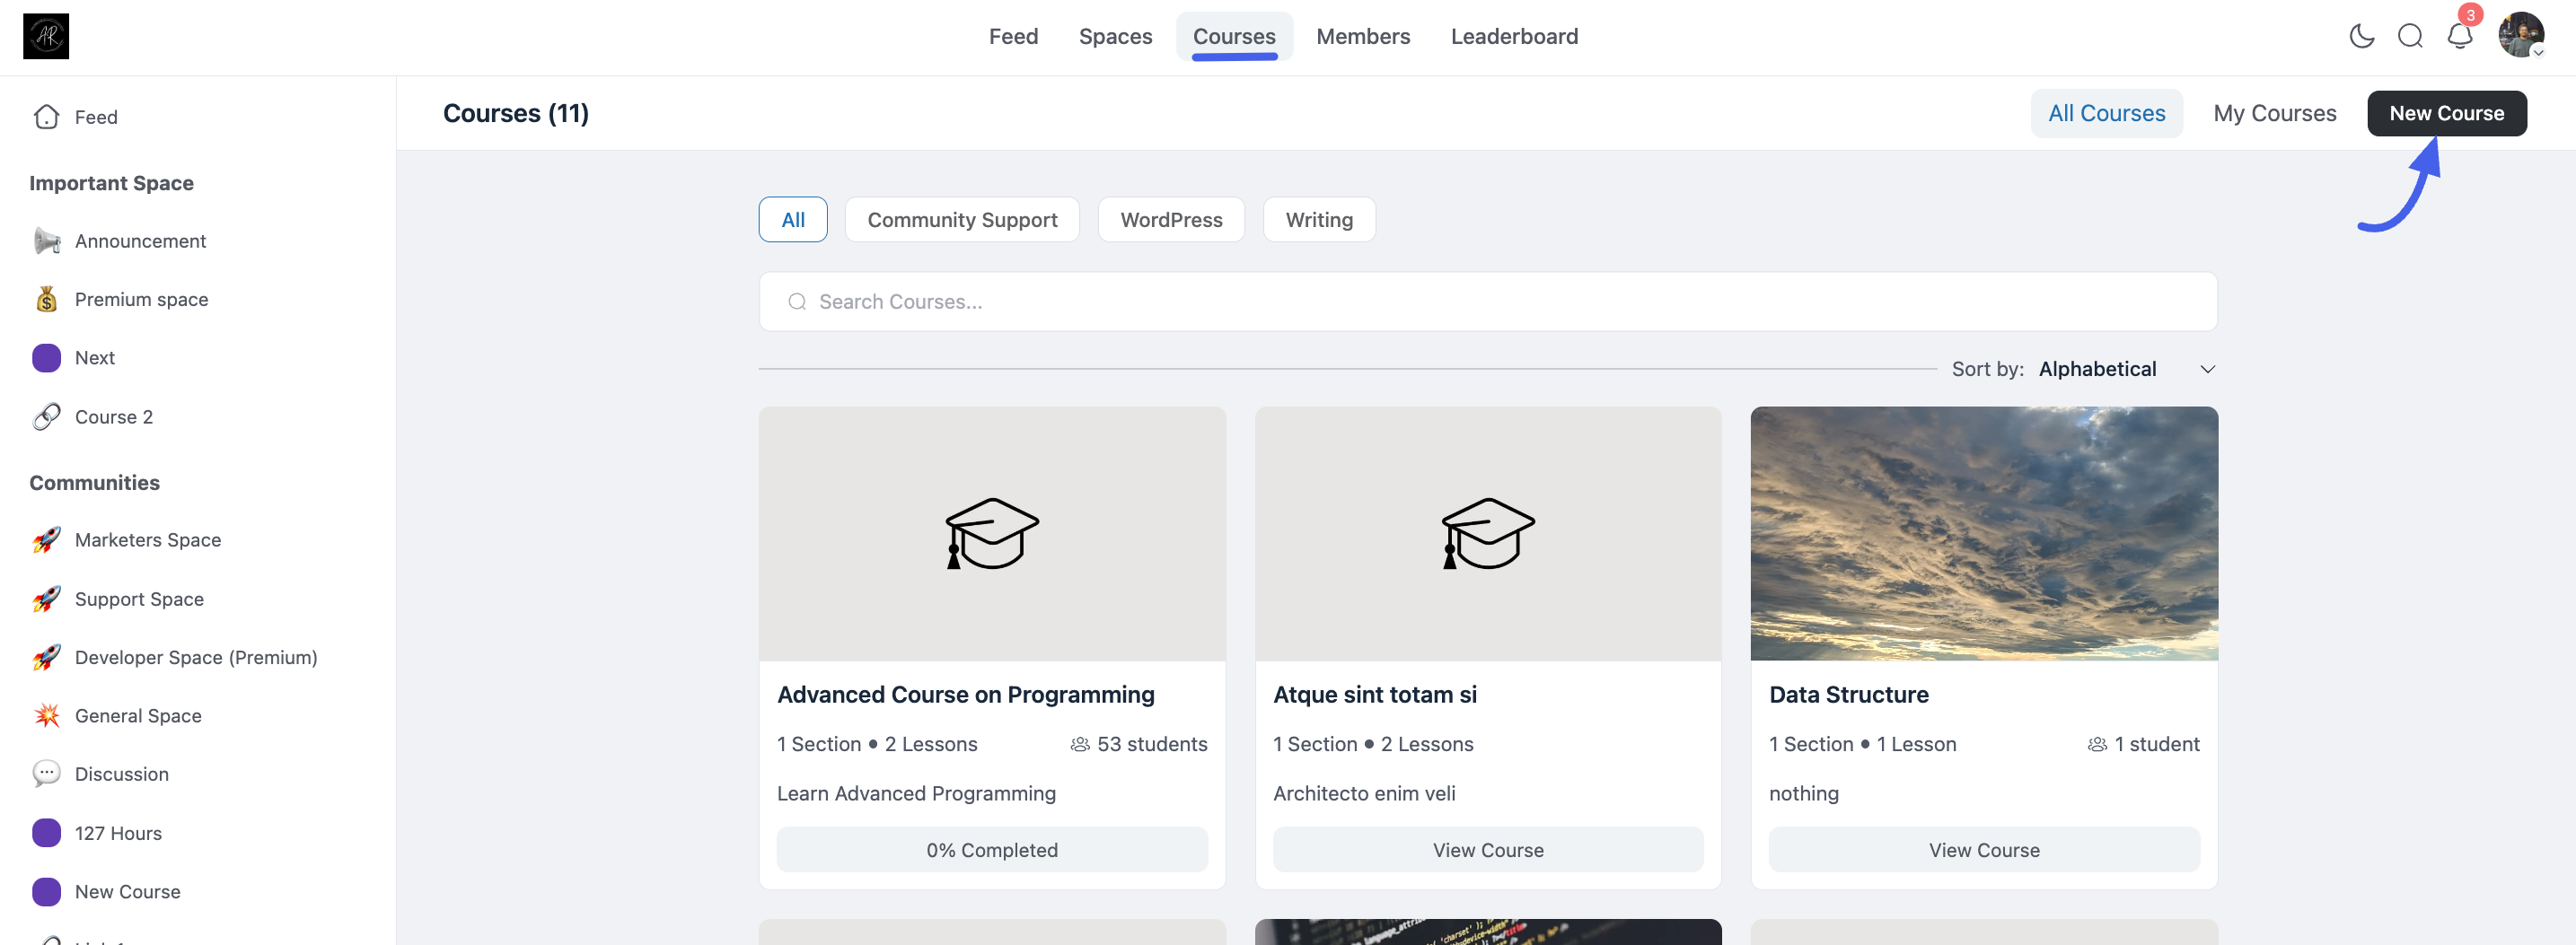
- From your WordPress dashboard, go to FluentCommunity → Courses (Pro).
- Click New Course at the top of the page to open the course editor.
This screen is where you define how the course appears in listings and on its main page before you add structure and lessons.
Add Course Details
Give members a clear reason to enroll with a strong title and description.
- Course Name: Enter a concise, descriptive title (for example, Introduction to Digital Marketing).
- Description: Explain what students will learn, who the course is for, and the main outcomes. Use the rich text editor for headings, lists, and emphasis where helpful.
Set Course Images
Visual assets help your course stand out in the course directory and on its landing page.
- Cover Photo: Upload a wide banner image shown at the top of the course page.
- Featured Image / Thumbnail: Upload a smaller image used in course listings and cards across the community.
Note
A clear description paired with professional cover and thumbnail images improves discovery and enrollment. You can update copy and images anytime from the same editor.
Save Your Course
When the name, description, and images are in place, click Create Course (or Update Course when editing an existing course) to save. Your course shell is ready—you can now add sections, lessons, and access rules.