Appearance
Push Notifications with Firebase (Pro)
The Notification Center bell keeps members updated while they're inside your community, but it can't reach them once they close the tab. FluentNotify closes that gap: it connects your community to Google Firebase Cloud Messaging (FCM) and sends real, OS-level browser push notifications for comments, replies, mentions, and new posts — even when the member isn't looking at your site at all.
Use Case: A member closes their browser after posting a question in a Space. Ten minutes later someone replies. With FluentNotify connected, they get a push notification on their desktop or phone the moment that reply is posted, and one tap takes them straight to it.
IMPORTANT
Set up New Posts Notifications before configuring FluentNotify. If no space has notifications enabled yet, the FluentNotify settings screen won't show any options.
Installing FluentNotify
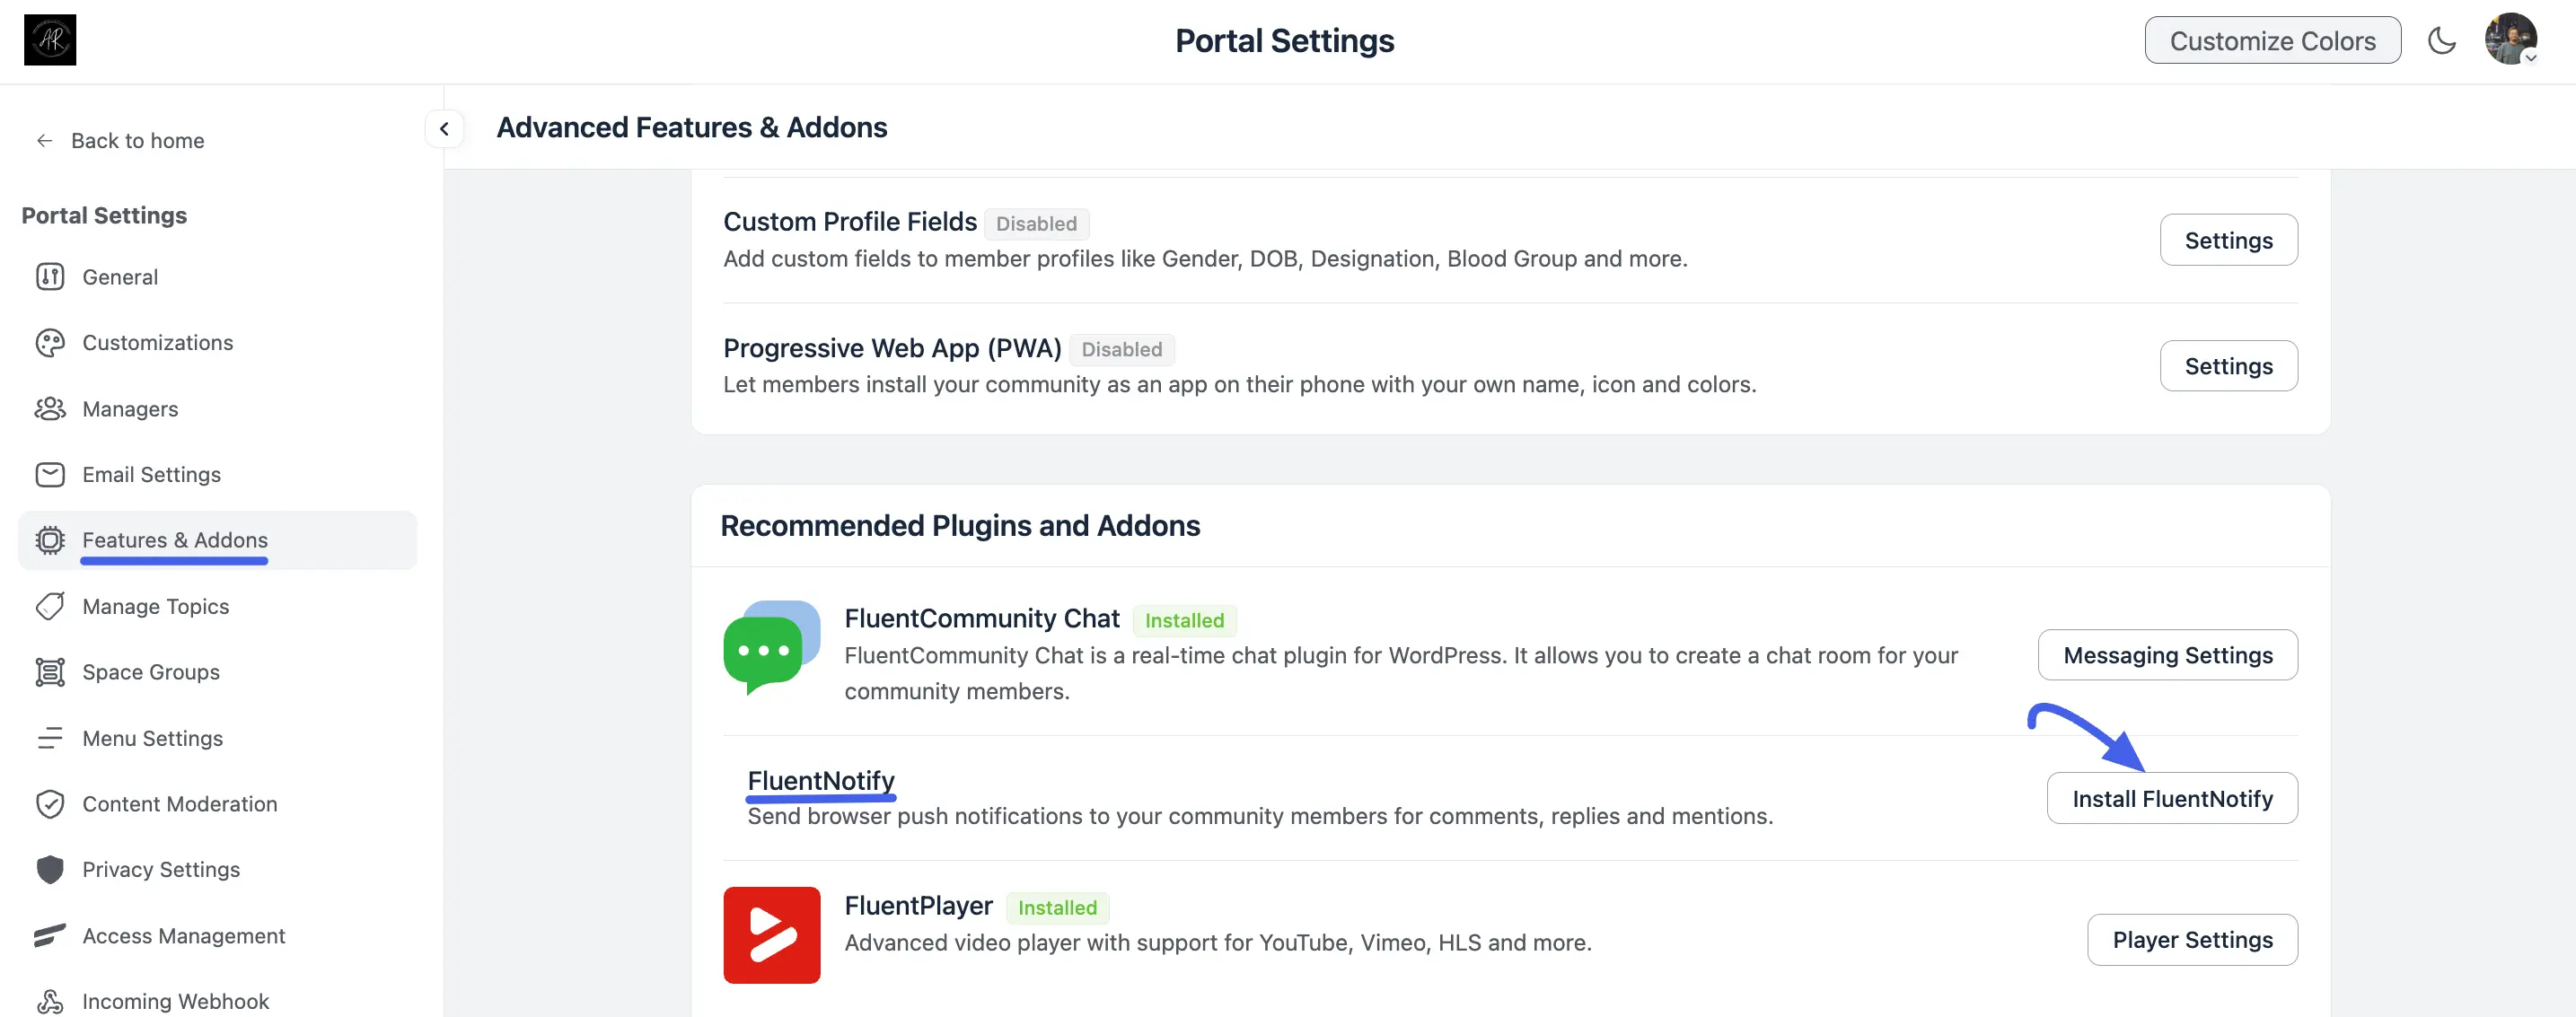
- Go to Portal Settings → Features & Addons → Advanced Features & Addons.
- Scroll down to the Recommended Plugins and Addons panel.
- Find FluentNotify "Send browser push notifications to your community members for comments, replies and mentions" and click Install FluentNotify.
INFO
If the one-click install button doesn't work on your server, download the FluentNotify plugin zip directly and upload it under Plugins → Add New → Upload Plugin in your WordPress admin: Download FluentNotify.
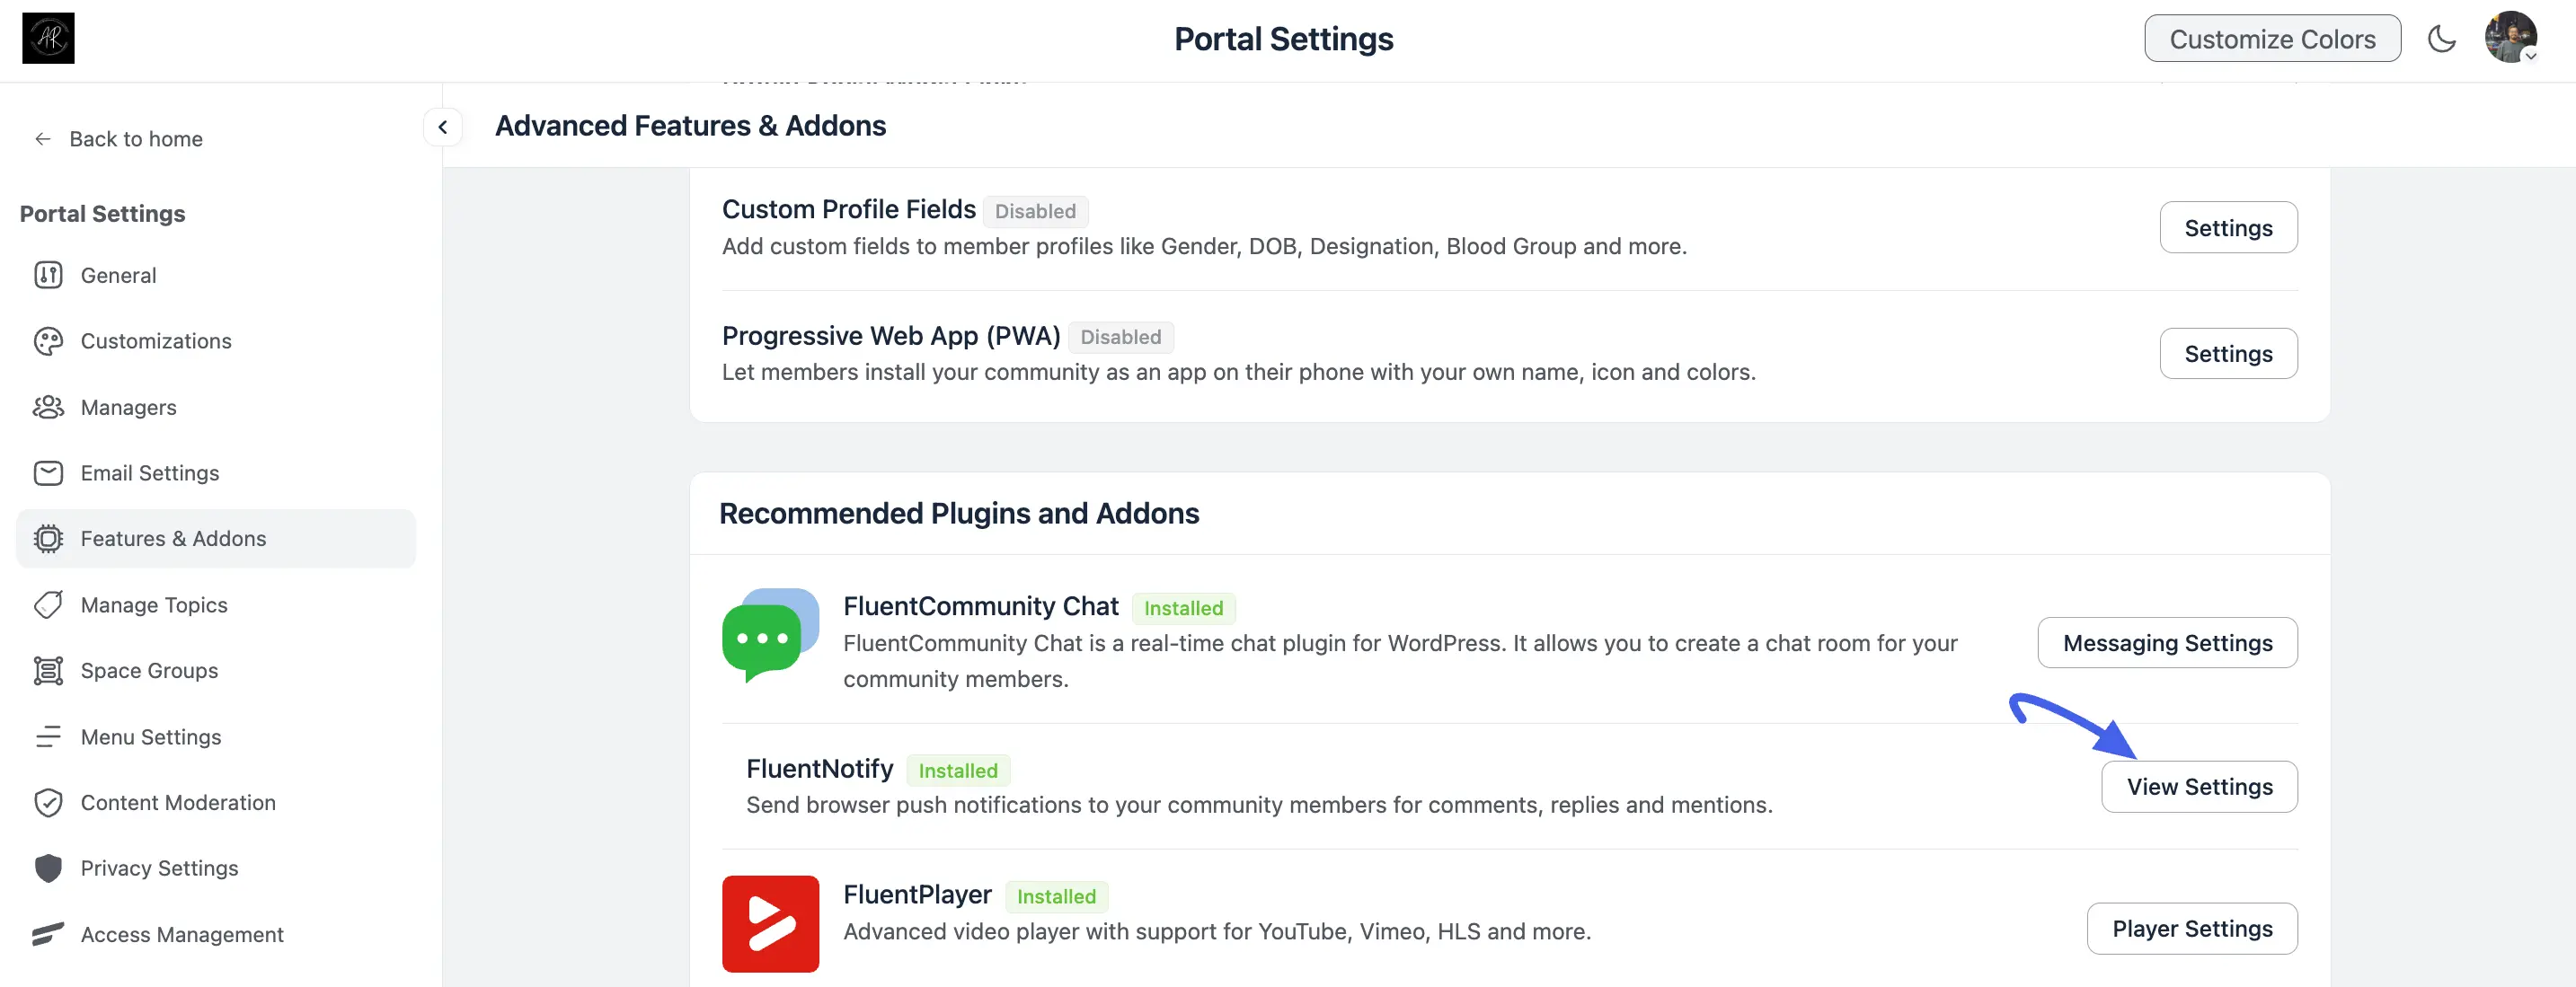
Once it finishes installing, the button changes to View Settings.
Push Notification Settings
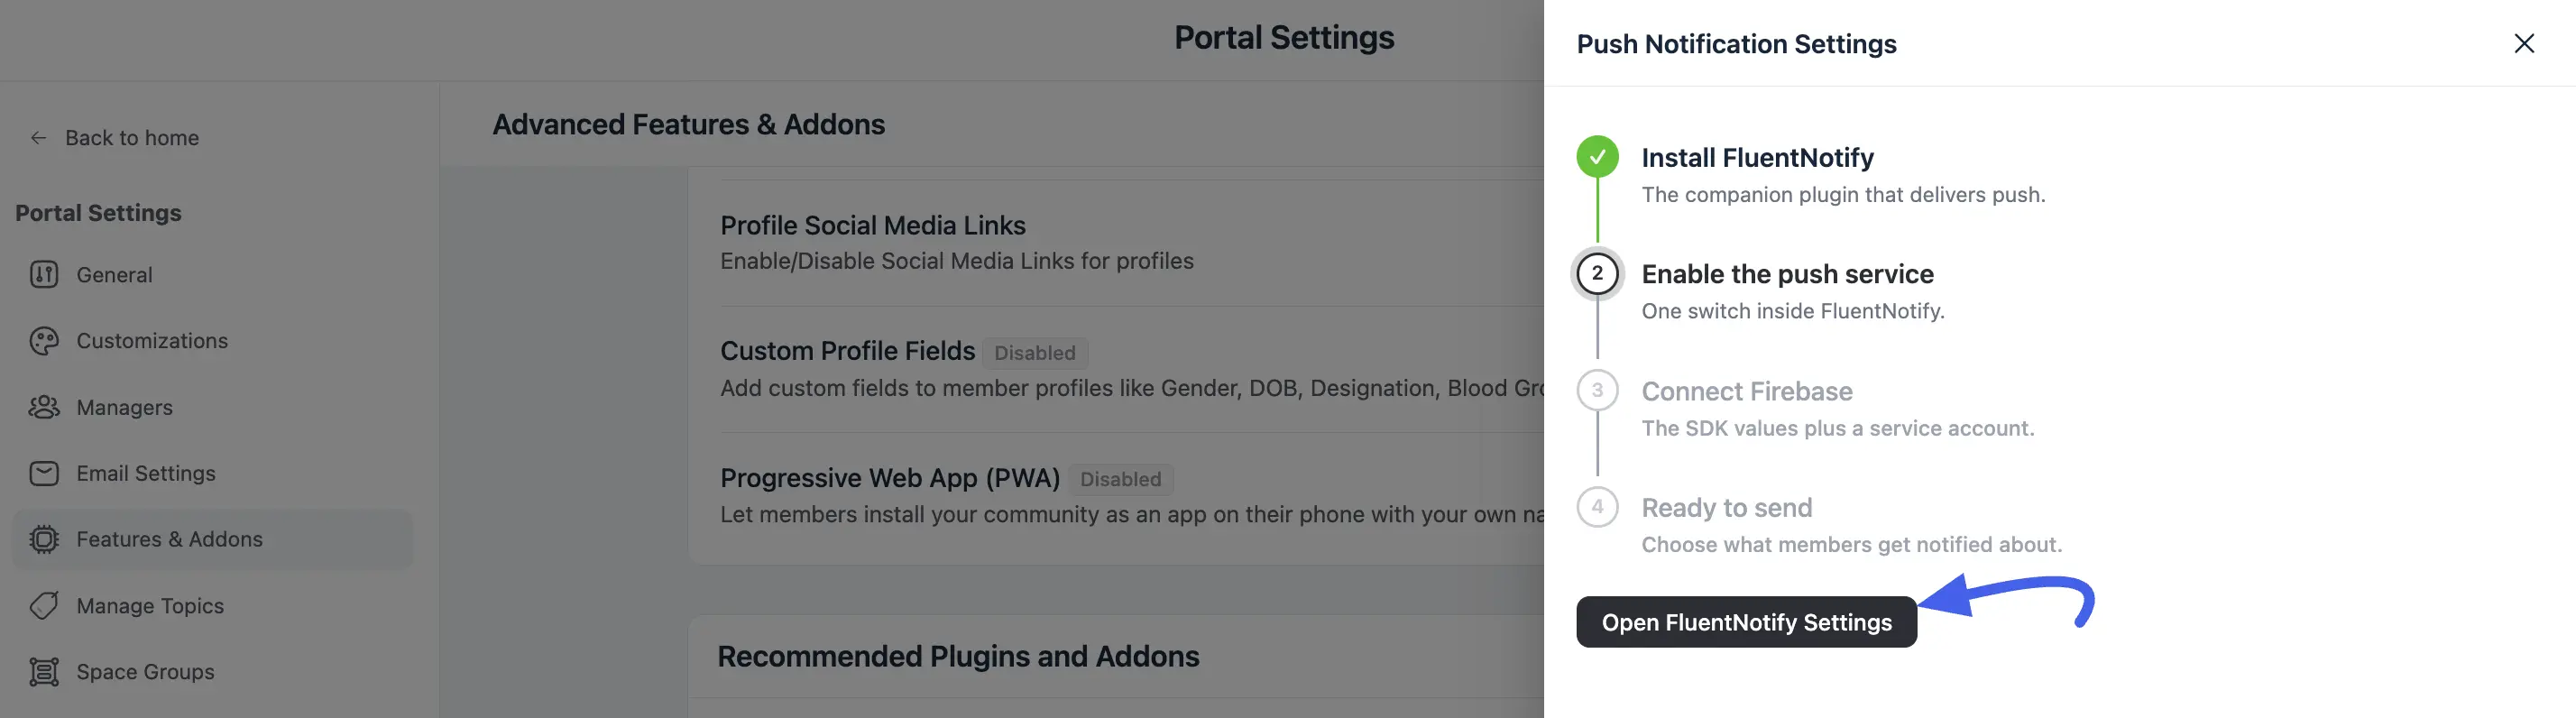
Click View Settings to open the Push Notification Settings panel. It's a short setup guide that tracks your progress toward sending your first push notification, in four steps:
- Install FluentNotify — done, since you already installed the plugin.
- Enable the push service — one switch inside FluentNotify.
- Connect Firebase — the SDK values plus a service account.
- Ready to send — choose what members get notified about.
Click Open FluentNotify Settings to jump straight into FluentNotify's full Settings screen and work through the remaining steps.
Configuring Google Firebase
FluentNotify needs a set of credentials from a Firebase project to actually send push notifications. The rest of this guide walks through generating them, step by step, in the Google Firebase Console.
Step 1: Create a Firebase Project
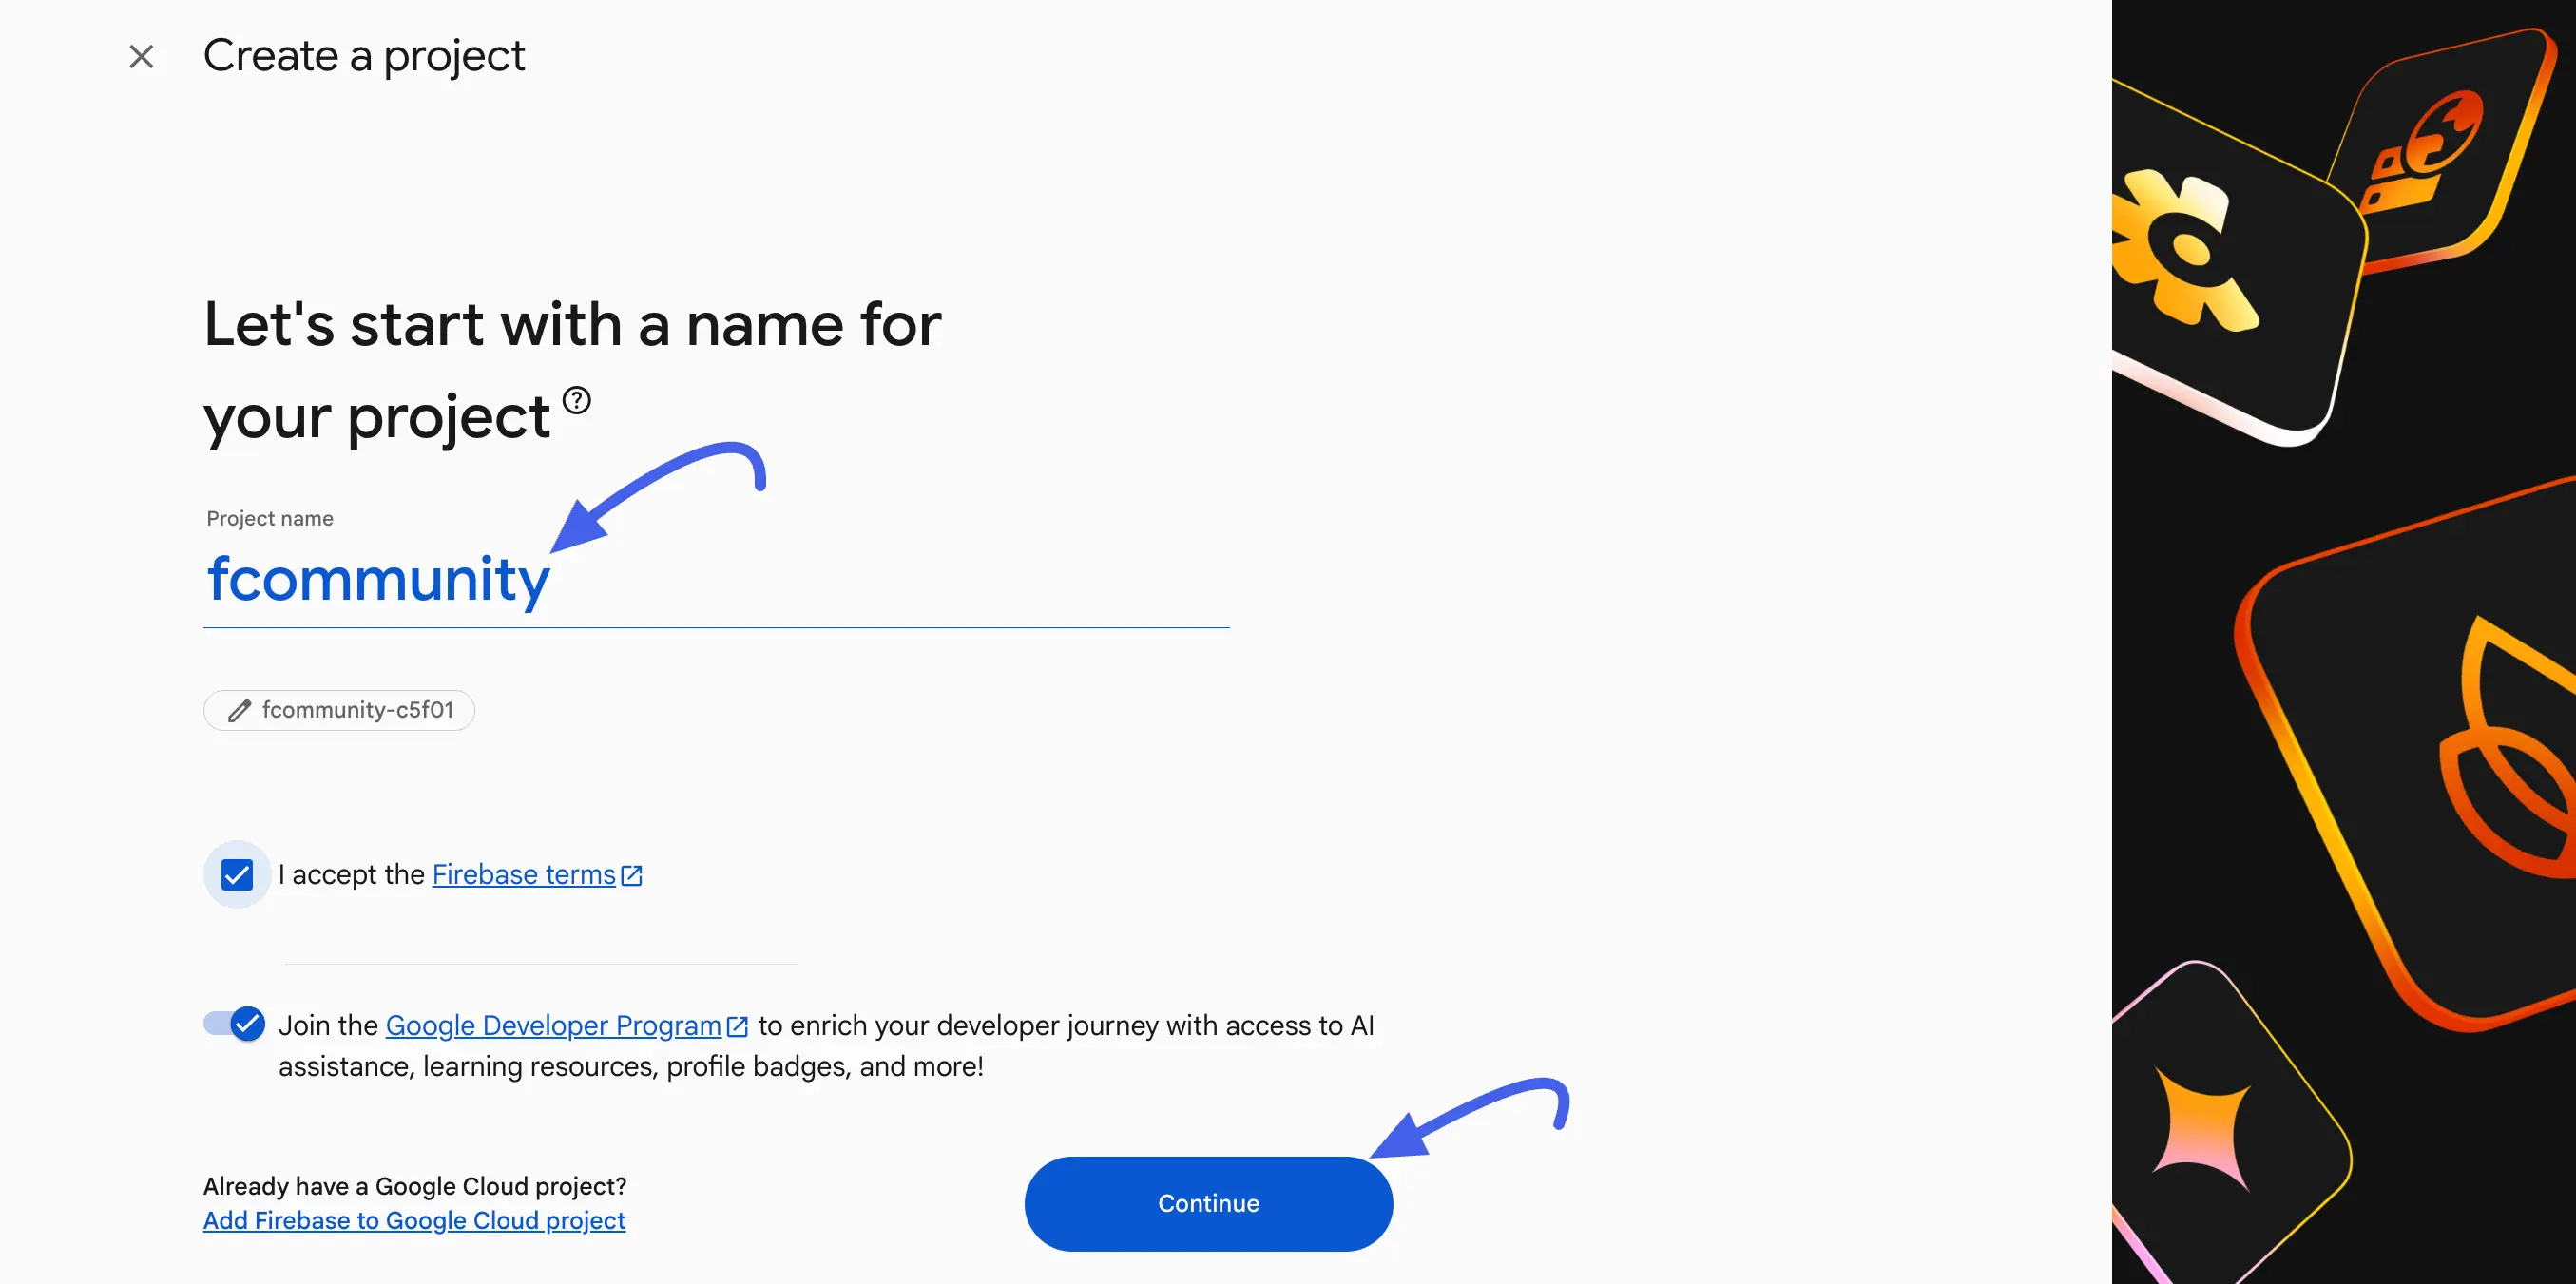
Log in to the Firebase Console and click Get started by setting up a Firebase project.
Enter a name for your project (for example, your community's name), accept the Firebase terms, and click Continue.
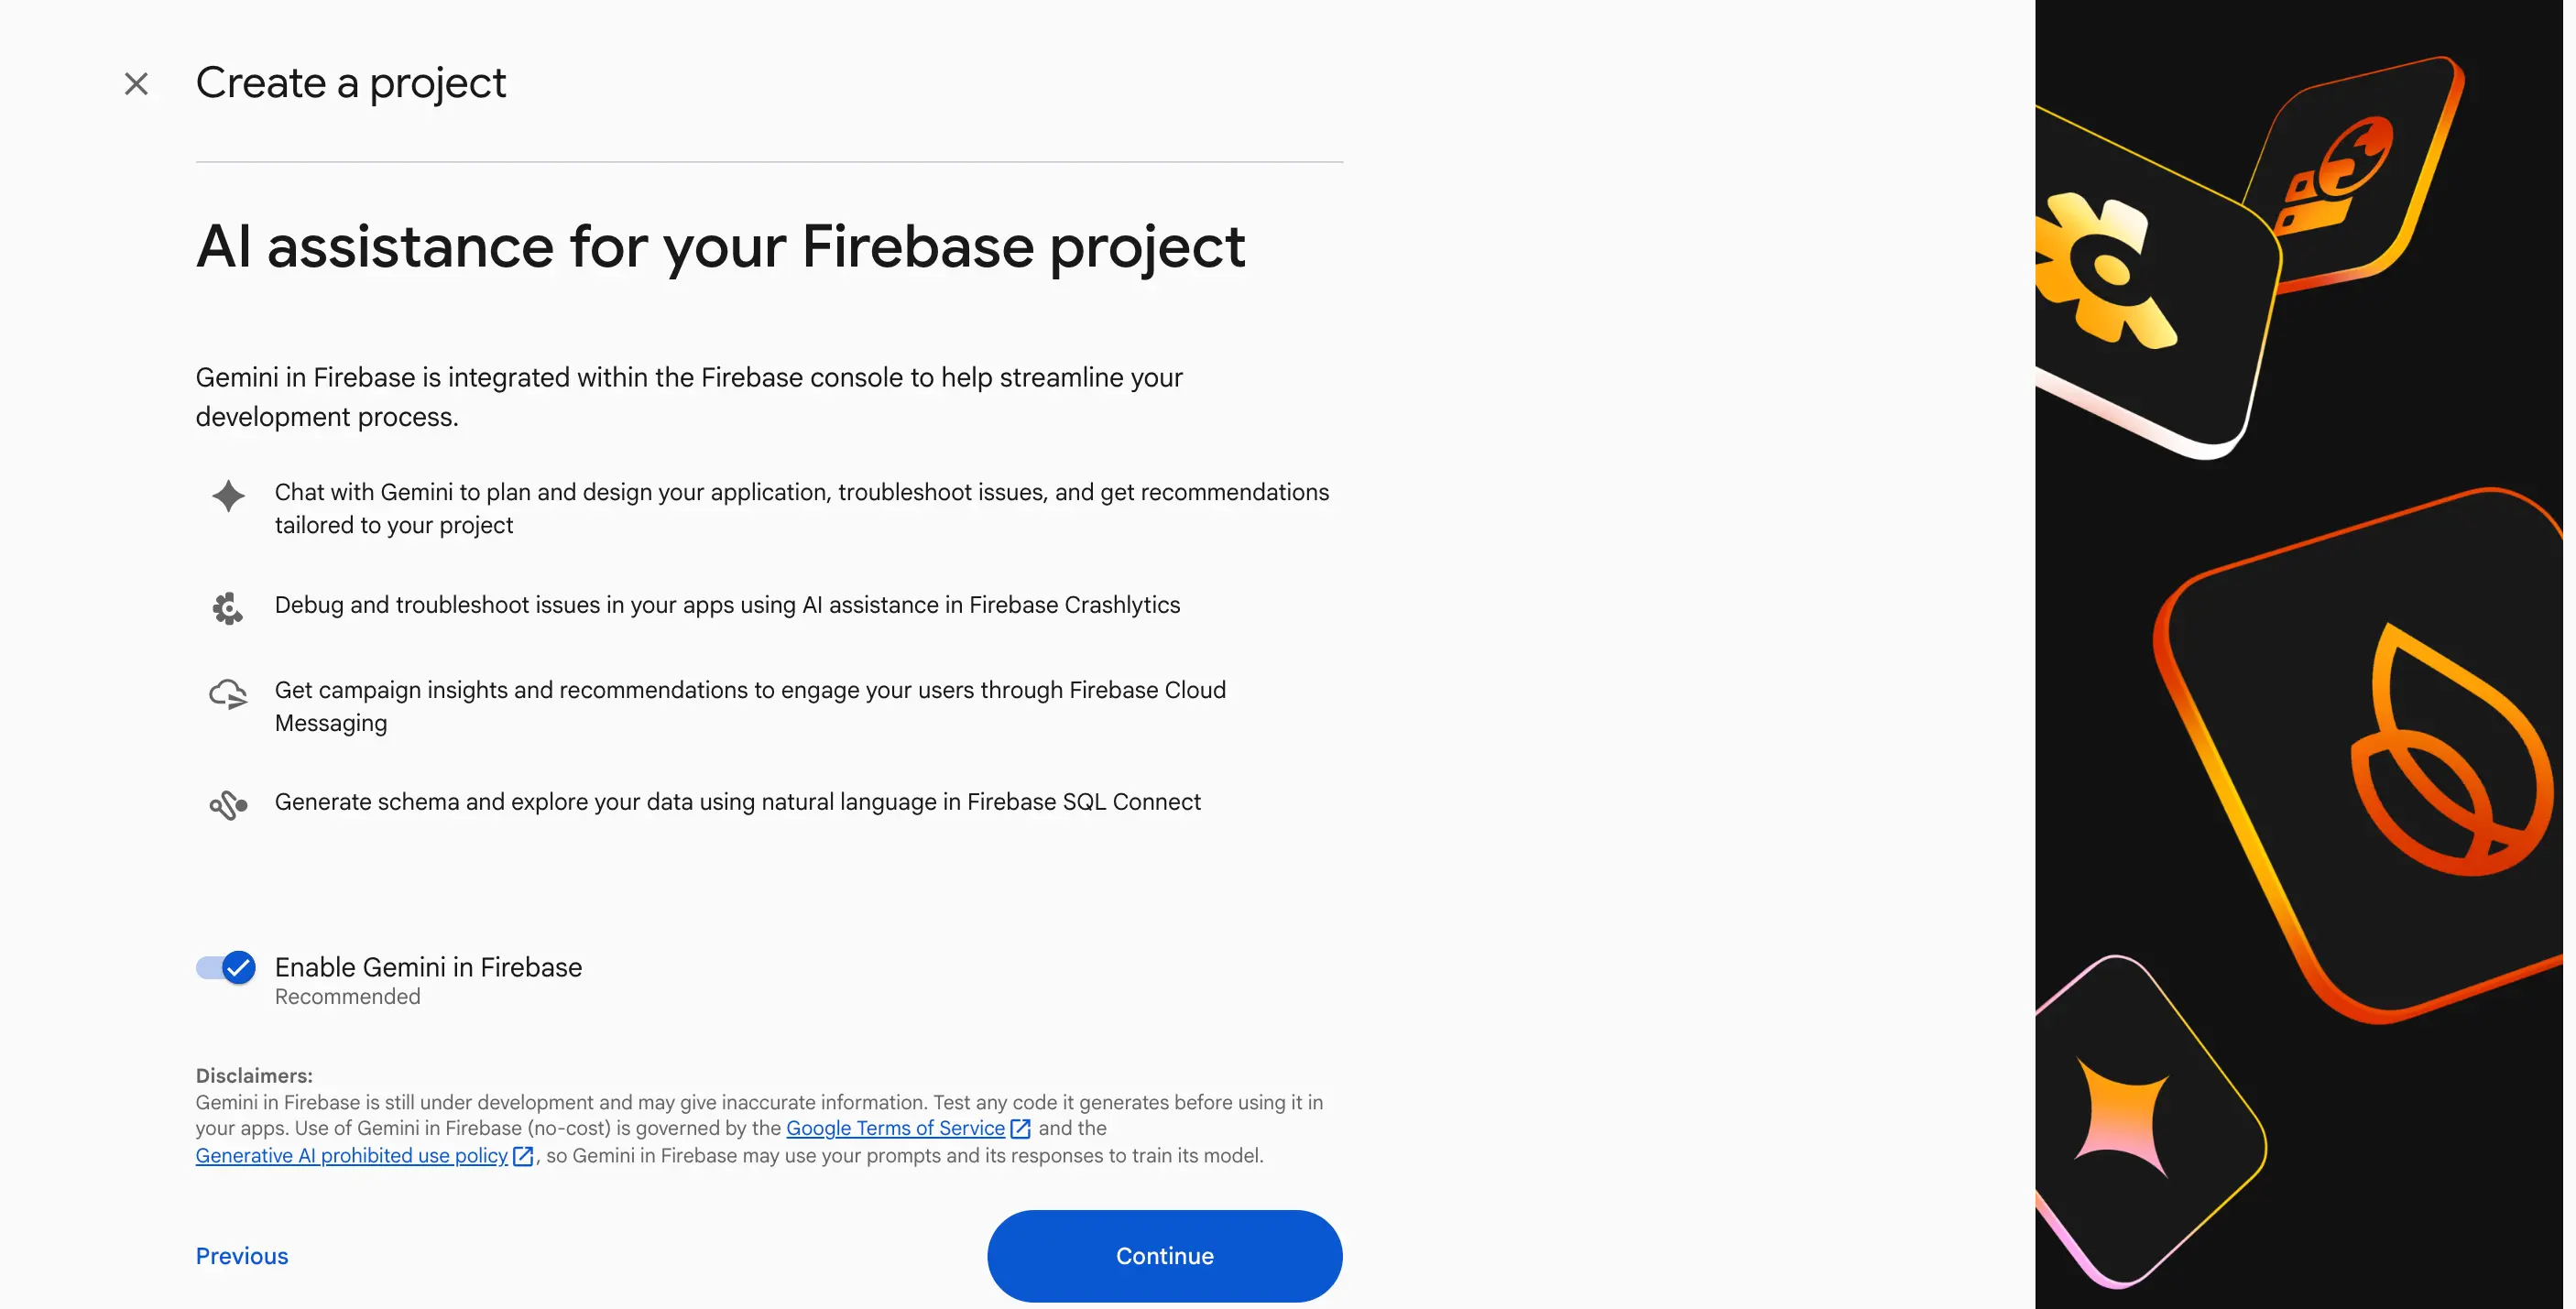
On the next screen, Gemini in Firebase is offered as an optional AI assistant for the project, it isn't needed for push notifications, so just click Continue.
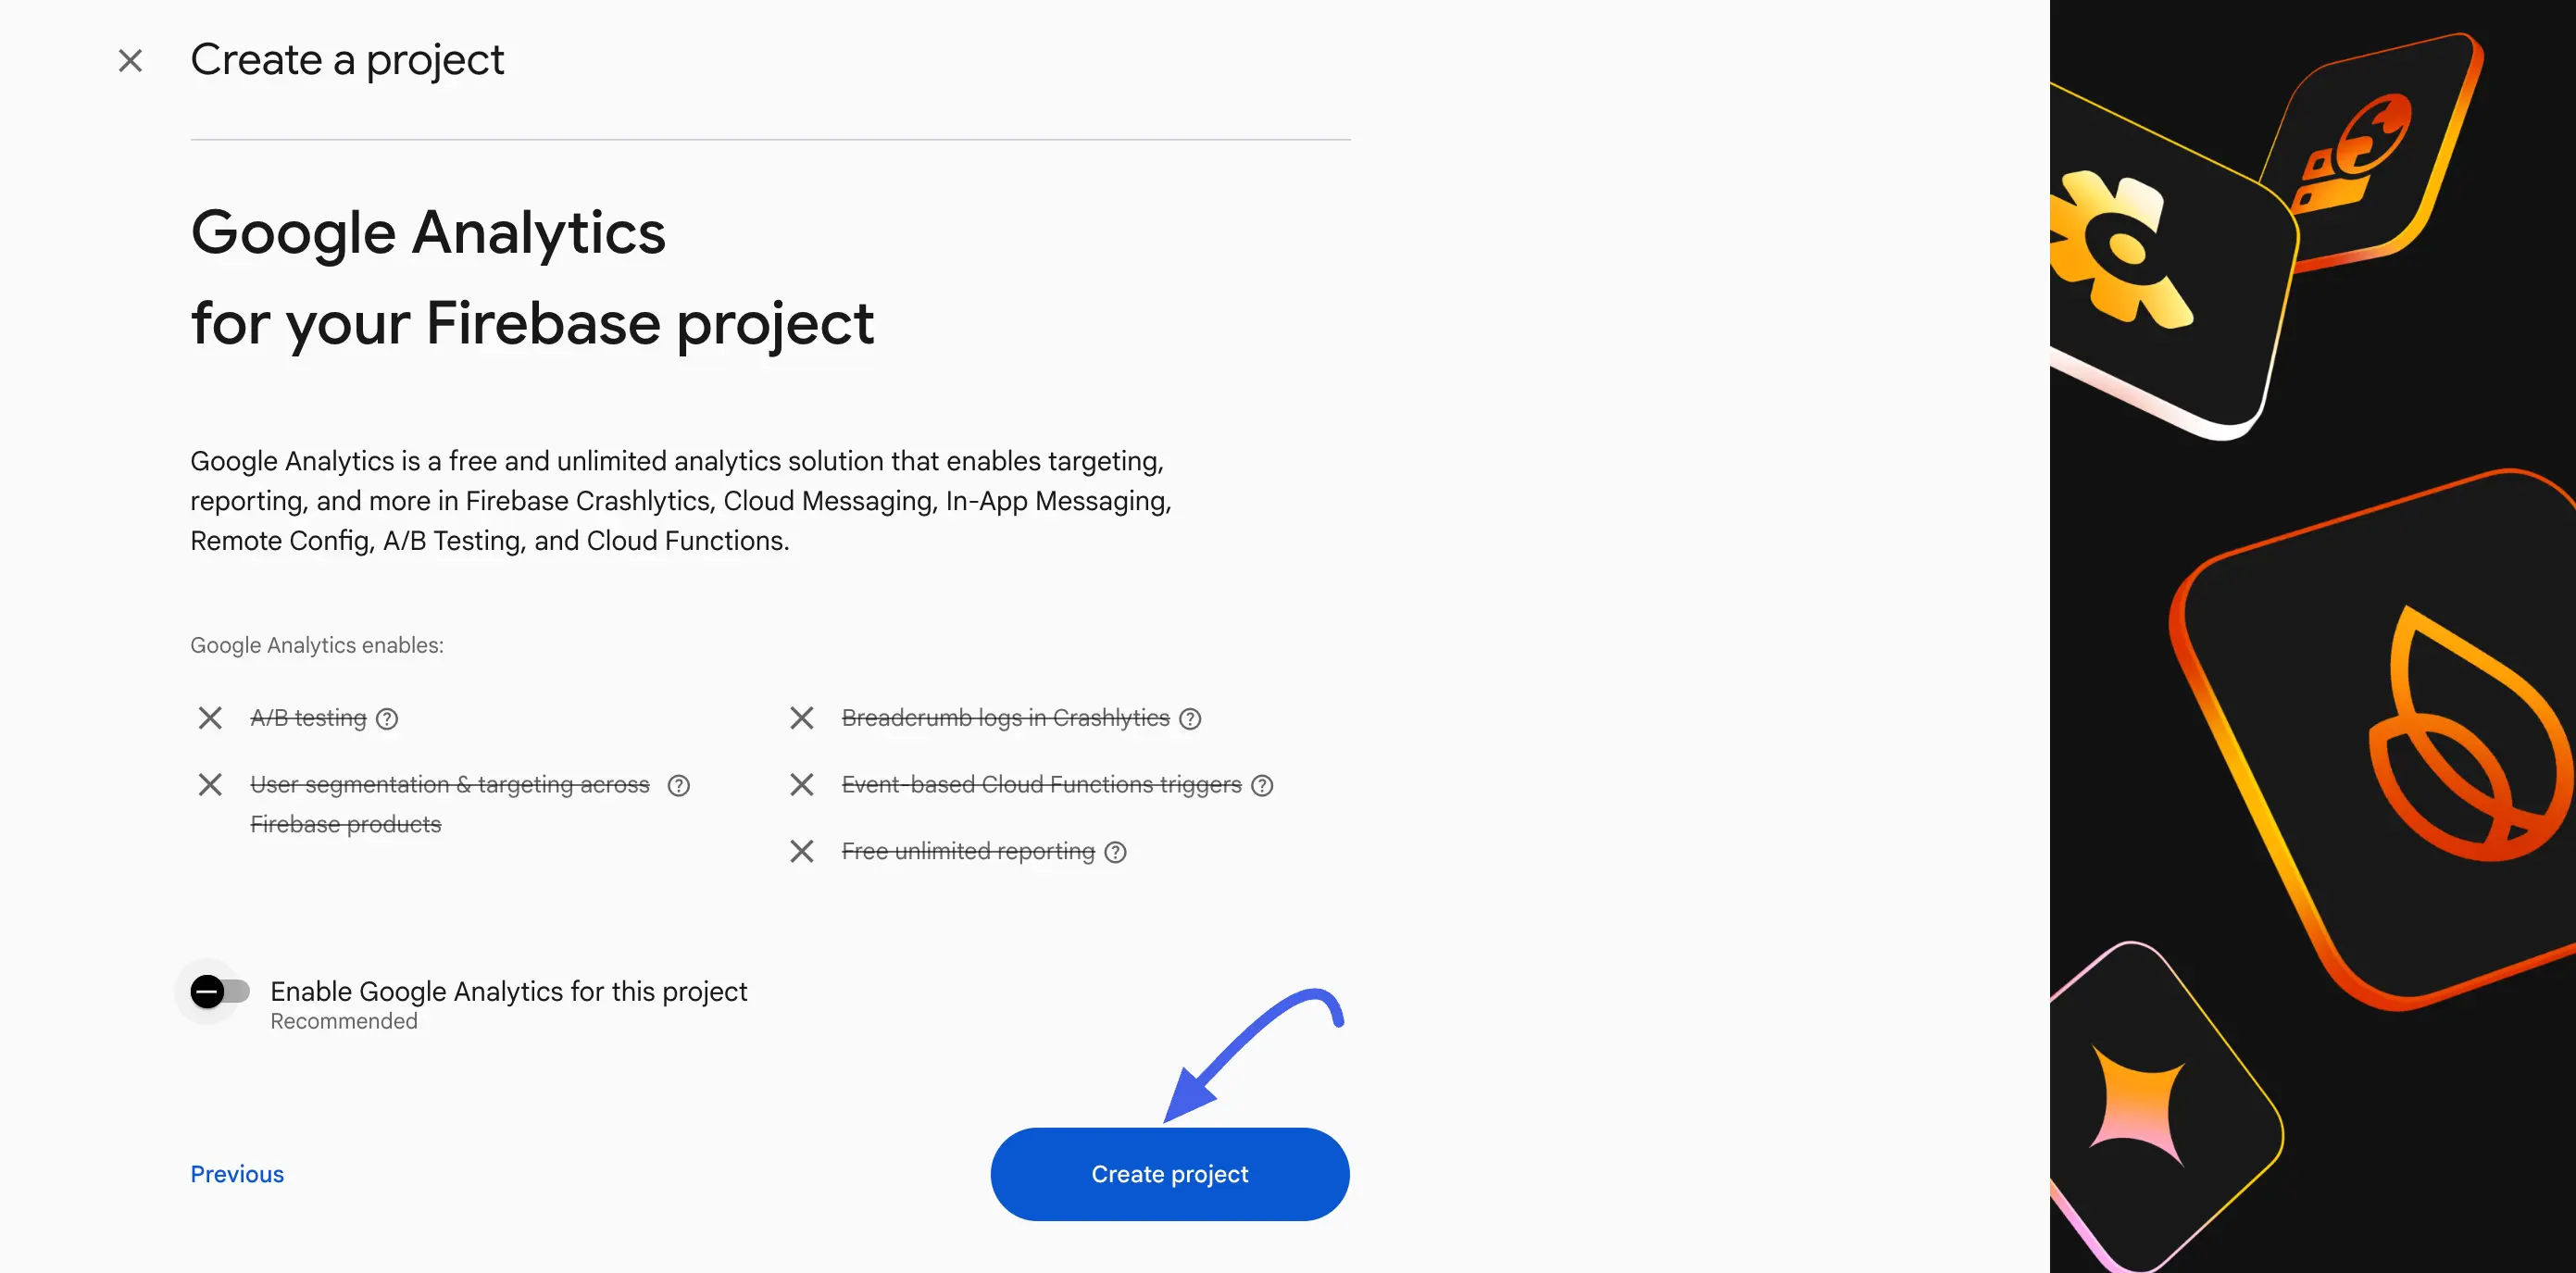
Google Analytics is also optional. Leave it as you prefer and click Create project.
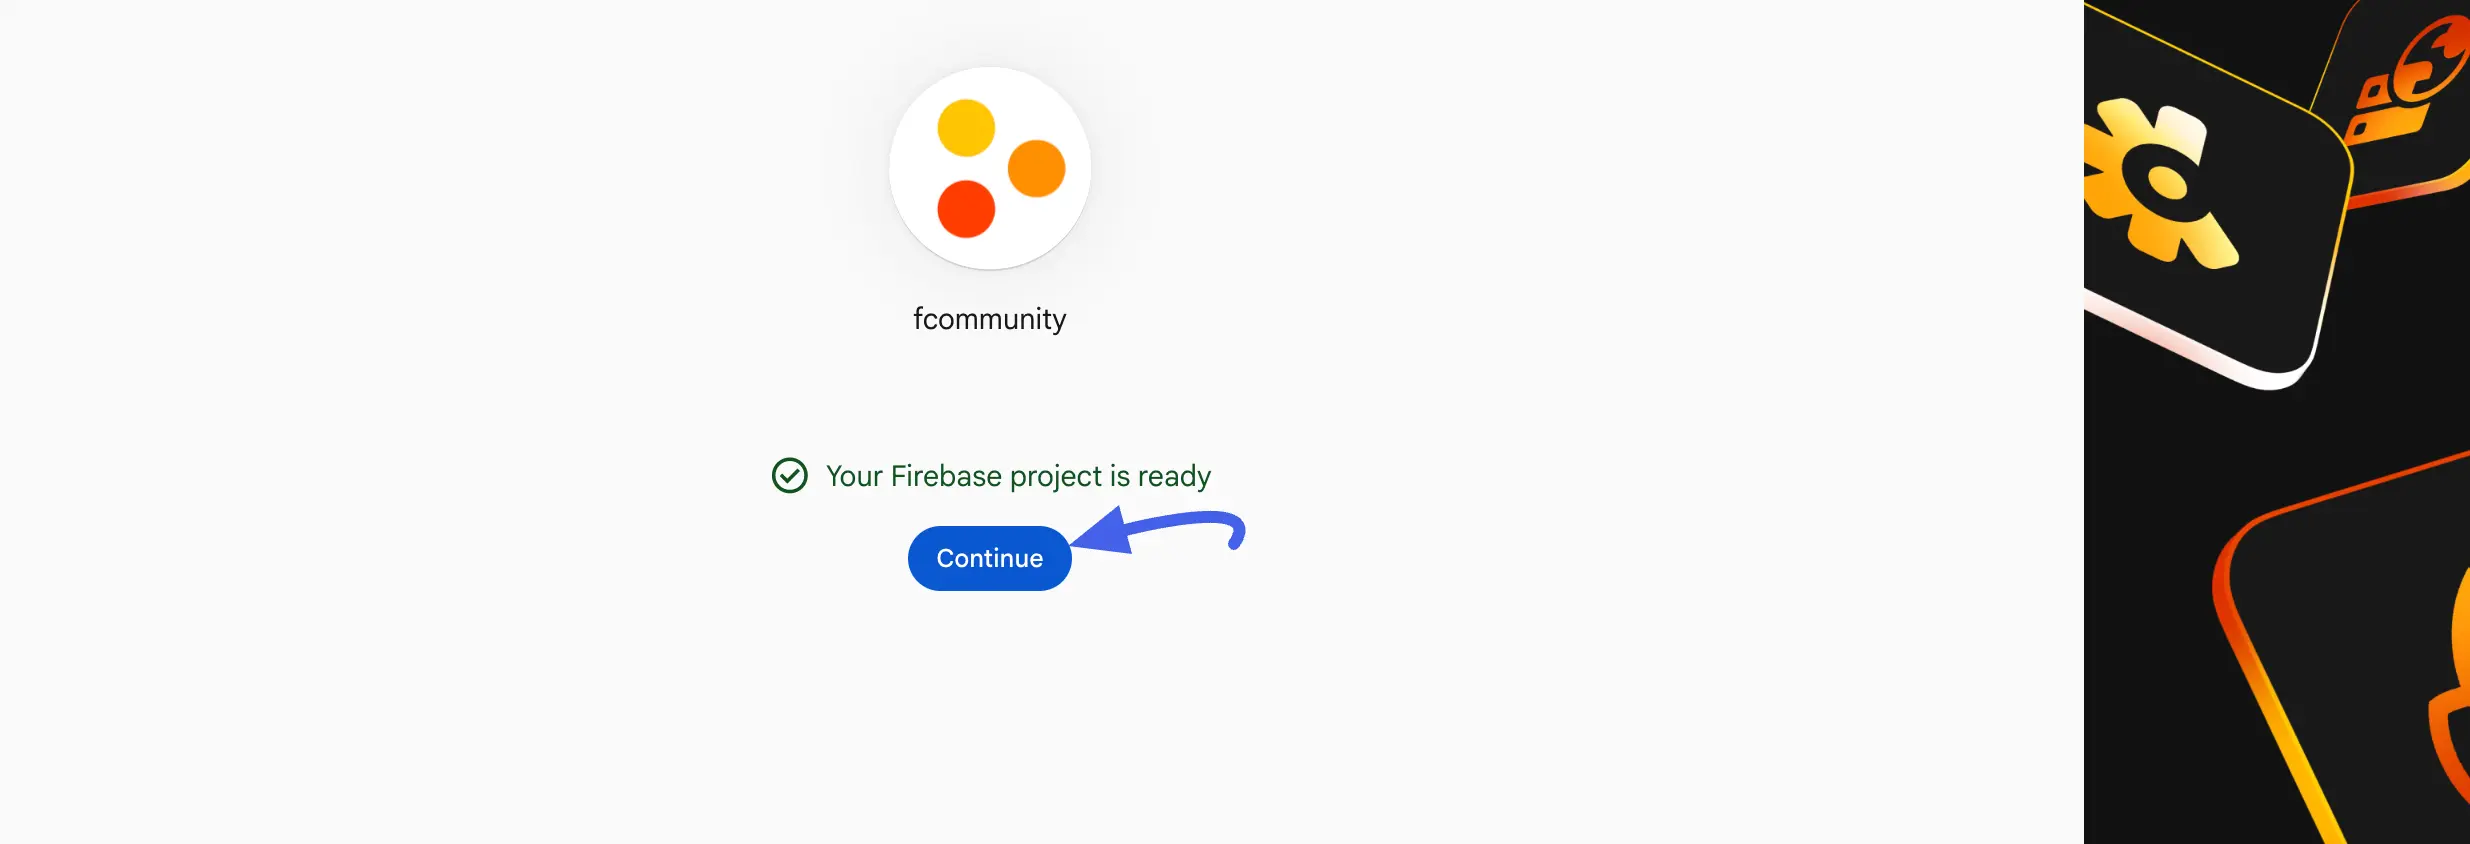
Once Firebase finishes setting things up, click Continue to enter your new project.
Step 2: Register a Web App
Push notifications are sent to a web browser, so you need to register a Web app inside the project, not iOS or Android.
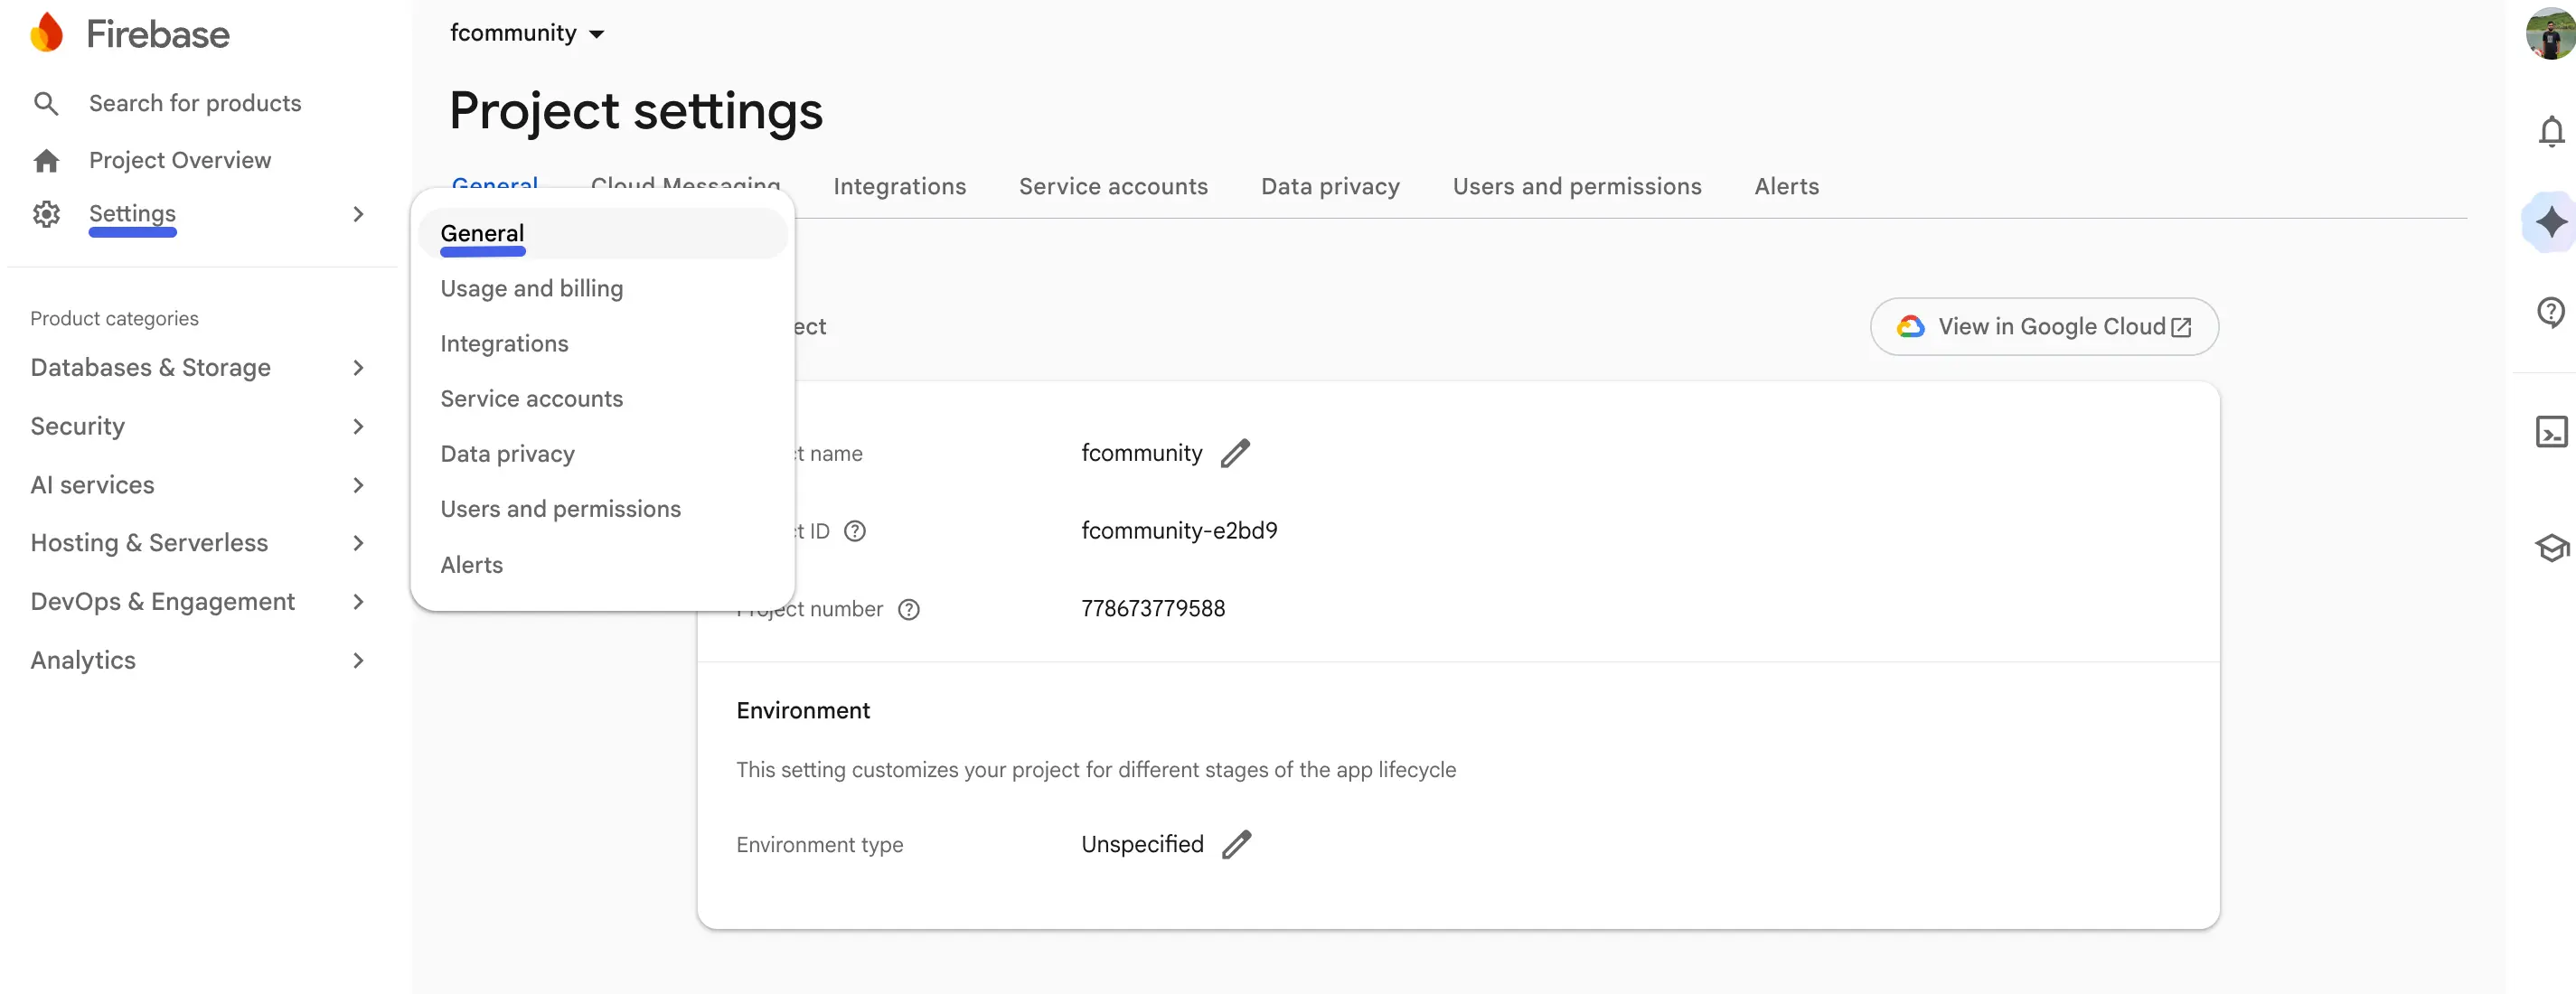
- In the Firebase Console, go to Settings → Project settings, then stay on the General tab.
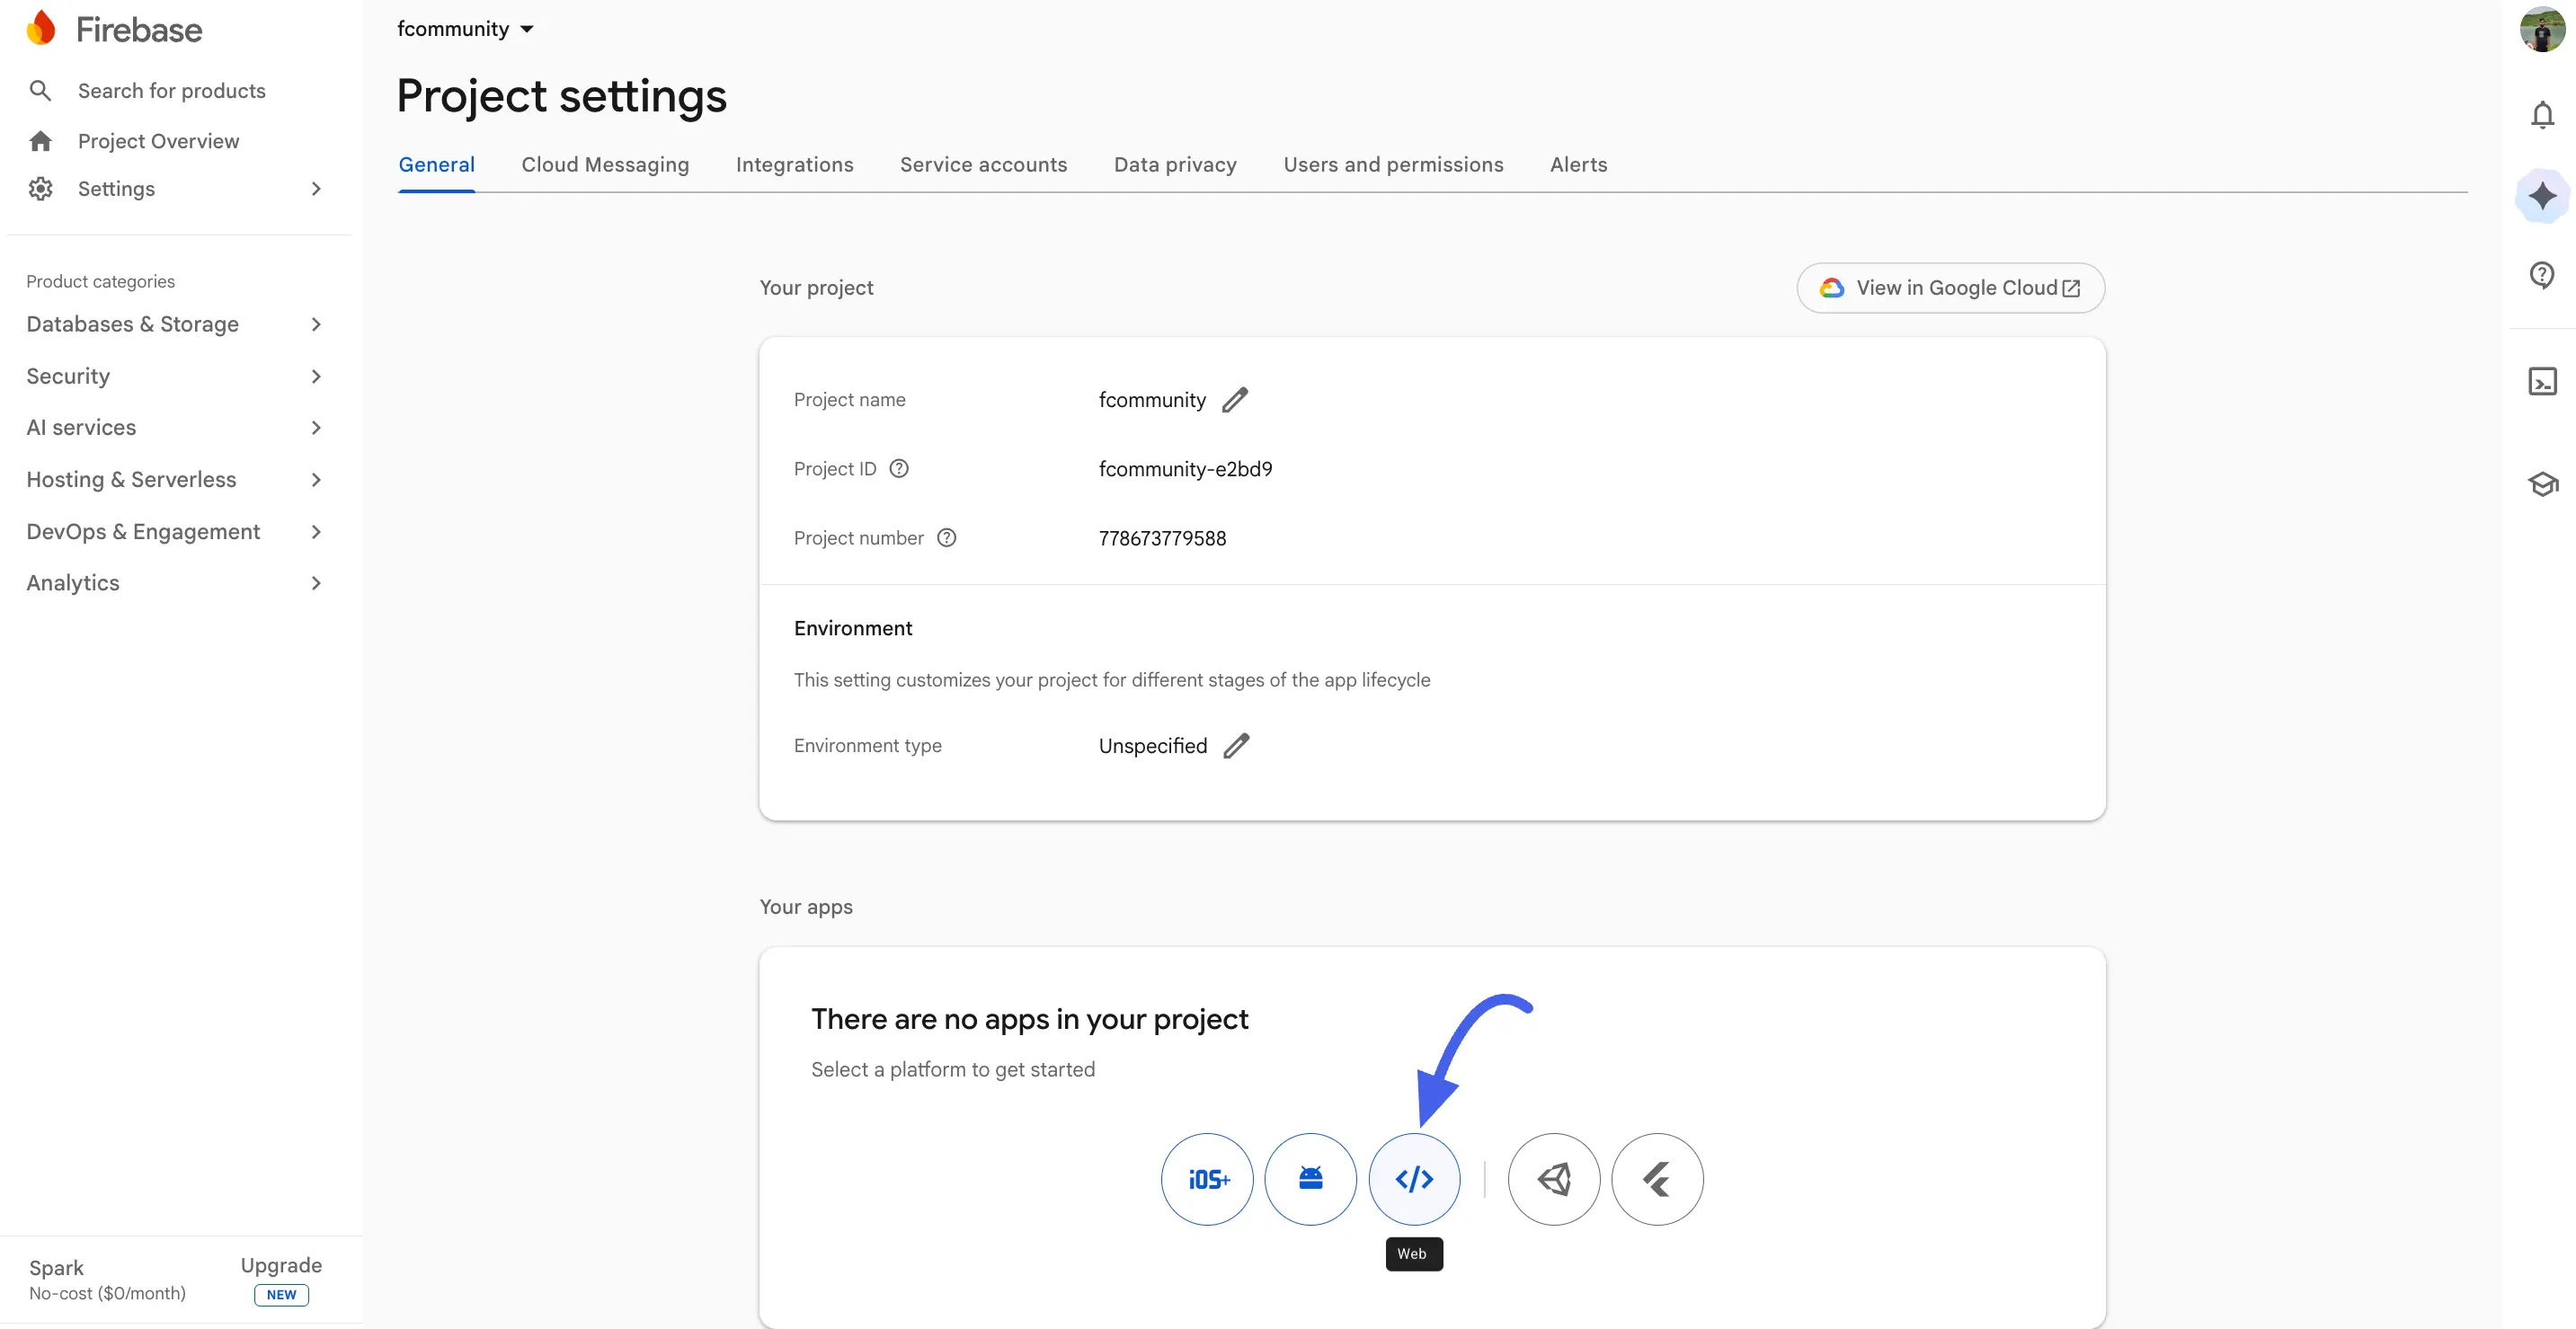
- Under Your apps, click the Web (
</>) icon.
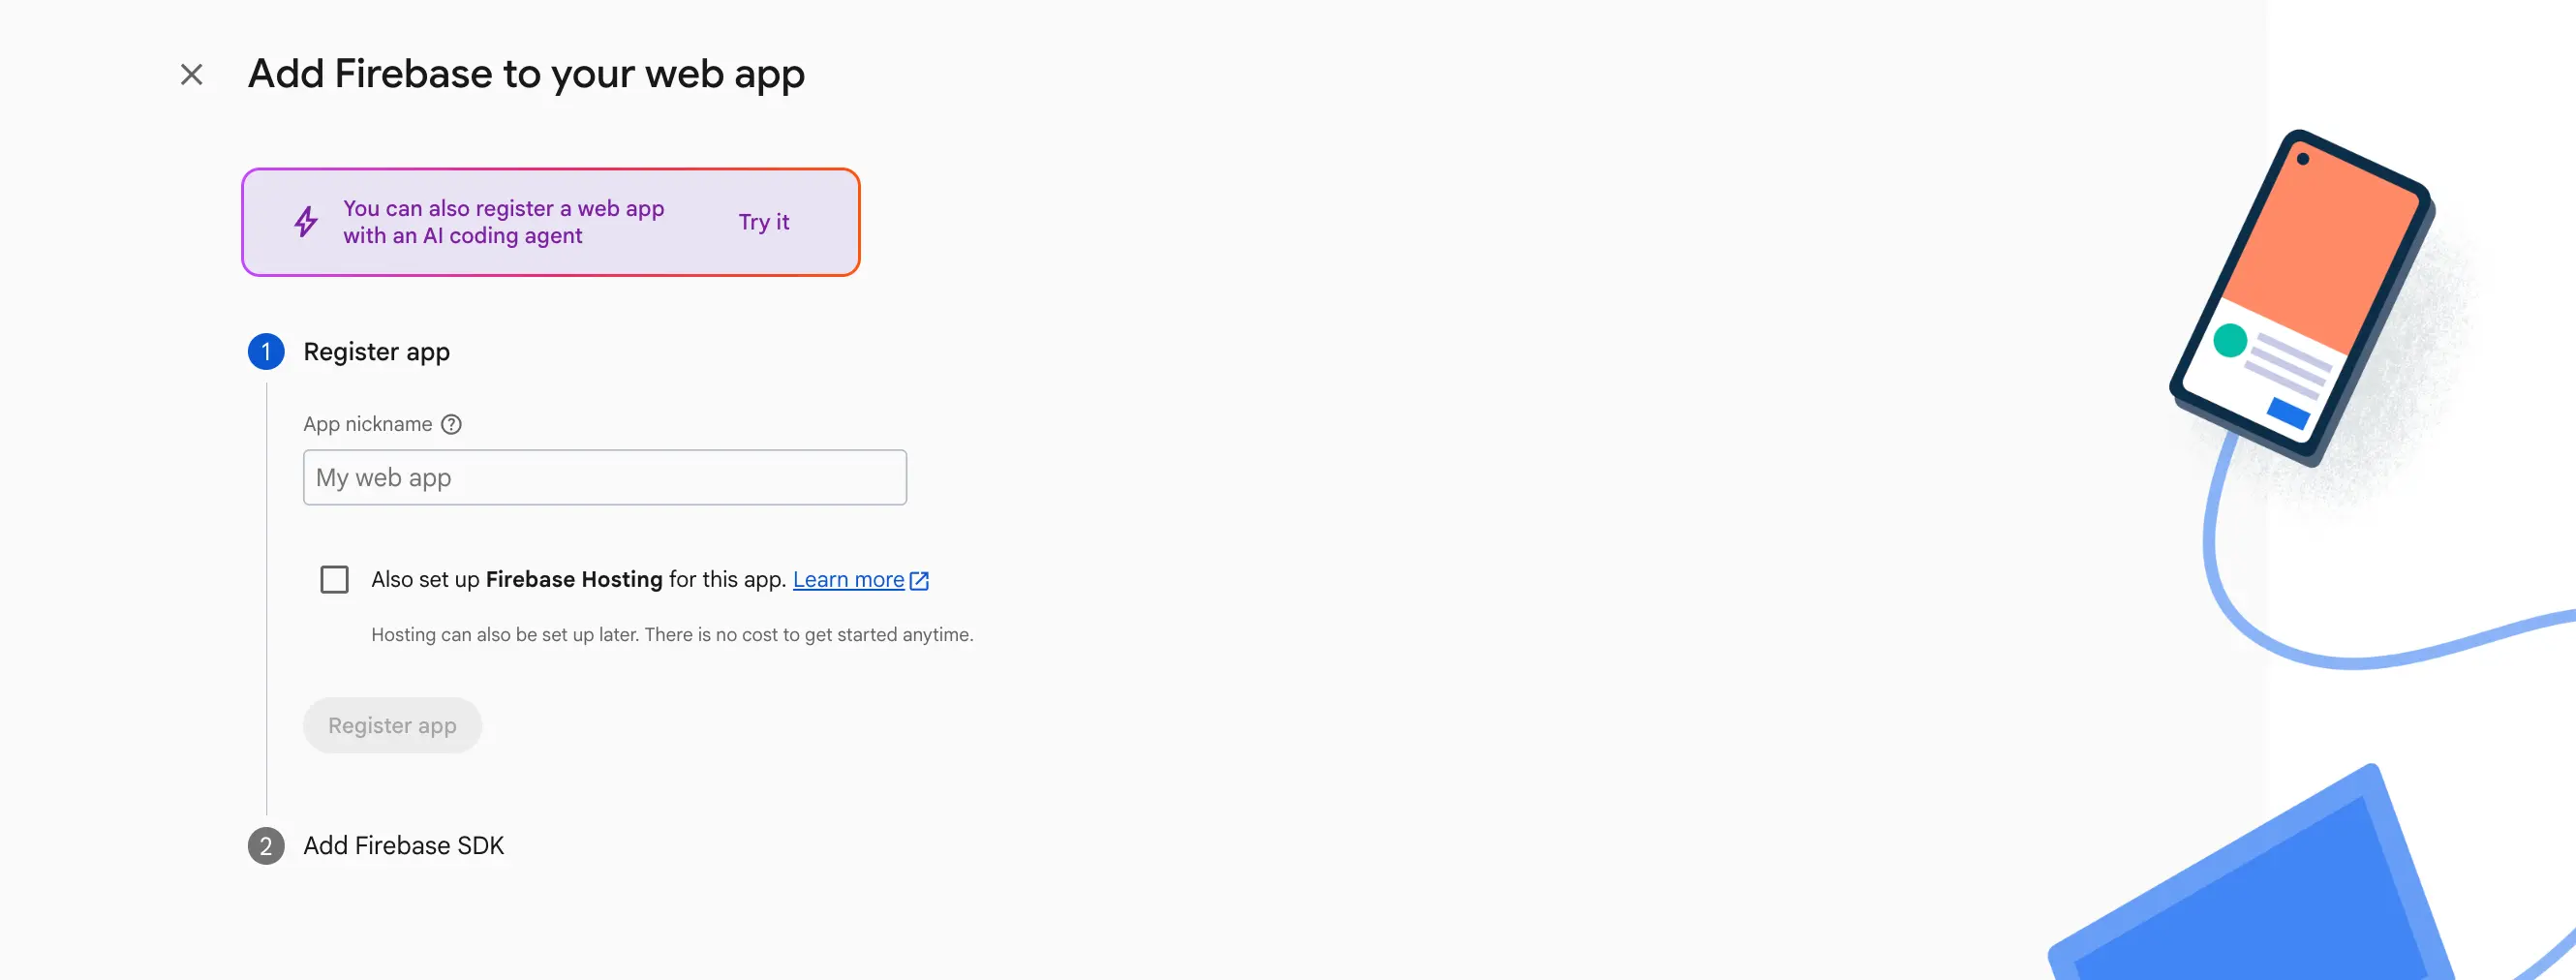
- Give the app a nickname (e.g., "My web app") and click Register app.
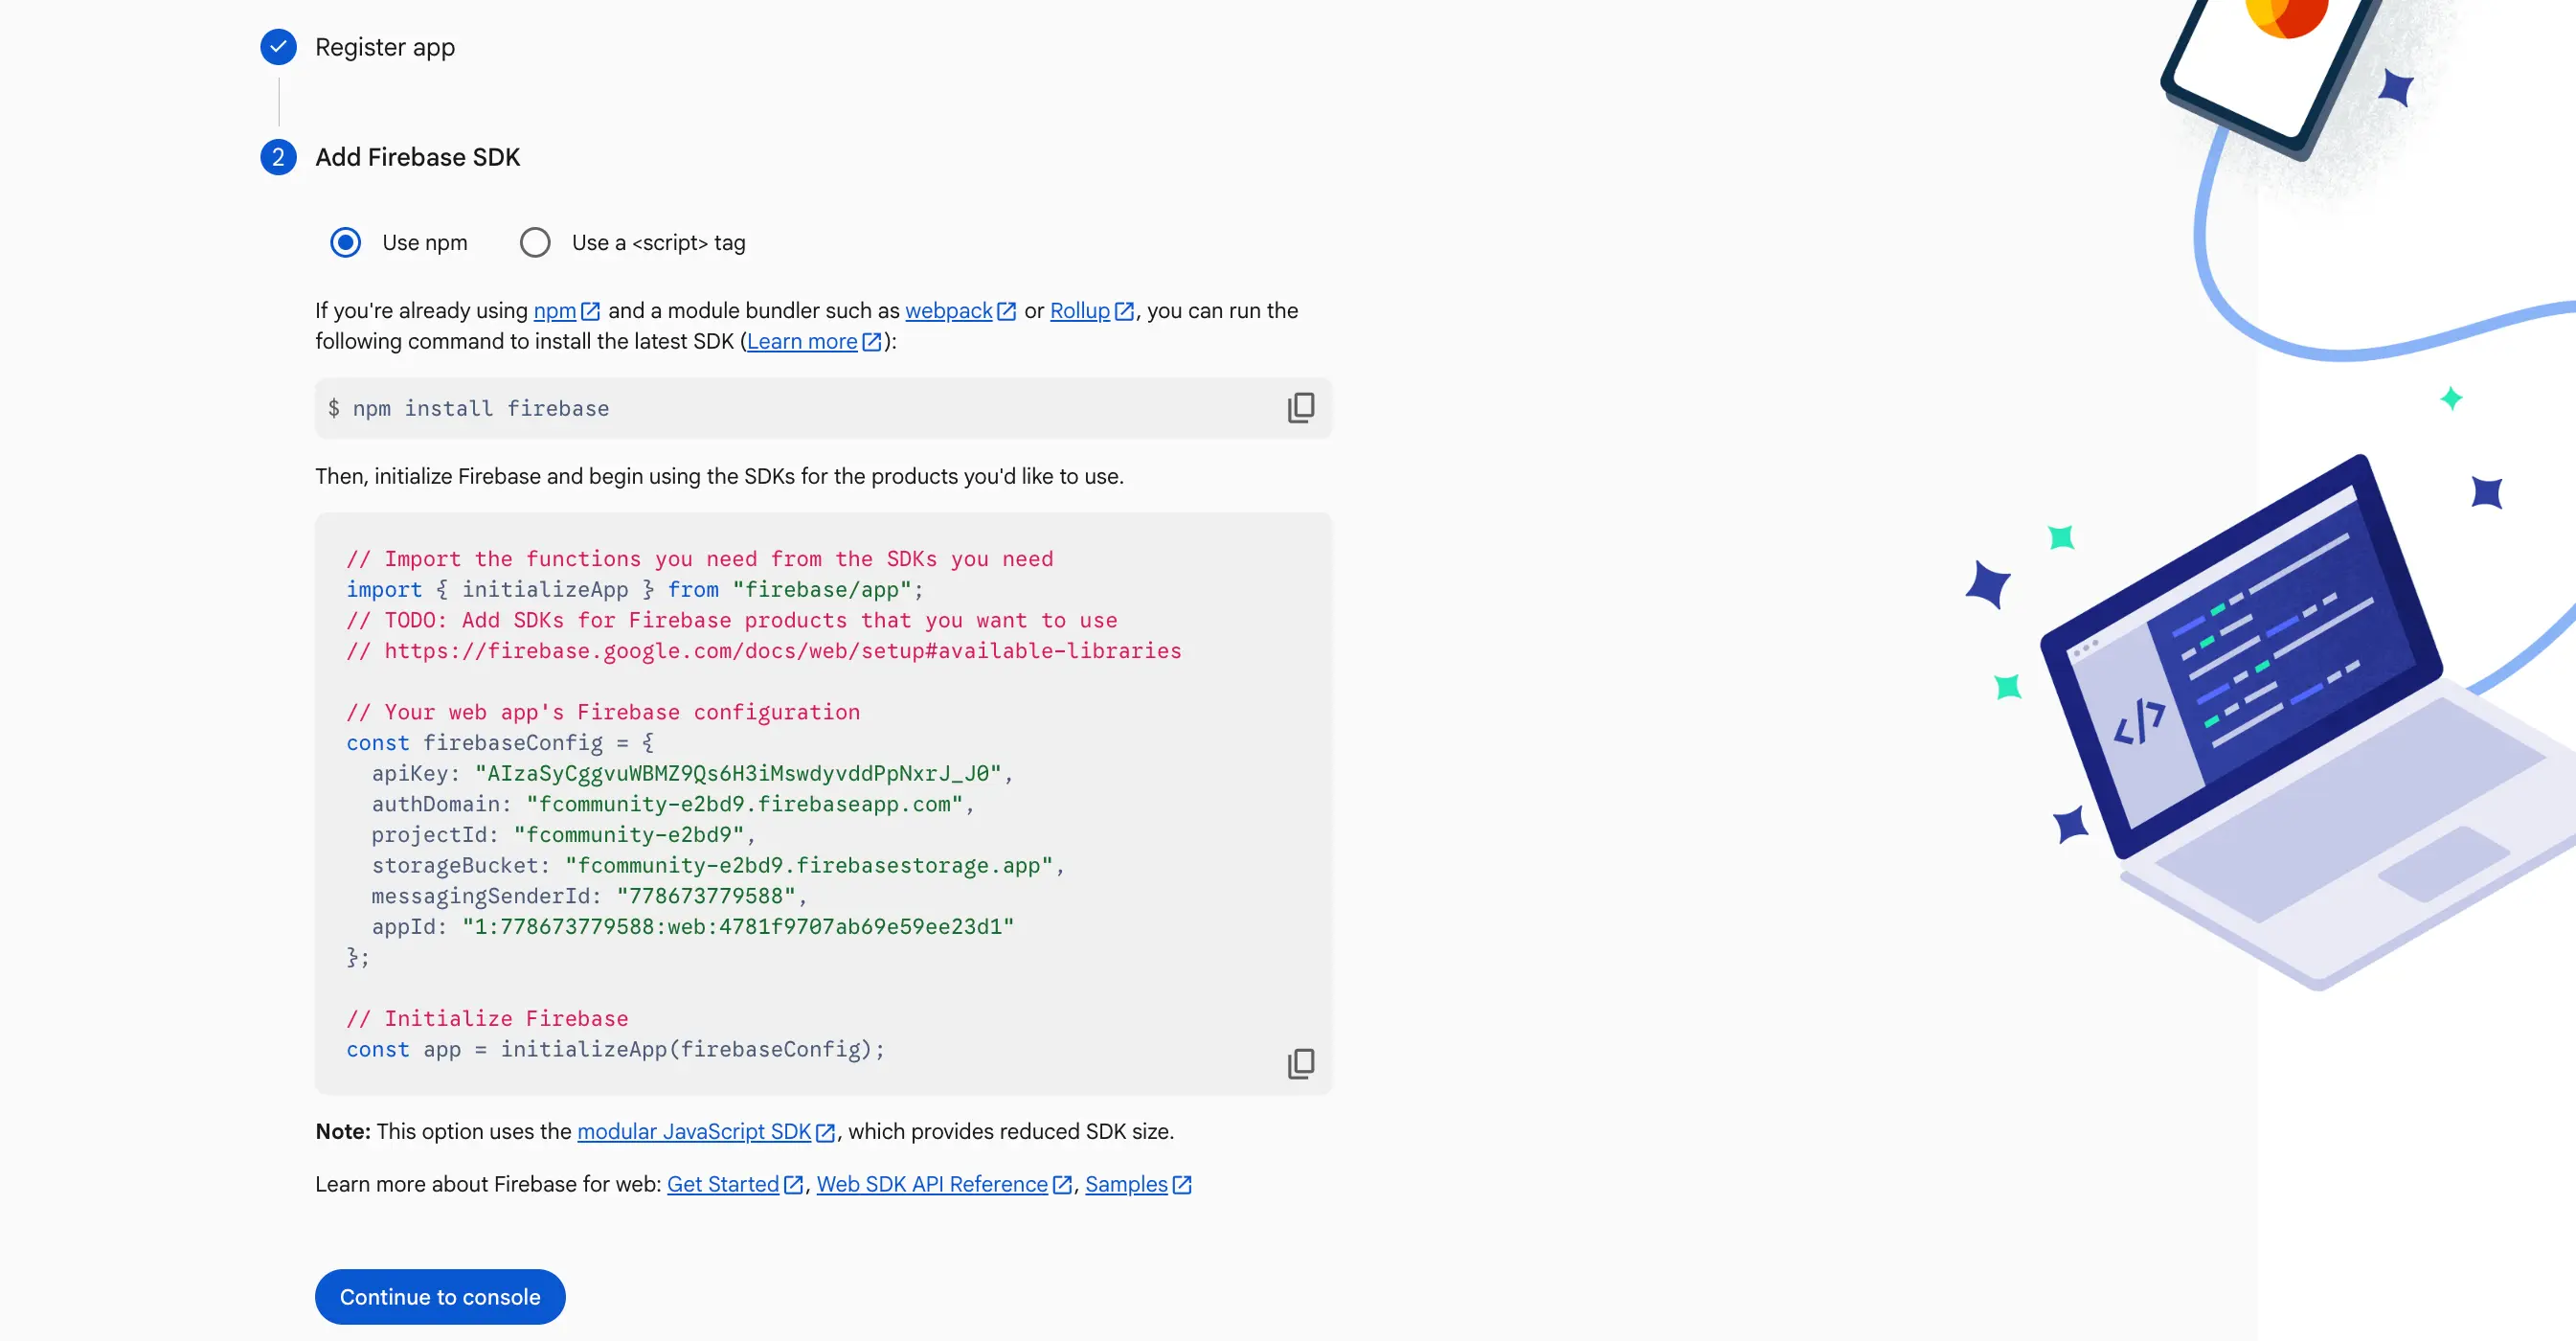
- On the Add Firebase SDK step, click Continue to console, you don't need to install anything via npm for FluentNotify to work.
Step 3: Copy the Firebase Config
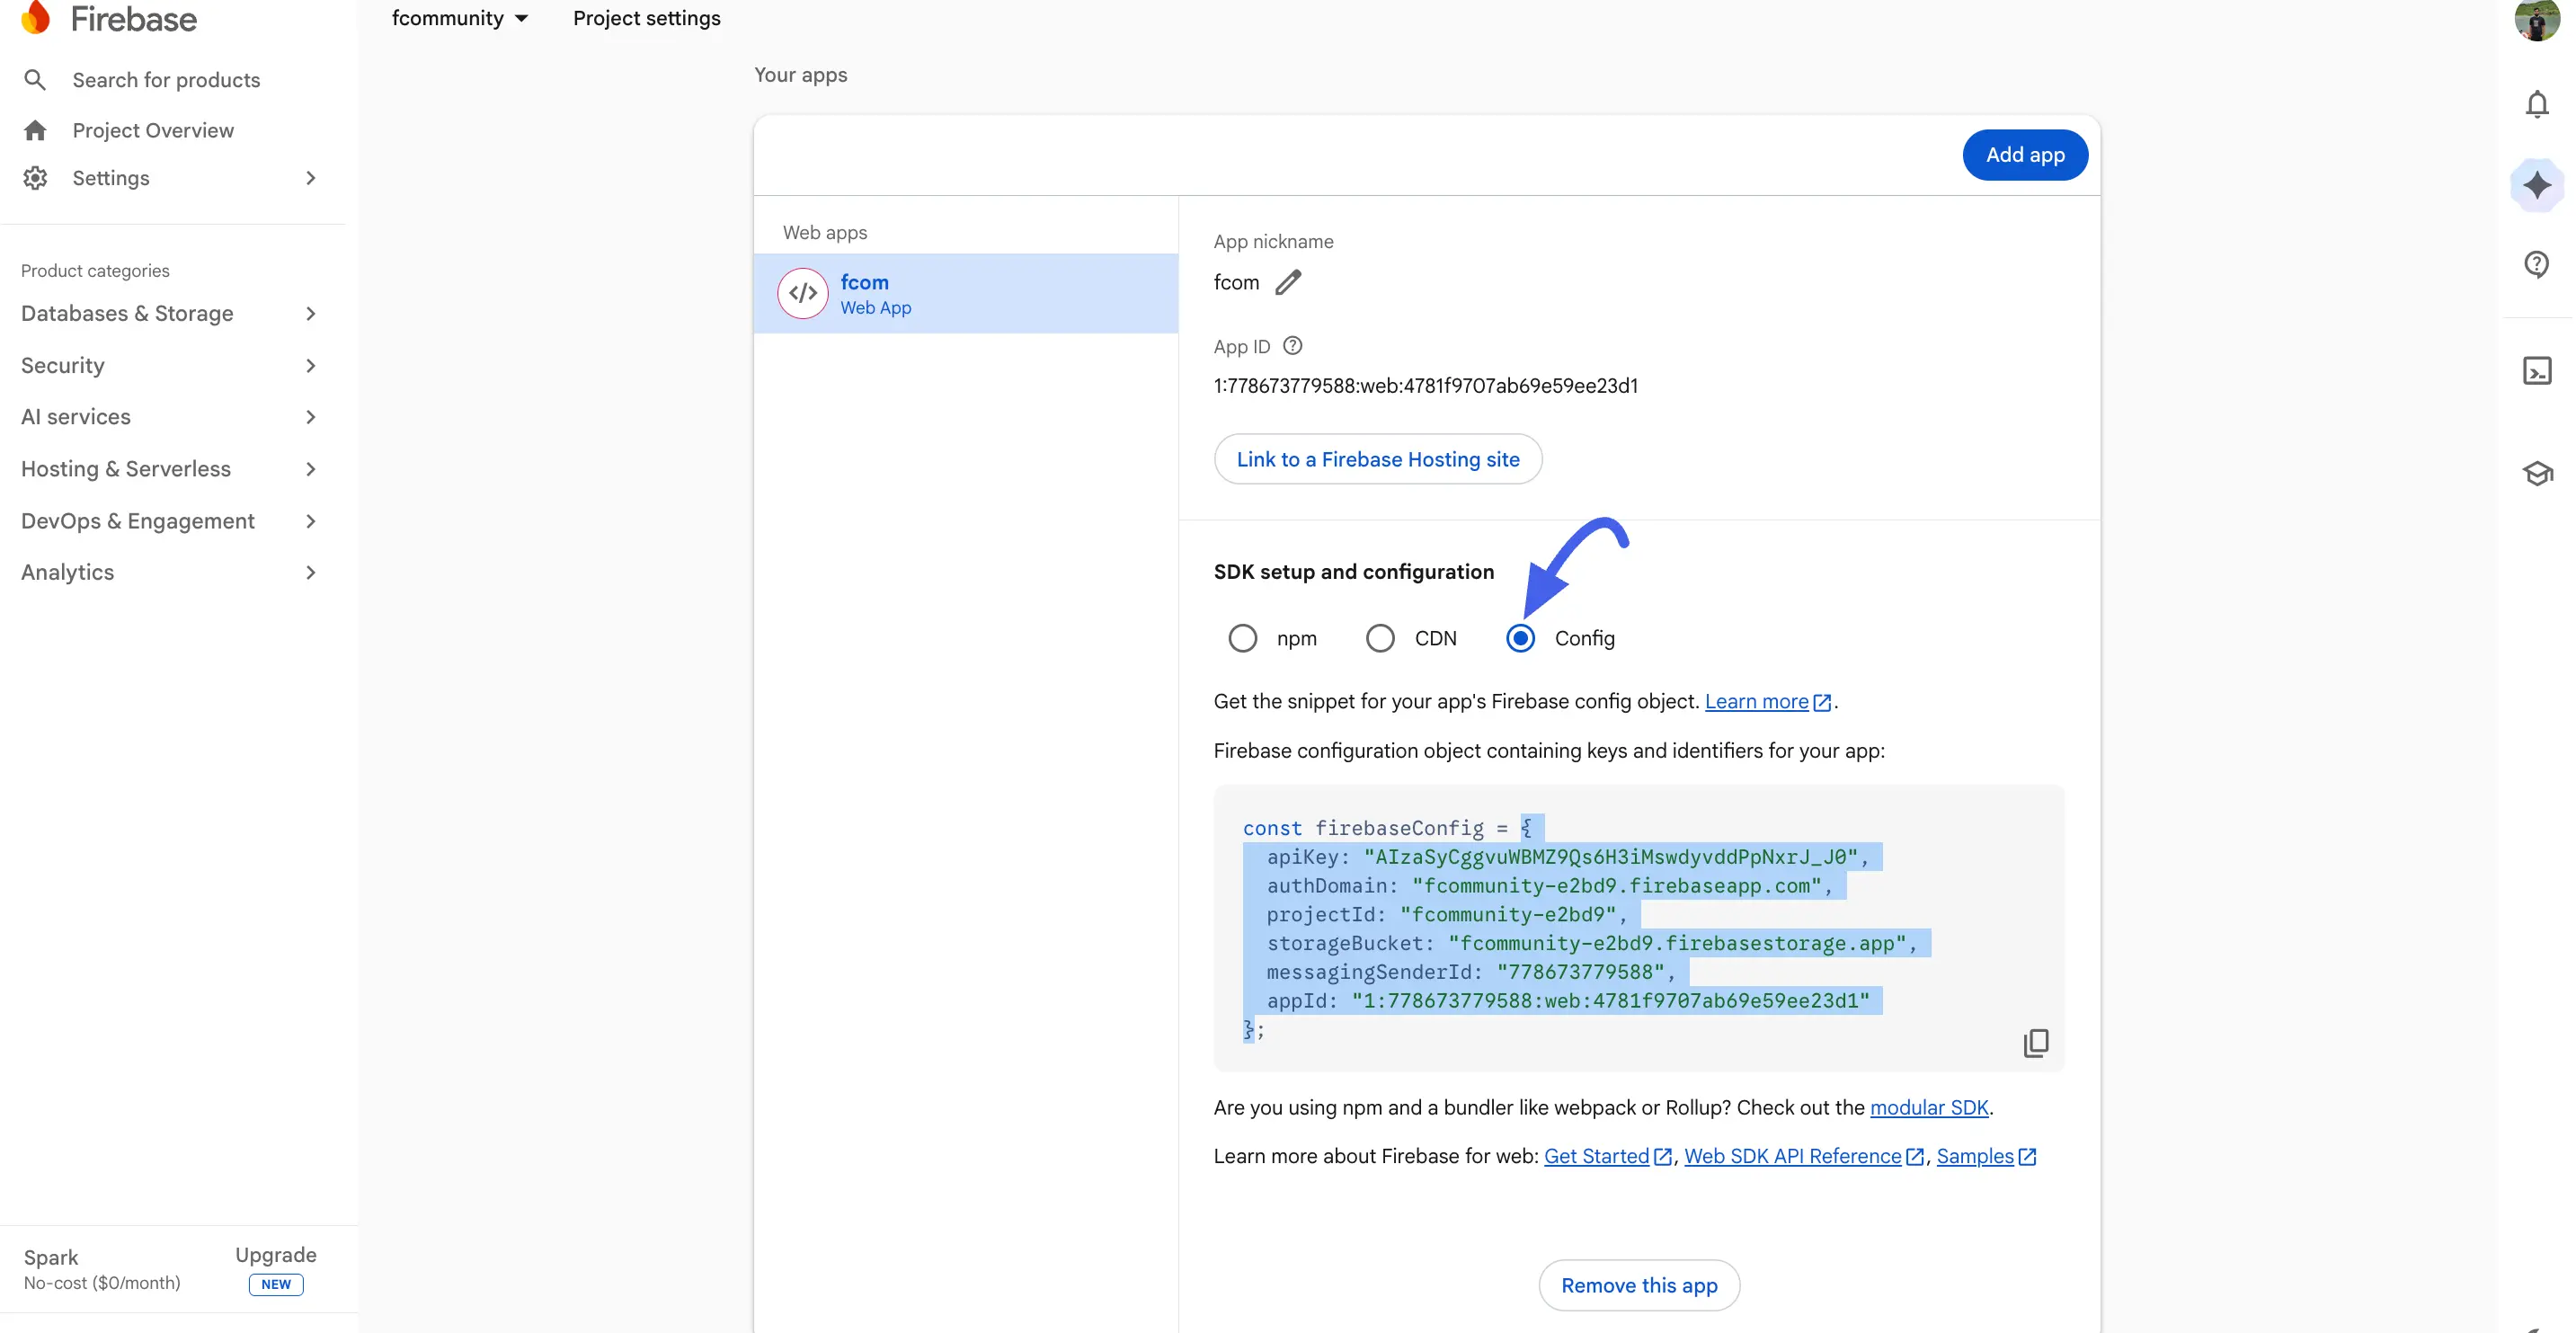
Back on the Project settings → General tab, your new web app now appears under Your apps. Under SDK setup and configuration, select the Config radio button to reveal the firebaseConfig object, and copy it.
You only need the values inside the curly brackets { } — not the surrounding const firebaseConfig = ... ; code. Because FluentNotify expects strict JSON, not JavaScript, you need to add quotes around each key name. For example, this JavaScript snippet:
js
const firebaseConfig = {
  apiKey: "AIzaSyCggvuWBMZ9Qs6H3iMswdyvddPpNxrJ_J0",
  authDomain: "fcommunity-e2bd9.firebaseapp.com",
  projectId: "fcommunity-e2bd9",
  storageBucket: "fcommunity-e2bd9.firebasestorage.app",
  messagingSenderId: "778673779588",
  appId: "1:778673779588:web:4781f9707ab69e59ee23d1"
};
...becomes this JSON, which is what you'll paste into FluentNotify:
json
{
  "apiKey": "AIzaSyCggvuWBMZ9Qs6H3iMswdyvddPpNxrJ_J0",
  "authDomain": "fcommunity-e2bd9.firebaseapp.com",
  "projectId": "fcommunity-e2bd9",
  "storageBucket": "fcommunity-e2bd9.firebasestorage.app",
  "messagingSenderId": "778673779588",
  "appId": "1:778673779588:web:4781f9707ab69e59ee23d1"
}
Keep this JSON handy — you'll paste it into FluentNotify shortly.
Step 4: Get the VAPID Key
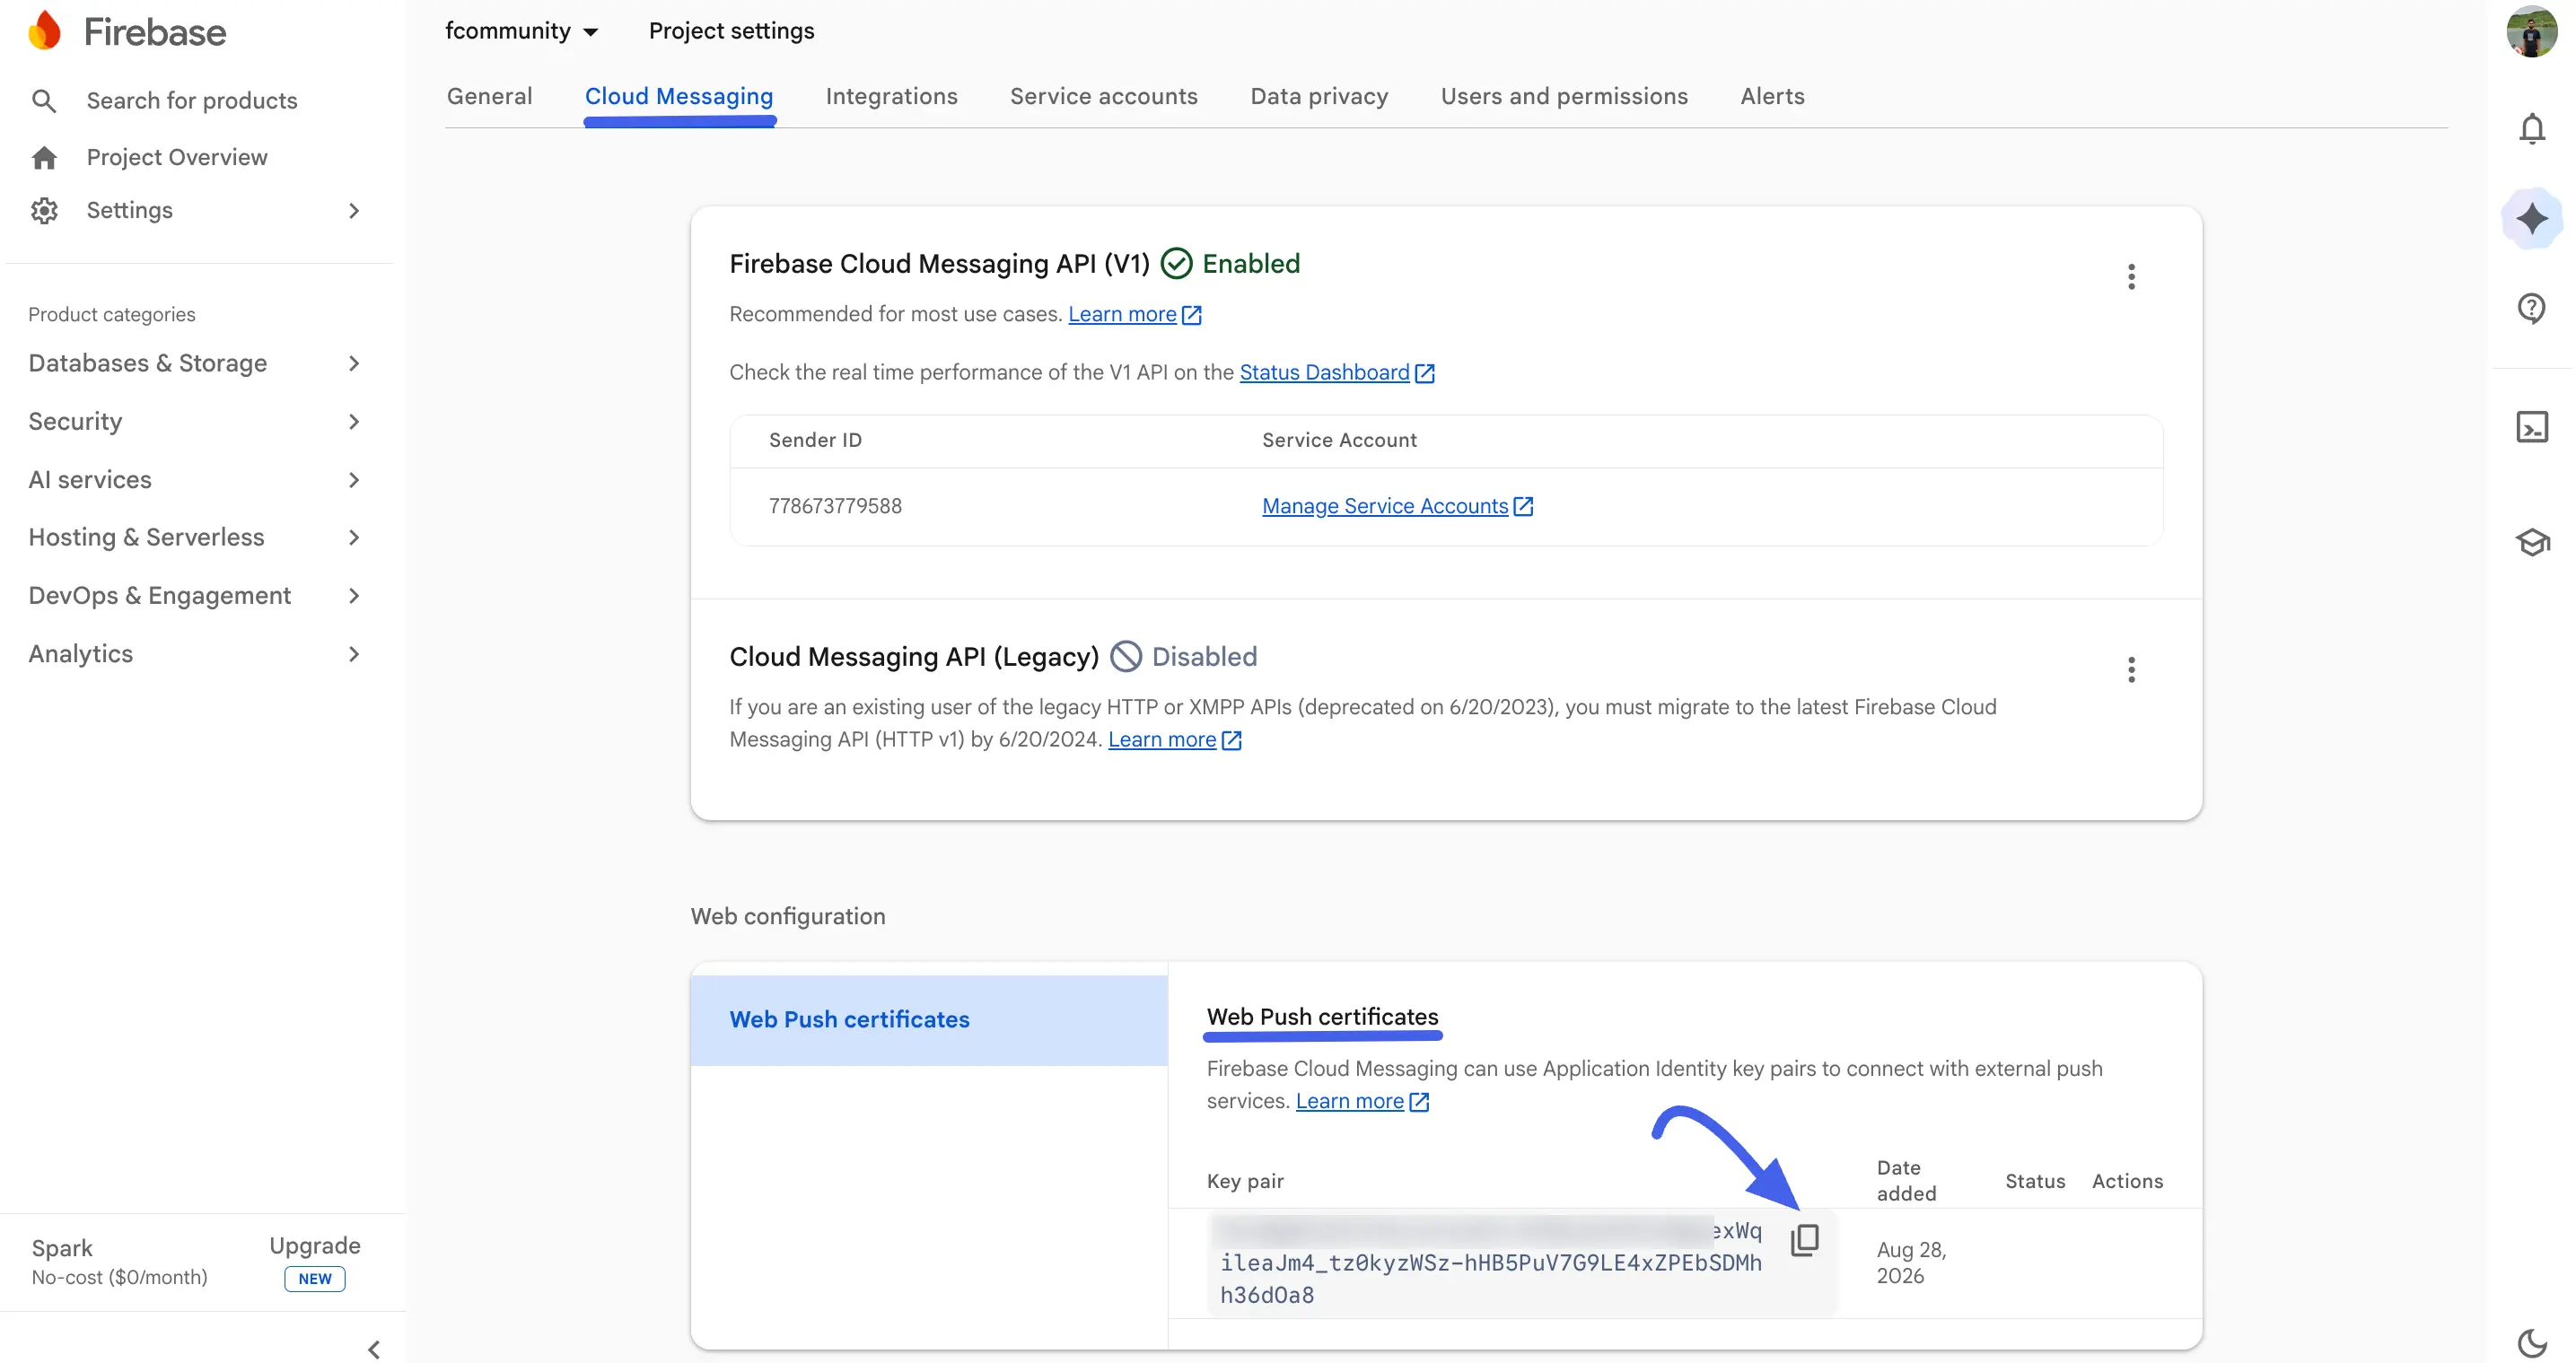
- In Project settings, click the Cloud Messaging tab.
- Scroll to Web configuration → Web Push certificates.
- Click the copy icon next to the Key pair to copy your VAPID key.
Step 5: Get Service Account Credentials
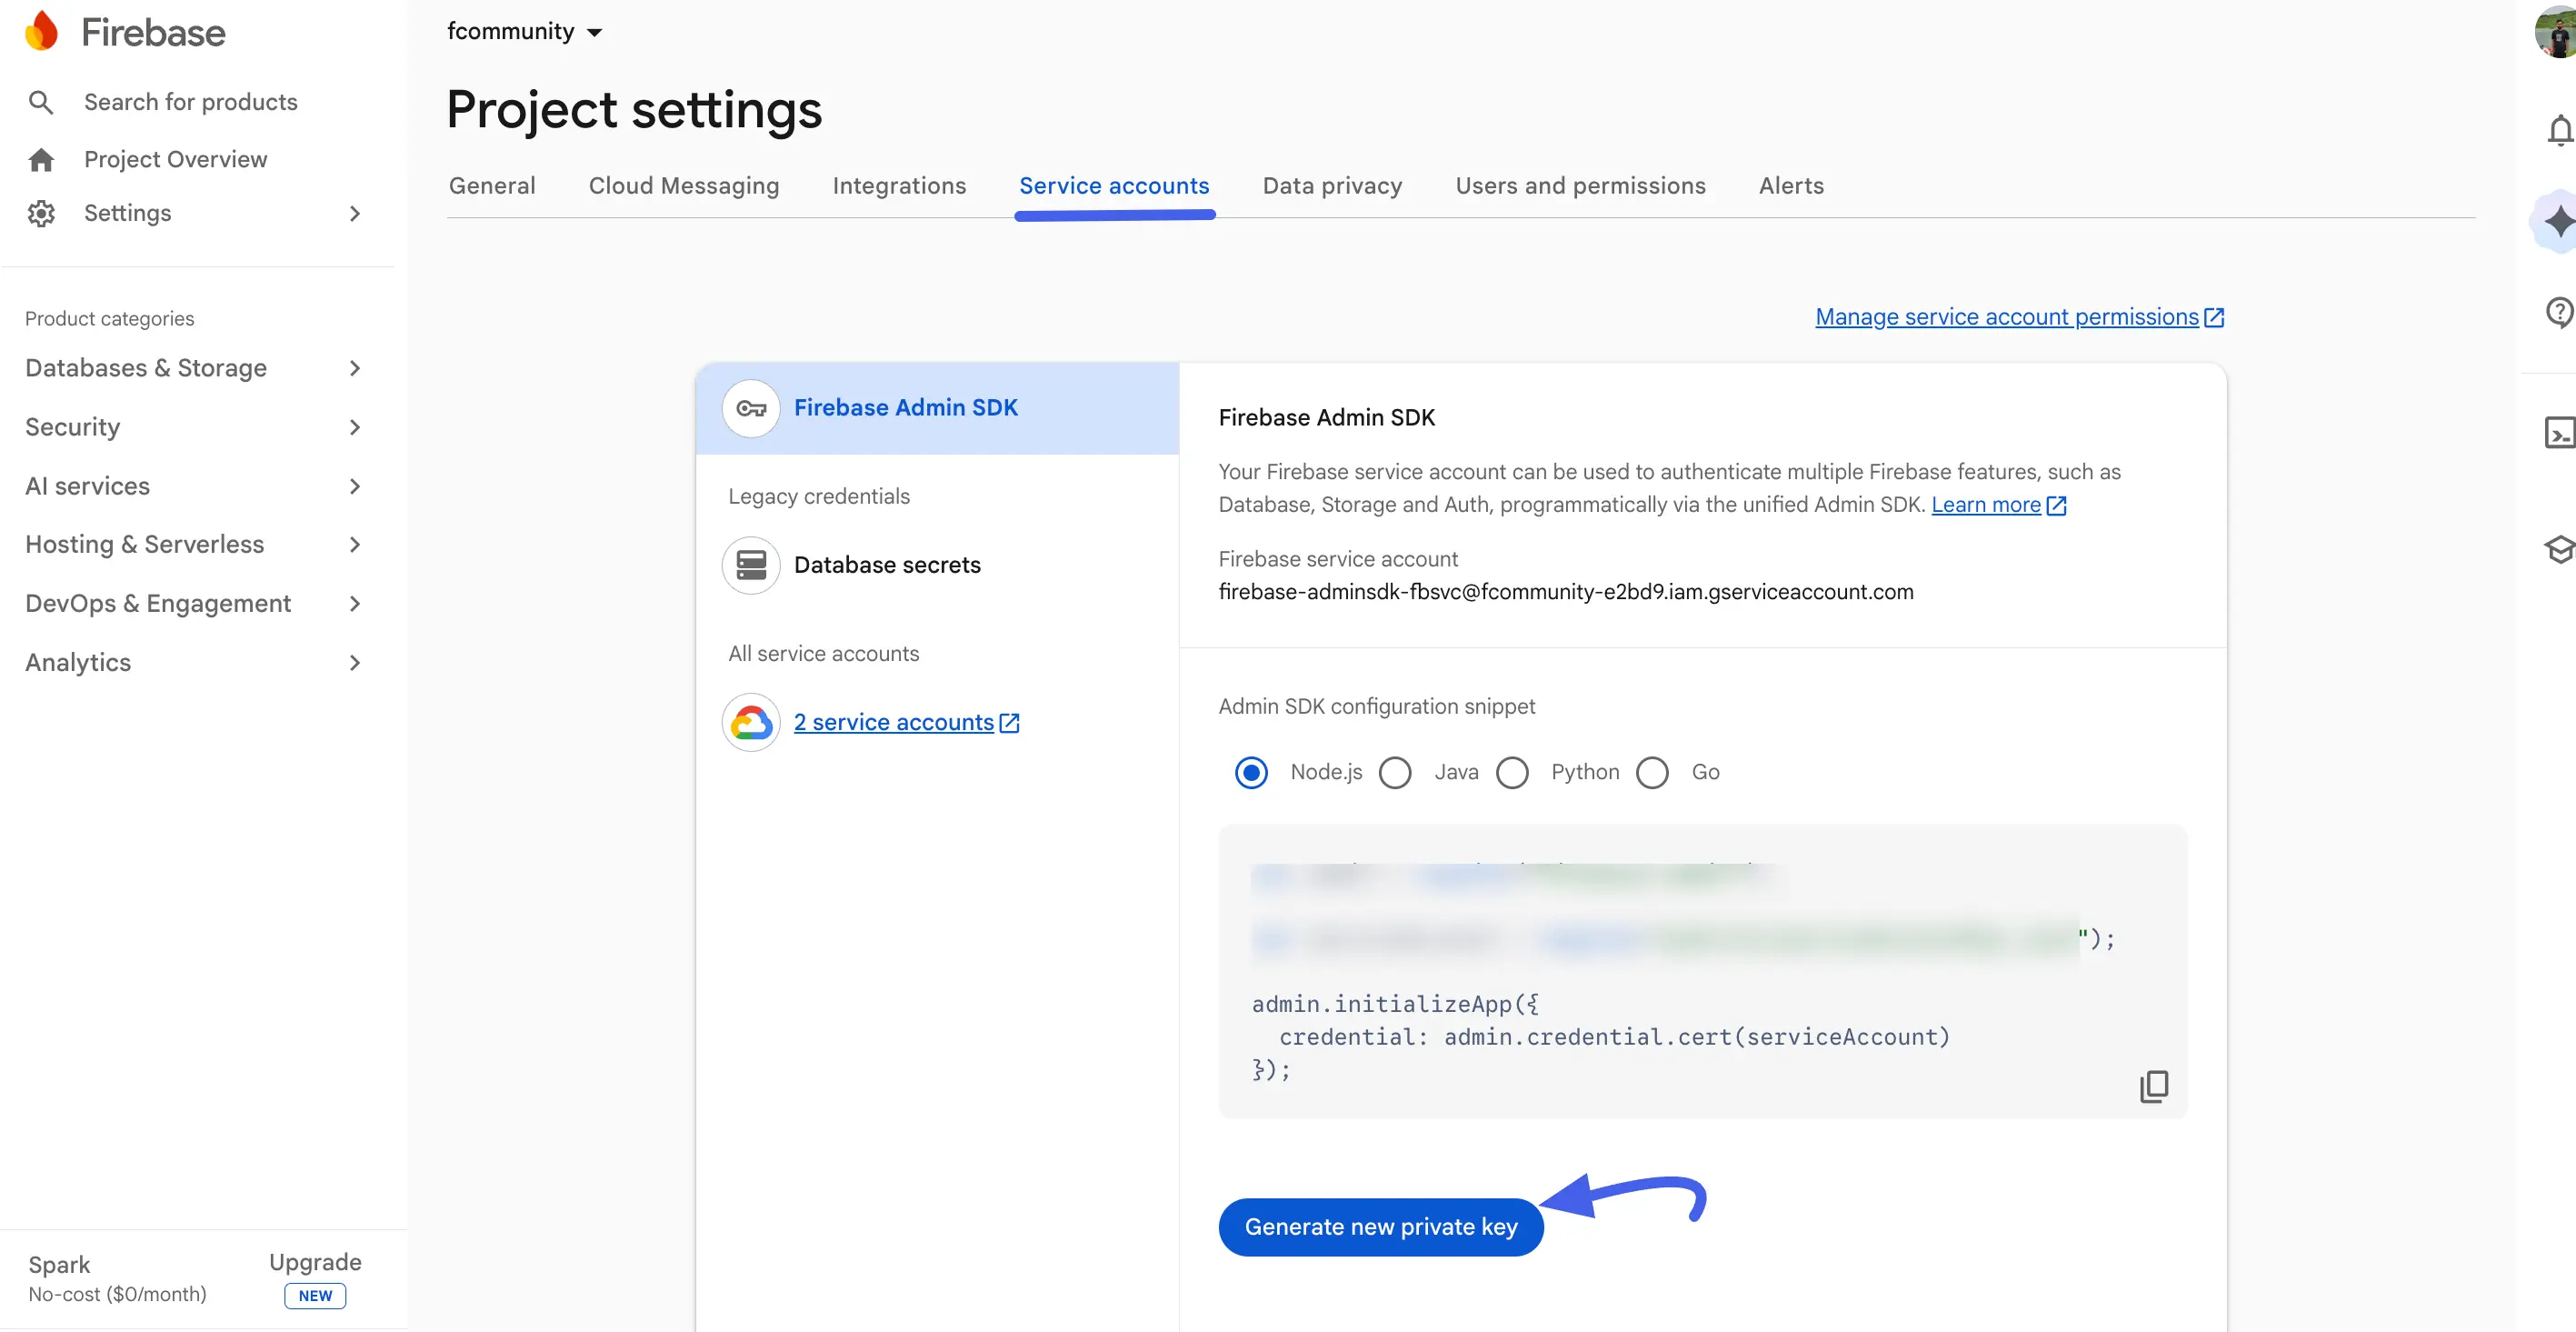
- Still in Project settings, click the Service accounts tab.
- Under Firebase Admin SDK, click Generate new private key.
- In the confirmation pop-up, click Generate key.
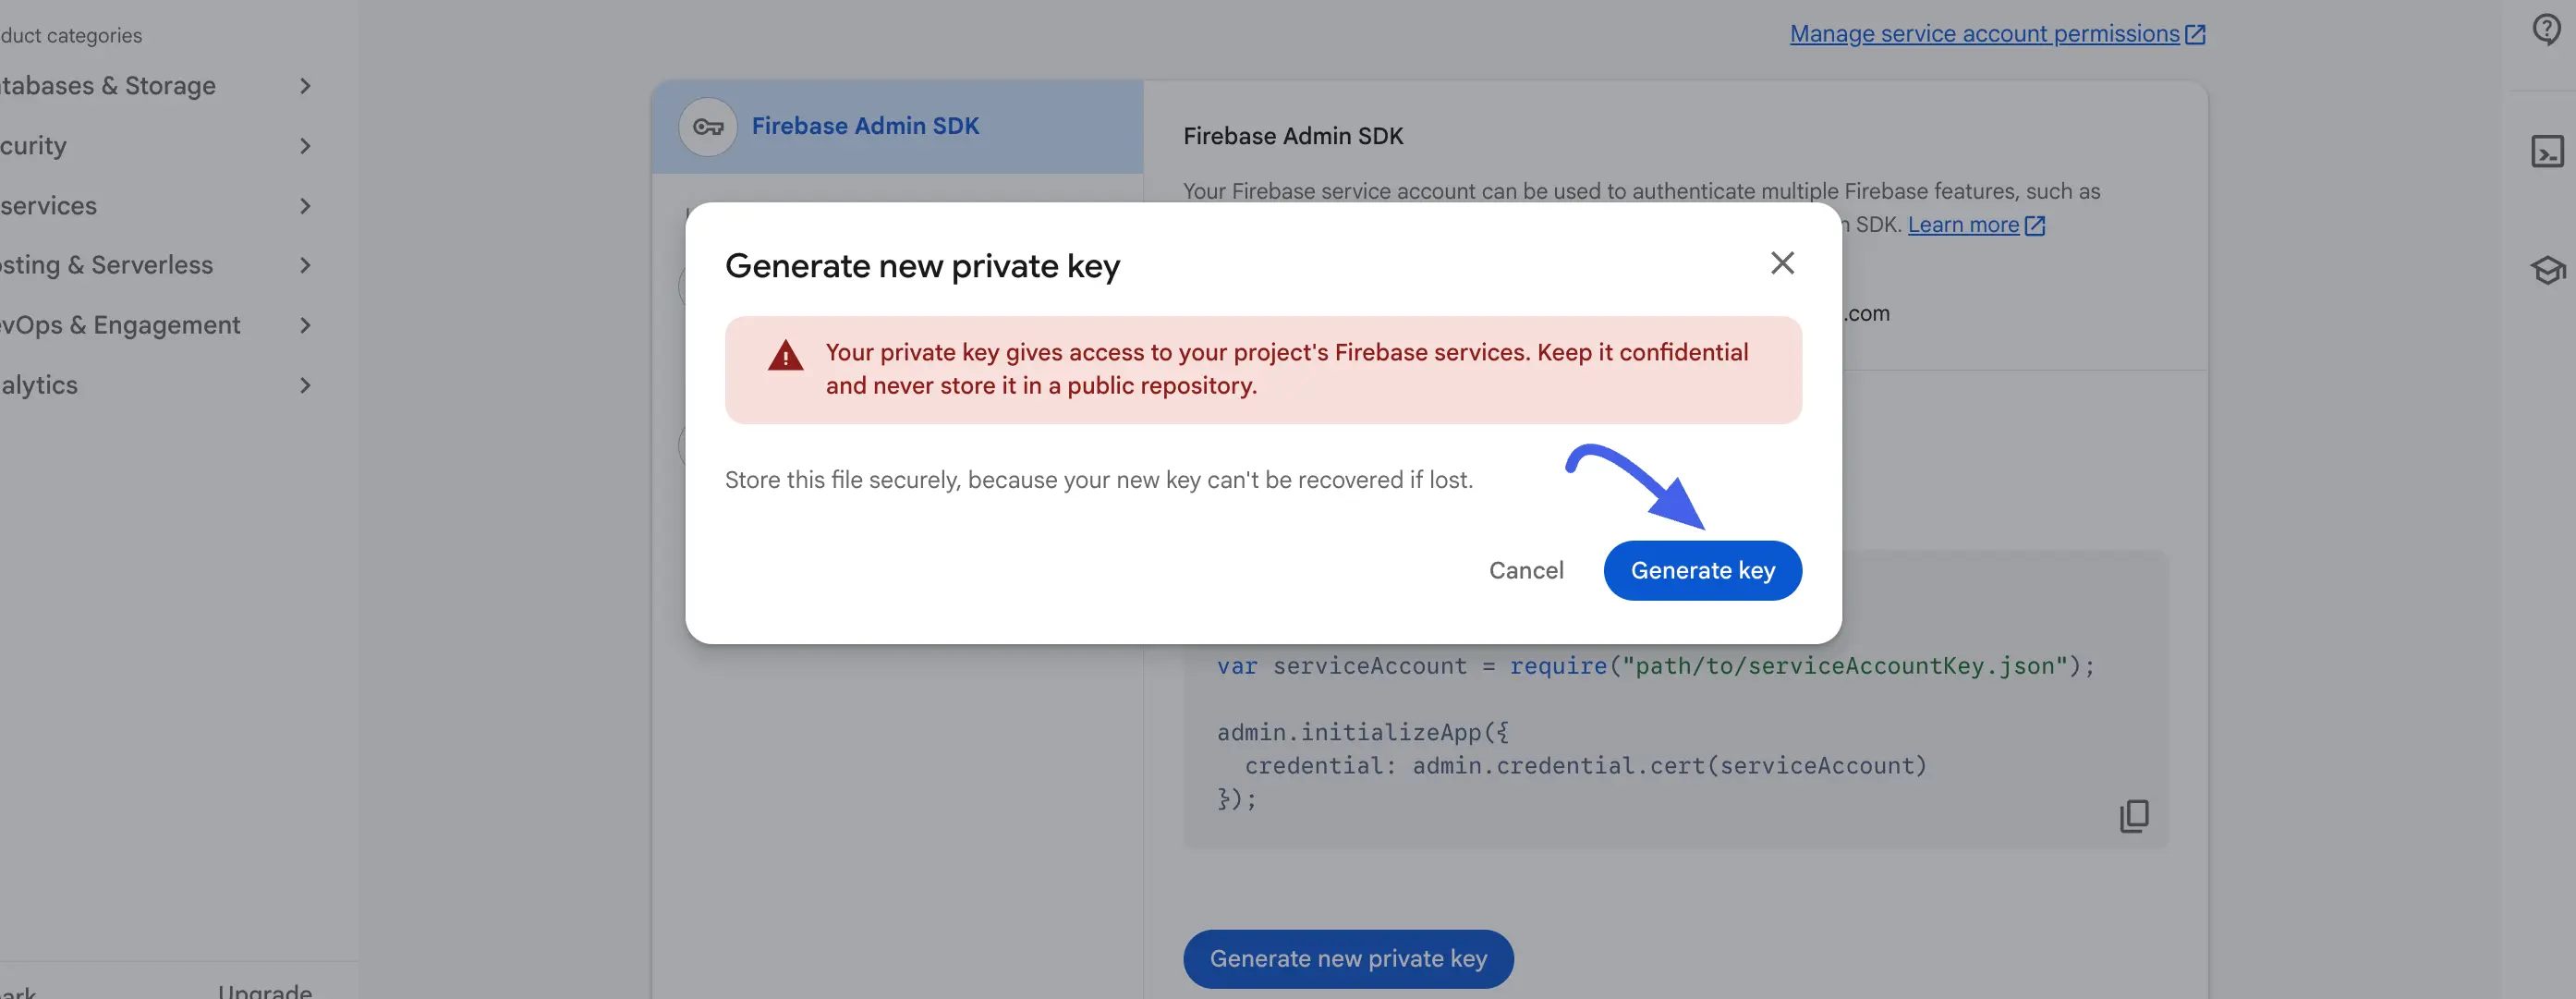
A .json file downloads to your computer. Keep it safe. Firebase can't regenerate this exact file if you lose it, and it grants access to your project's Firebase services.
IMPORTANT
Keep your service account JSON file safe. You can only download the JSON key when it is created. If you lose the file, you will need to generate a new key from your service account and replace the old key in FluentCommunity.
Connecting Firebase to FluentNotify
Clicking Open FluentNotify Settings takes you to FluentNotify's full Settings screen. This is where you connect it to the Firebase project you just configured. A See the setup guide link at the top points back to this section if you need it again.
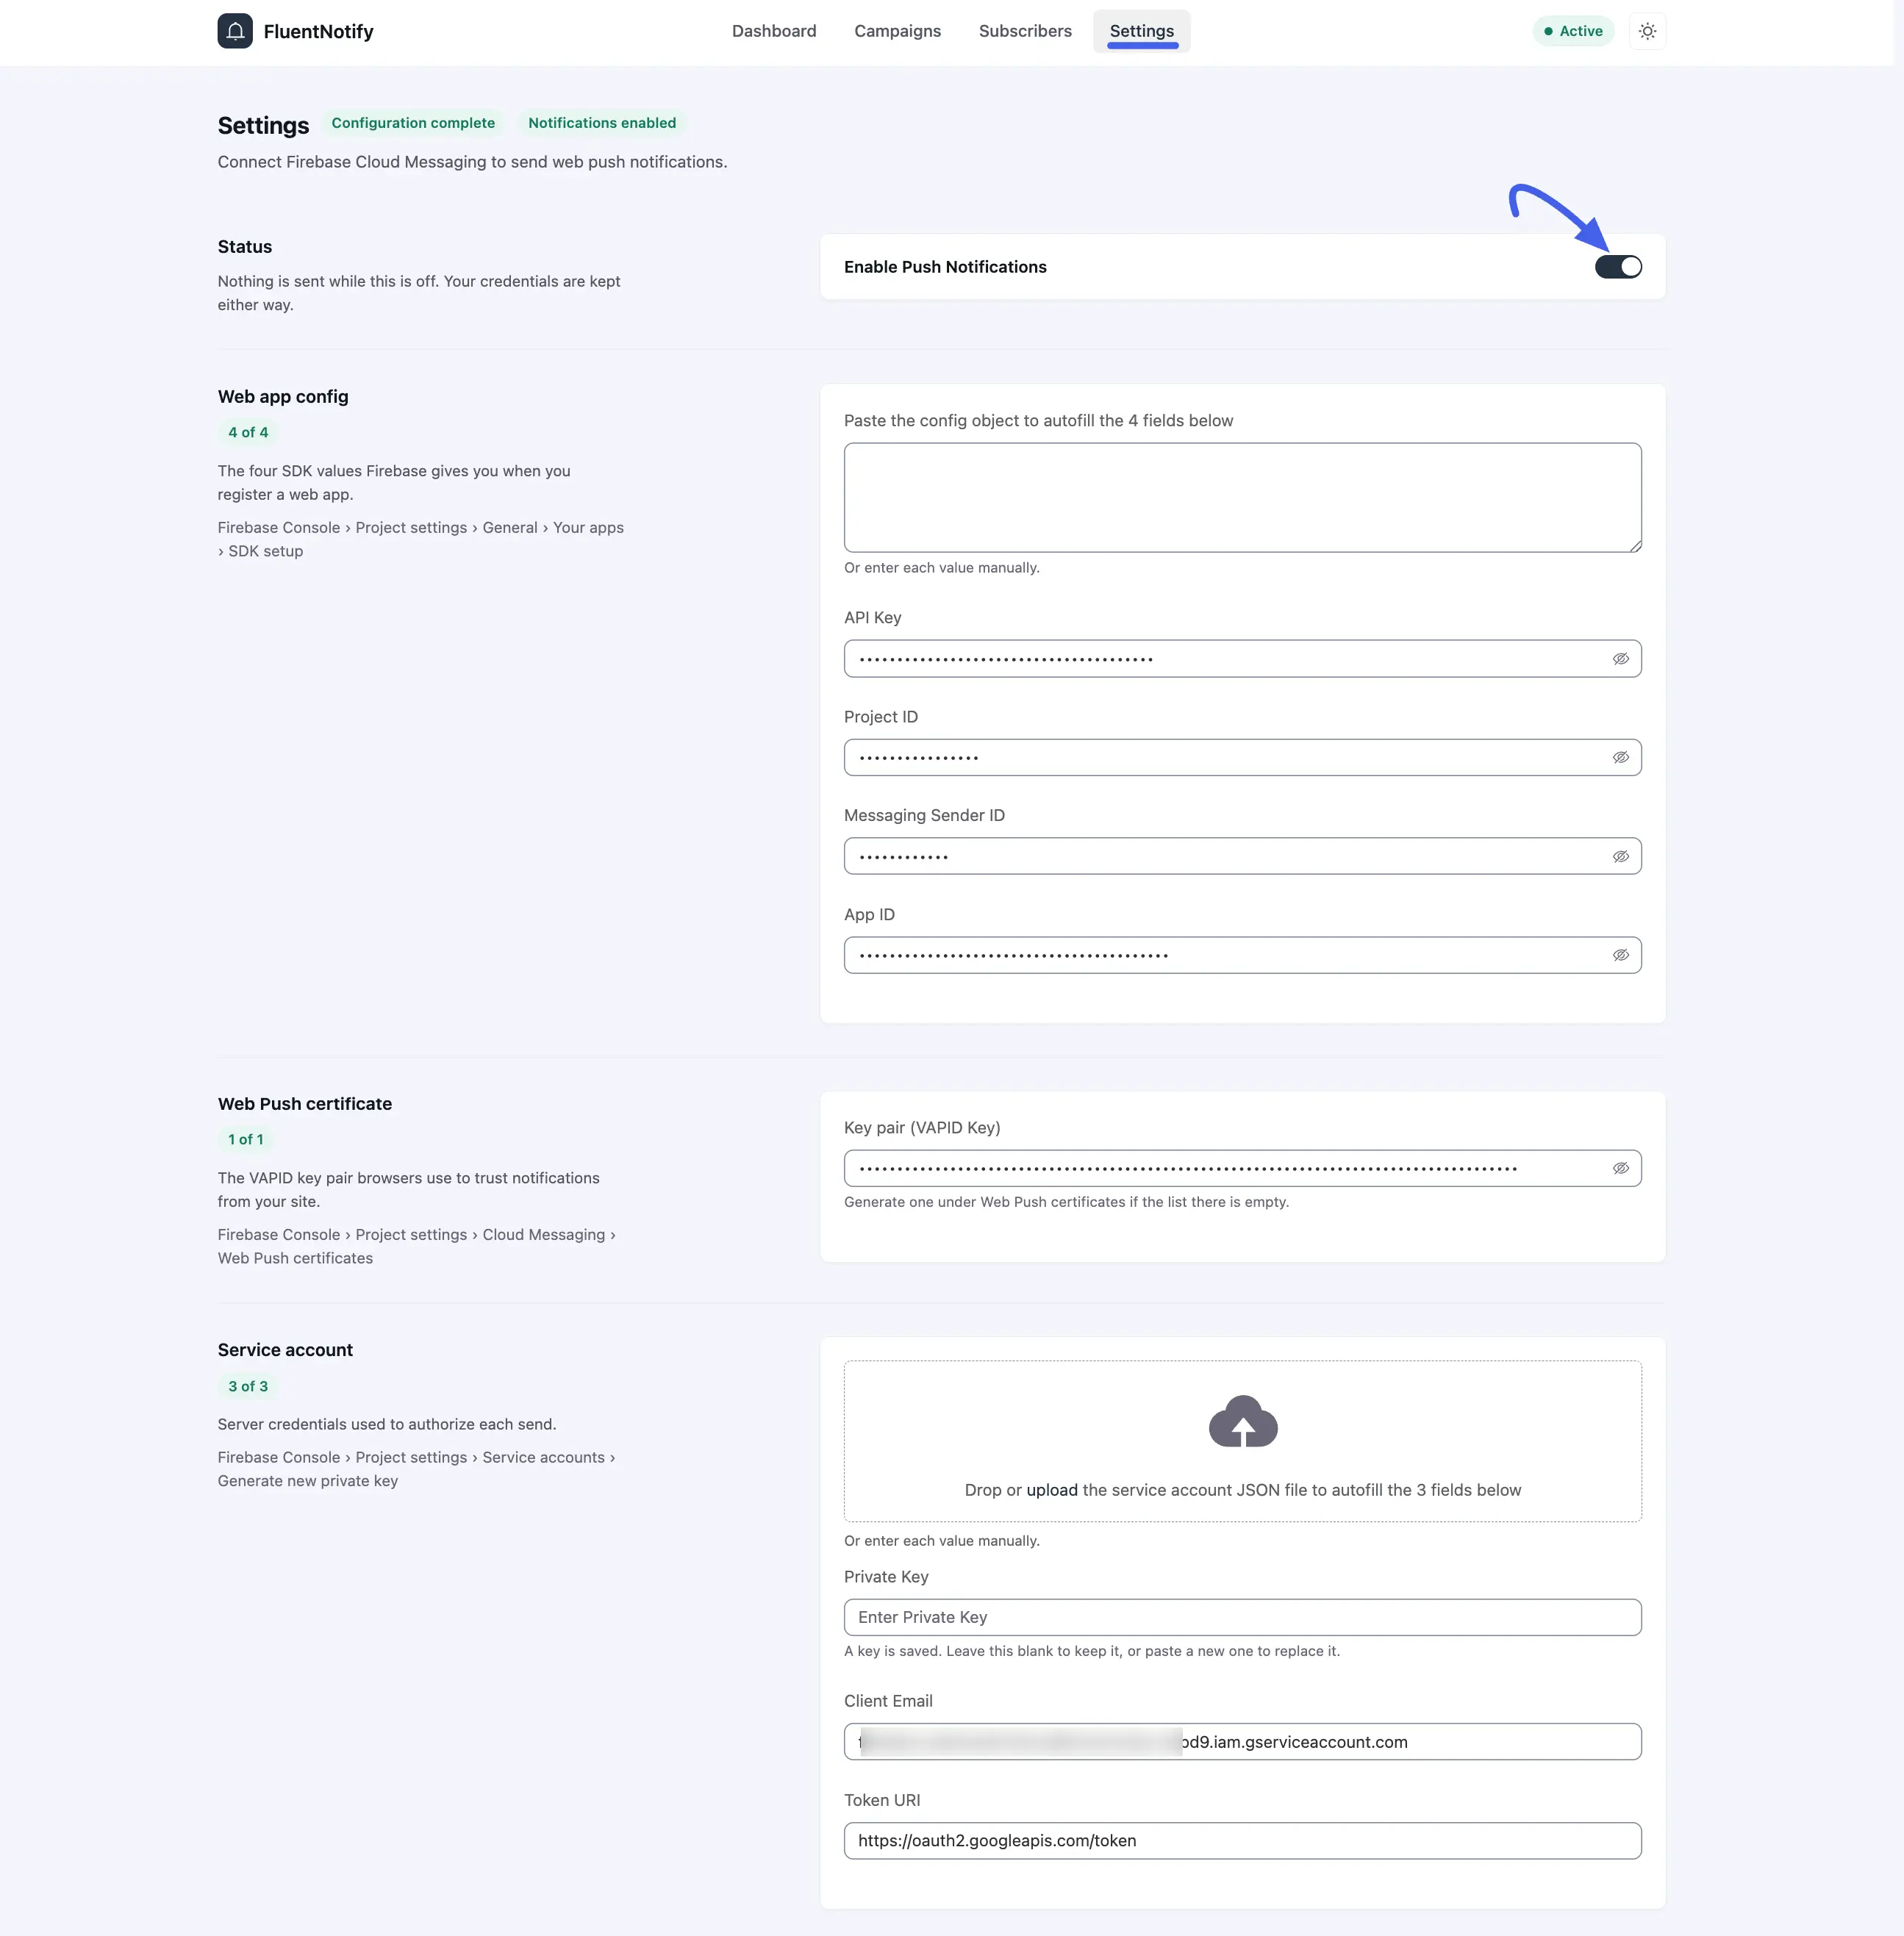
- Under Status, turn on the Enable Push Notifications toggle. Nothing is sent while it's off, but your credentials are kept either way, so it's safe to turn on before you finish the rest of the form.
- Under Web app config, paste the Firebase Config JSON you copied in Step 3 into the box. FluentNotify auto-fills the API Key, Project ID, Messaging Sender ID, and App ID fields from it (each has an eye icon to reveal it), or you can enter each one manually.
- Under Web Push certificate, paste your VAPID Key from Step 4 into the Key pair field. If it's empty, generate one under Web Push certificates in the Firebase Console.
- Under Service account, drop the
.jsonfile you downloaded in Step 5 onto the upload area (or click to browse for it). This auto-fills the Private Key, Client Email, and Token URI fields.
Each panel shows a live count as you fill in its fields (e.g., "4 of 4"). If you're editing an existing connection, the Private Key field stays blank and shows "A key is saved. Leave this blank to keep it, or paste a new one to replace it" — you only need to fill it in if you're replacing the key.
NOTE
All five Firebase fields (API Key, Project ID, Messaging Sender ID, App ID, VAPID Key) plus the three service-account fields are required, FluentNotify won't send notifications until every one of them is filled in and Enable Push Notifications is on.
Notification Defaults
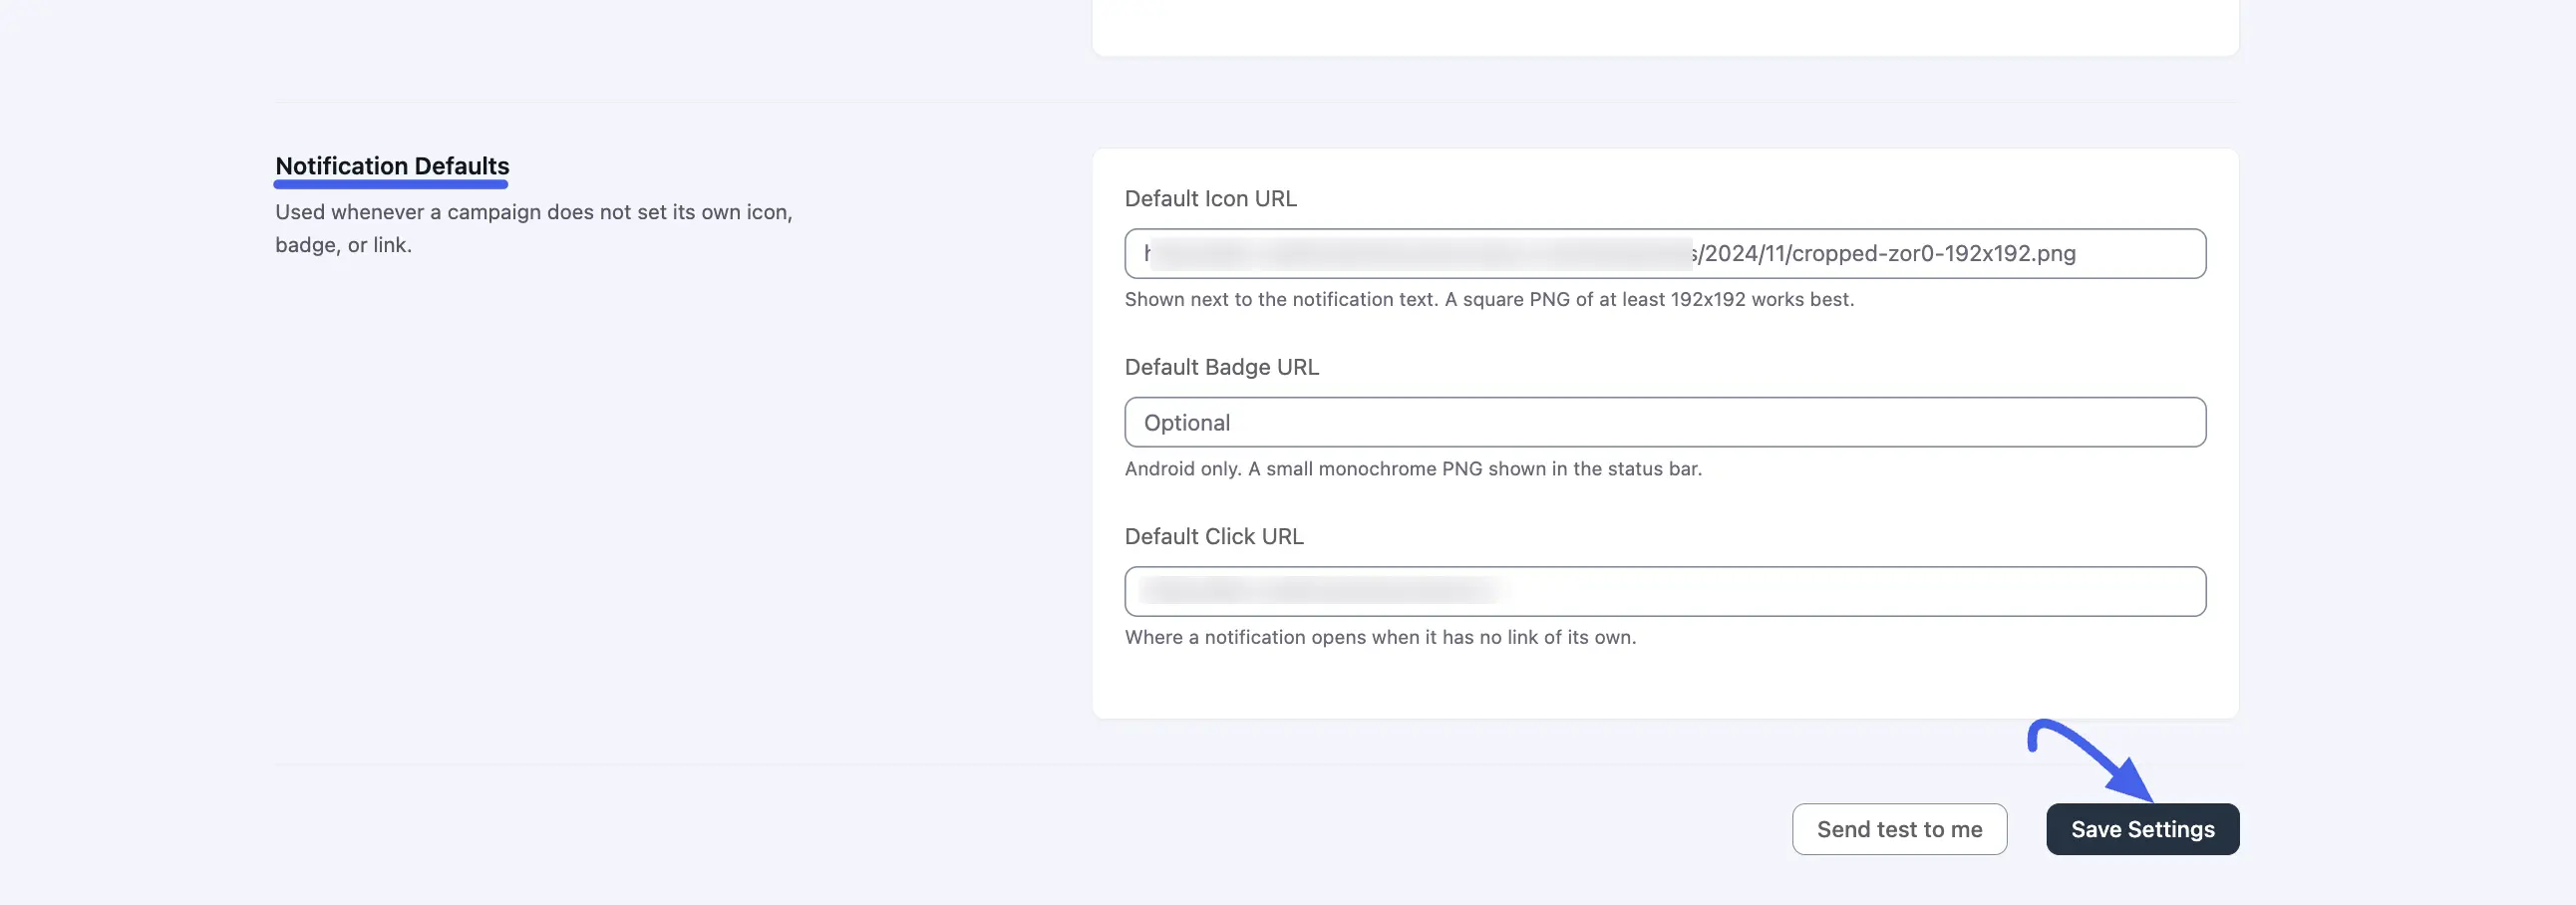
Further down the same Settings page, Notification Defaults controls the fallback icon, badge, and link used whenever a campaign doesn't set its own:
- Default Icon URL — shown next to the notification text. A square PNG of at least 192×192px works best.
- Default Badge URL — Android only. A small monochrome PNG shown in the status bar. Optional.
- Default Click URL — where the notification opens when it has no link of its own.
Three buttons sit at the bottom of the page:
- Verify credentials — checks that your Firebase connection is valid without sending anything or changing your settings.
- Enable & send test — turns on push notifications and sends a test notification to you.
- Save Settings — saves everything on the page: the Firebase connection, Web Push certificate, service account, and notification defaults.
Data Retention
Further down, the Data panel controls what happens to your subscriber list if FluentNotify is ever deleted:
- Delete all data when the plugin is deleted: Leave it unchecked if you might reinstall FluentNotify later: a subscriber list can't be rebuilt, since every row represents a browser permission that visitor granted, and simply deactivating the plugin never deletes anything.
Click Save to apply.
Turn On Push Notification
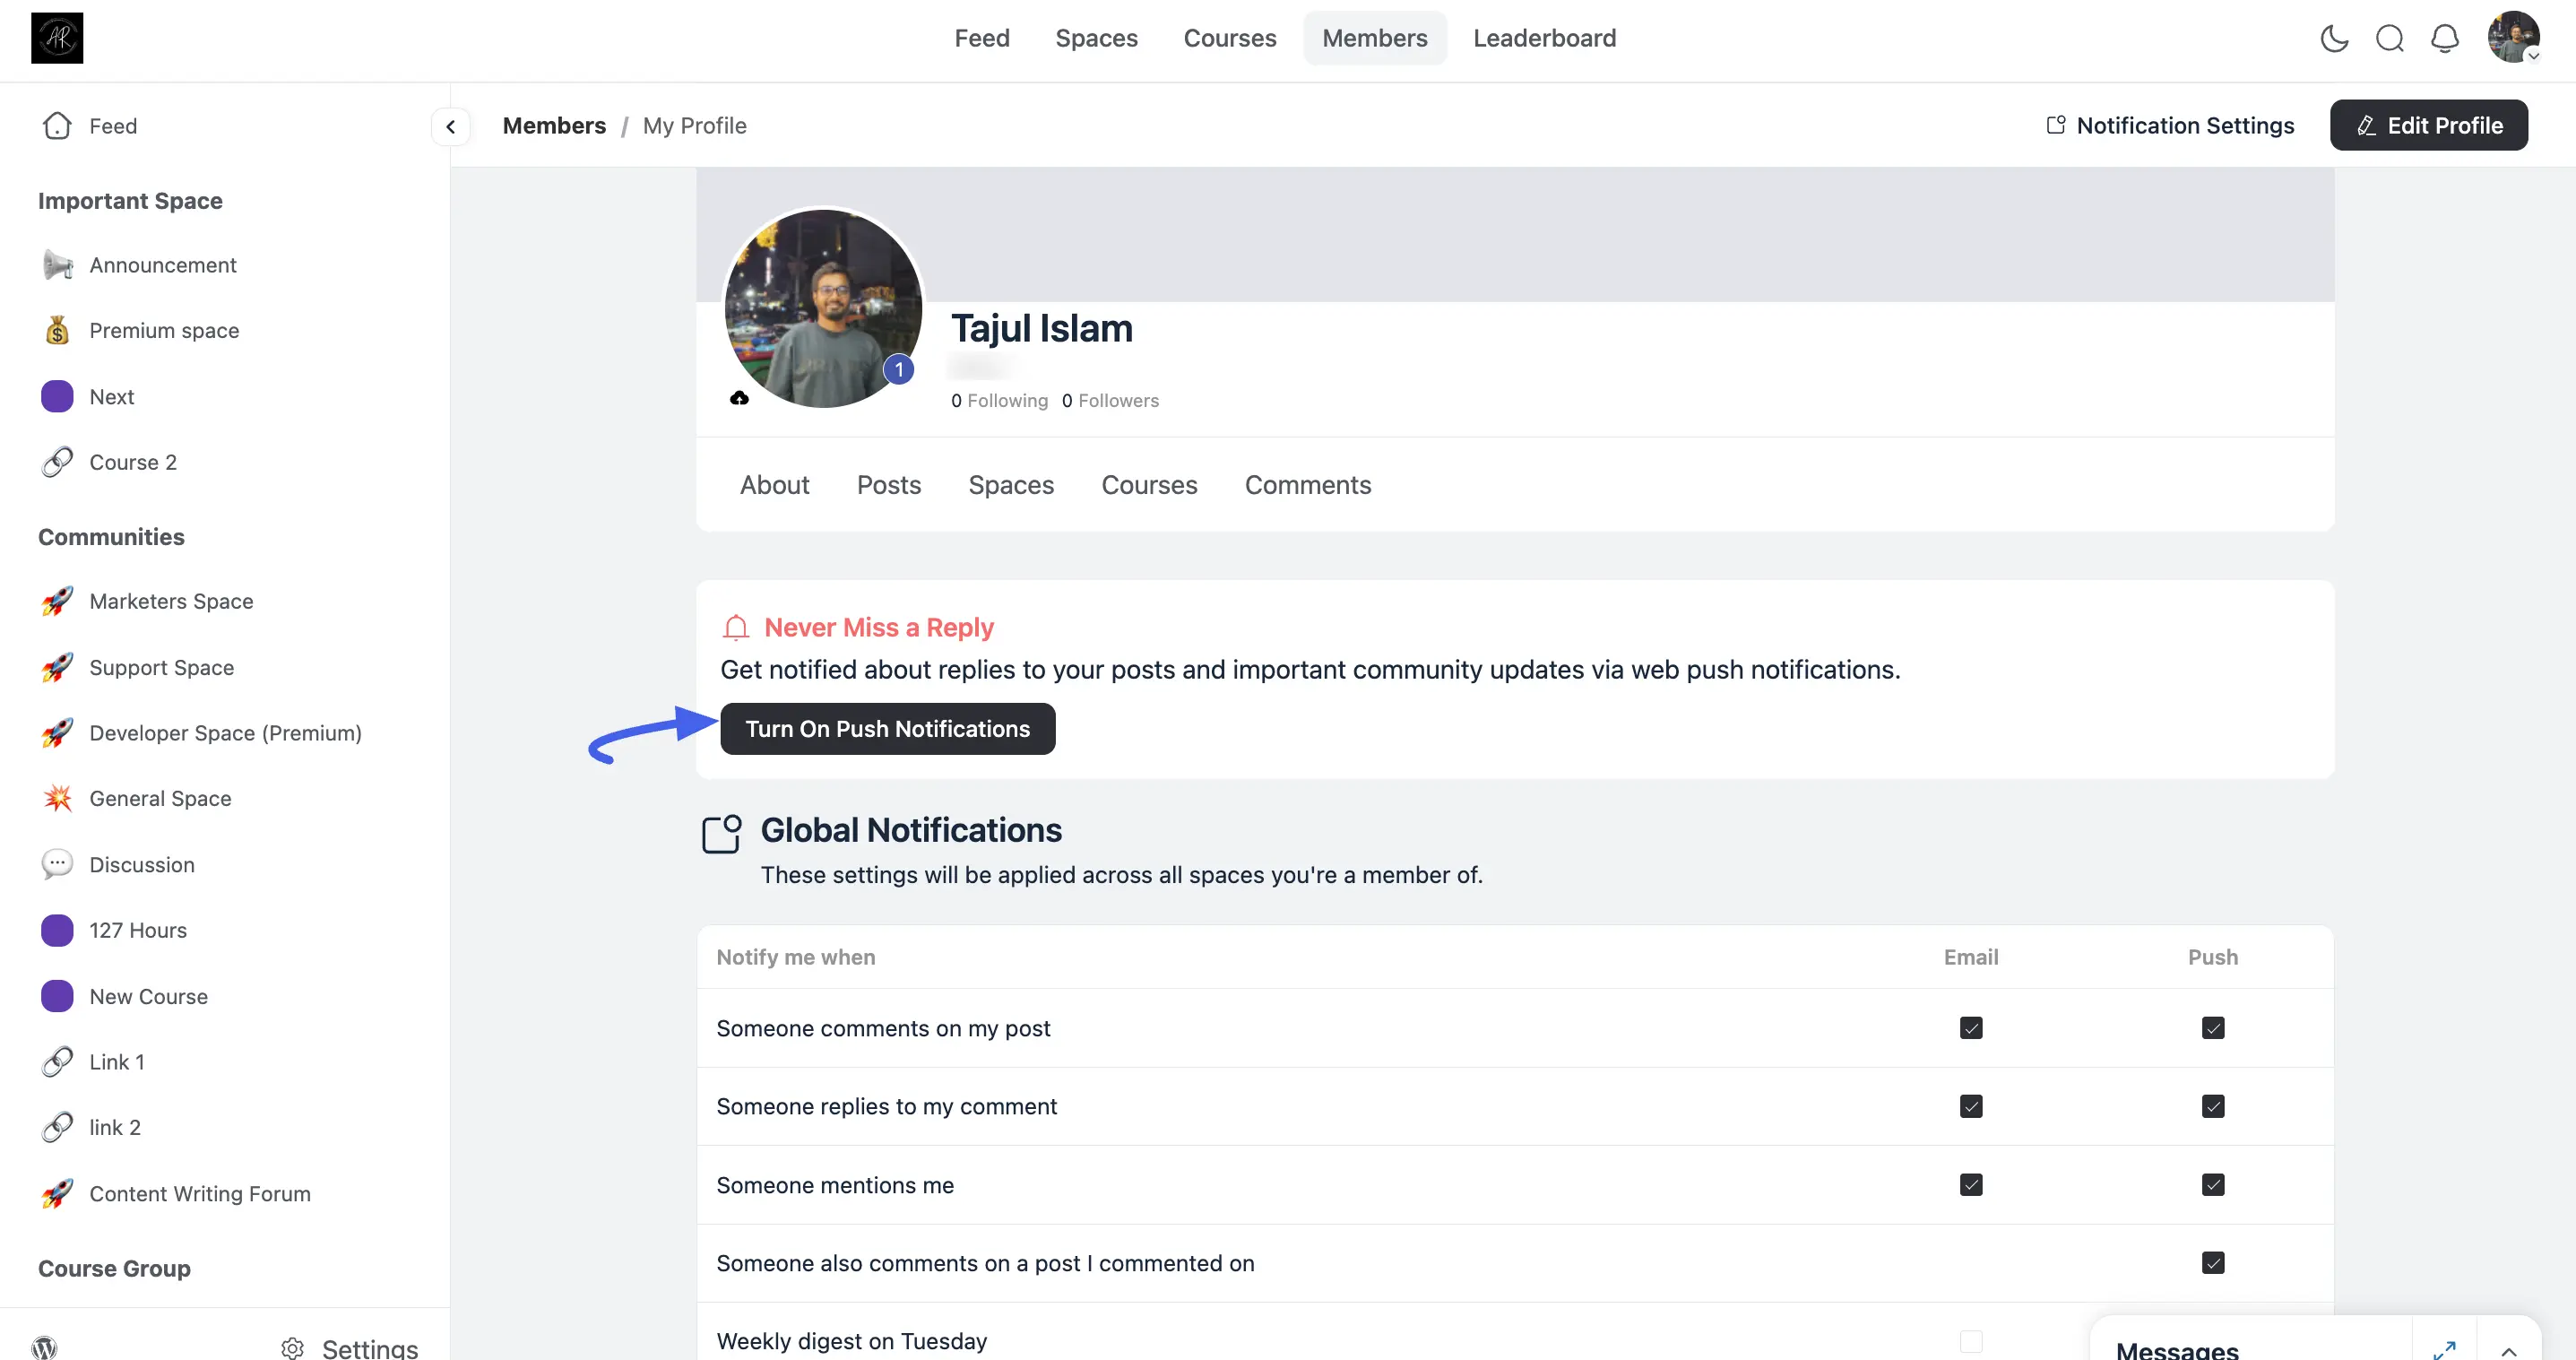
Even after an administrator connects Firebase and a member has Push checked under Global Notifications, nothing actually arrives until the member also grants their browser's notification permission, that's a separate, one-time step per device.
A Never Miss a Reply prompt handles it: it appears on the member's own profile page with a Turn On Push Notifications button. Clicking it triggers the browser's native permission dialog, once the member allows it, push notifications start arriving for whichever events they have enabled.
What Members See
Once connected, members who grant browser notification permission get a real push notification the moment someone comments, replies, or mentions them, the same way any other website's push alerts appear on desktop or mobile, even outside the browser.
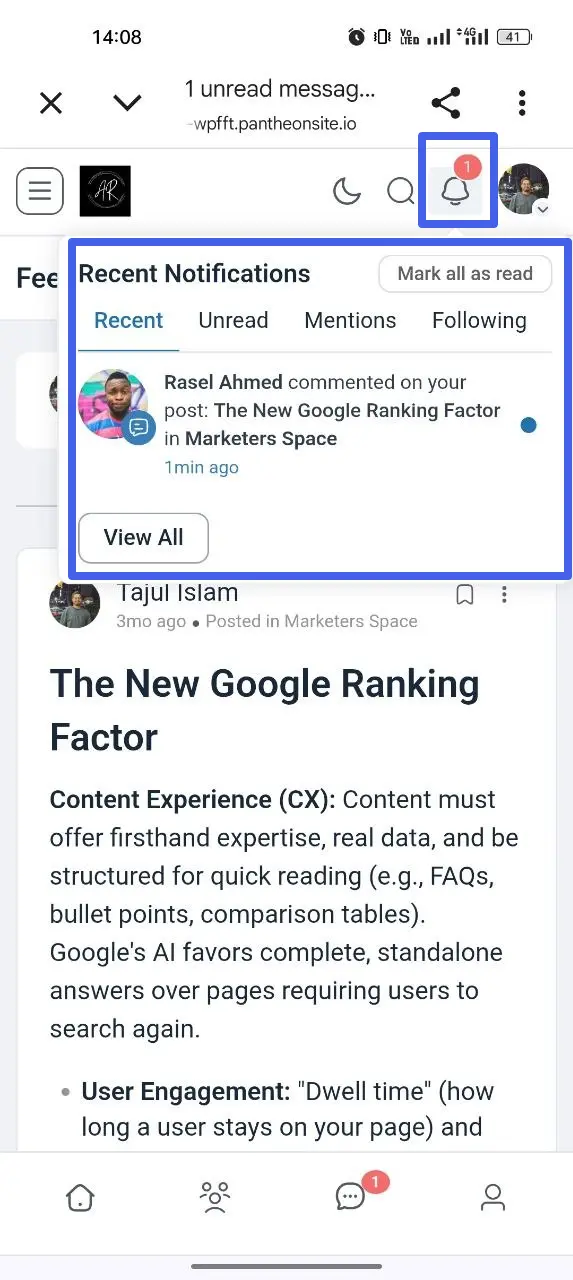
Inside the community itself, the same activity also appears in the in-app bell dropdown: