Appearance
Connecting With Paymattic
FluentCommunity integrates with Paymattic, allowing you to collect payments and add members to the paid Courses and VIP Spaces of FluentCommunity directly through Paymattic's payment forms or subscription forms.
This article guides you through integrating FluentCommunity with Paymattic so you can make the most of your community features.
TIP
Before starting, make sure you install and activate the FluentCommunity Pro plugin on your WordPress site to set up this integration.
Connecting Paymattic with FluentCommunity
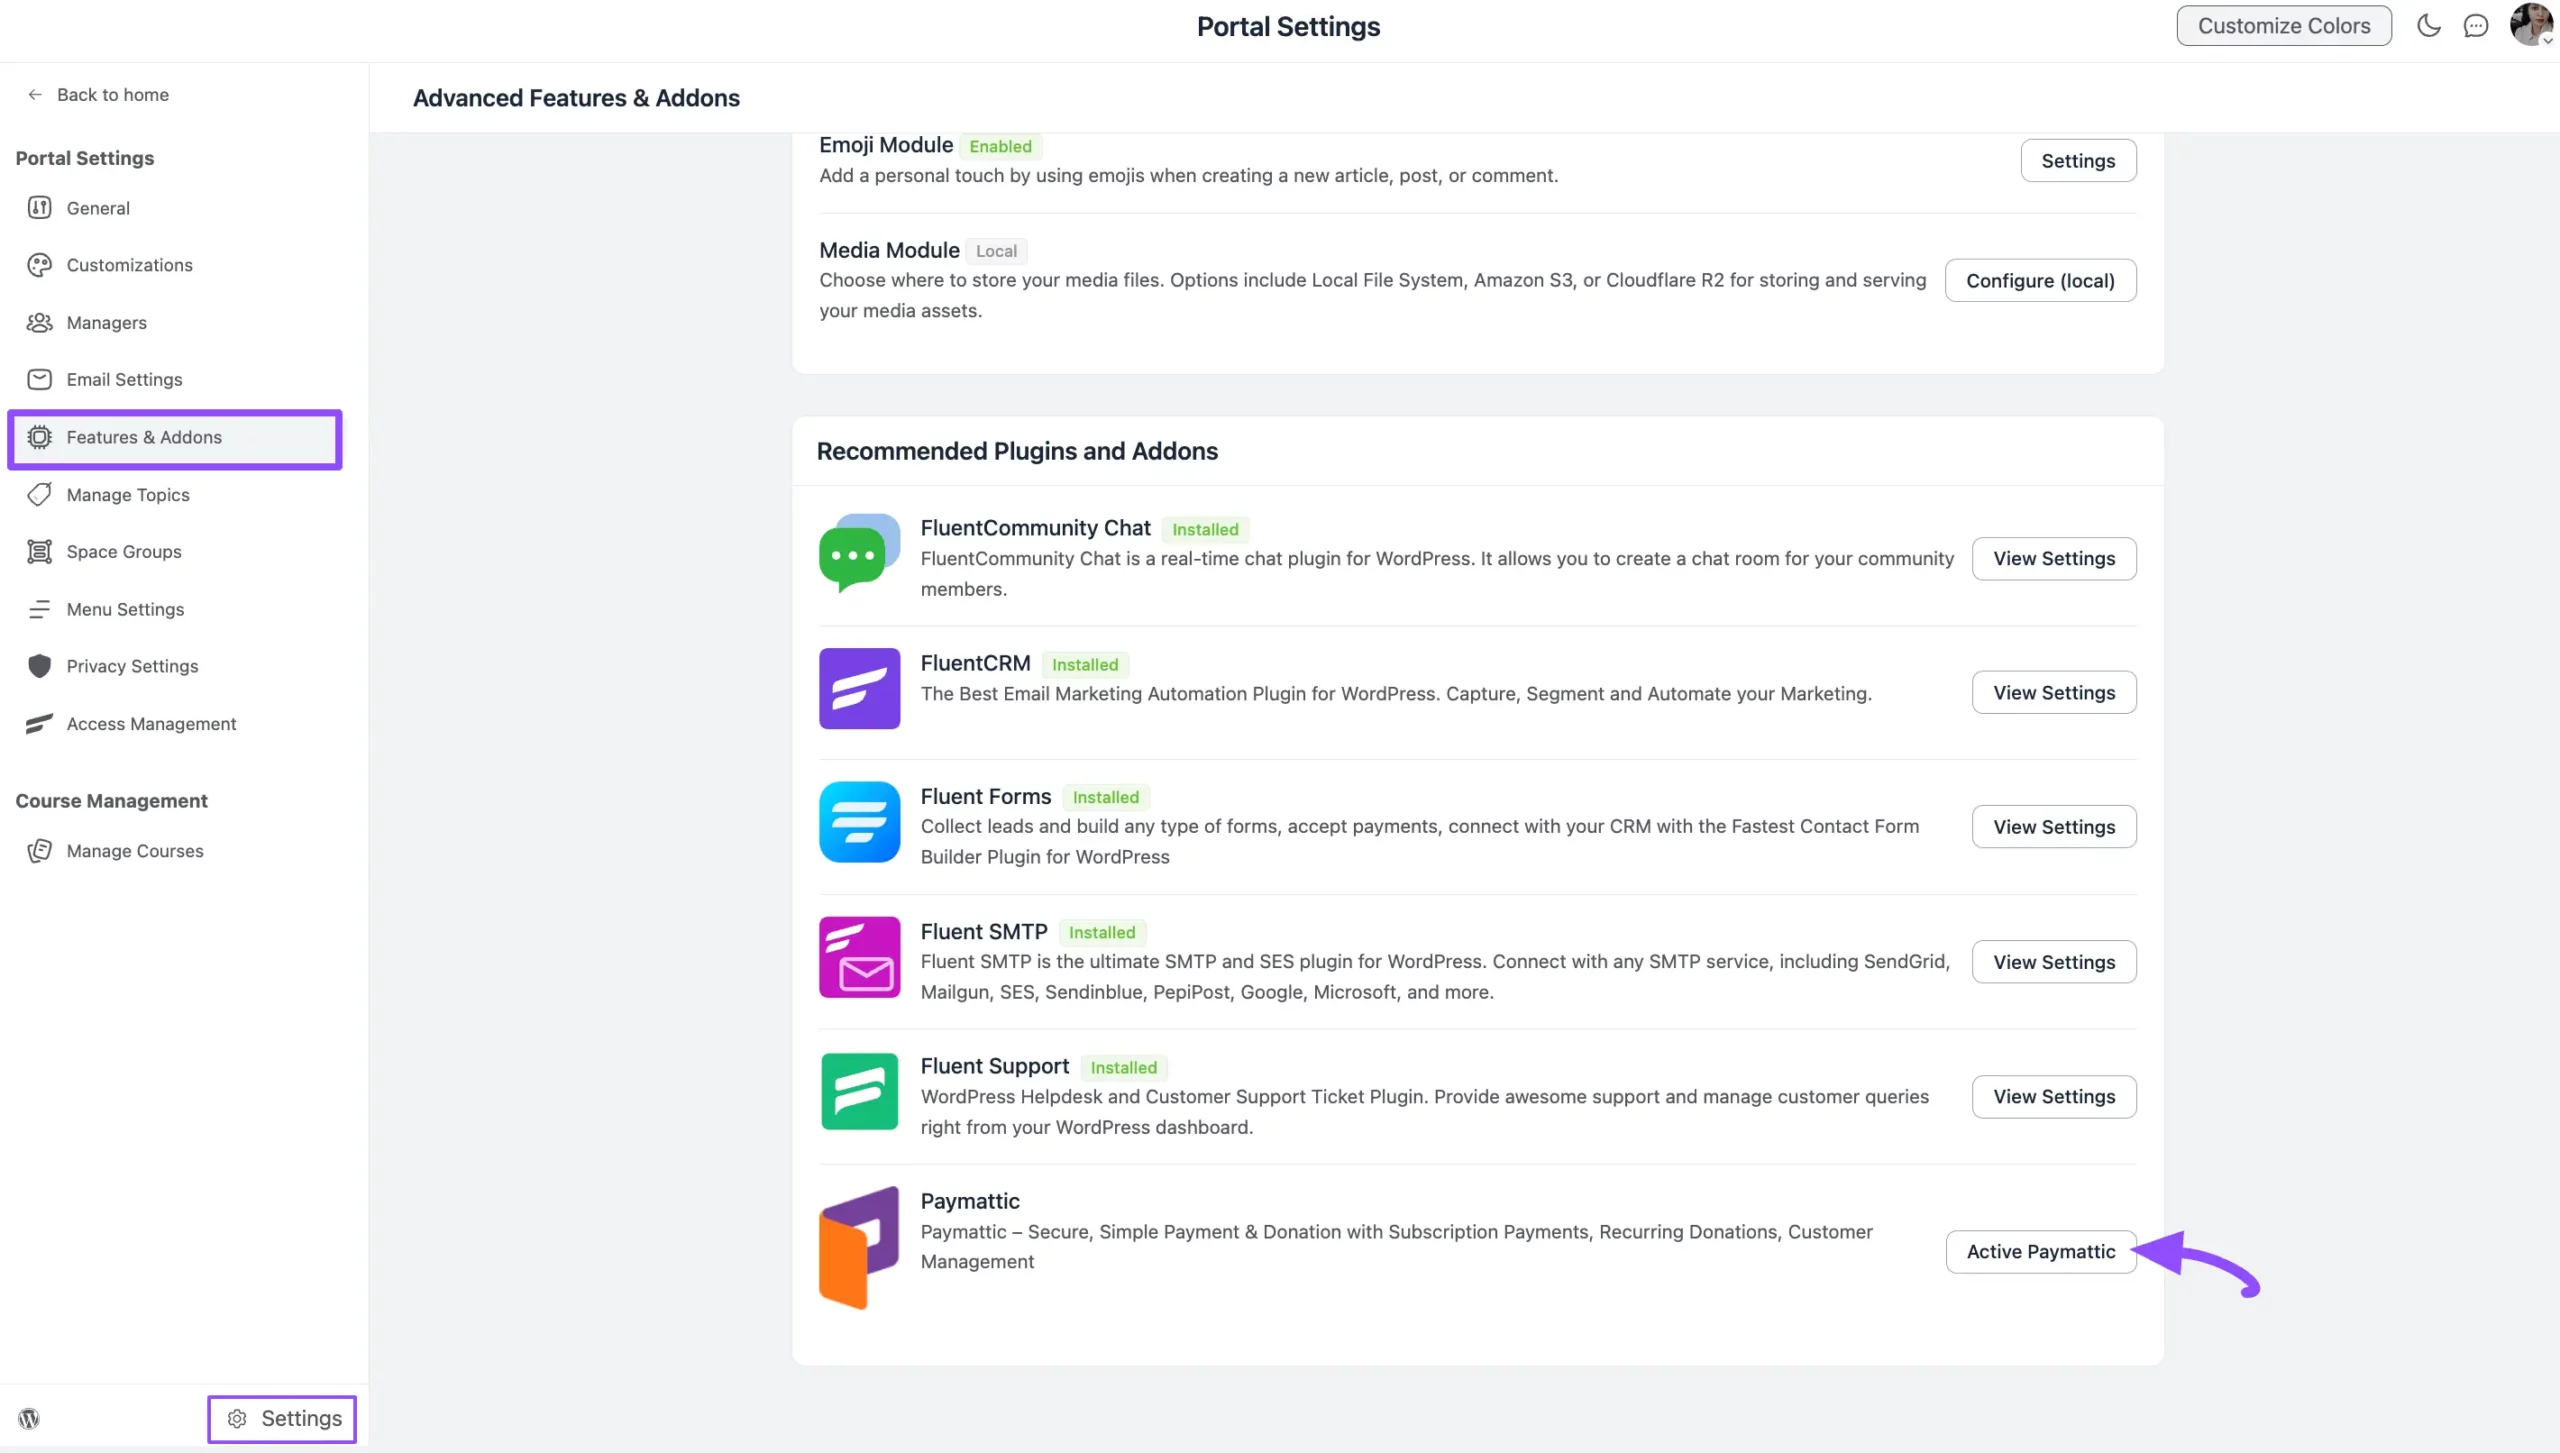
First, go to the Settings of FluentCommunity from the bottom-left corner.
Open the Features & Addons tab from the left sidebar and scroll down to the Recommended Plugins and Addons section.
Click the Activate Paymattic button to automatically set up the Paymattic (free version) plugin with your FluentCommunity.
TIP
To perform all tasks (e.g., using conditional logic, adding the user dashboard, etc.) with FluentCommunity, you need to install and activate the Paymattic Pro plugin.
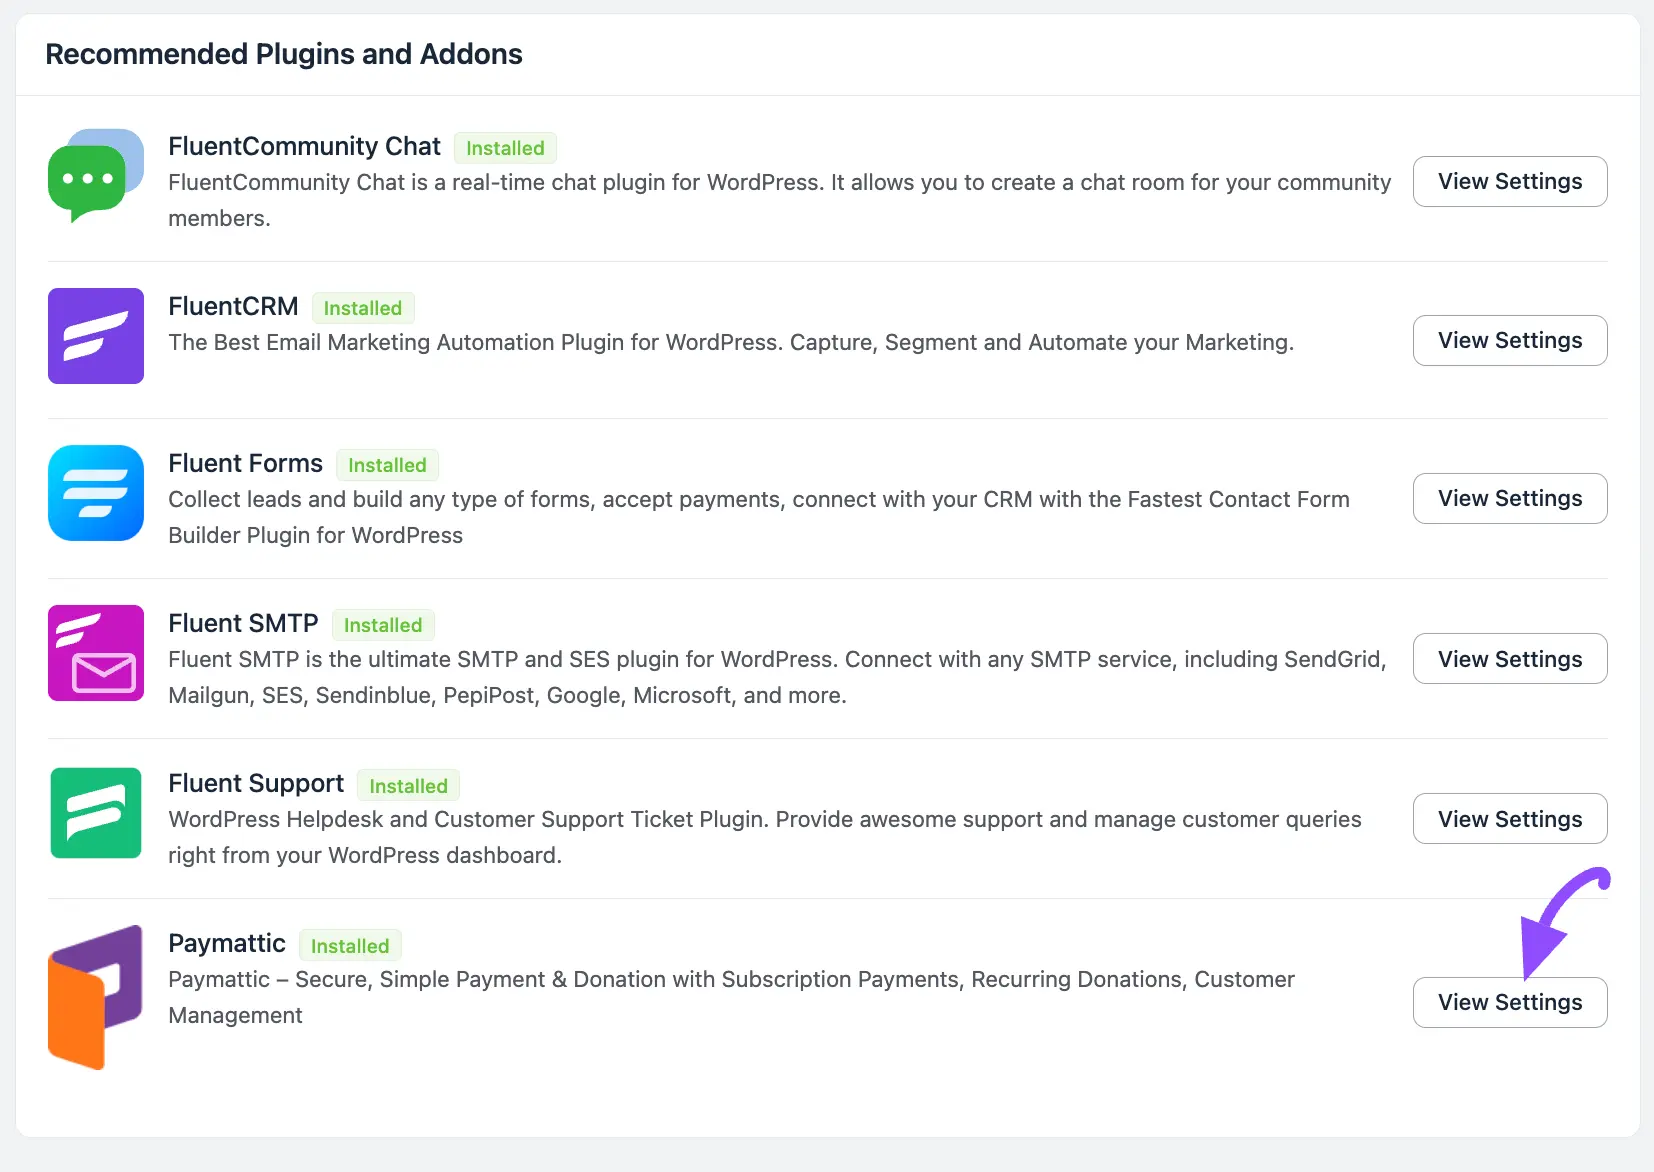
Now, click the View Settings button and it redirects you to the Paymattic Dashboard.
Enabling the FluentCommunity Module in Paymattic
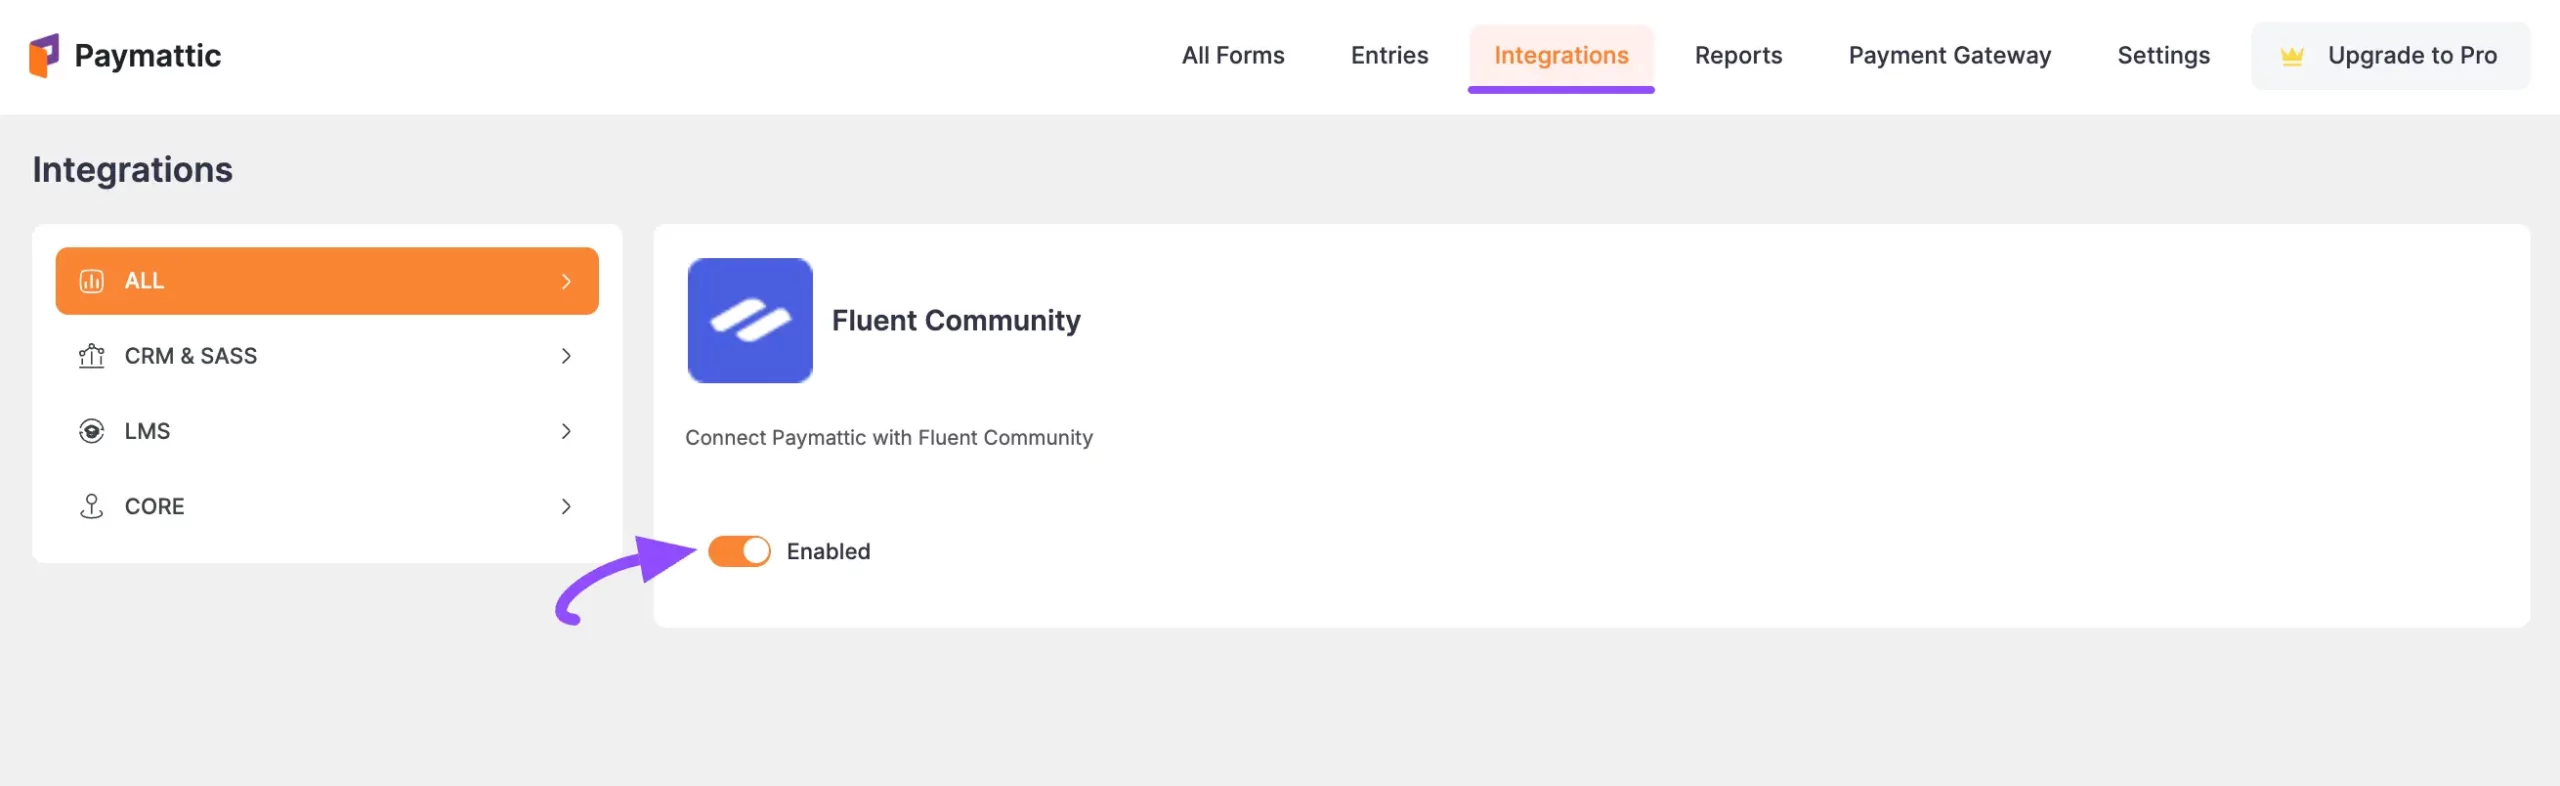
By default, the FluentCommunity module will be enabled in Paymattic.
If not, go to the Integrations section and manually enable the FluentCommunity module by toggling the switch to get access to the FluentCommunity Integration Feed.
FluentCommunity Integration Feed
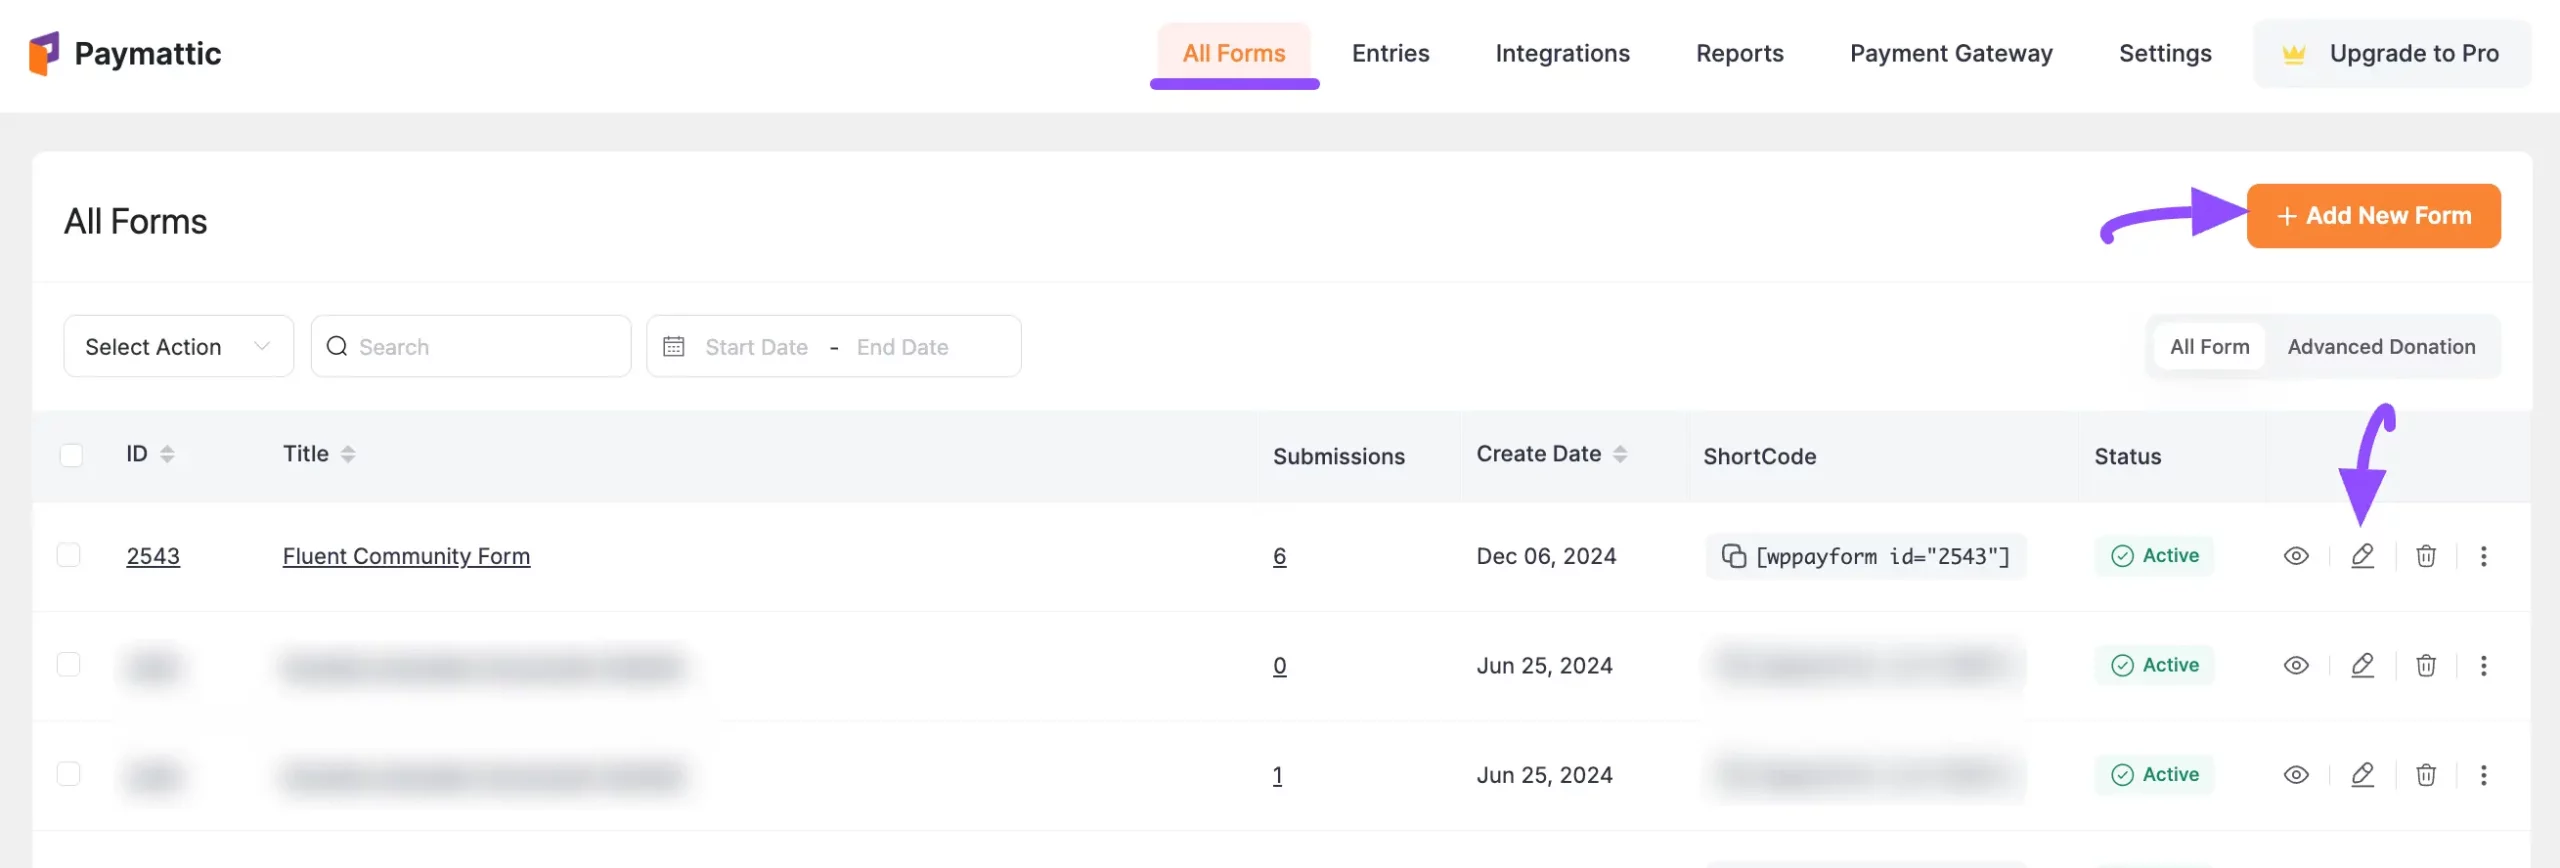
Now, go to All Forms, open an existing form by clicking the Pencil/Edit icon, or create a new form by clicking the + Add New Form button to integrate FluentCommunity.
INFO
To learn the detailed process of creating a new form to collect payments, read the Payment Form or Subscription Form documentation.
For this example, we use an existing payment form to show the integration process.
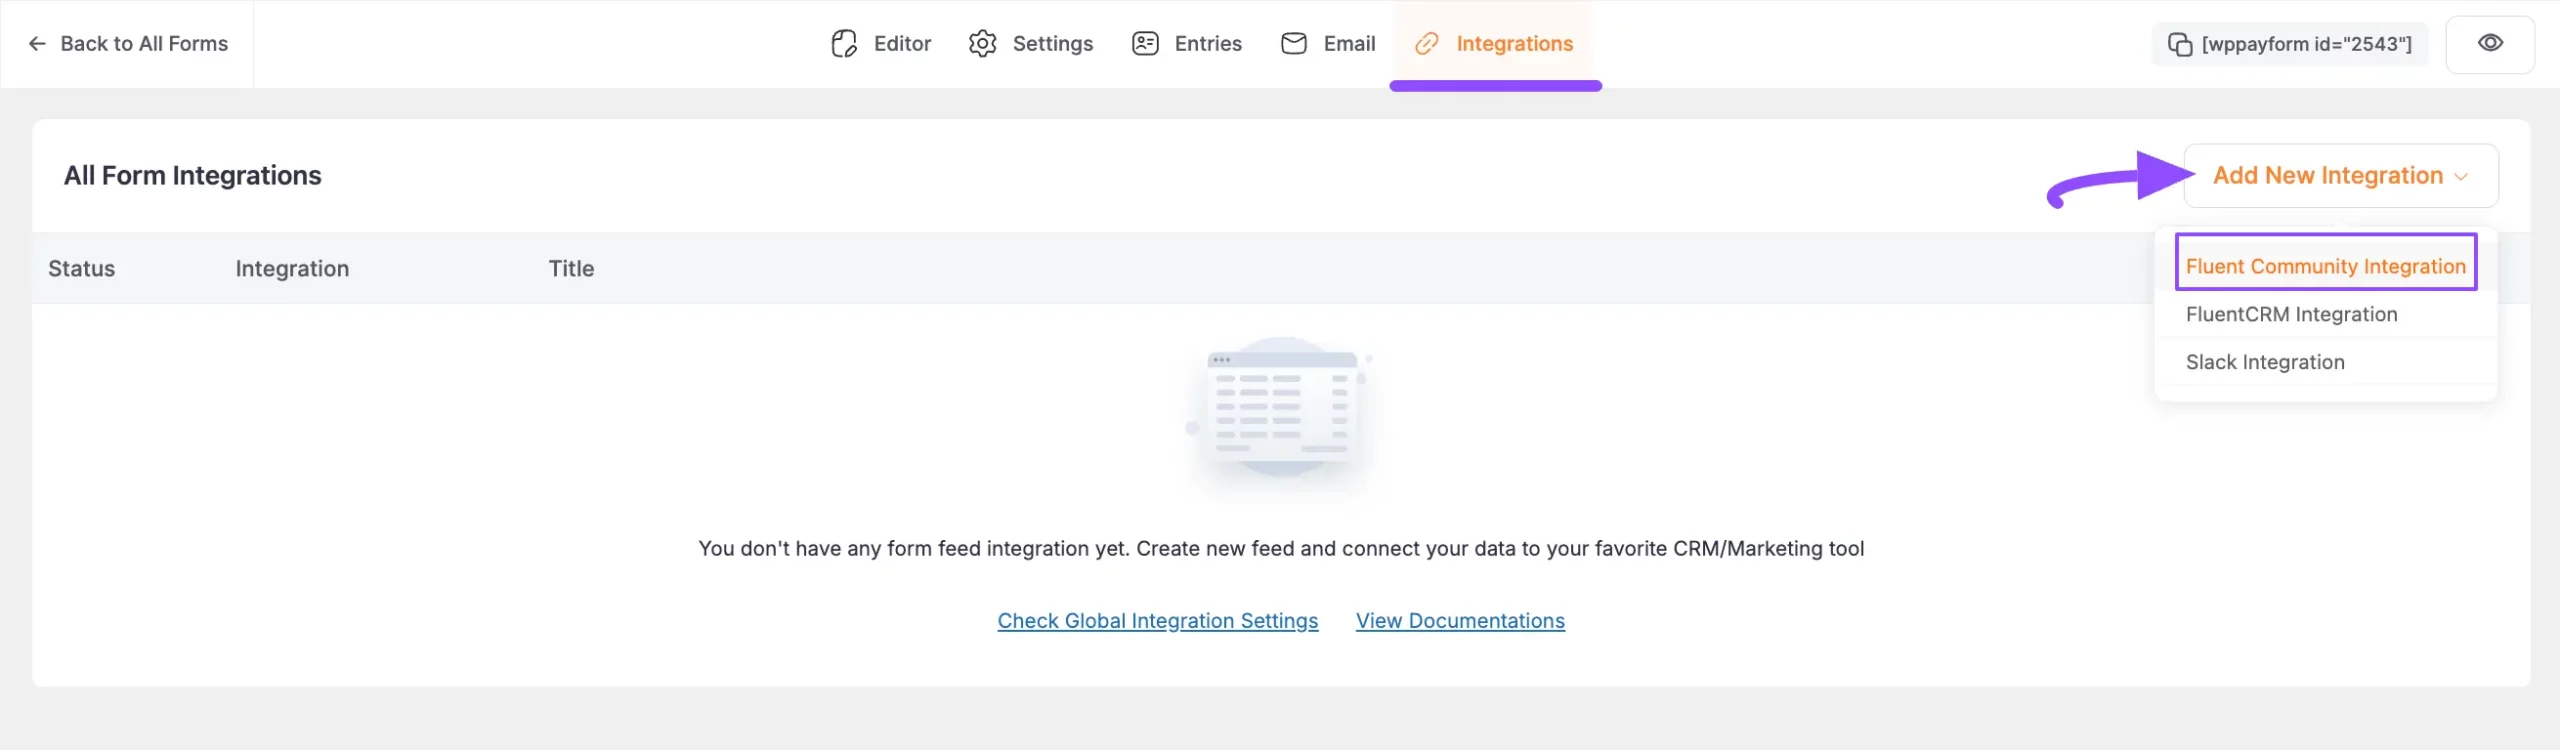
Once you are on the Editor page of your desired form, go to the Integrations tab, open the Add New Integration dropdown list, and select the FluentCommunity Integration option.
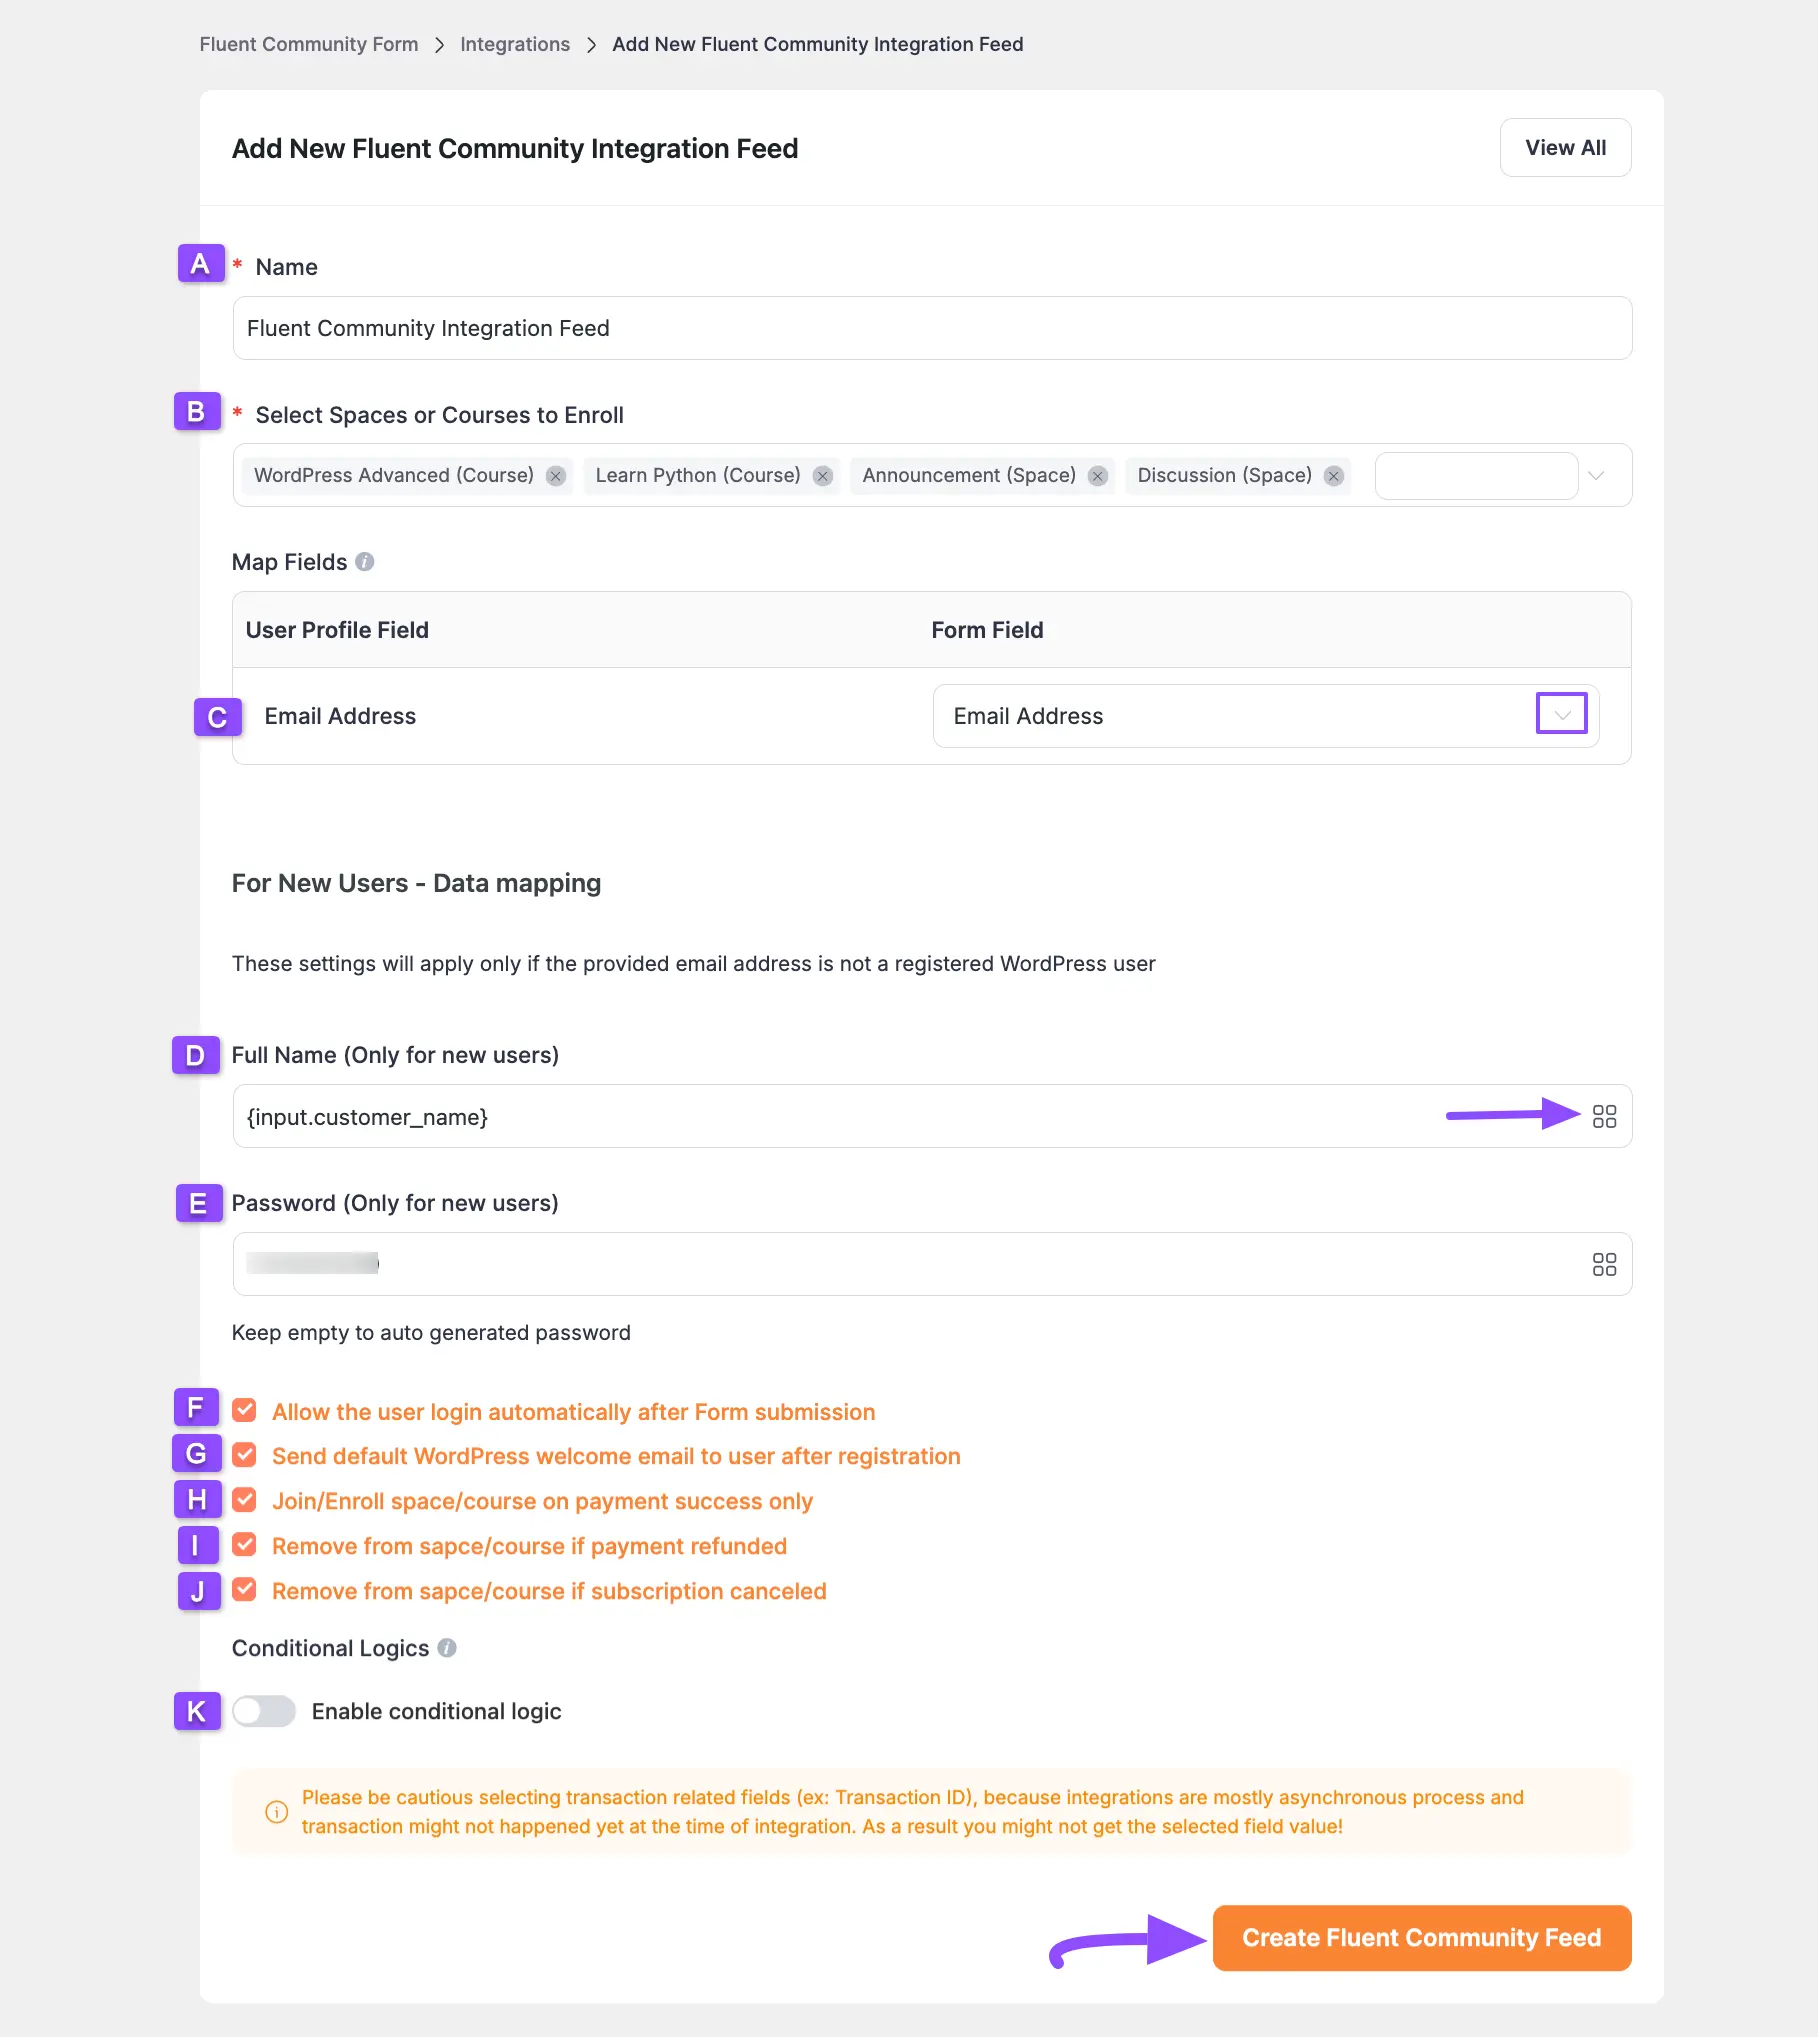
A pop-up page will appear with various settings for configuring FluentCommunity. Each option is explained below:
- A. Name: Set a name of your preference for this feed.
- B. Select Spaces or Courses to Enroll: Select your desired (or all) Space(s) and Course(s) to set where your users will be added as members/students immediately after form submission.
- C. Email Address: Select the email address field.
- D. Full Name (only for new users): Use the
{input.customer_name}shortcode by clicking the ShortCode icon. - E. Password (only for new users): Set a fixed password for every new user, or keep it empty to automatically generate a new password for each user.
- F. Allow the user to log in automatically after form submission: Enable this option and your user will be directly logged into your Paymattic User Dashboard after submitting the form.
- G. Send default WordPress welcome email to a user after registration: Enable this option to send a welcome email notification to your users with login details, including a password reset option.
- H. Join/Enroll space/course on payment success only: Check this option if you want users to join/enroll in a Space/Course only when the payment is successful. If unchecked, users can access the space/course without a successful payment.
- I. Remove from space/course if payment refunded: Check this option to automatically remove users from a space/course if the payment is refunded.
- J. Remove from space/course if subscription canceled: Check this option to automatically remove users from a space/course if they cancel their subscription.
- K. Enable conditional logic: Enable this toggle if you want to set conditions on the form submission. To learn how to use it, read the Conditional Logic documentation. This feature requires the Paymattic Pro plugin.
Once you set up the page, click the Create FluentCommunity Feed button and the feed will be added.
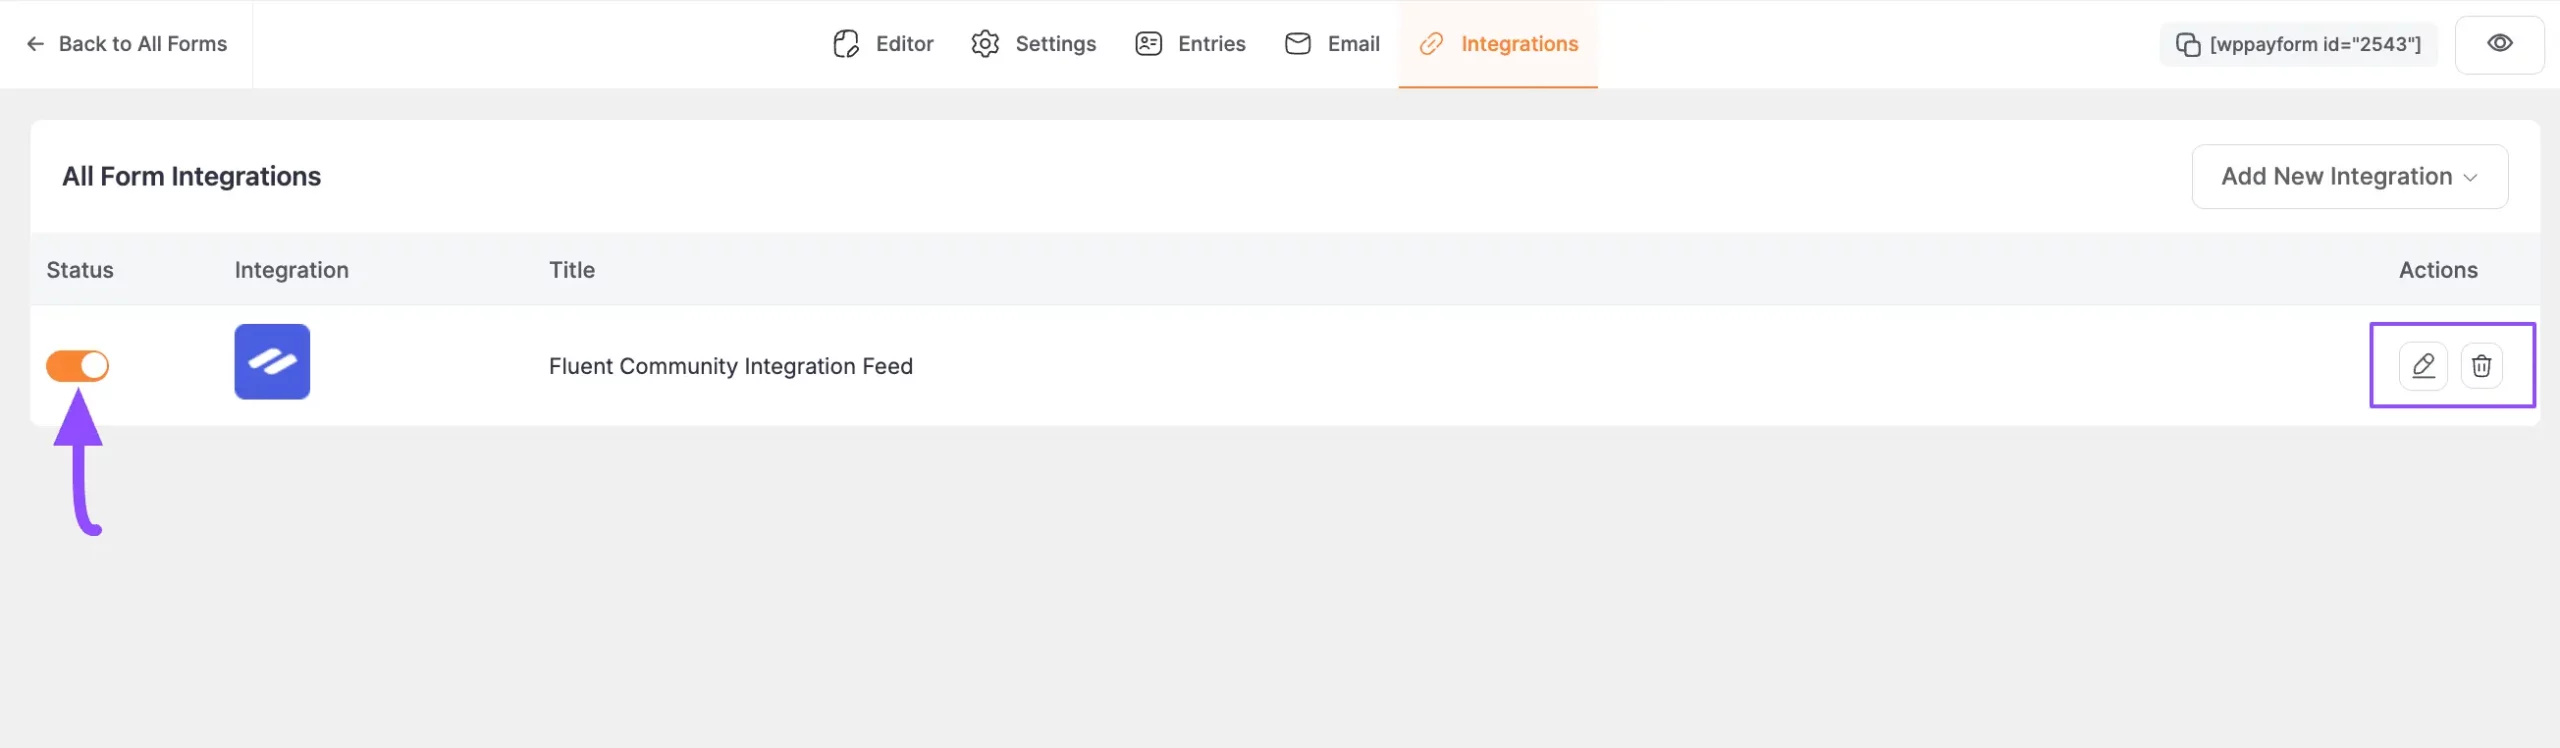
Now you will see that your FluentCommunity Integration Feed has been added here.
You can modify your feed anytime by clicking the Pencil icon and delete it by clicking the Trash icon. You can also disable or enable the feed anytime by clicking the Toggle button if needed.
Displaying the Form on the Front End
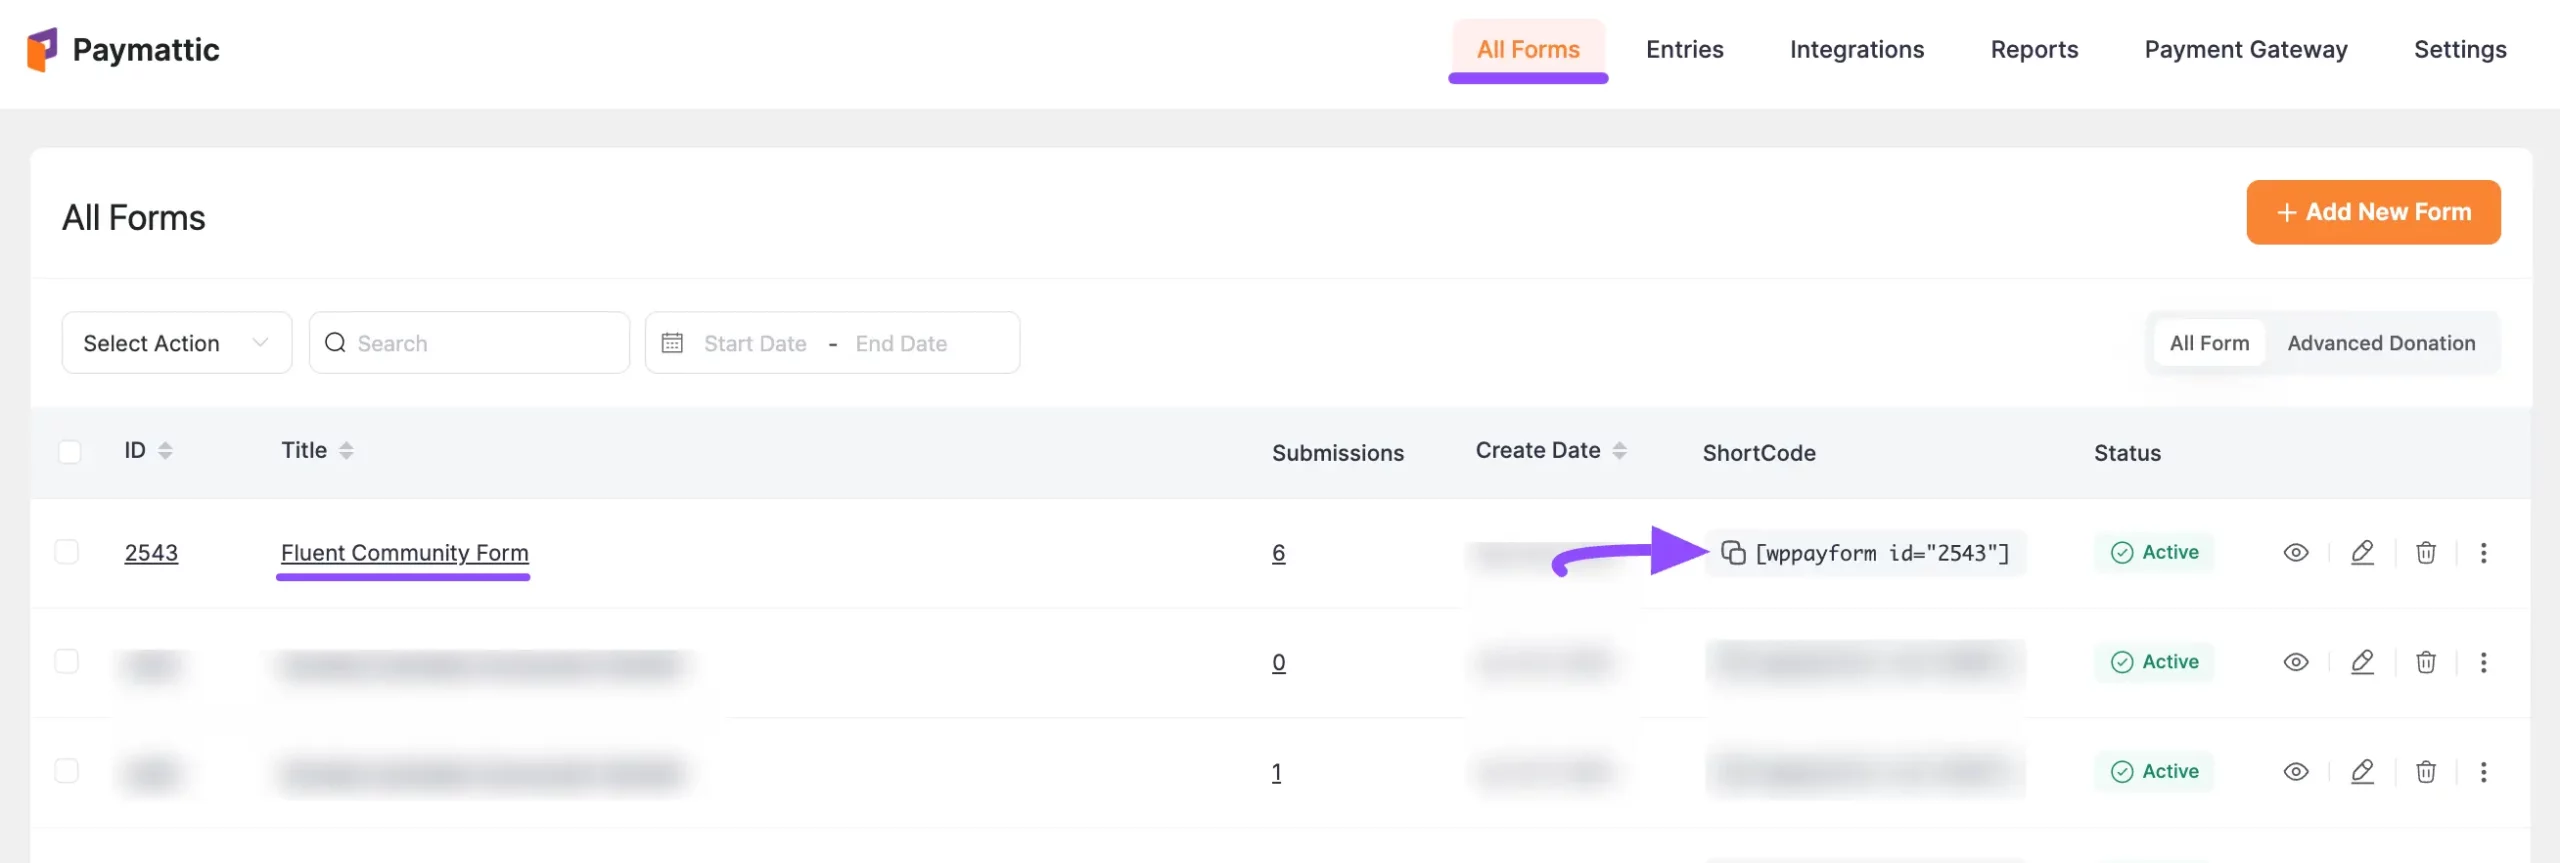
To display your FluentCommunity form on the front end of your WordPress site, copy the Shortcode of your desired form.
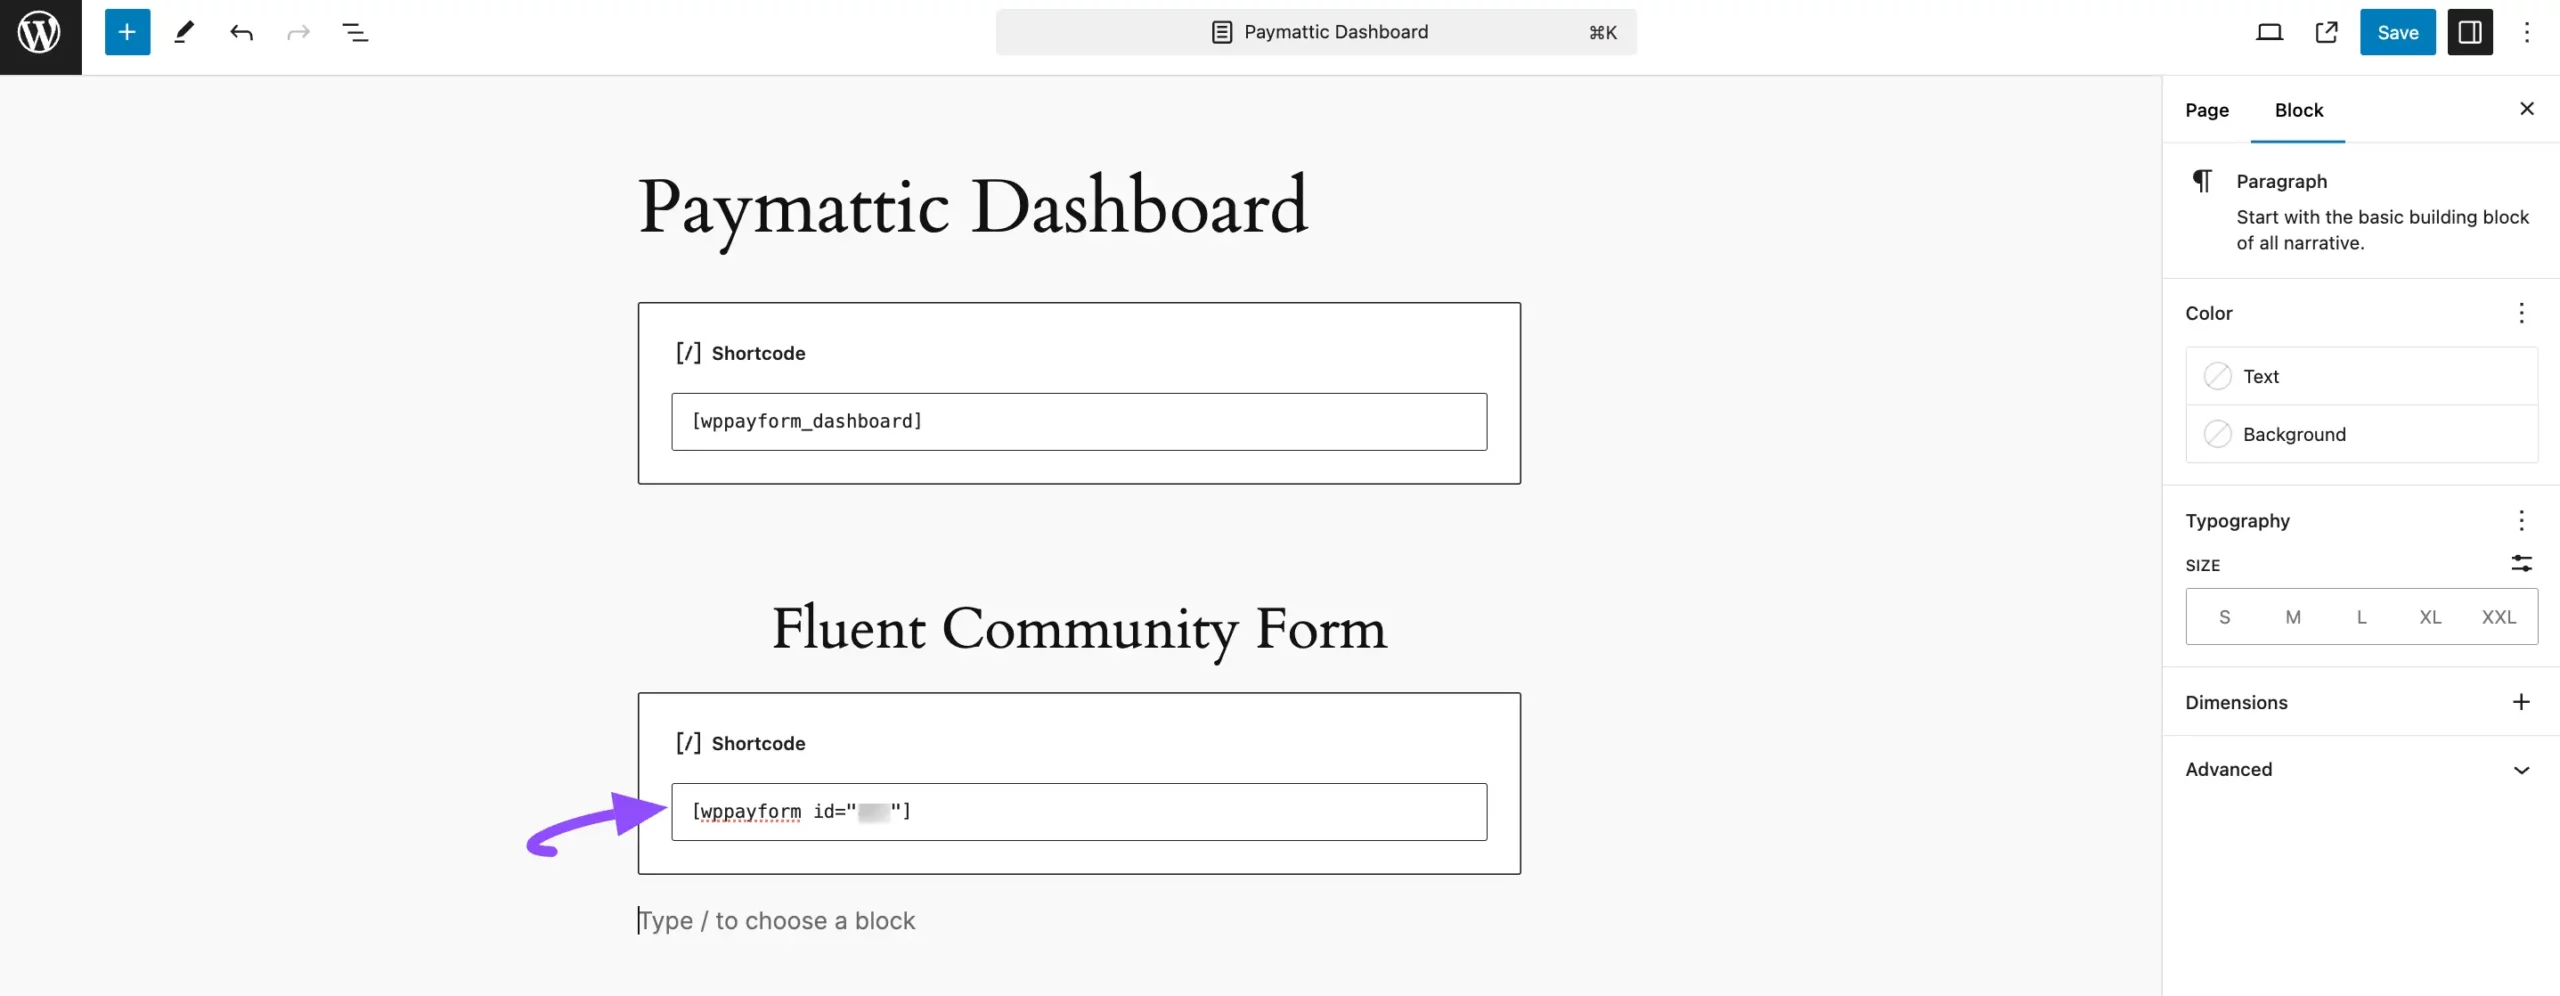
Then, paste the shortcode into the Page/Post where you want to display your form. For this example, we pasted the shortcode into the default Paymattic Dashboard Page.
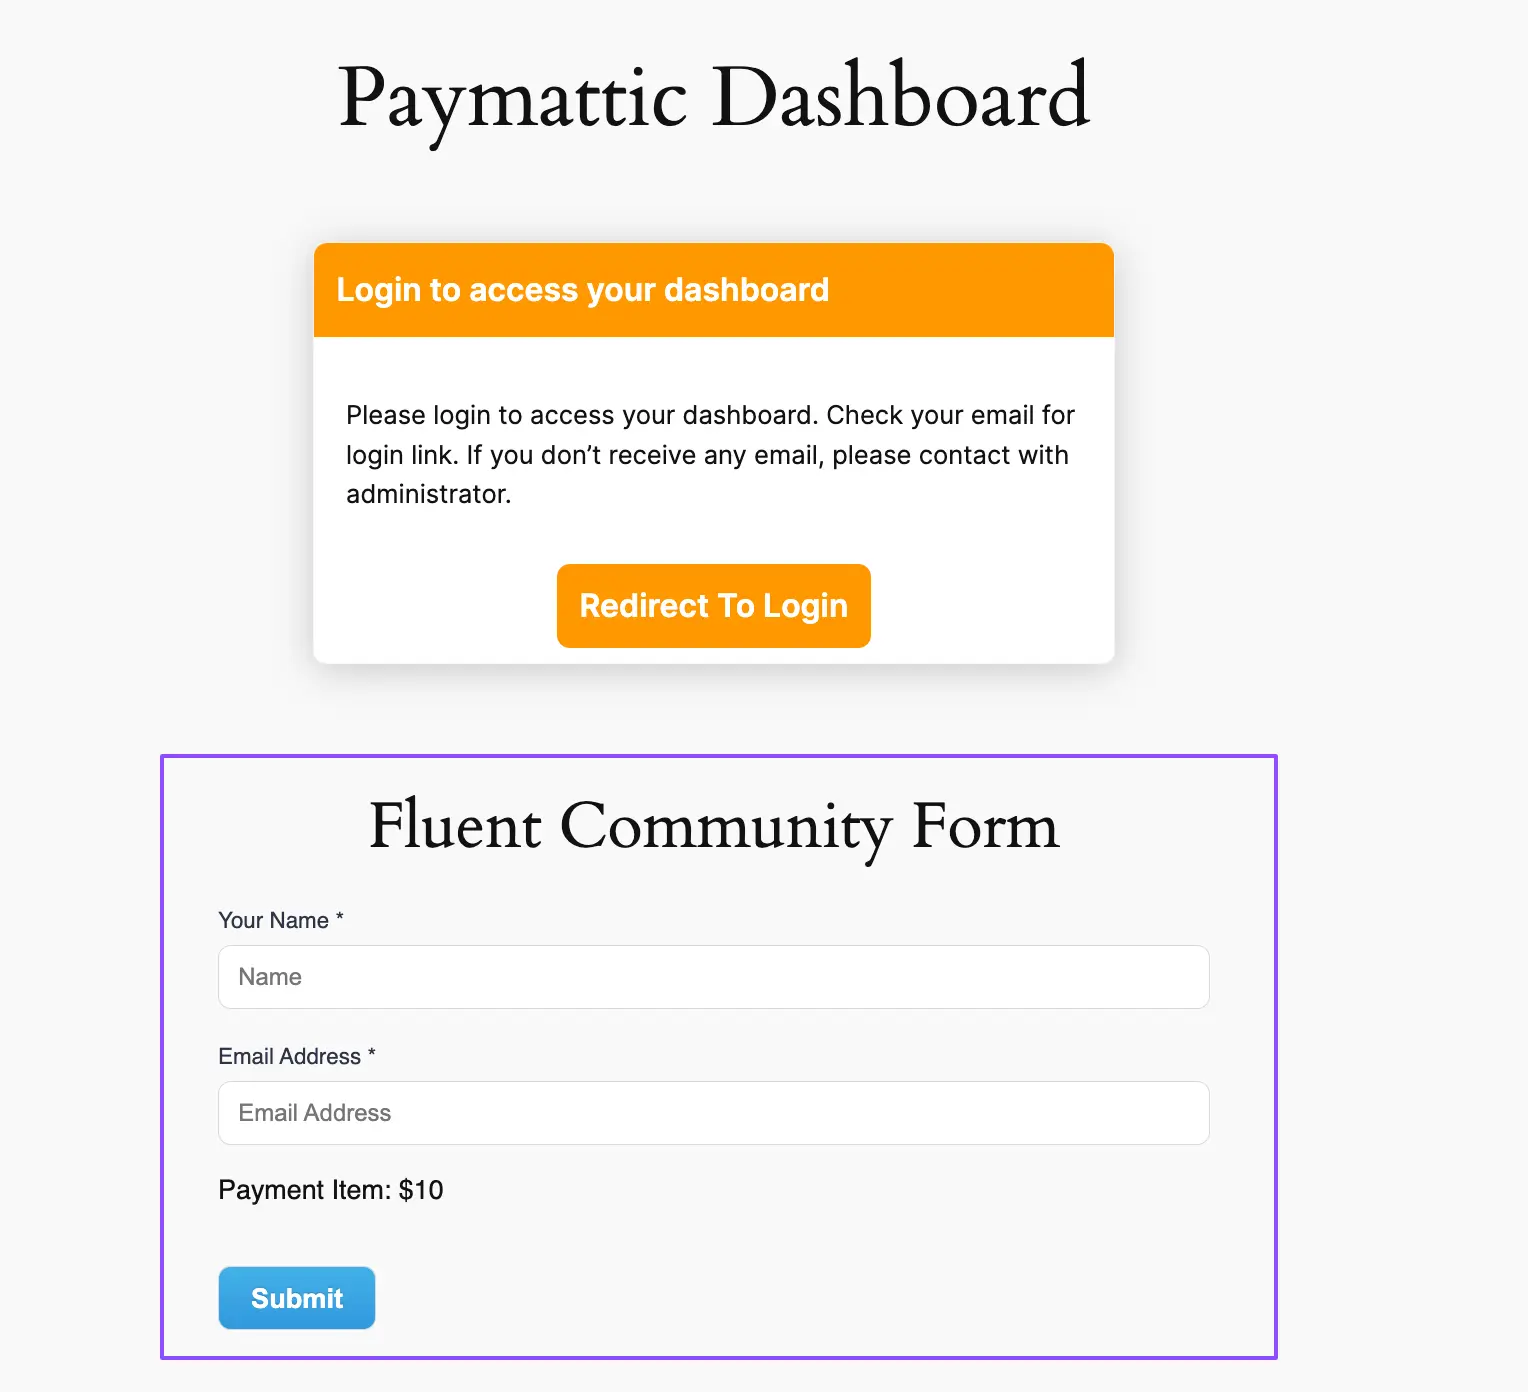
Now, on your front end, you will see your FluentCommunity form like the screenshot below. Your user needs to fill in the form to log into the FluentCommunity Portal.
The Paymattic form user will automatically be added to the Members list of the selected Spaces and Courses of FluentCommunity.
Paymattic User Dashboard
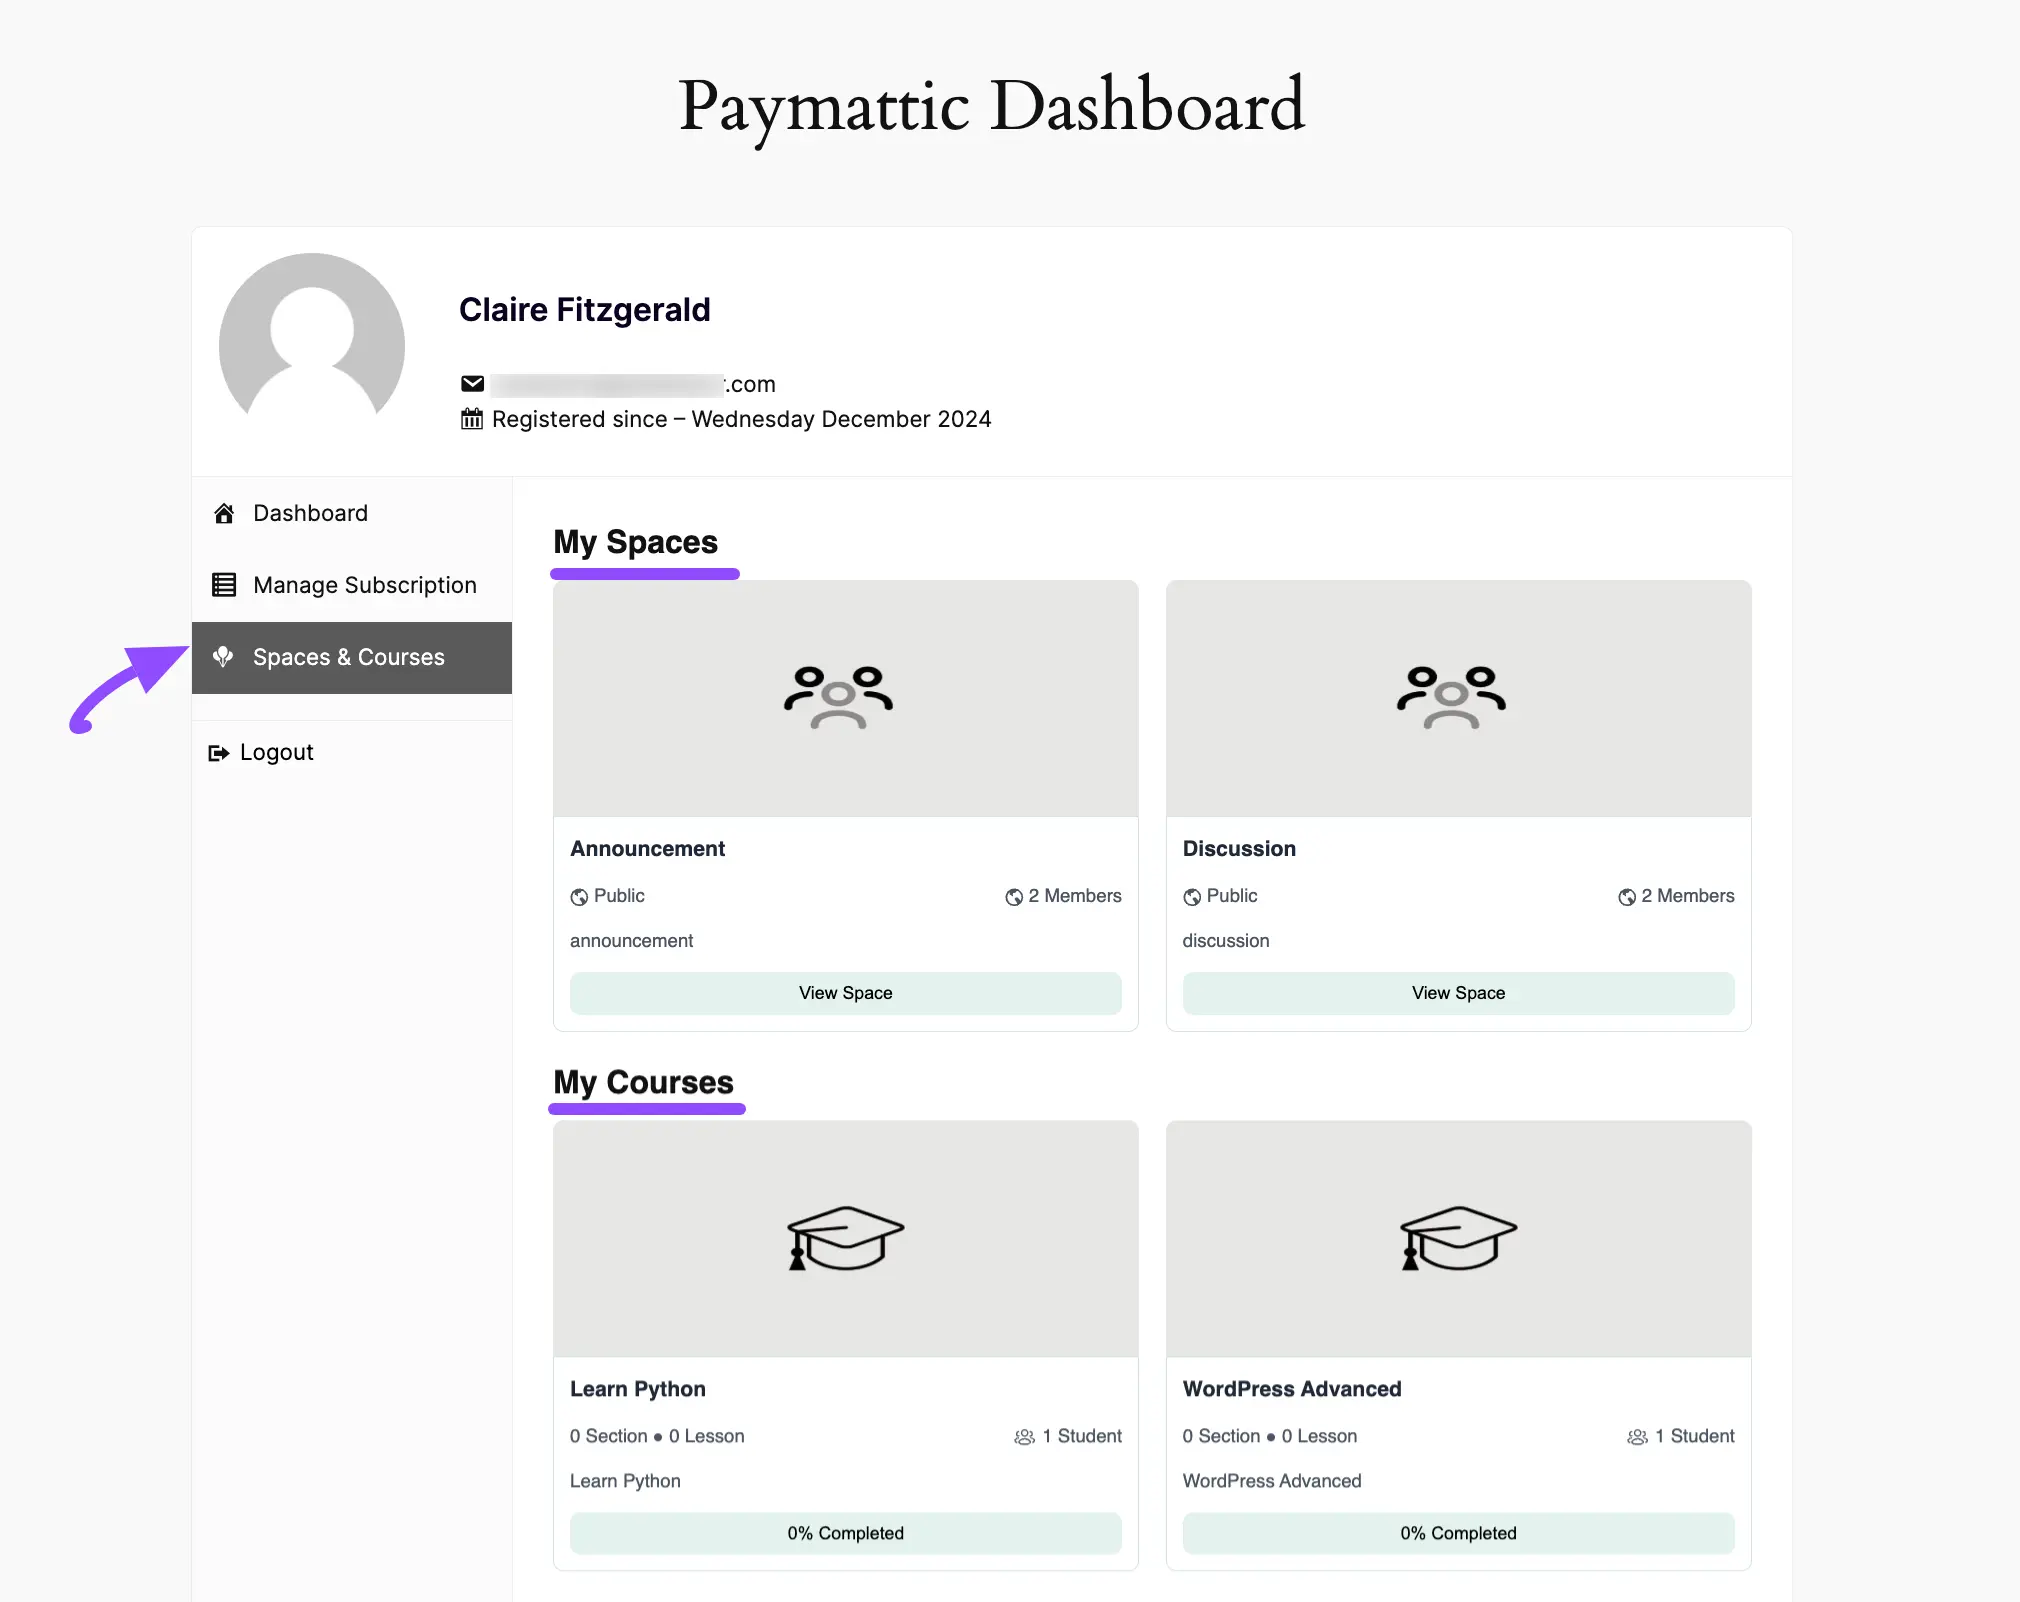
After completing the integration, Paymattic users or FluentCommunity members who access the community through Paymattic will see a dedicated section called Spaces & Courses in their User Dashboard.
This section provides an overview of their community activities, such as the Spaces they have joined and the Courses they are enrolled in. They can also manage and view the payment history of their subscriptions through this dashboard.
TIP
The Paymattic User Dashboard requires the Paymattic Pro plugin.
Once your users fill in the form, the user dashboard will look like the screenshot below.