Appearance
Social Links Customization
FluentCommunity's Social Links Customization feature allows admins to control which social platforms users can add to their profiles. It also enables users to easily manage their social links, increasing engagement and connectivity within the community.
This guide will walk you through setting up and customizing social links on user profiles.
Enable Profile Social Media Links
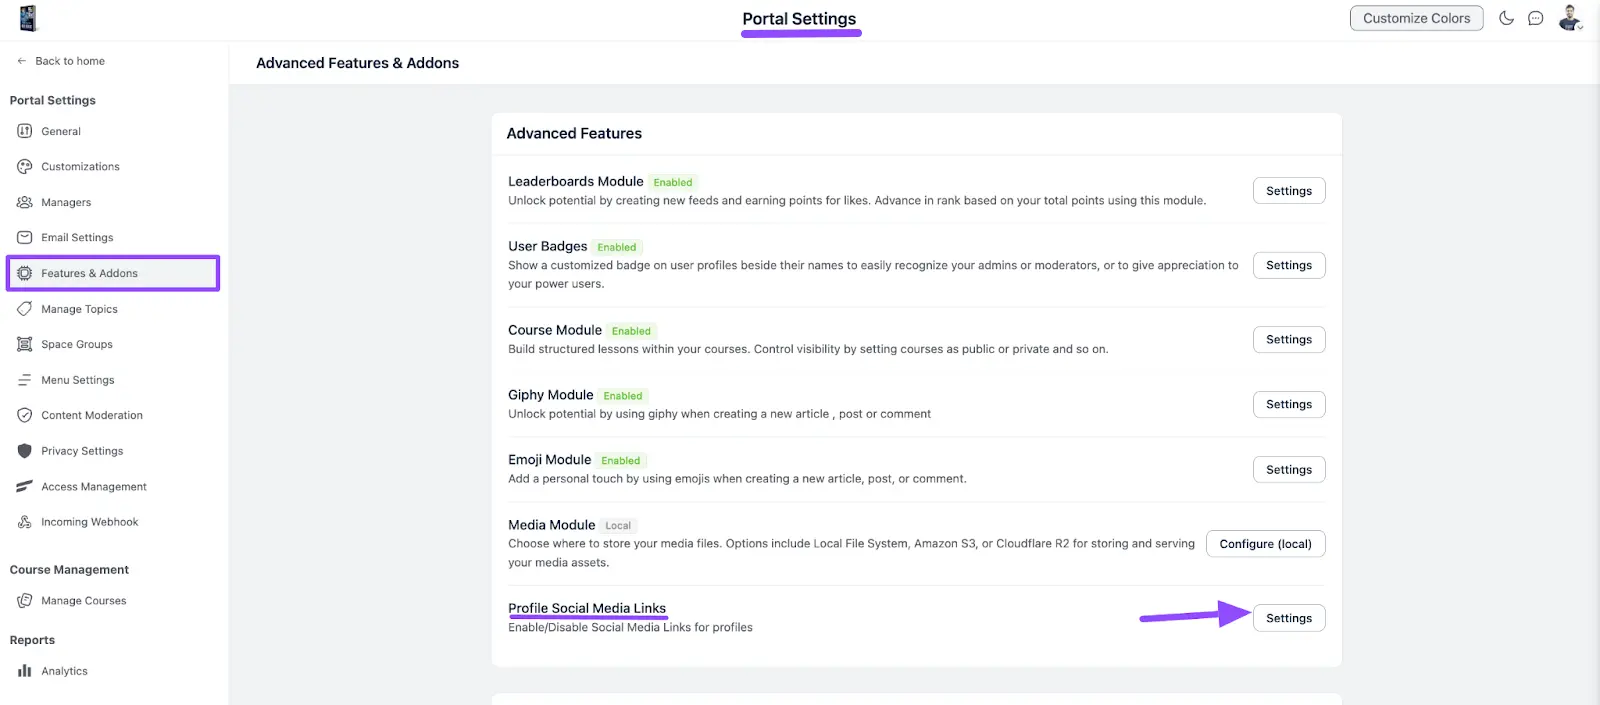
To enable social media links in your profile, go to the Portal Settings and select the Features & Addons section from the left sidebar. Then, locate the Profile Social Media Links section and click the Settings button.
Social Media Links Settings
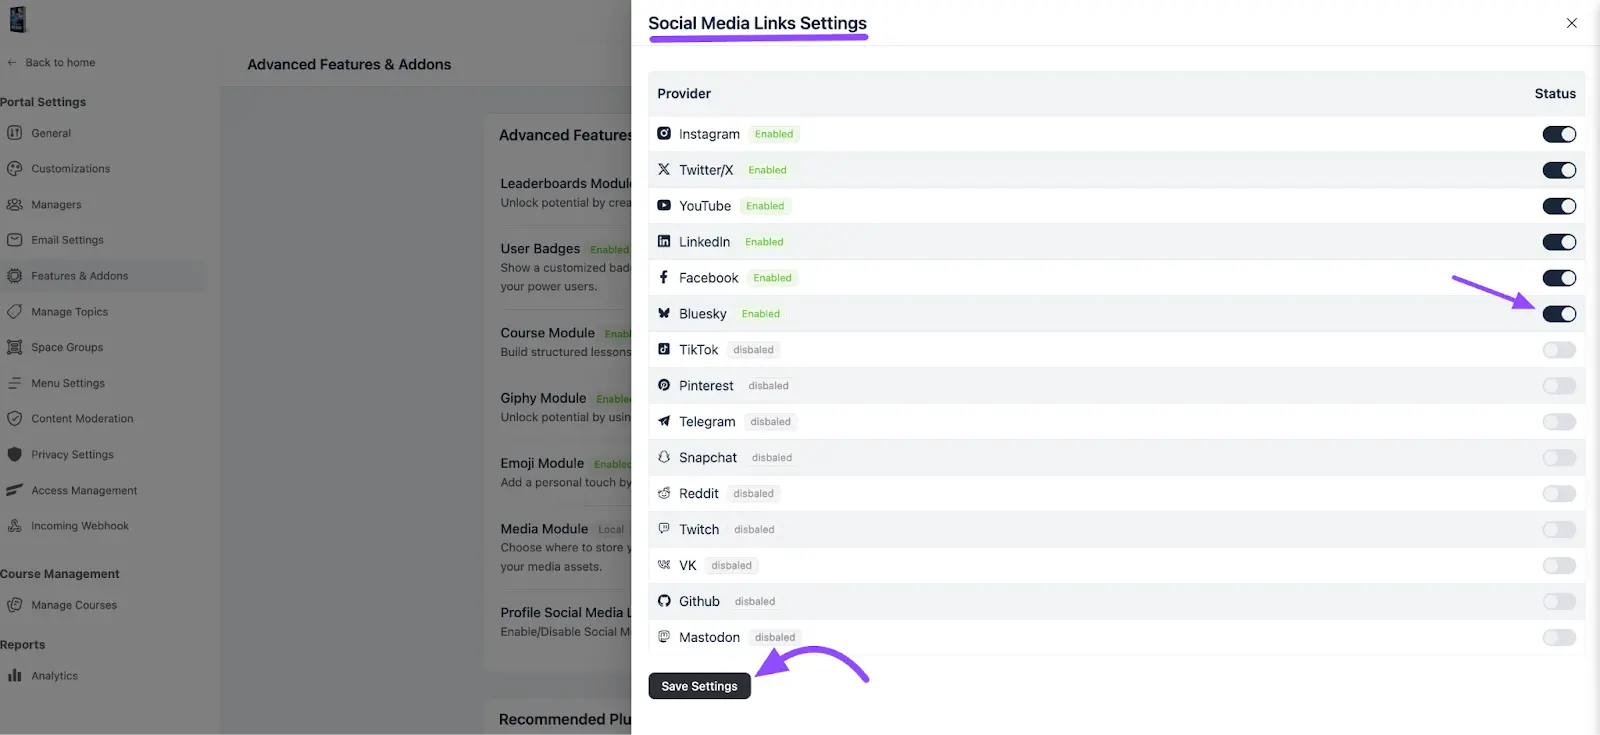
Here, you'll see a list of supported social media platforms. Toggle each platform on or off to control which links users can add to their profiles. After that, click the Save Settings button.
Adding Your Social Media Links
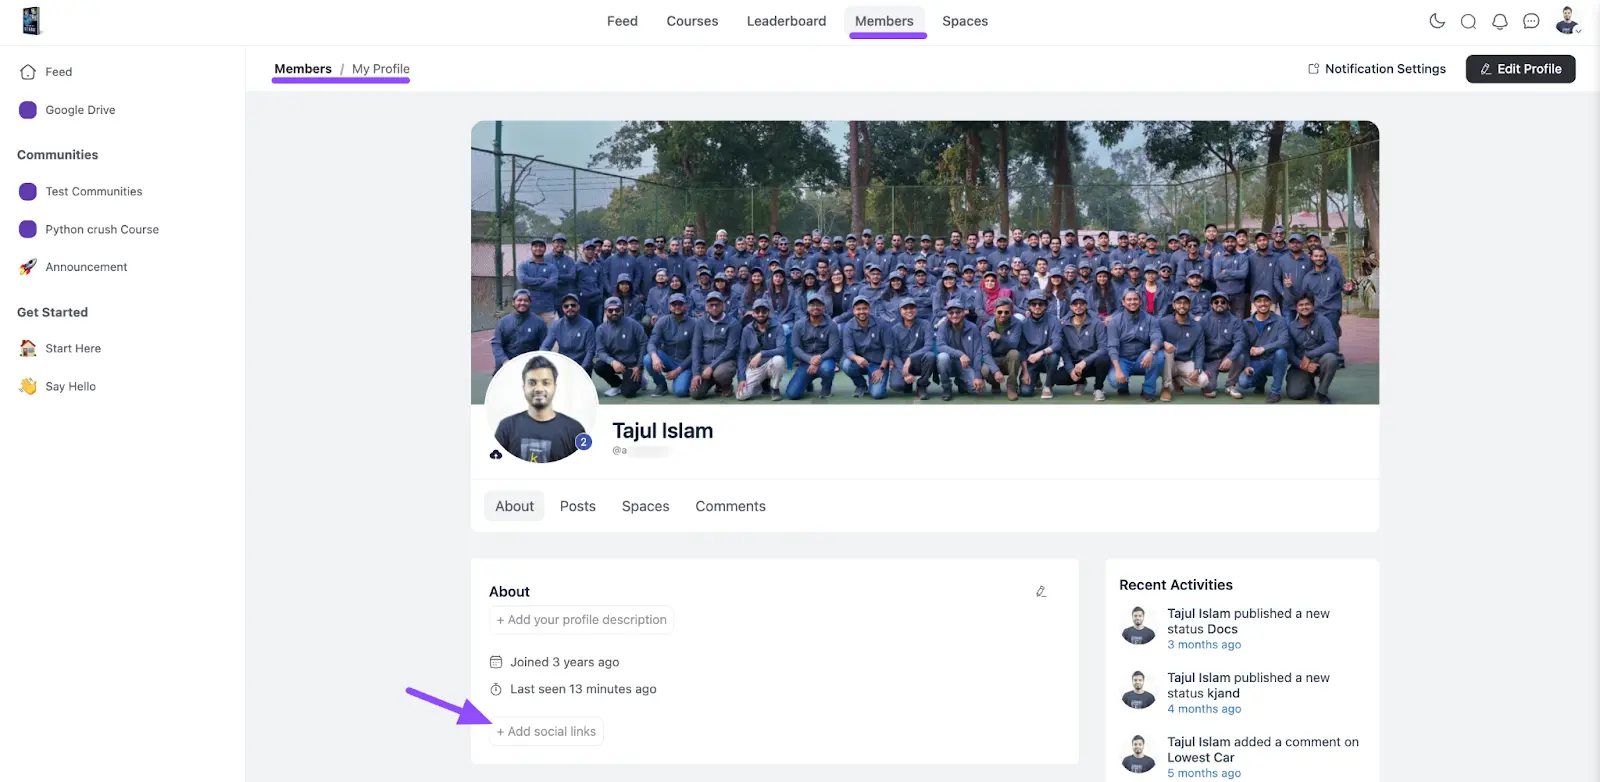
Once social links are enabled, users can add their profiles to supported platforms. To add these links, go to your Profile. Click the Add Social Links button.
Scroll down and select the social media platform where you want to add your profile link. Enter your username or profile URL for the selected platform.
Once all desired links are added, click the Save Changes button.
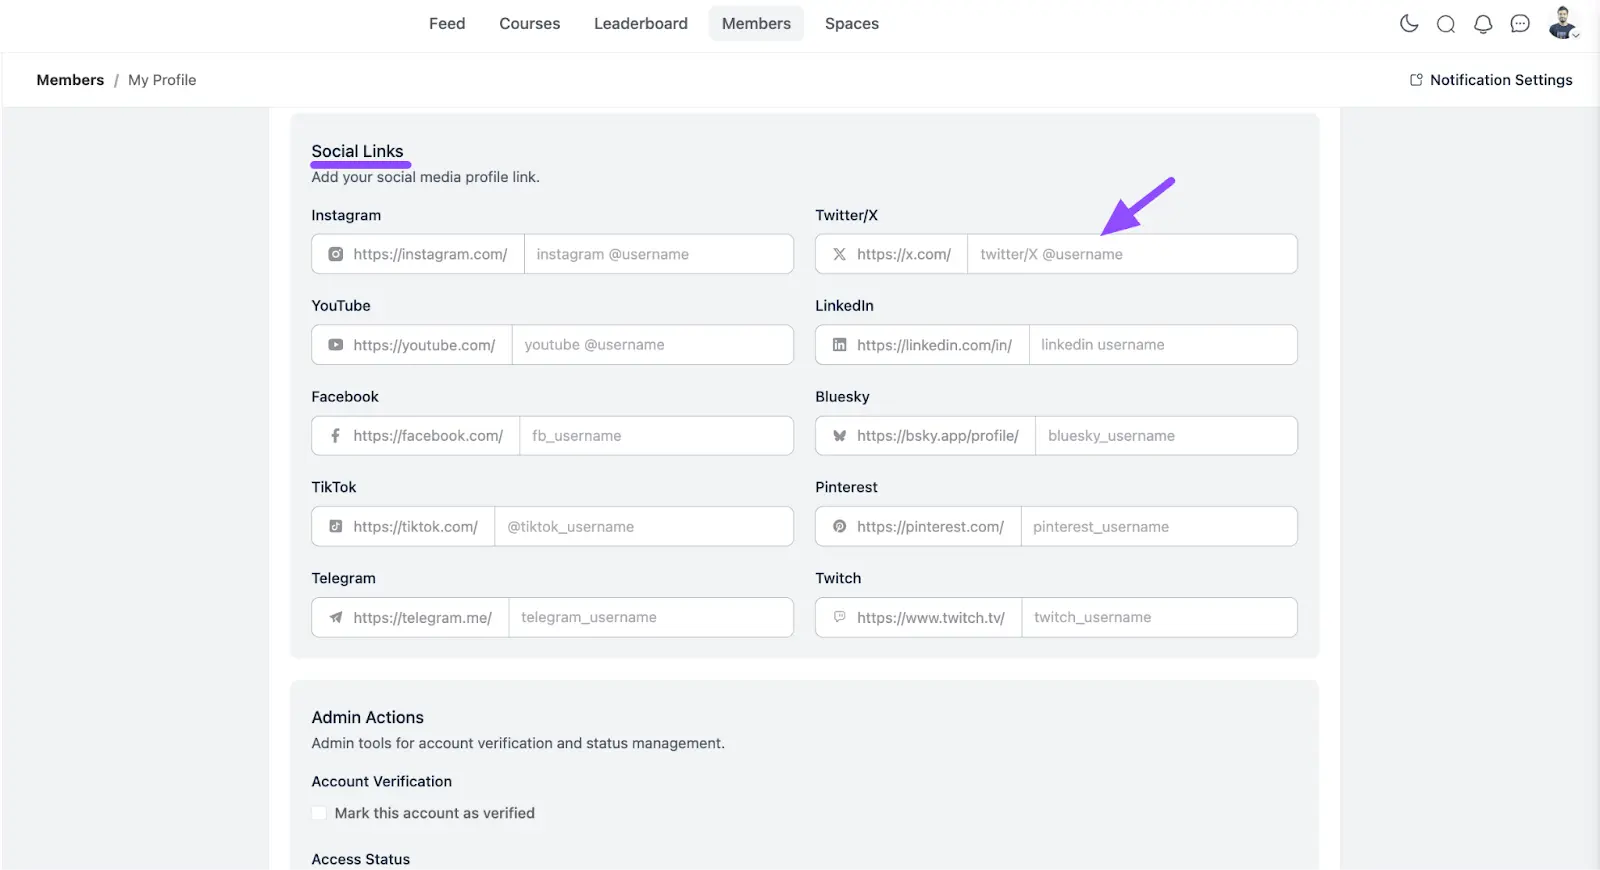
Customizing Social Links
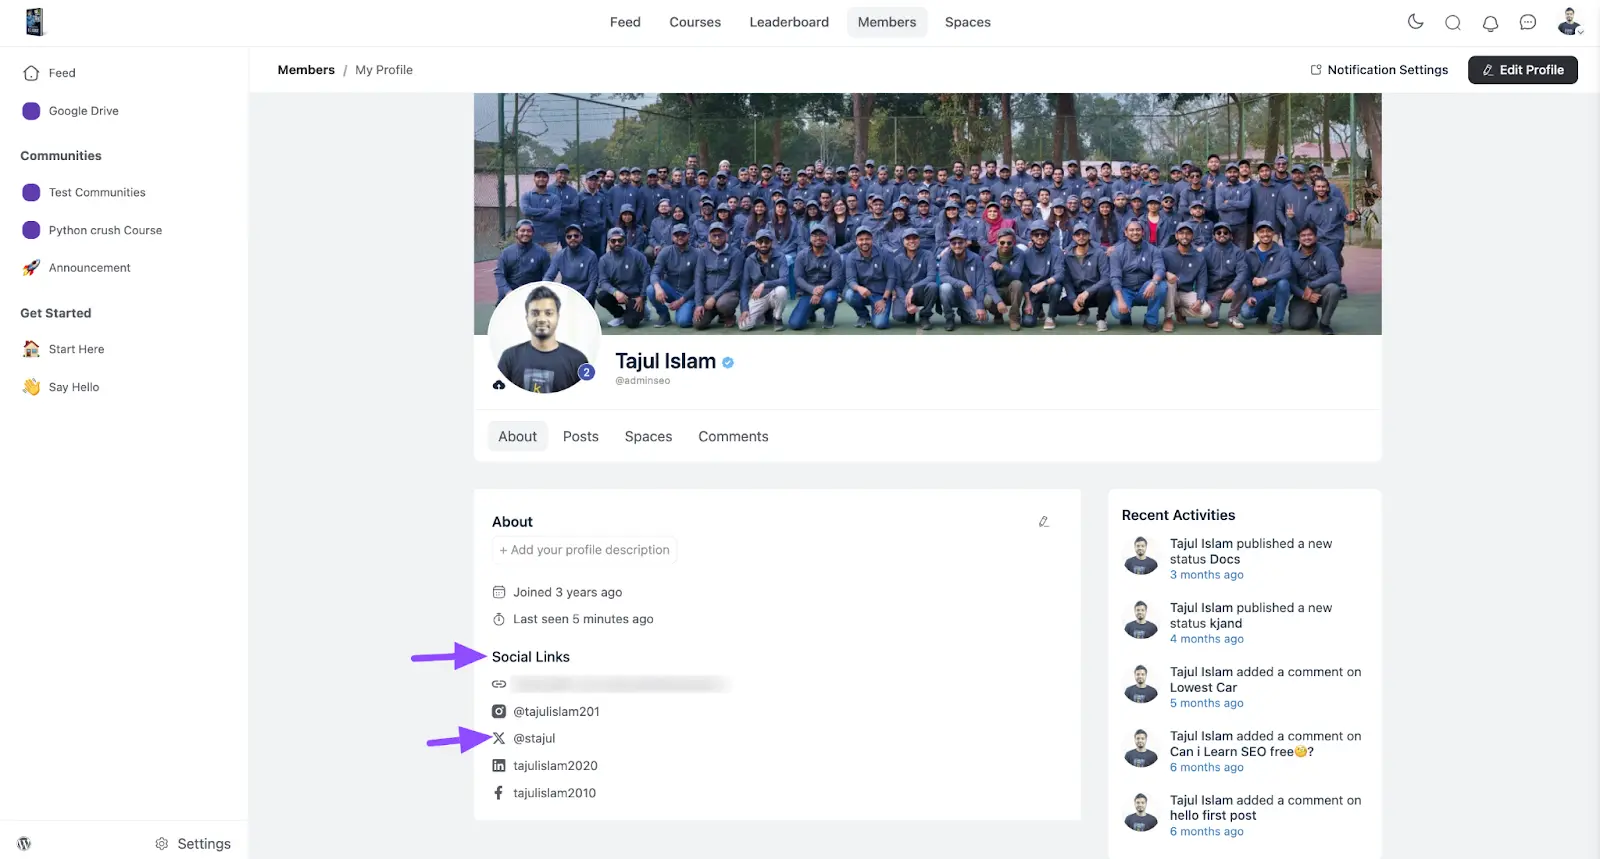
If you want to edit or customize your social links, go to the Profile's About section. Here, you can view your social media links.
Now, locate the Social Links dropdown and click the Social Icon of the platform you want to customize. Next, modify your username or profile URL.
After that, click Save Changes to update your social links.