

Appearance
Assigning User Roles
User roles are a fundamental part of managing your community. They let you grant different levels of permissions to members on a per-Space basis, so trusted volunteers can help moderate without full site-wide access.
Use Case: You have a trusted, long-time member who is always helpful in your "General Discussion" Space. You can promote them to Moderator for that Space so they can help manage posts and comments, without giving them full admin access to your entire site.
Understanding the Default Roles
FluentCommunity's role system is designed to be simple and powerful.
- Member: The standard role for users who join a Space. Members can create posts, comment, and interact with content but cannot edit or delete other members' content.
- Moderator: Has all Member abilities, plus permission to edit or delete any post or comment within that Space. Ideal for trusted community volunteers.
- Admin: Has Moderator abilities, plus control over Space settings, member management (approve, remove, or block), and Space customization.
- Site Admin (WordPress Administrator): A WordPress-level role, not a FluentCommunity Space role. WordPress Administrators have full control over FluentCommunity and all Spaces by default.
Viewing Your Role in a Space
From the community front end, open Spaces to see all available Spaces. If you are already a member, your role appears as a badge on the Space card next to the title (for example, Member or Admin). Spaces you have not joined show a Join button instead of a role badge.
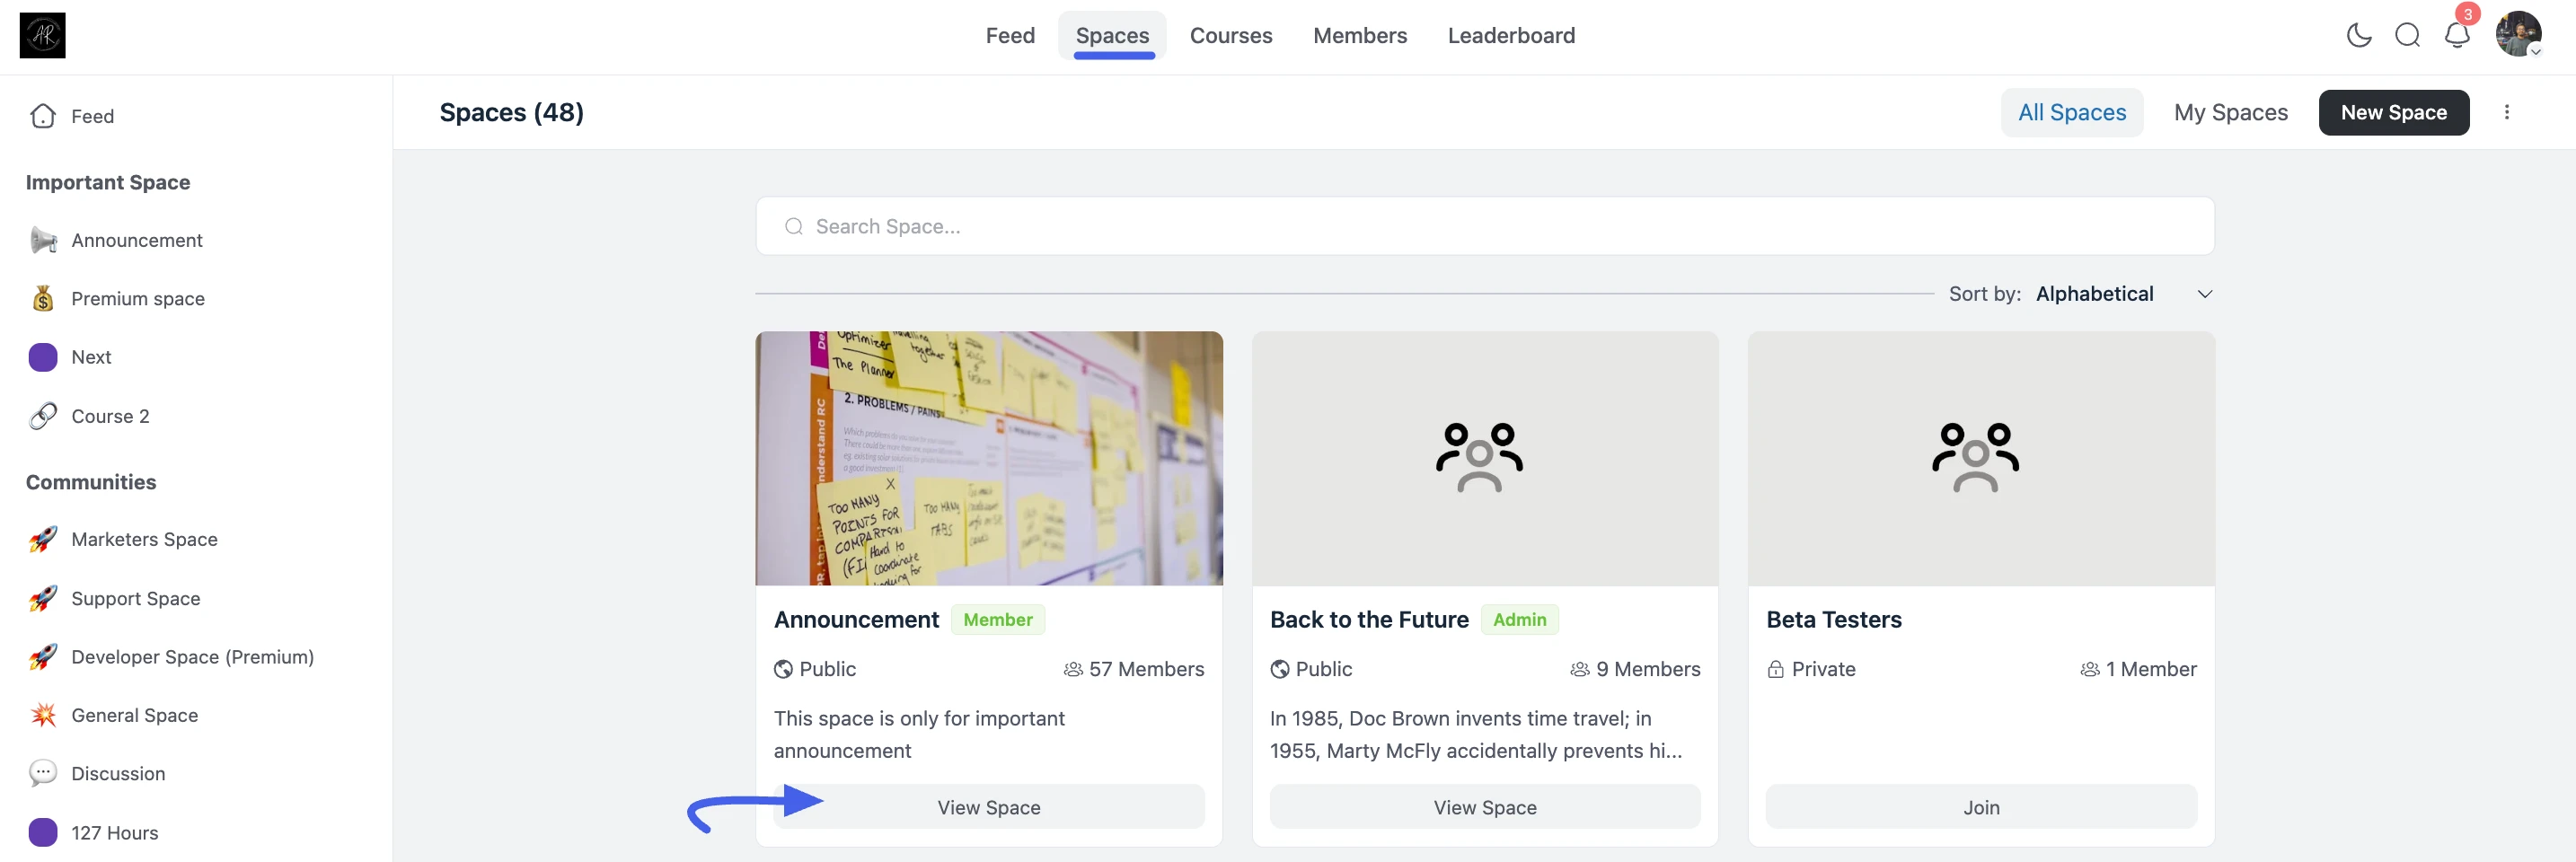
How to Assign or Change a User's Role in a Space
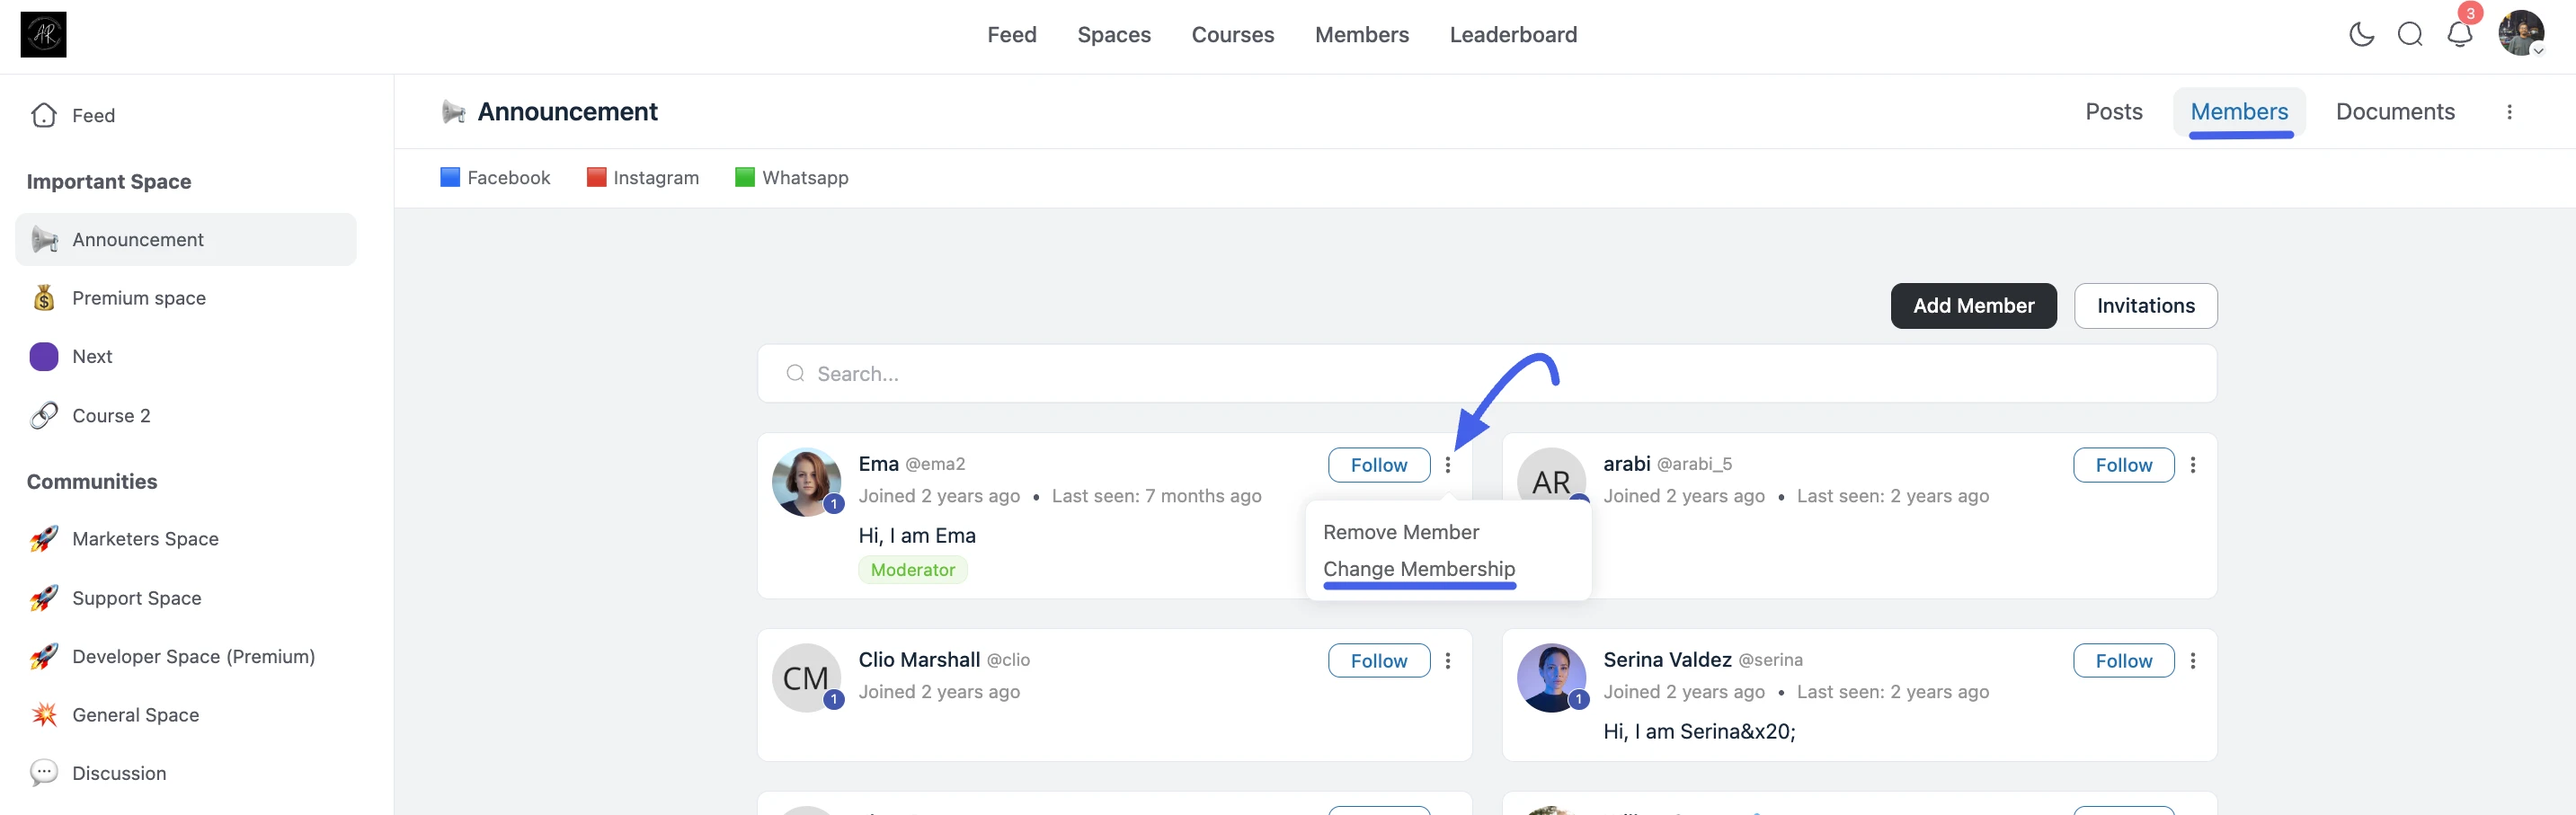
You can update a member's role from the Space's Members tab on the community portal.
- Navigate to the Space where you want to manage roles.
- Open the Members tab in the Space navigation.
- Use the Search bar to find the member, or browse the member list.
- Click the three-dot (...) menu on the member's card.
- Select Change Membership from the dropdown.
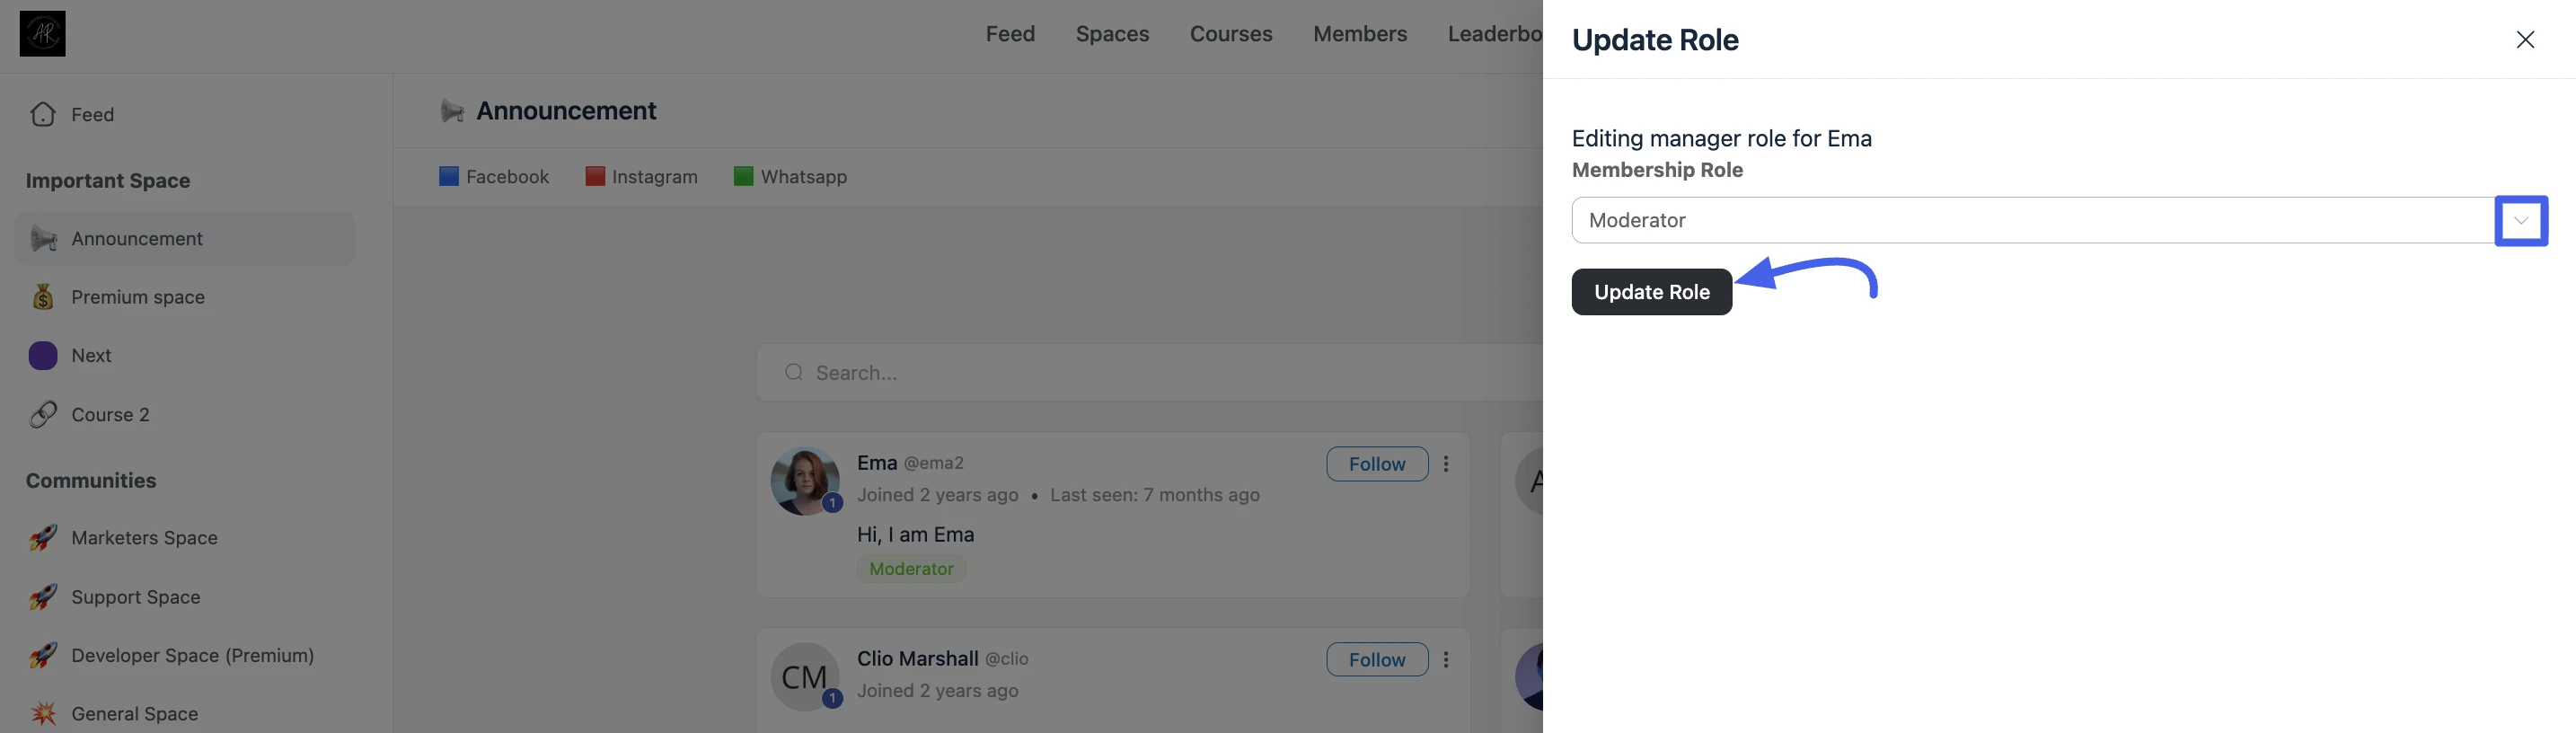
The Update Role panel opens on the right.
Open the Membership Role dropdown and select the new role: Member, Moderator, or Admin.
Click Update Role to save.
The member's role badge updates immediately, and their permissions apply the next time they visit that Space.
Other Member Actions
From the same three-dot (...) menu, you can also:
- Remove Member — Remove the user from the Space entirely.
Use Add Member or Invitations at the top of the Members tab to bring new users into the Space before assigning roles.