

Appearance
Connecting with FluentCRM
FluentCommunity integrates with FluentCRM, allowing you to run email campaigns, build automations, and add or remove CRM contacts to and from FluentCommunity members.
This article covers Automations, Contacts, and Email Campaigns that you can manage for FluentCommunity using FluentCRM.
Connecting FluentCRM with FluentCommunity
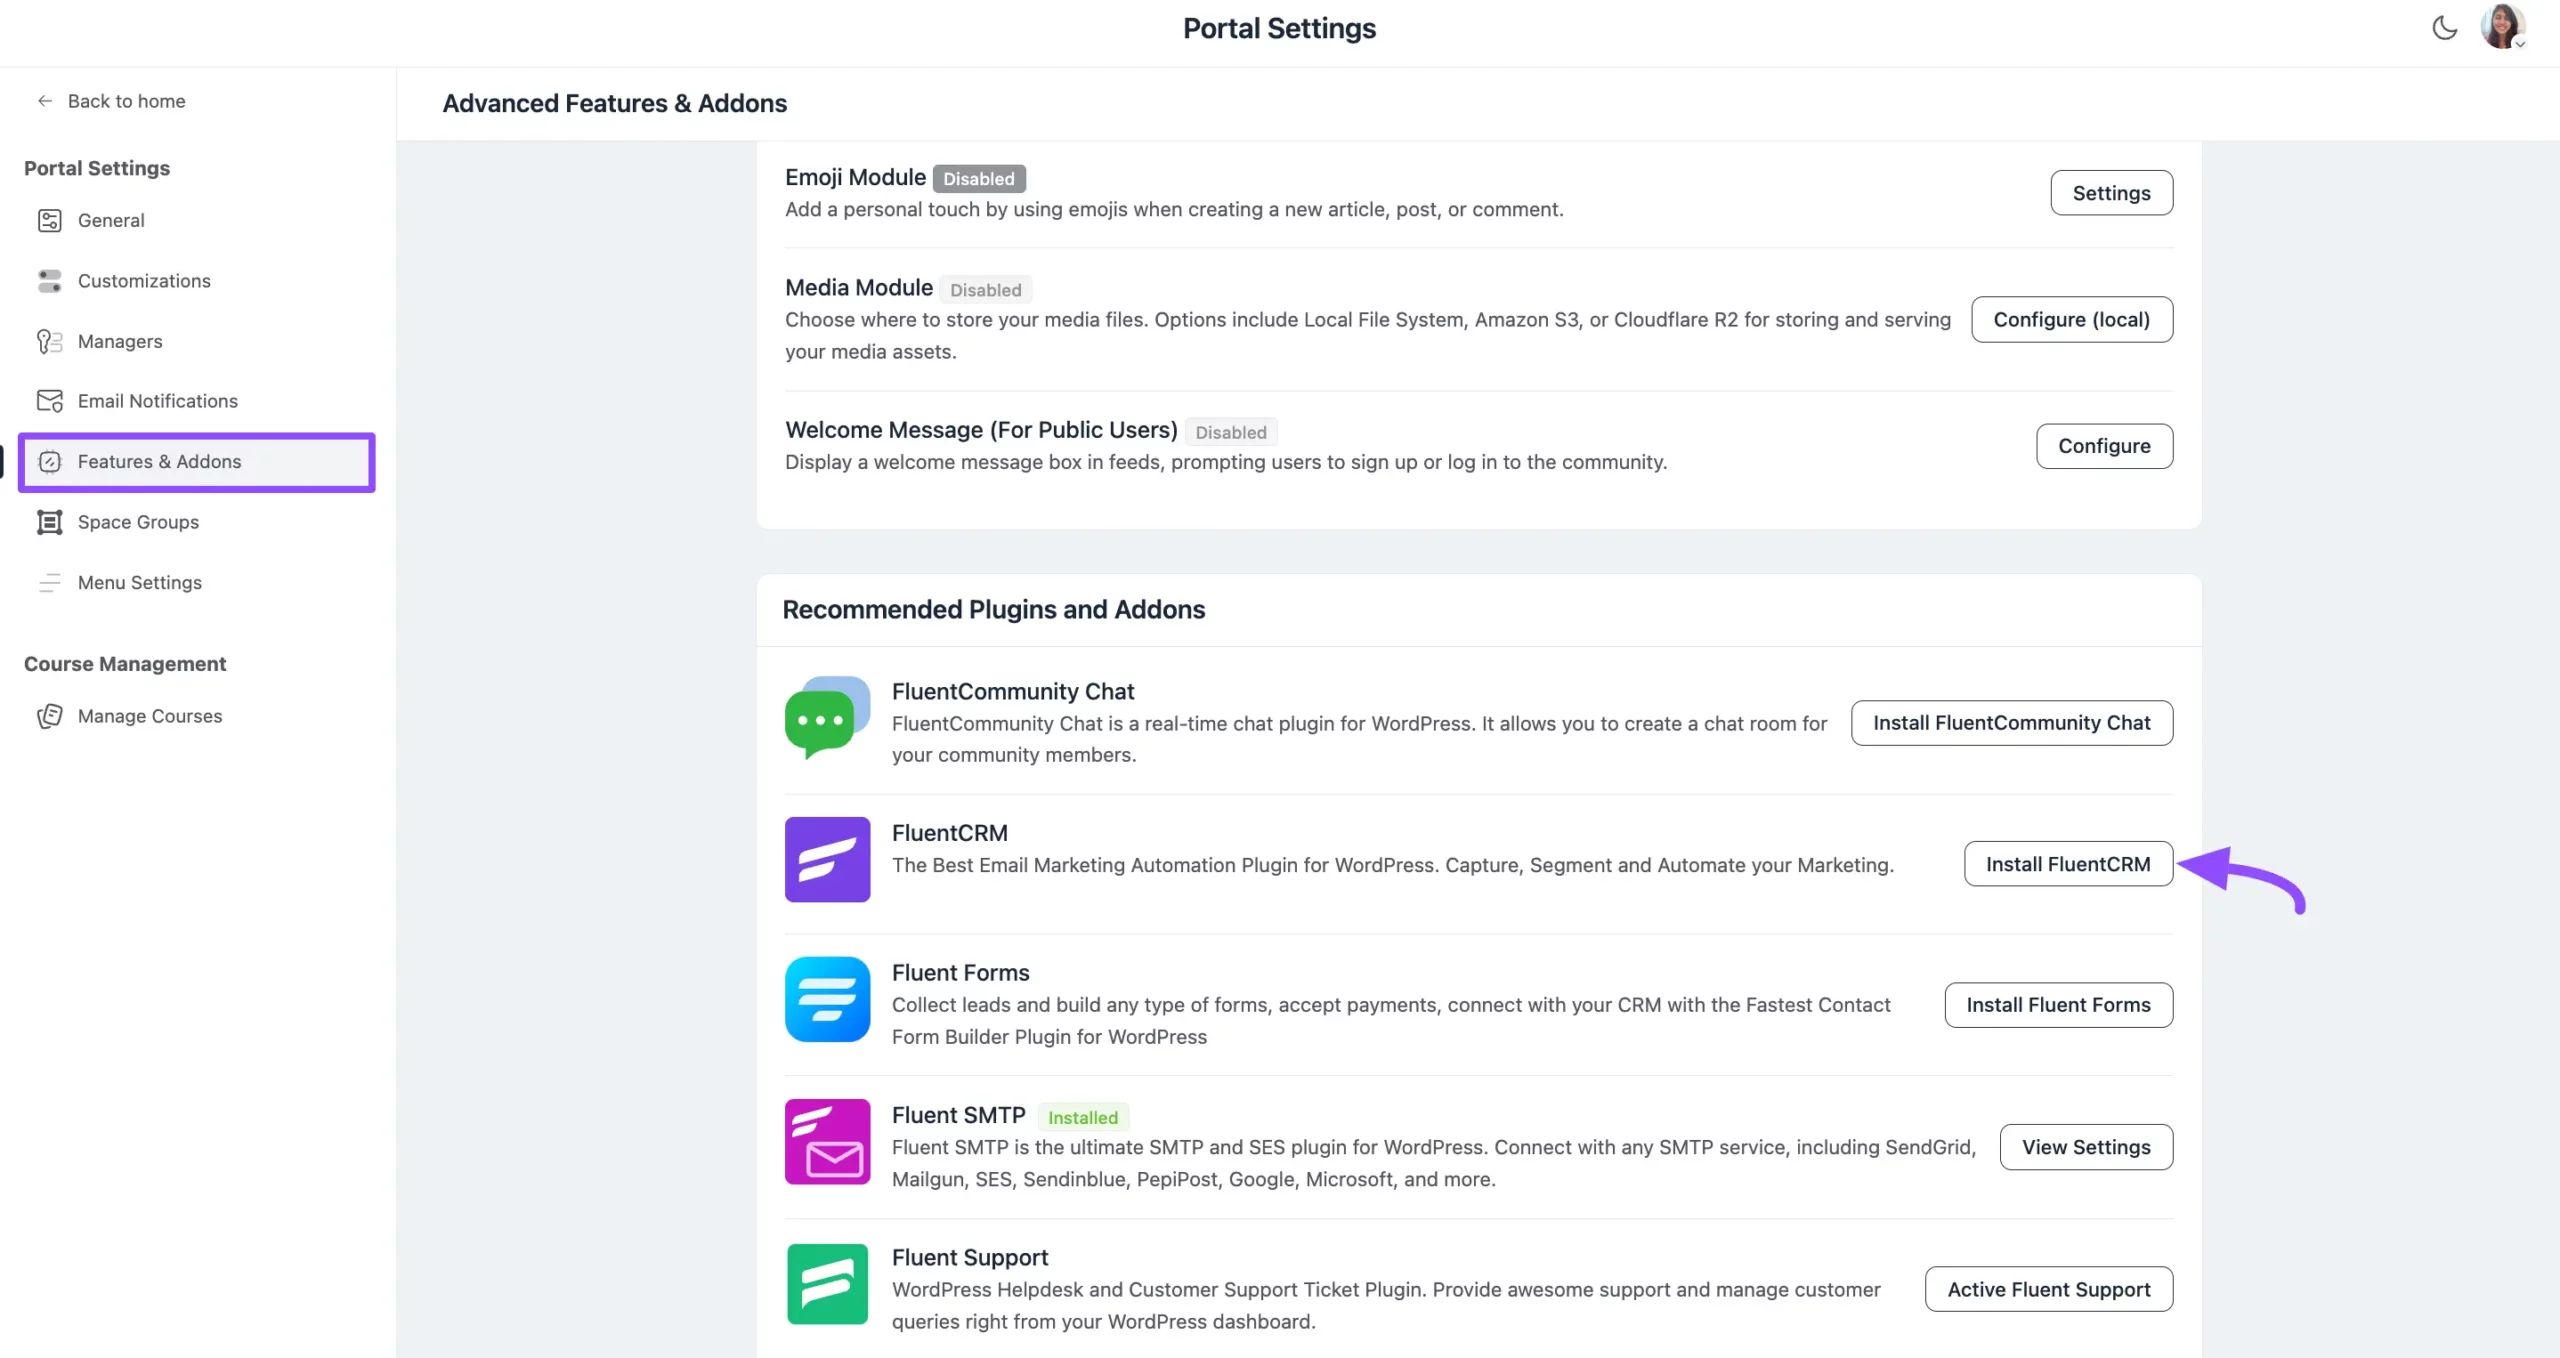
First, go to the Settings of FluentCommunity from the bottom-left corner.
Open the Features & Addons tab from the left sidebar and scroll down to the Recommended Plugins and Addons section.
Click the Install FluentCRM button to automatically set up the FluentCRM (free version) plugin with your FluentCommunity.
TIP
You don't need the Pro version of the FluentCRM plugin to perform all the automated tasks for FluentCommunity.
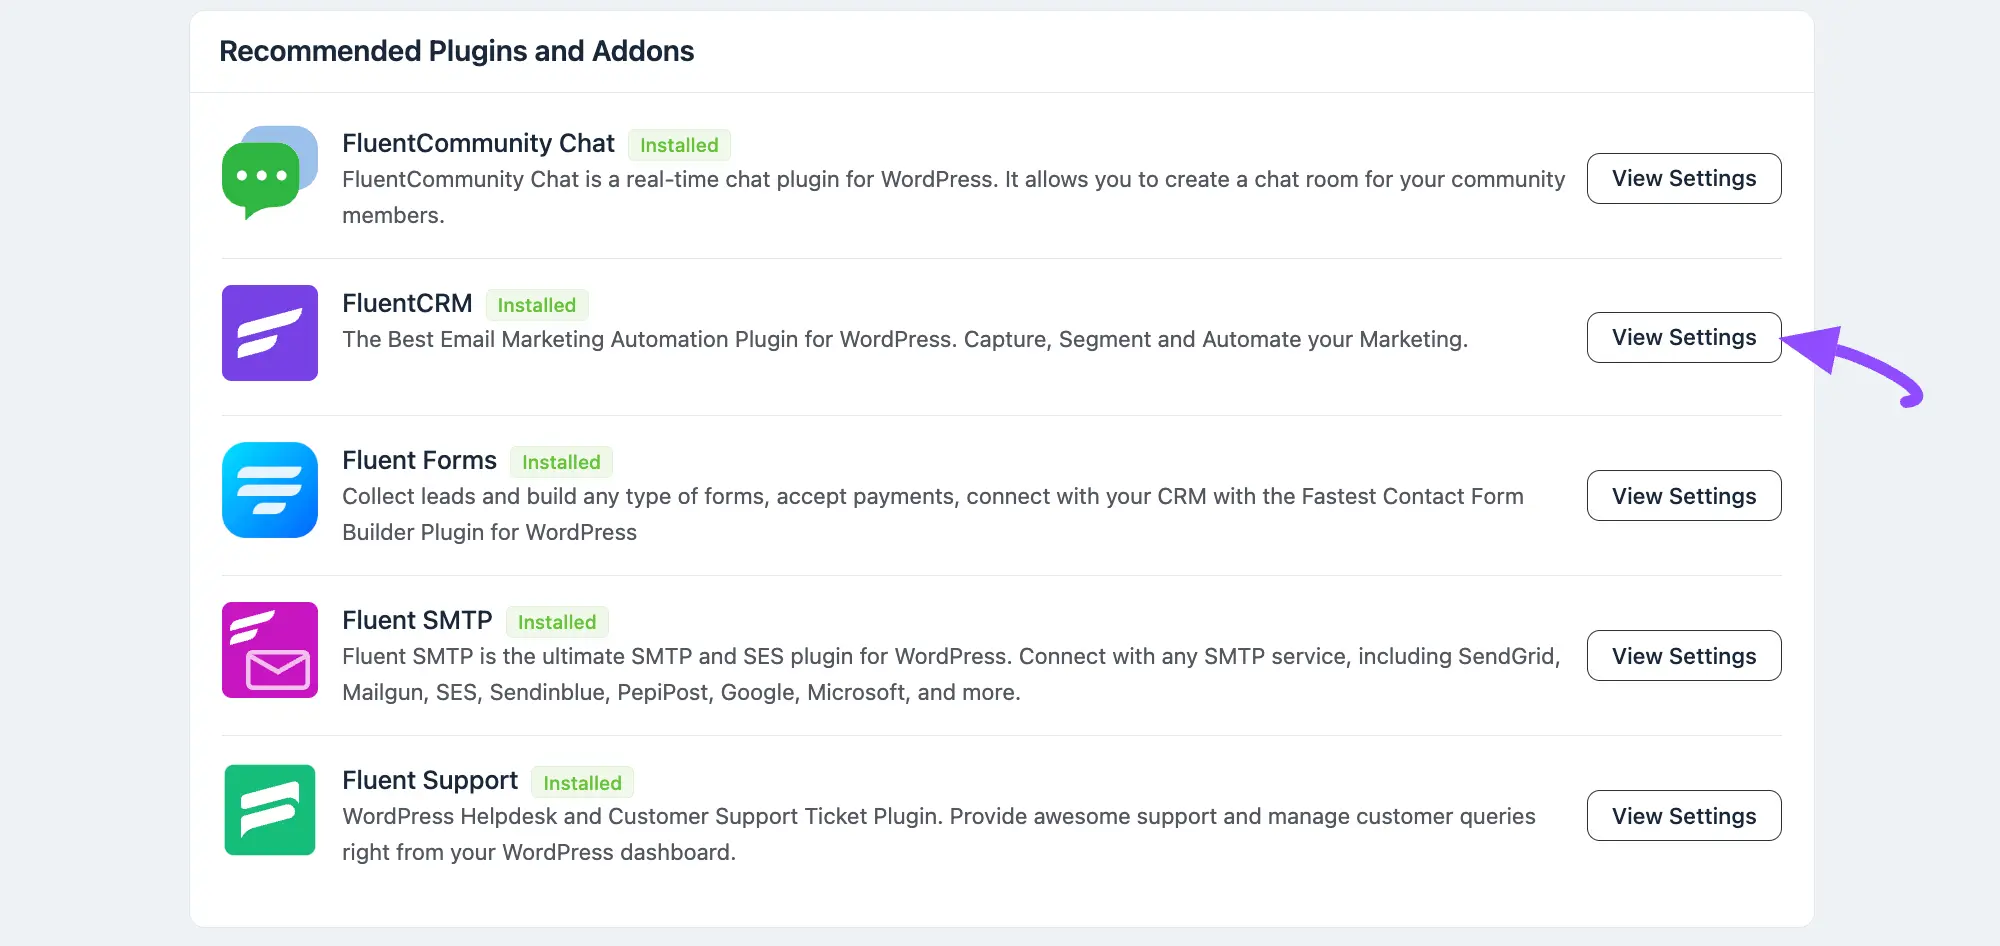
Now, click the View Settings button and it redirects you to the FluentCRM Dashboard.
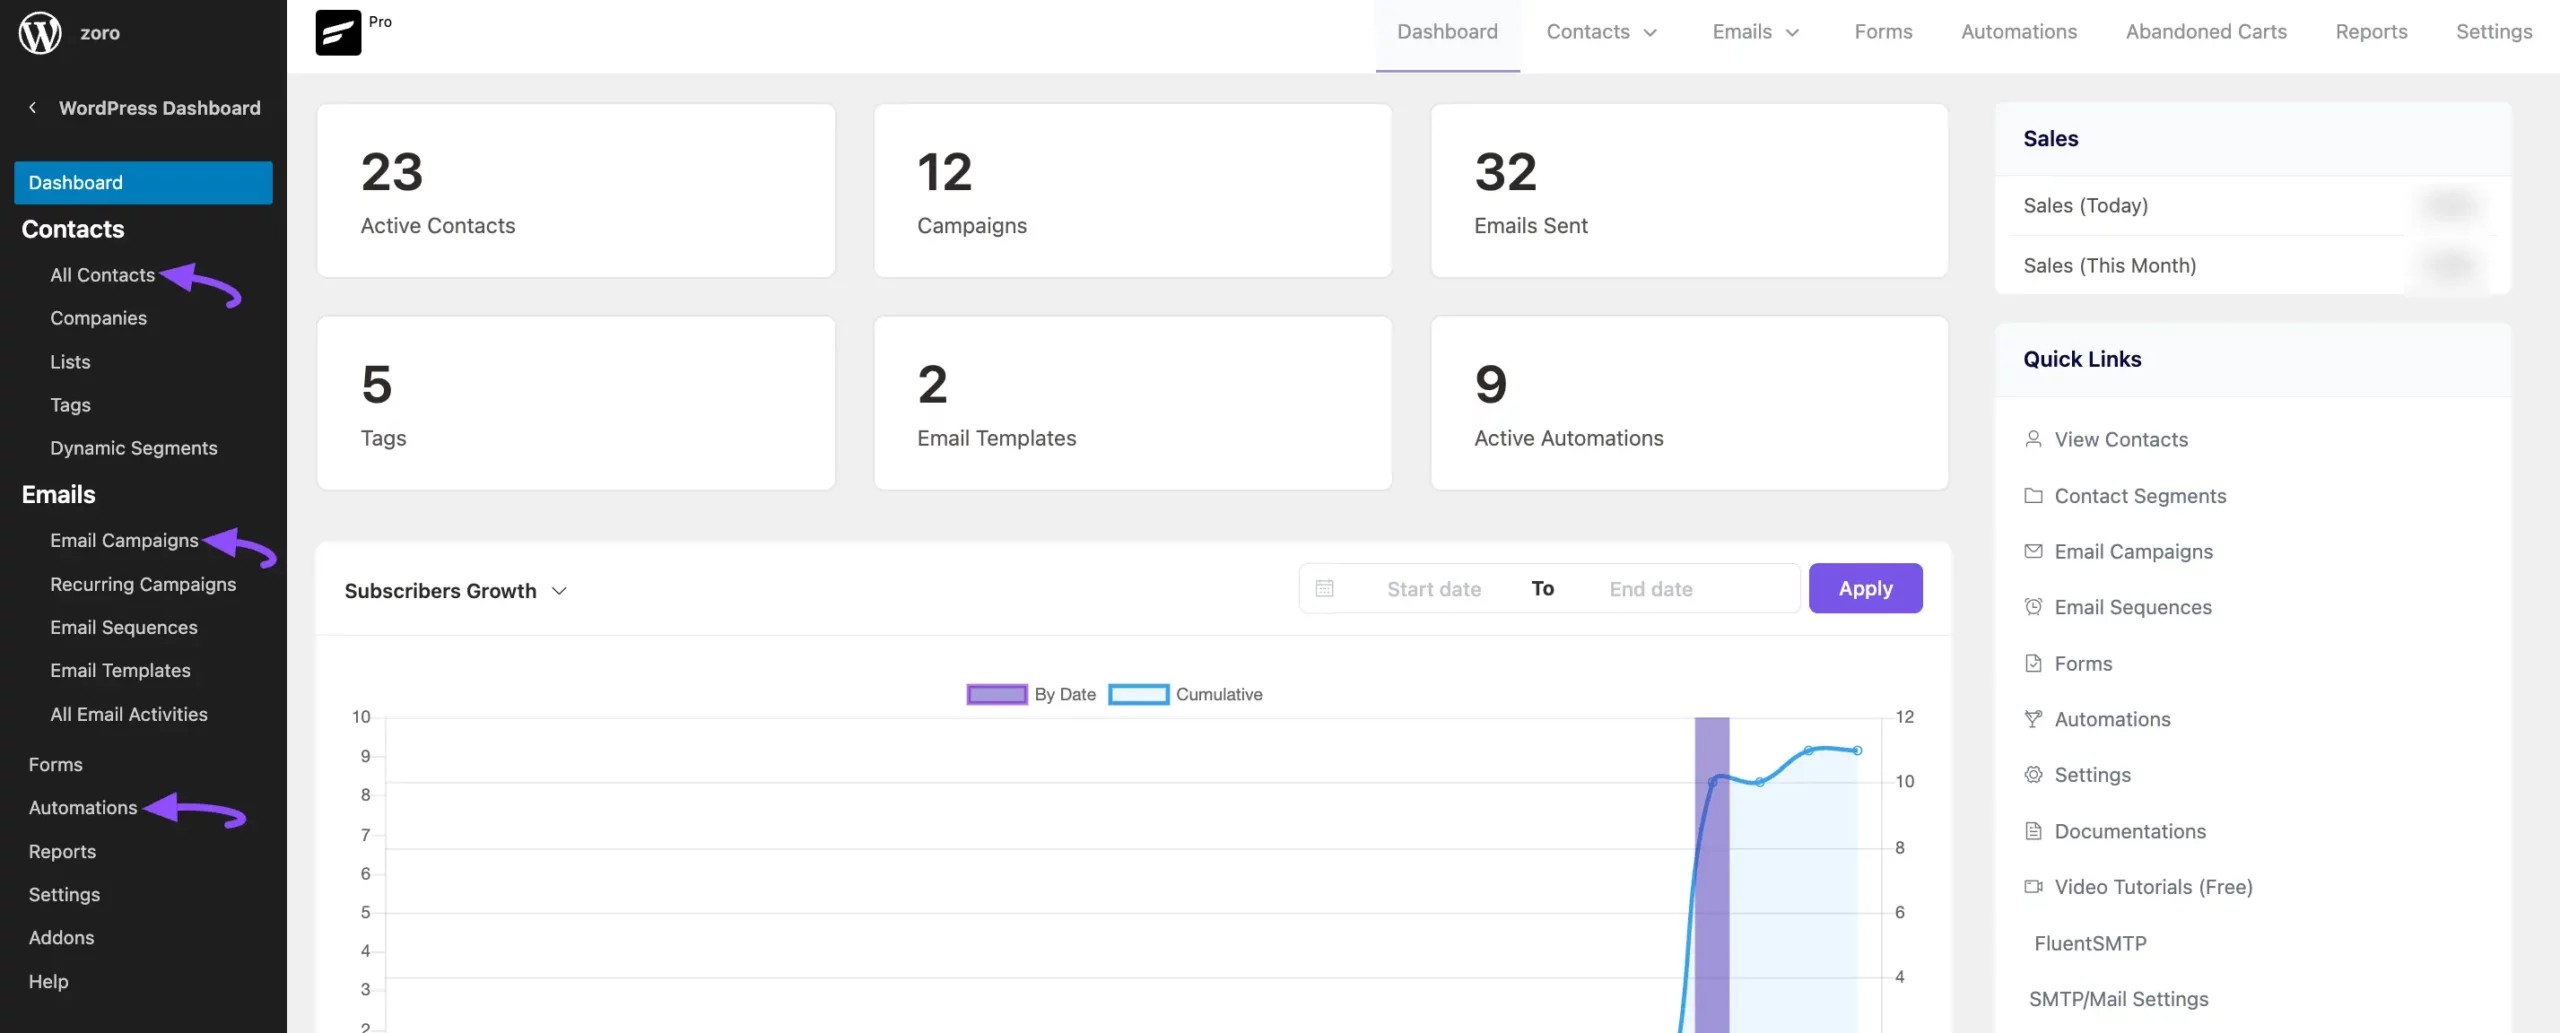
From the various options of FluentCRM, we will discuss three necessary sections:
- Automations
- All Contacts
- Email Campaigns
1. Automations
FluentCRM provides Triggers and Actions specifically designed for FluentCommunity to run automations.
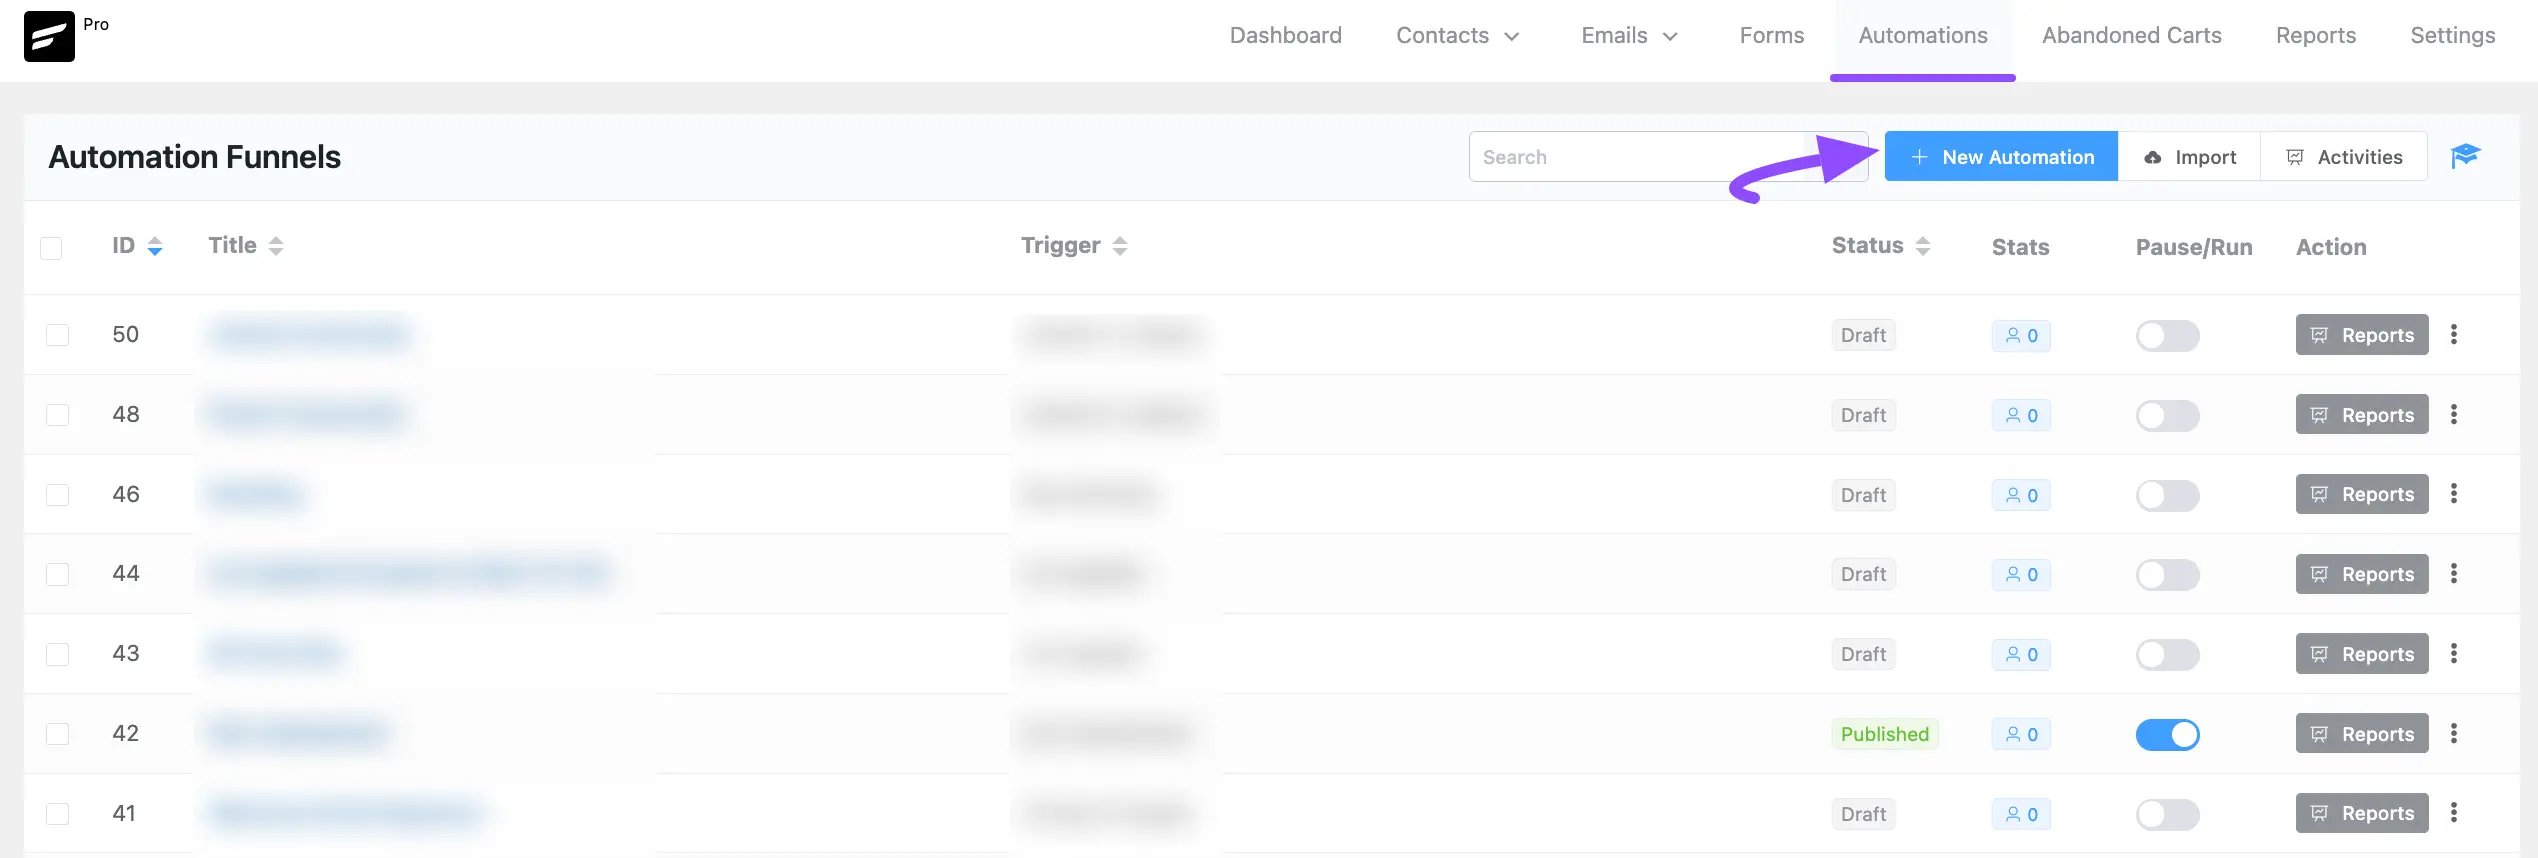
To get all the Triggers and Actions, go to the Automations section from the FluentCRM navbar and click the + New Automation button.
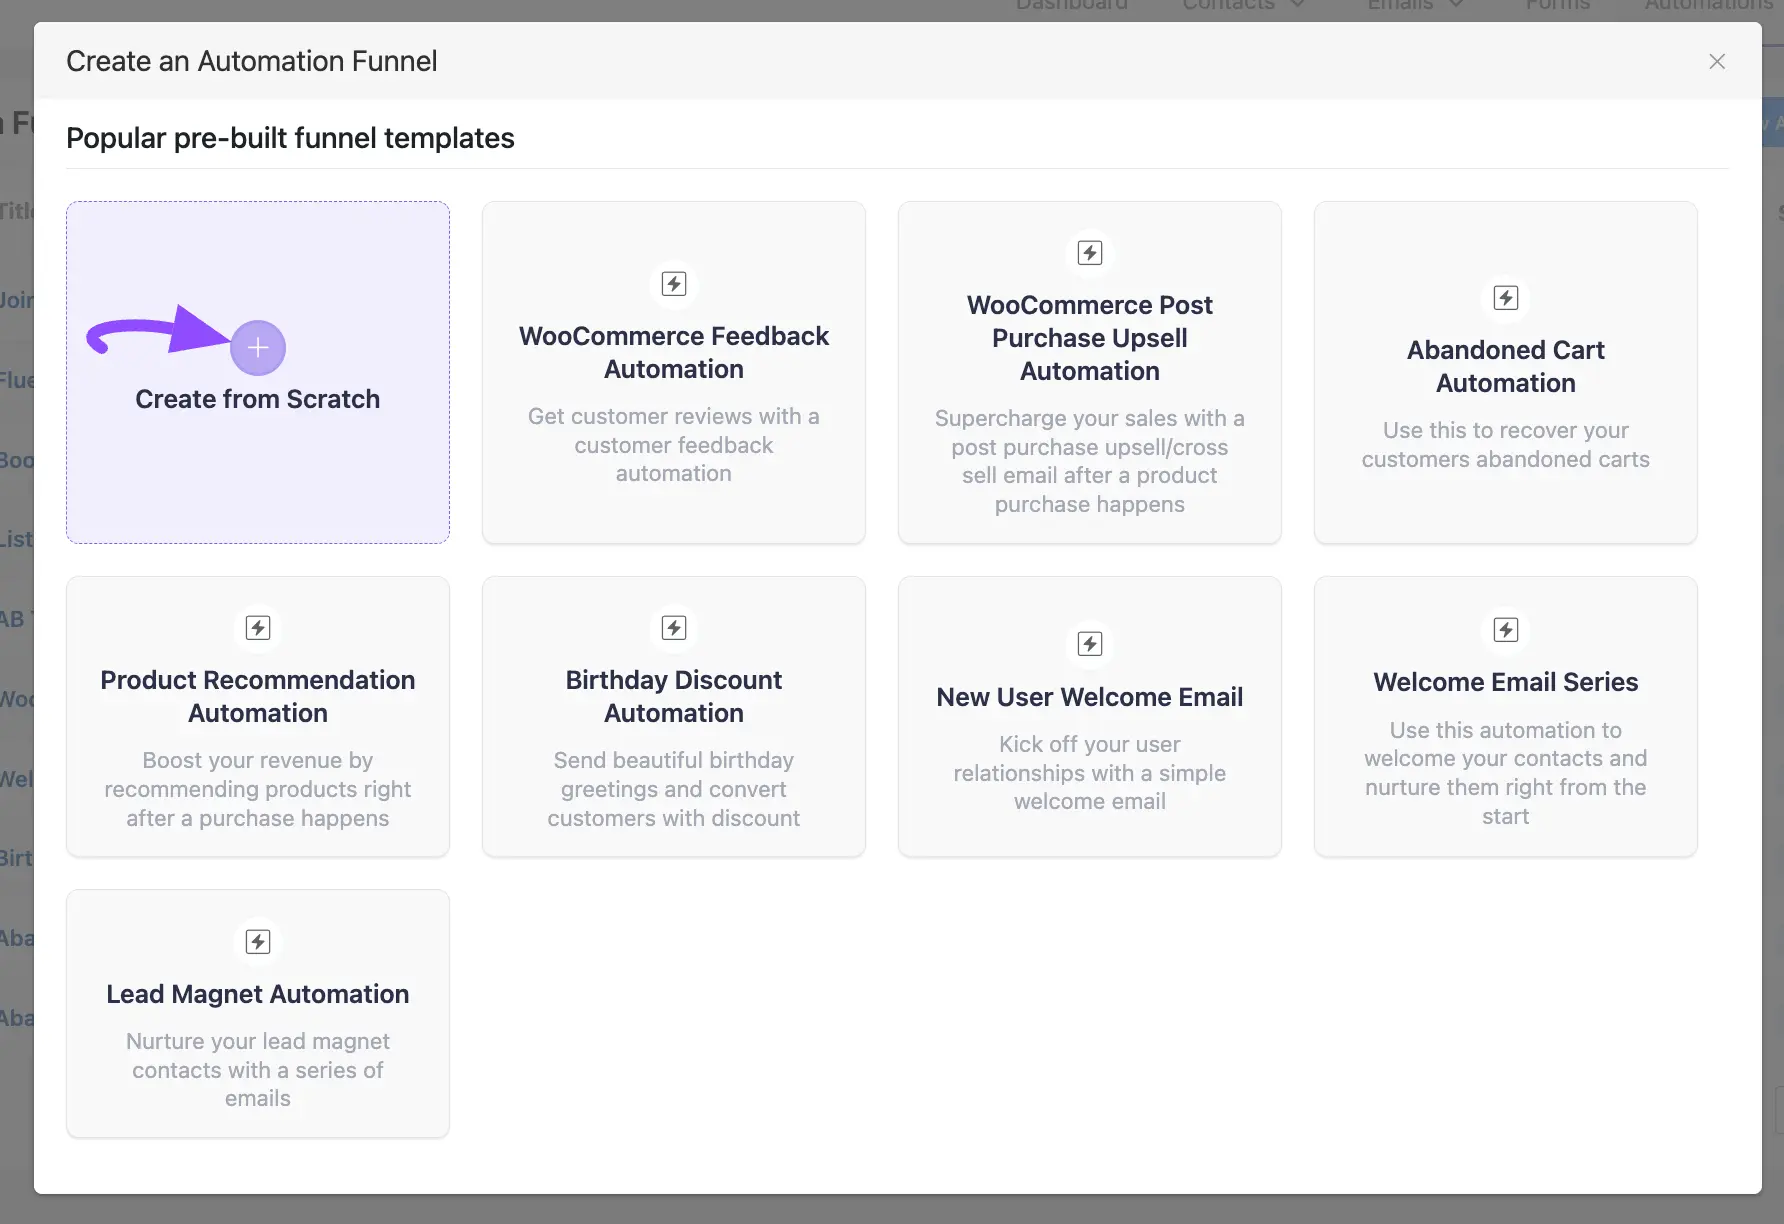
A pop-up page will appear with all the popular pre-built funnel templates, where the full funnel diagram is ready automatically. To create your automation funnel from scratch, click the Create from Scratch tab.
Triggers for FluentCommunity
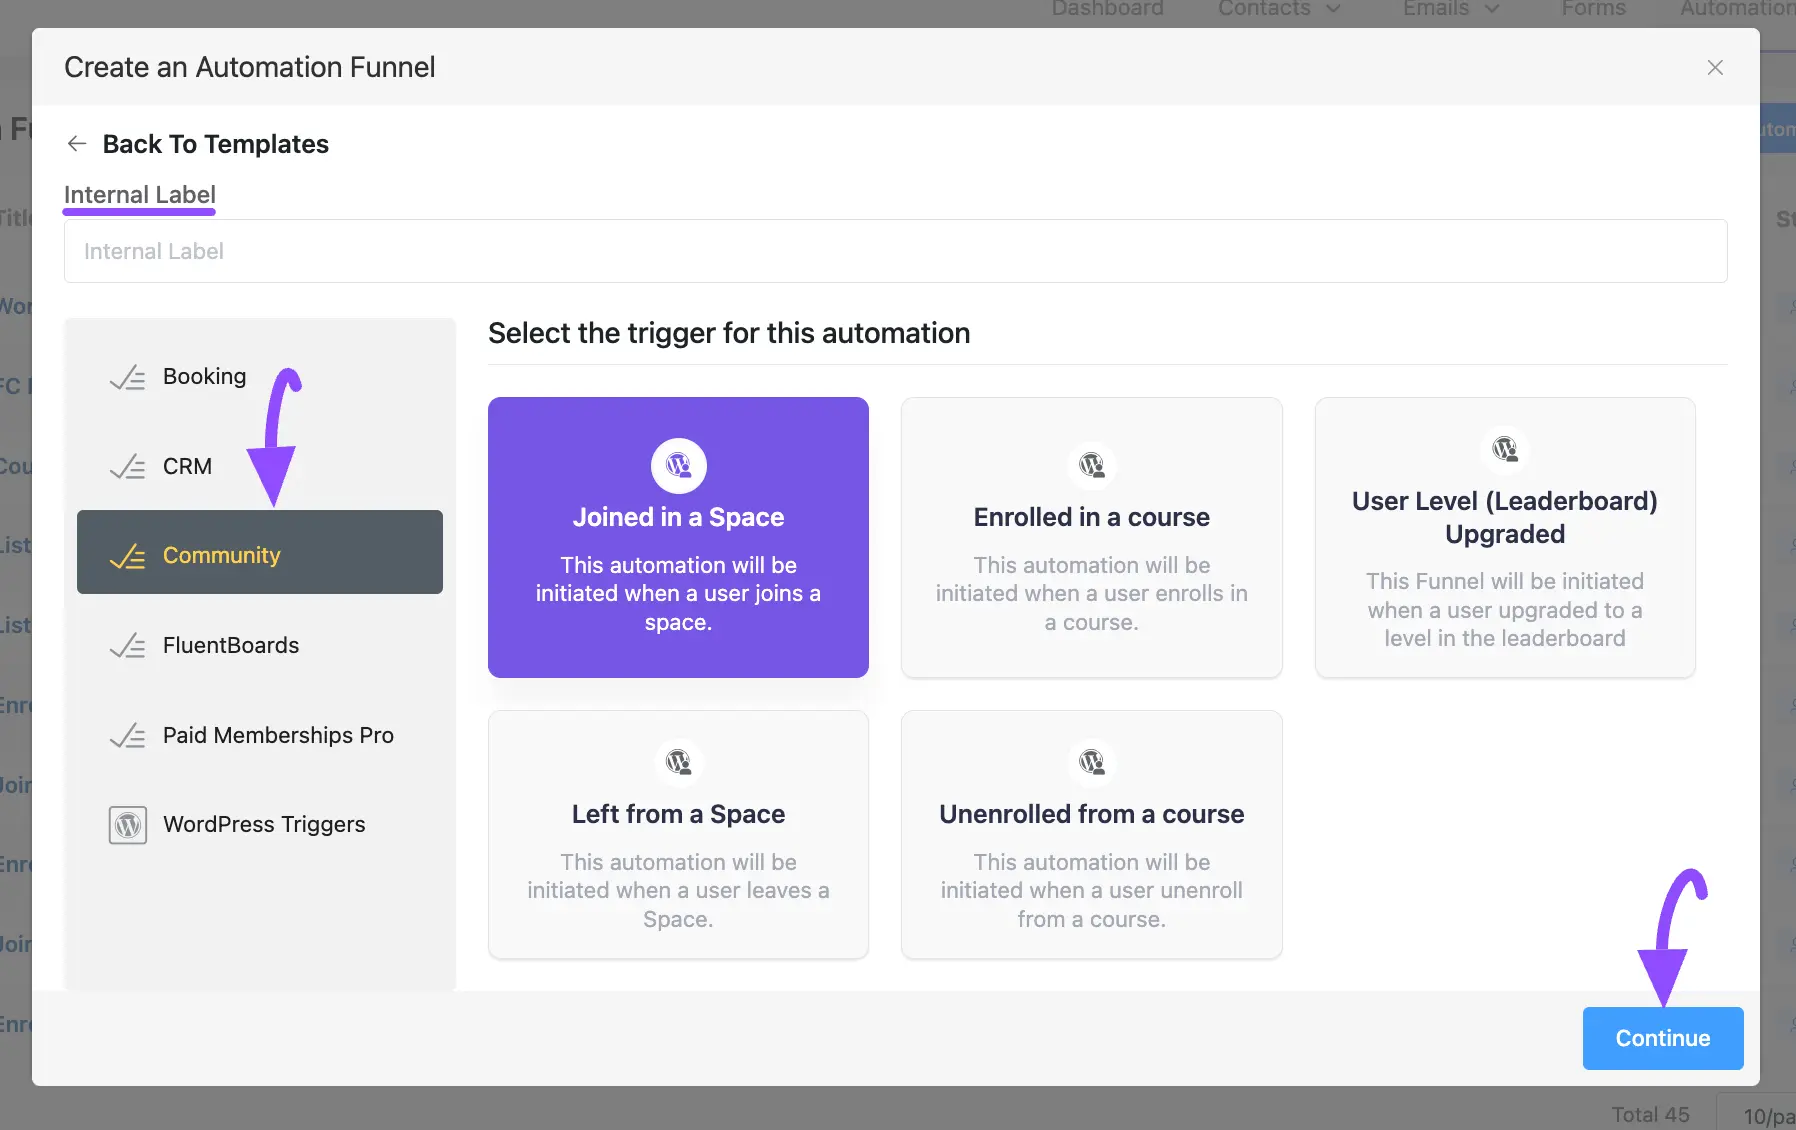
Go to Community from the left sidebar and all the Triggers for FluentCommunity will appear:
- Joined in a Space: Automation starts when a user joins a Space in FluentCommunity.
- Enrolled in a Course: Automation starts when a user enrolls in a Course in FluentCommunity.
- User Level (Leaderboard) Upgraded: Automation starts when a user upgrades to a level in the FluentCommunity leaderboard.
- Left from a Space: Automation starts when a user leaves a Space in FluentCommunity.
- Unenrolled from a Course: Automation starts when a user unenrolls from a Course in FluentCommunity.
Once you select your desired Trigger, click the Continue button. You can also give a Title to your automation in the Internal Label field for easy referencing later — if you leave it blank, the title is set automatically based on your chosen trigger.
Actions for FluentCommunity
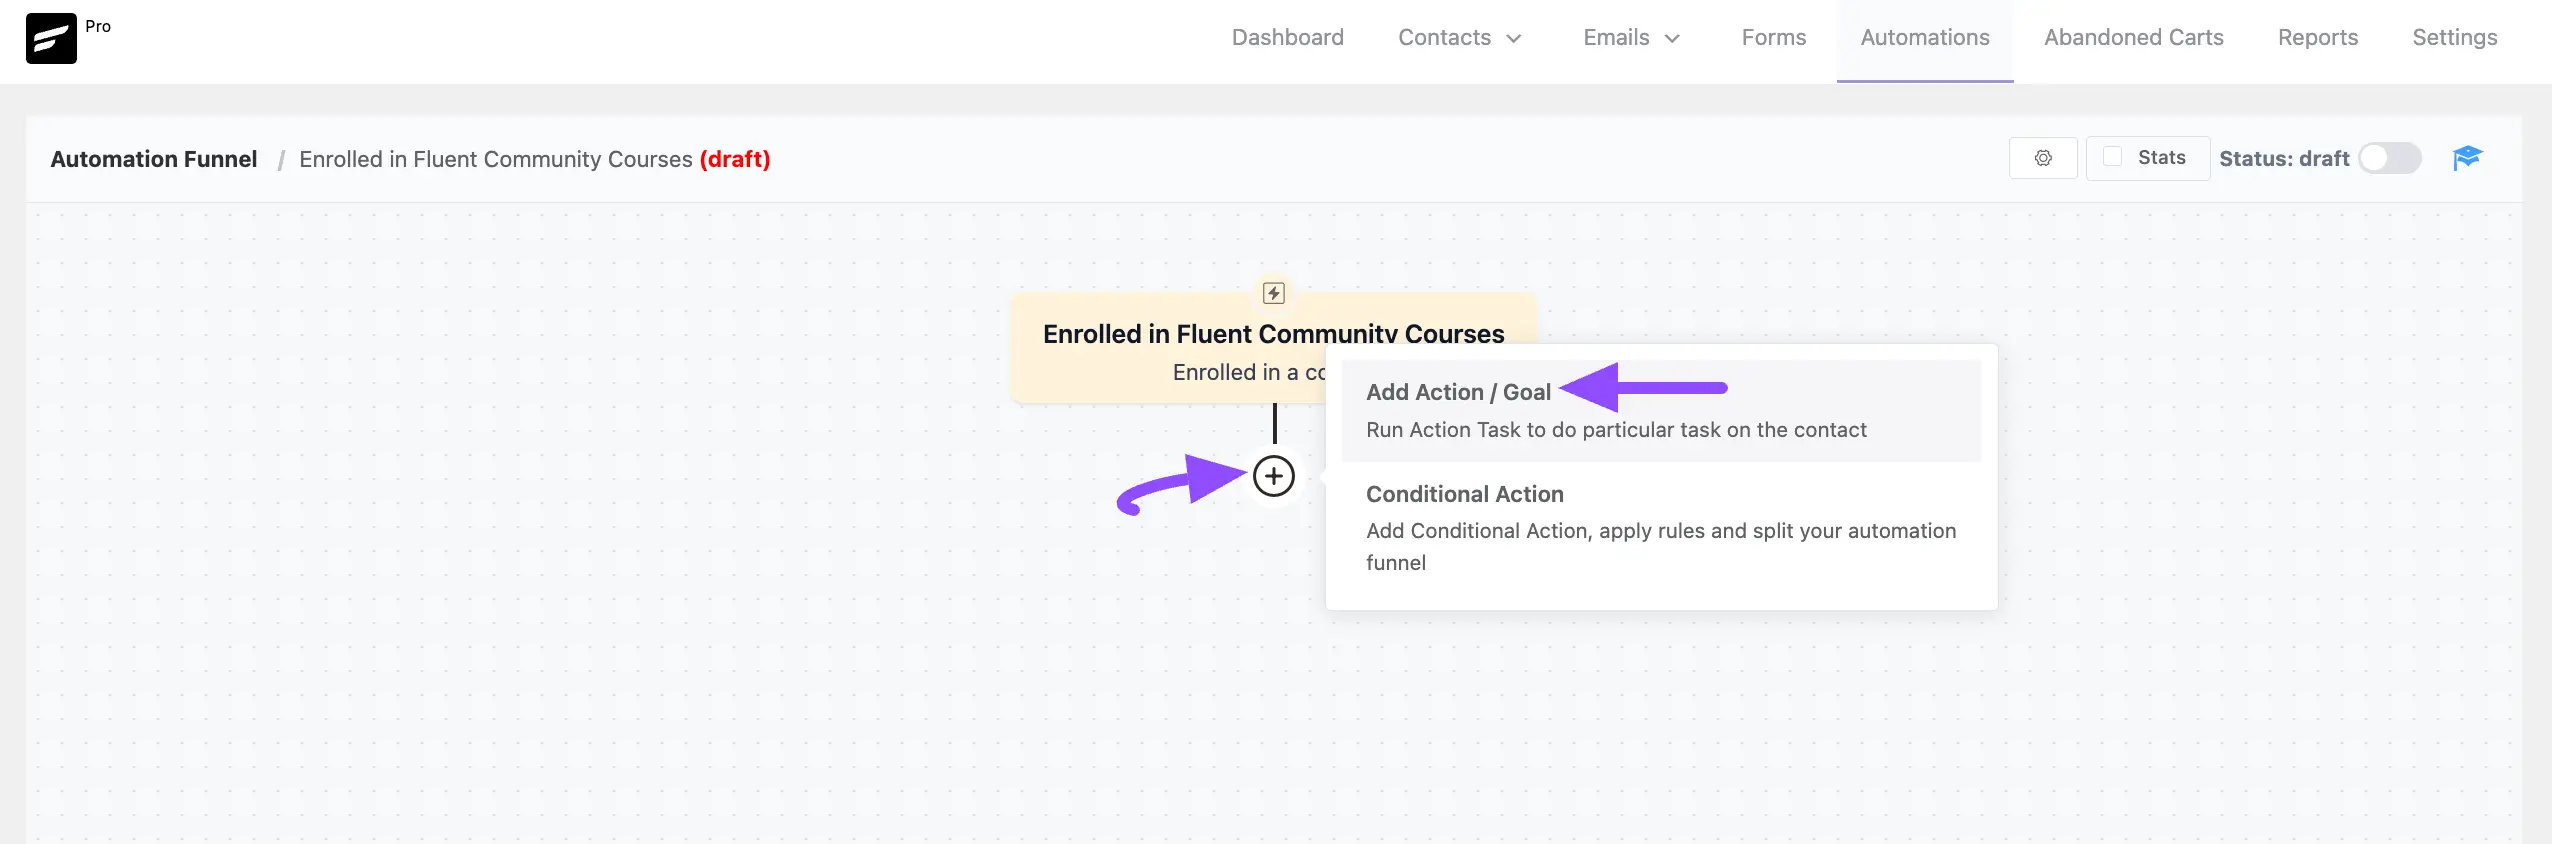
Once you choose the Trigger, you are redirected to a screen where you can add the Actions for FluentCommunity.
Click the Plus icon (or hover over it and click Add Action / Goal) to view all the FluentCommunity Actions.
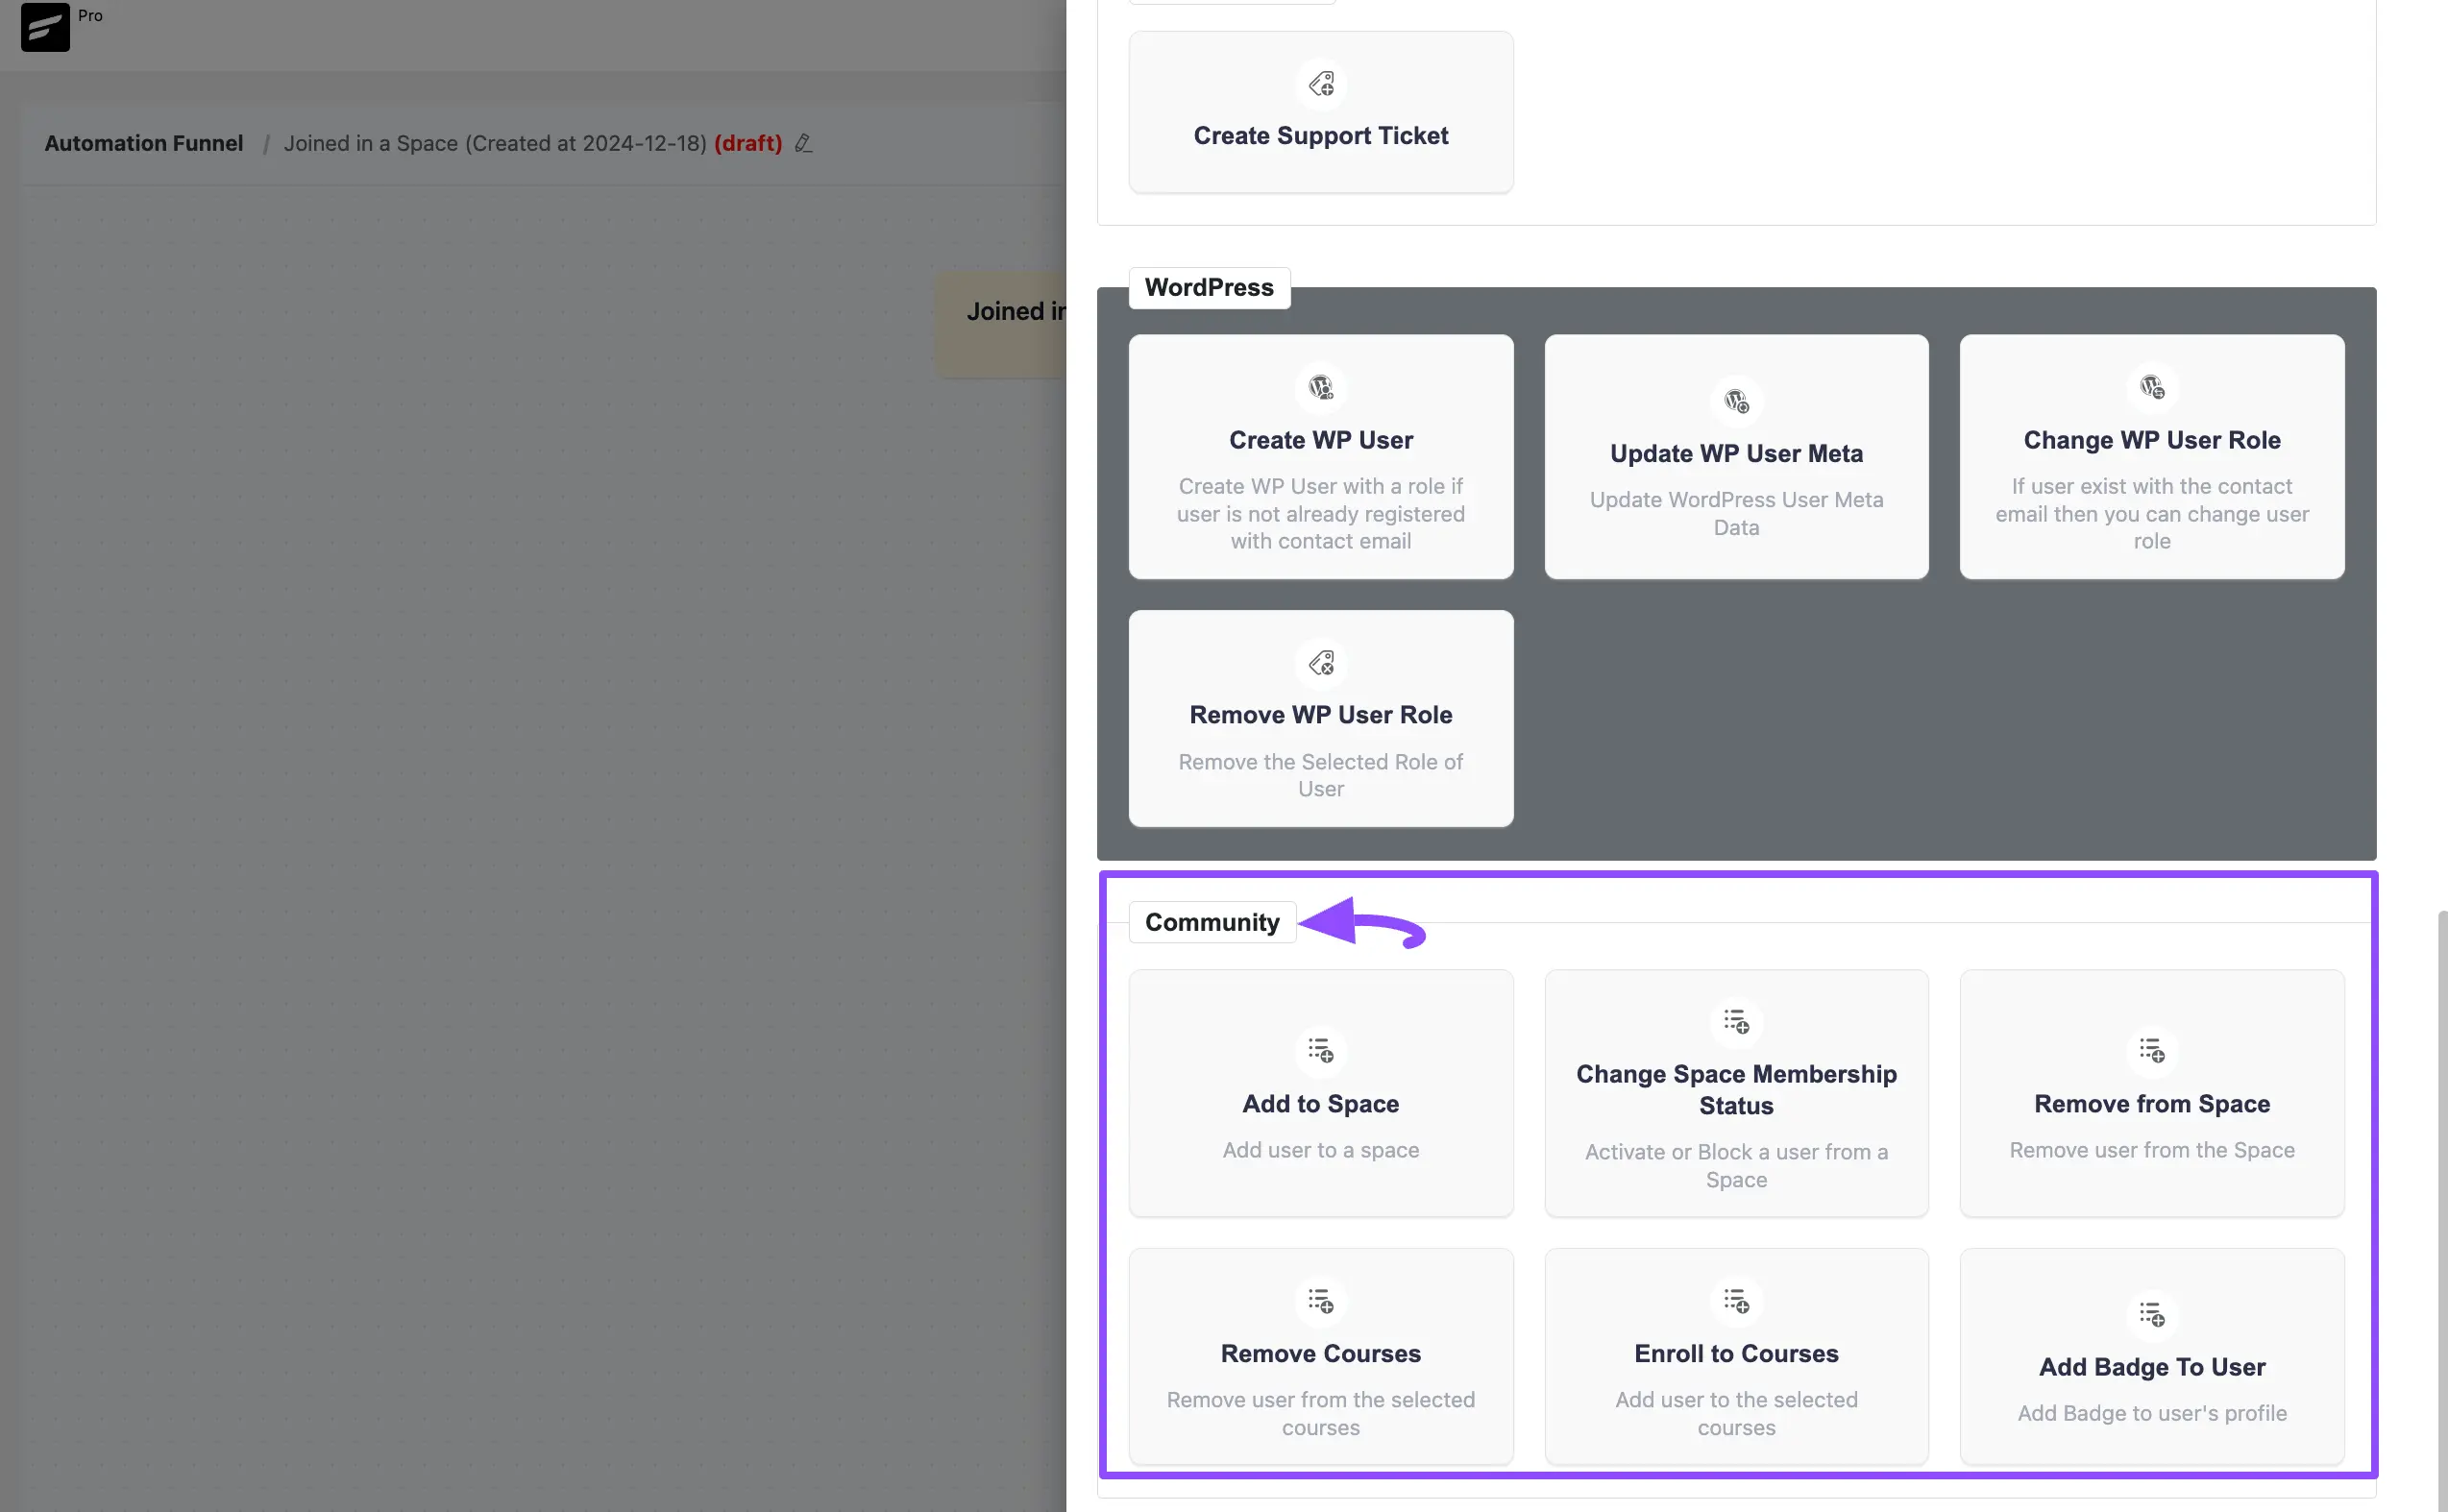
A pop-up page will appear with the primary Action blocks to choose from:
- Add to Space: Choose the Space where users will be added once the automation starts.
- Change Space Membership Status: Change a user's Space membership status (Active, Pending, or Blocked) when the automation starts.
- Remove from Space: Select the Space the user will be removed from after the automation starts.
- Remove Courses: Select the Course(s) the users will be removed from after the automation starts.
- Enroll to Course: Choose the Course(s) where the users will be added once the automation starts.
- Add Badge To User: Add badges to the user profile of community members once the automation starts.
Apart from the actions shown above, FluentCRM comes with many other actions. To see the full list, click here.
2. All Contacts
You can add or remove users directly from the Contacts of FluentCRM to the Spaces of FluentCommunity.
First, go to All Contacts under the Contacts section from the FluentCRM navbar.
Select contacts either individually by clicking the checkboxes or all at once by clicking the icon before the Email column. Then, click the Dropdown Arrow of the Select Action field, and choose the desired action for FluentCommunity.
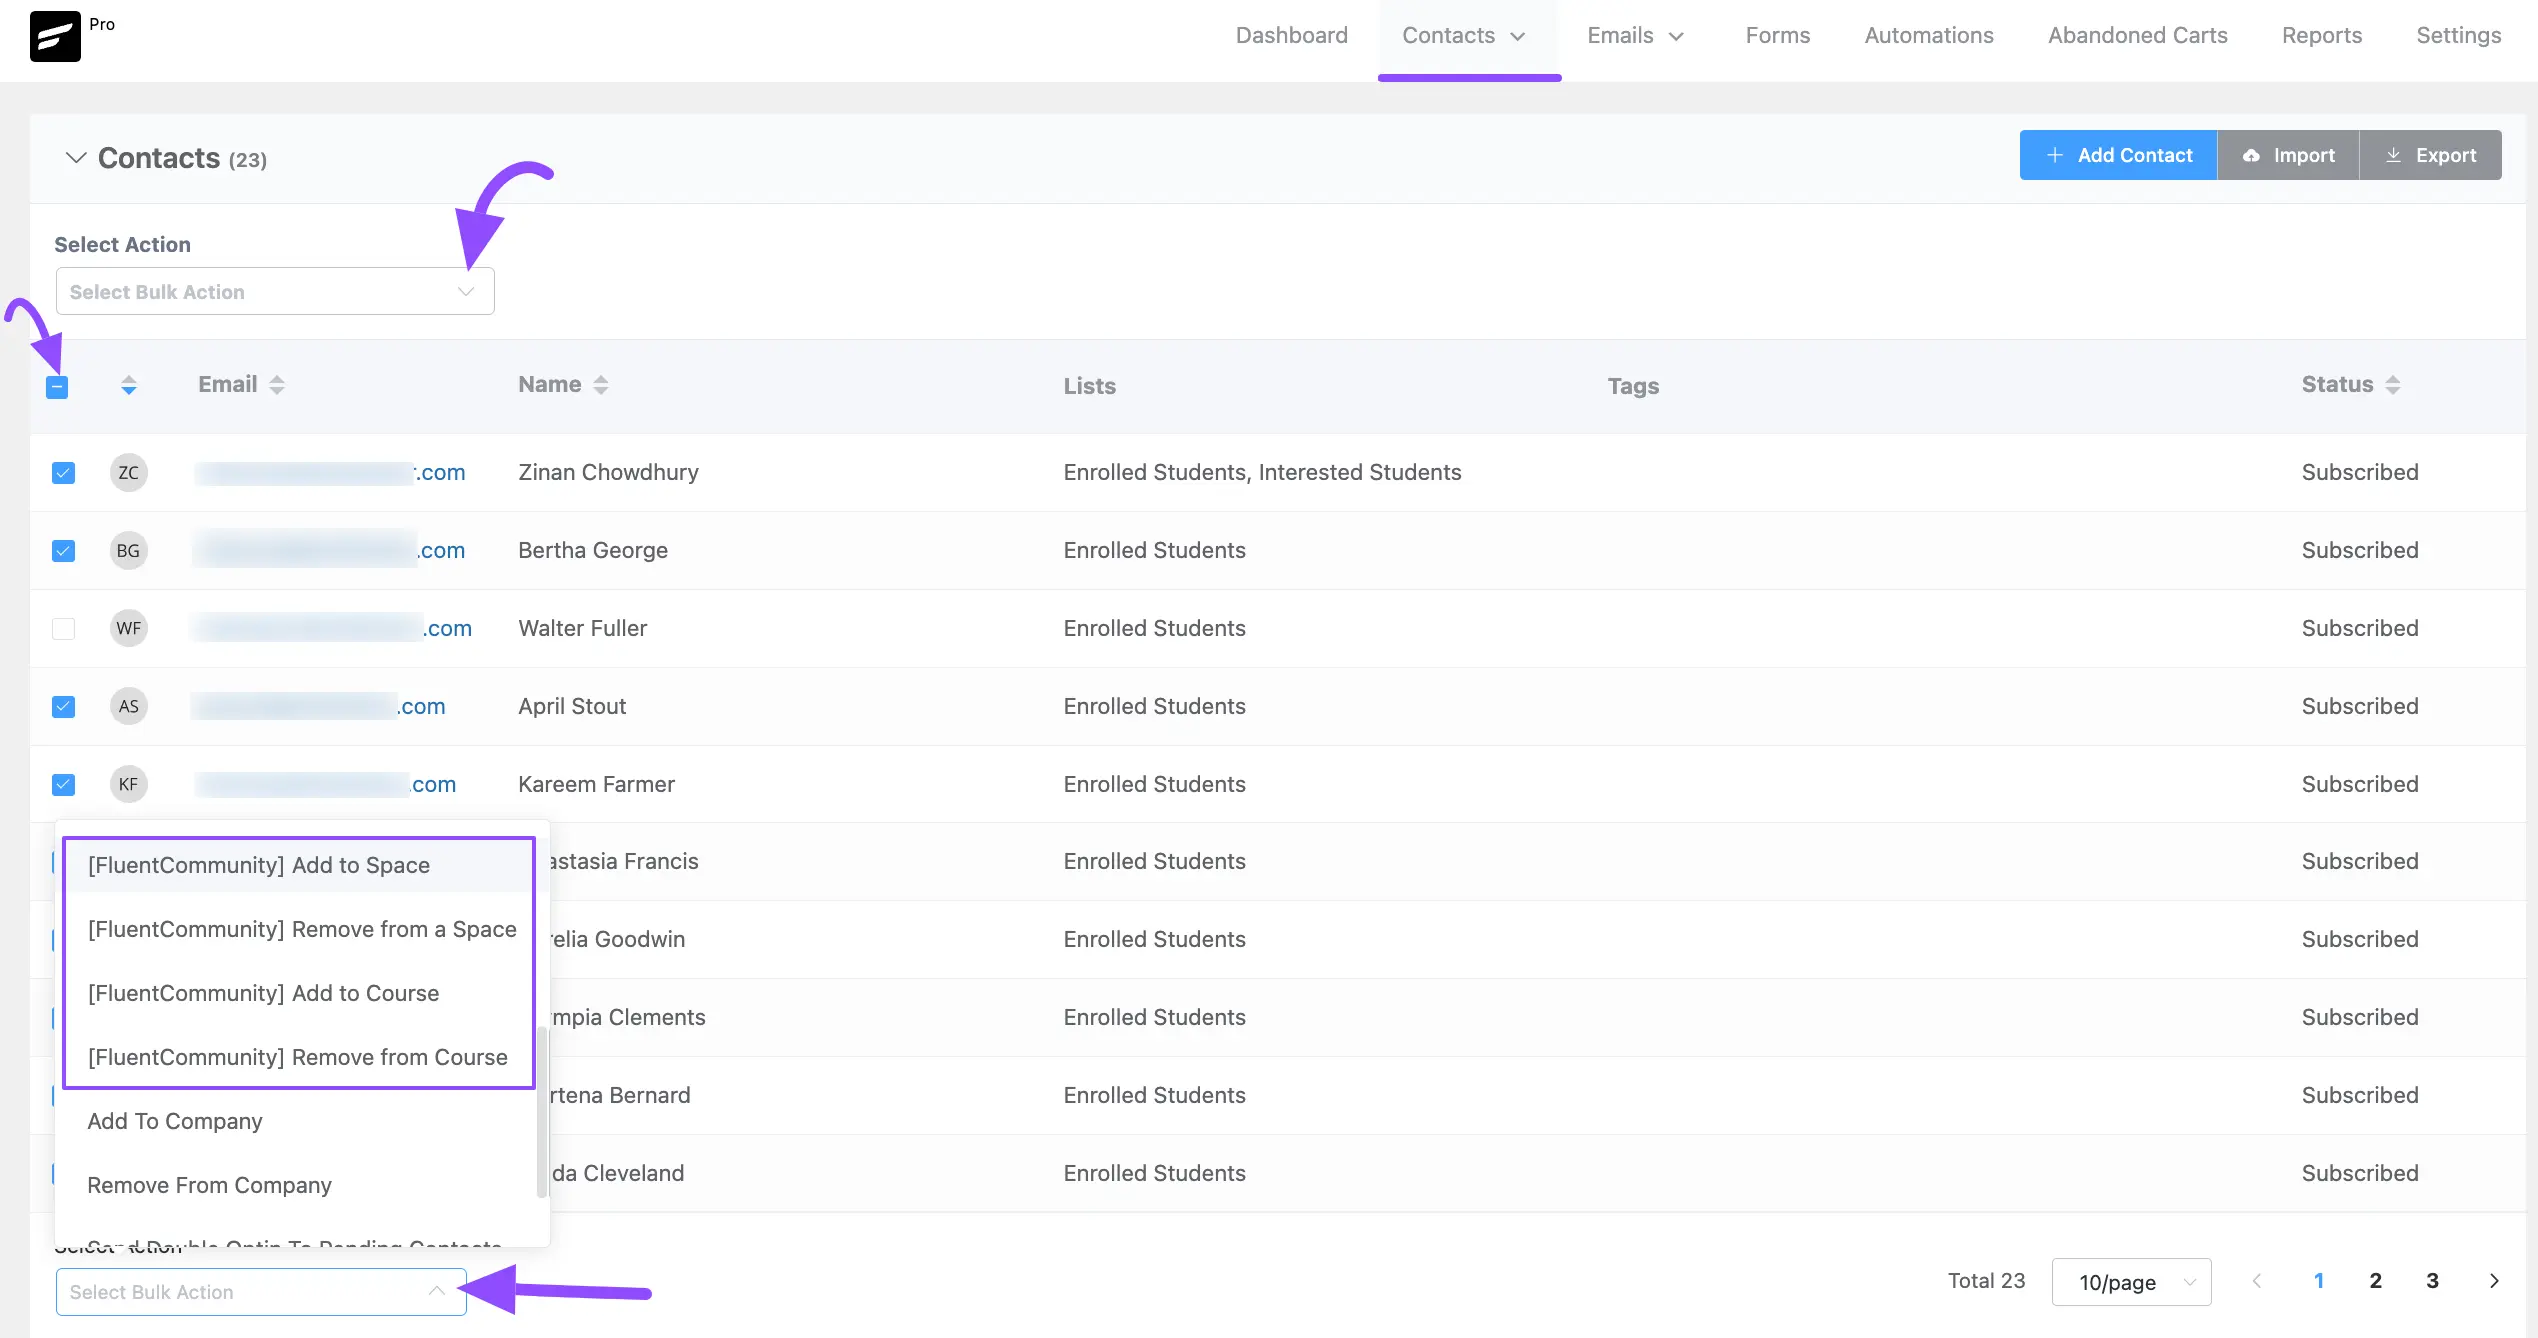
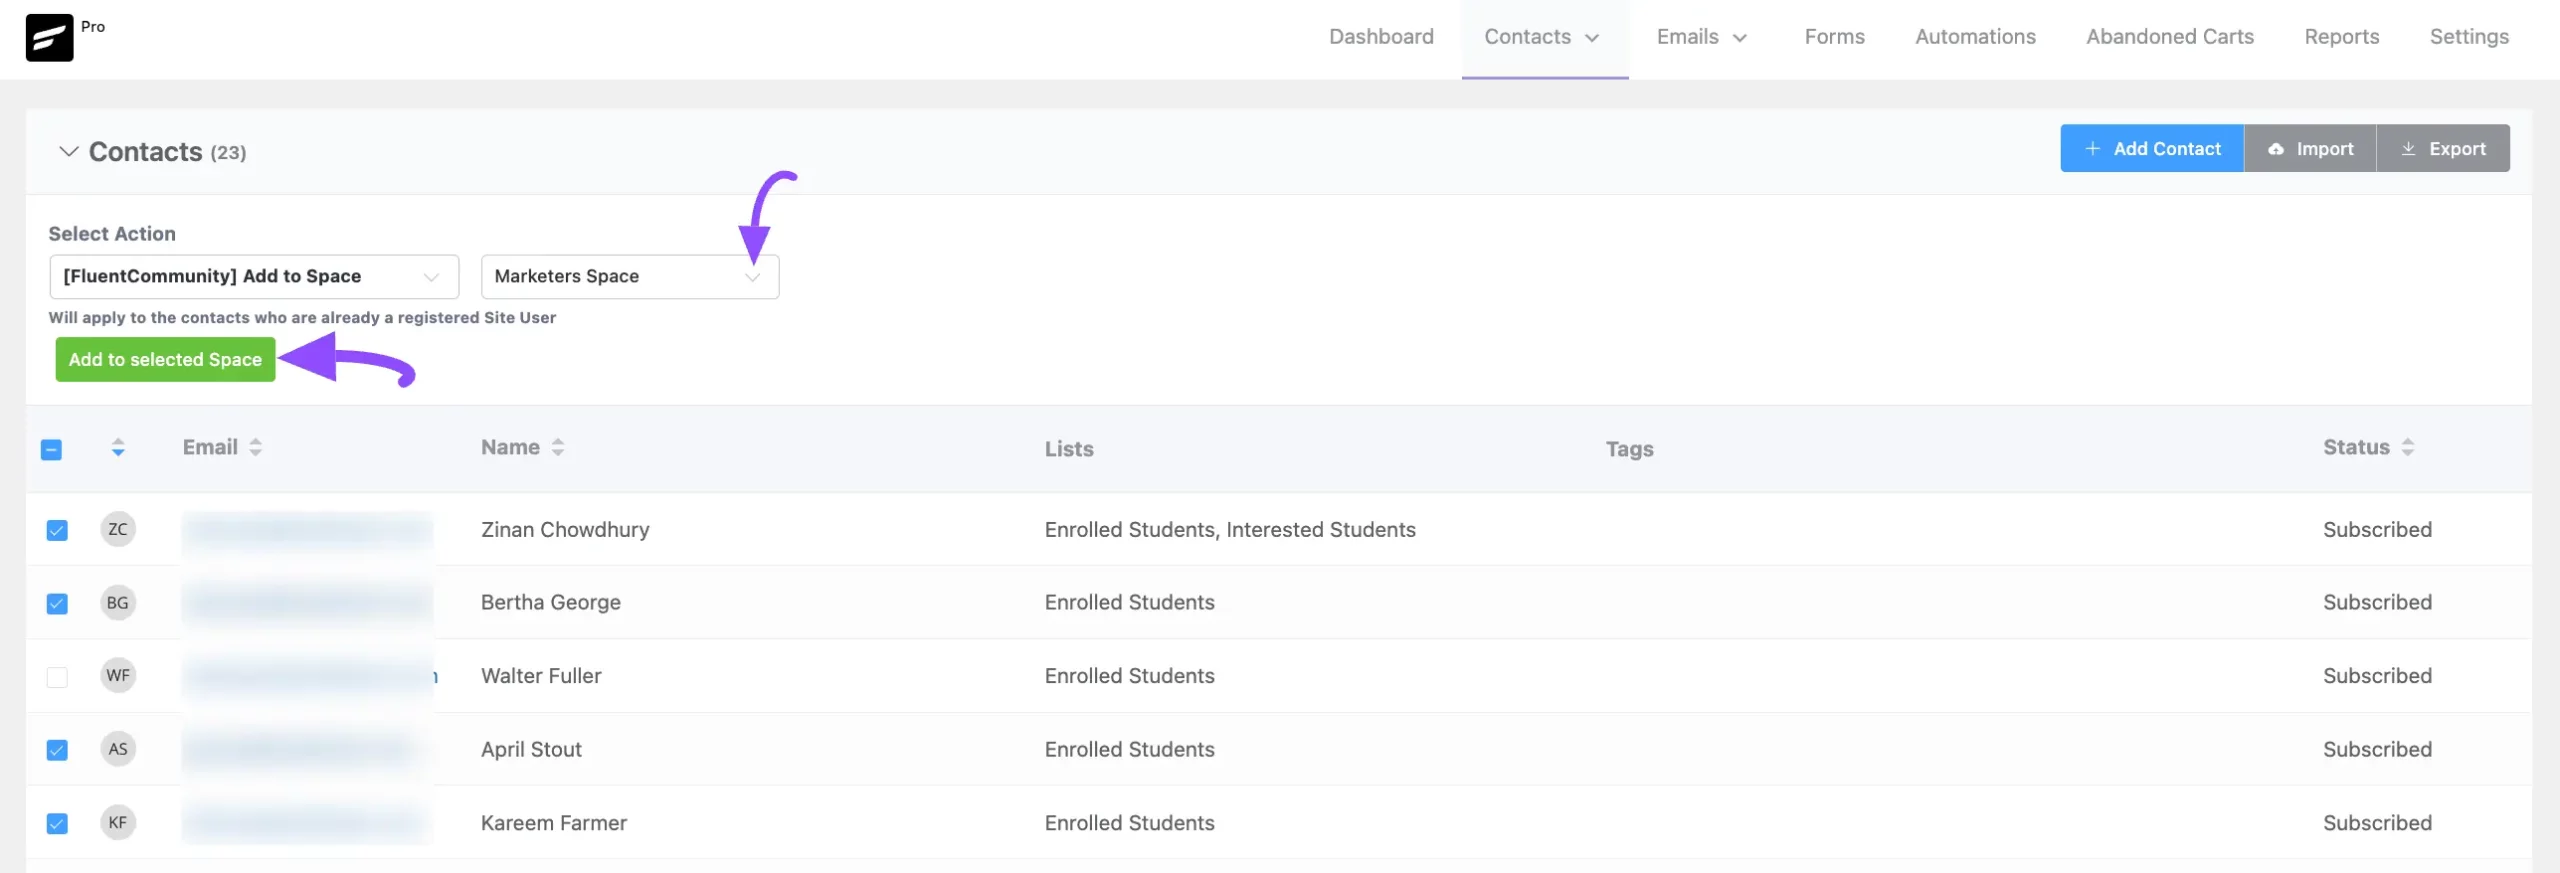
After selecting the desired action, select the Space/Course where you want to add or remove the contacts using the dropdown list. Finally, click the Add to Selected Space or Add to Selected Course button.
3. Email Campaigns
FluentCRM allows you to run email campaigns particularly for FluentCommunity.
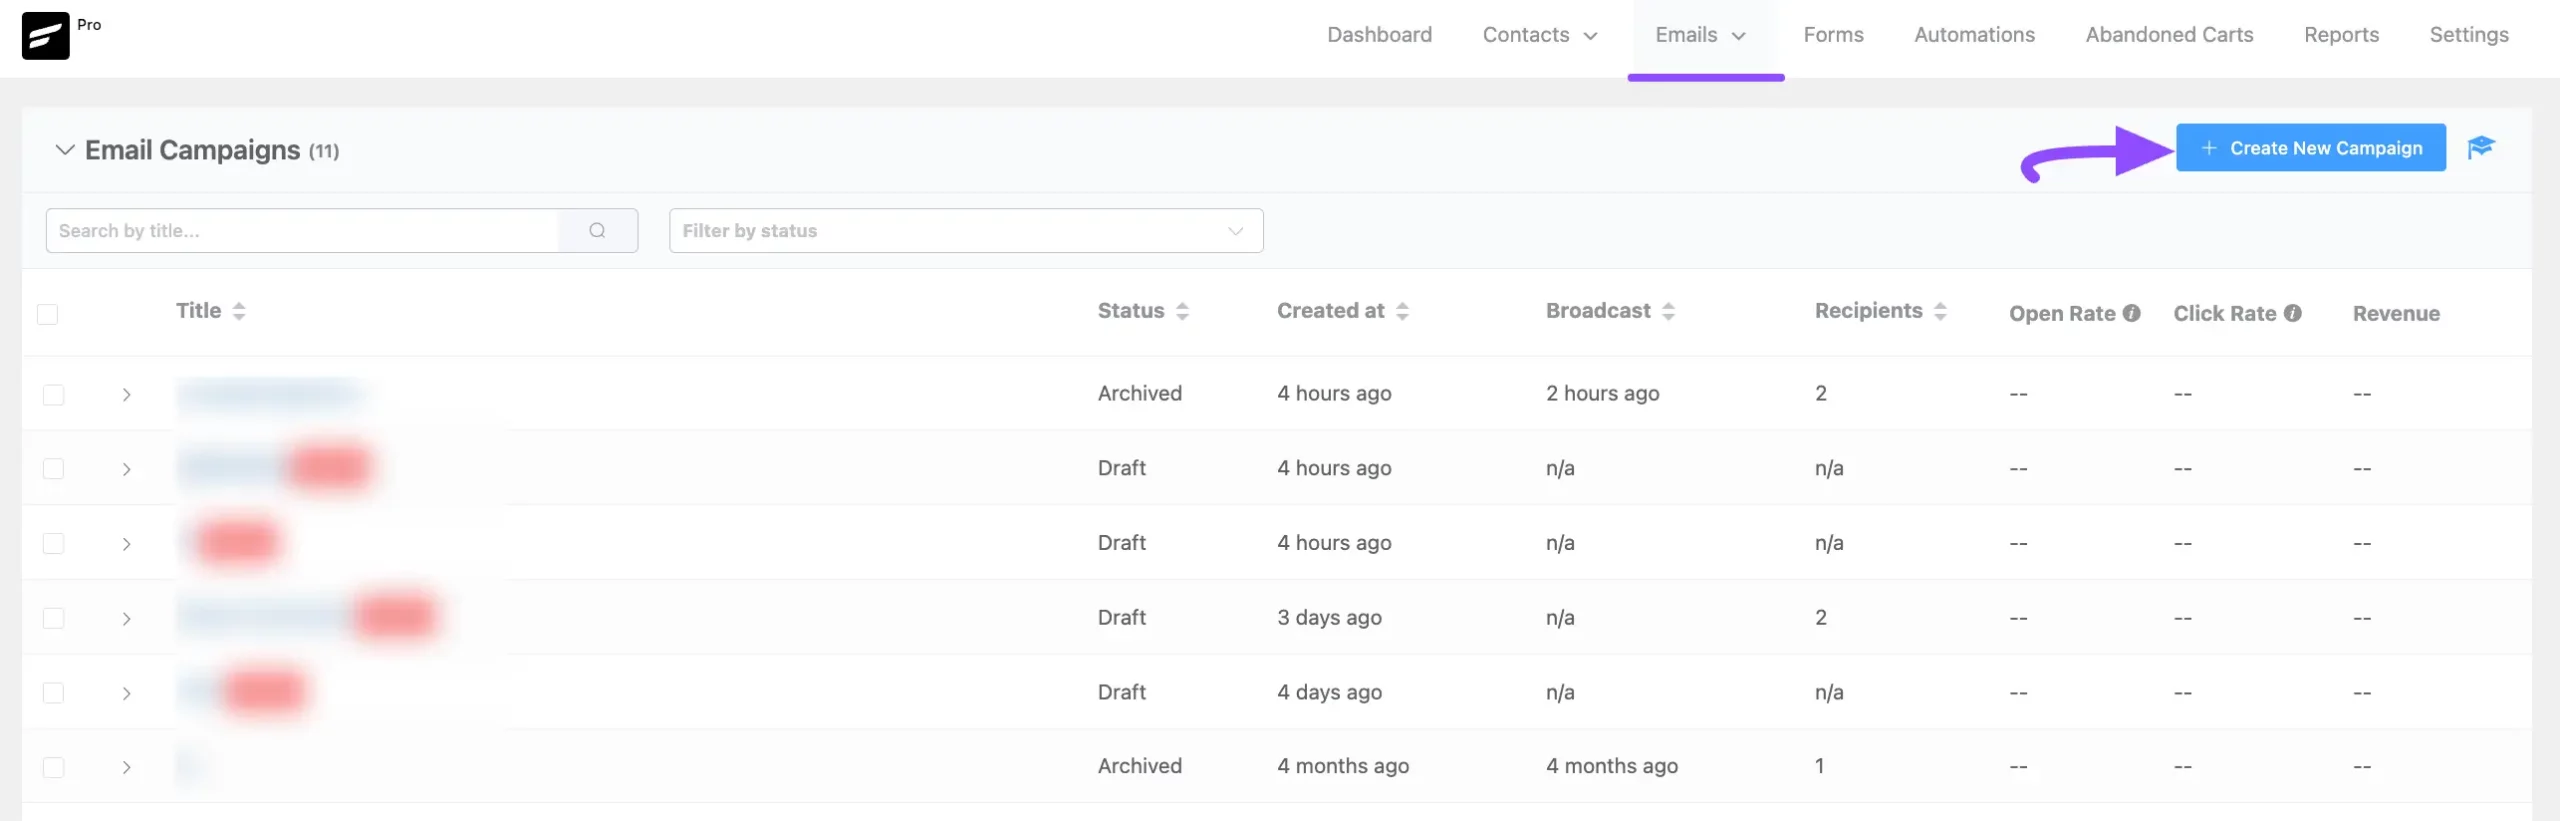
First, go to All Campaigns under the Emails section from the FluentCRM navbar, and click the + Create New Campaign button.
Once you reach the Recipients section, you can select the recipients (FluentCommunity users) for whom you want to run this email campaign in two ways:
- By List & Tag
- By Advanced Filter
By List & Tag Filter
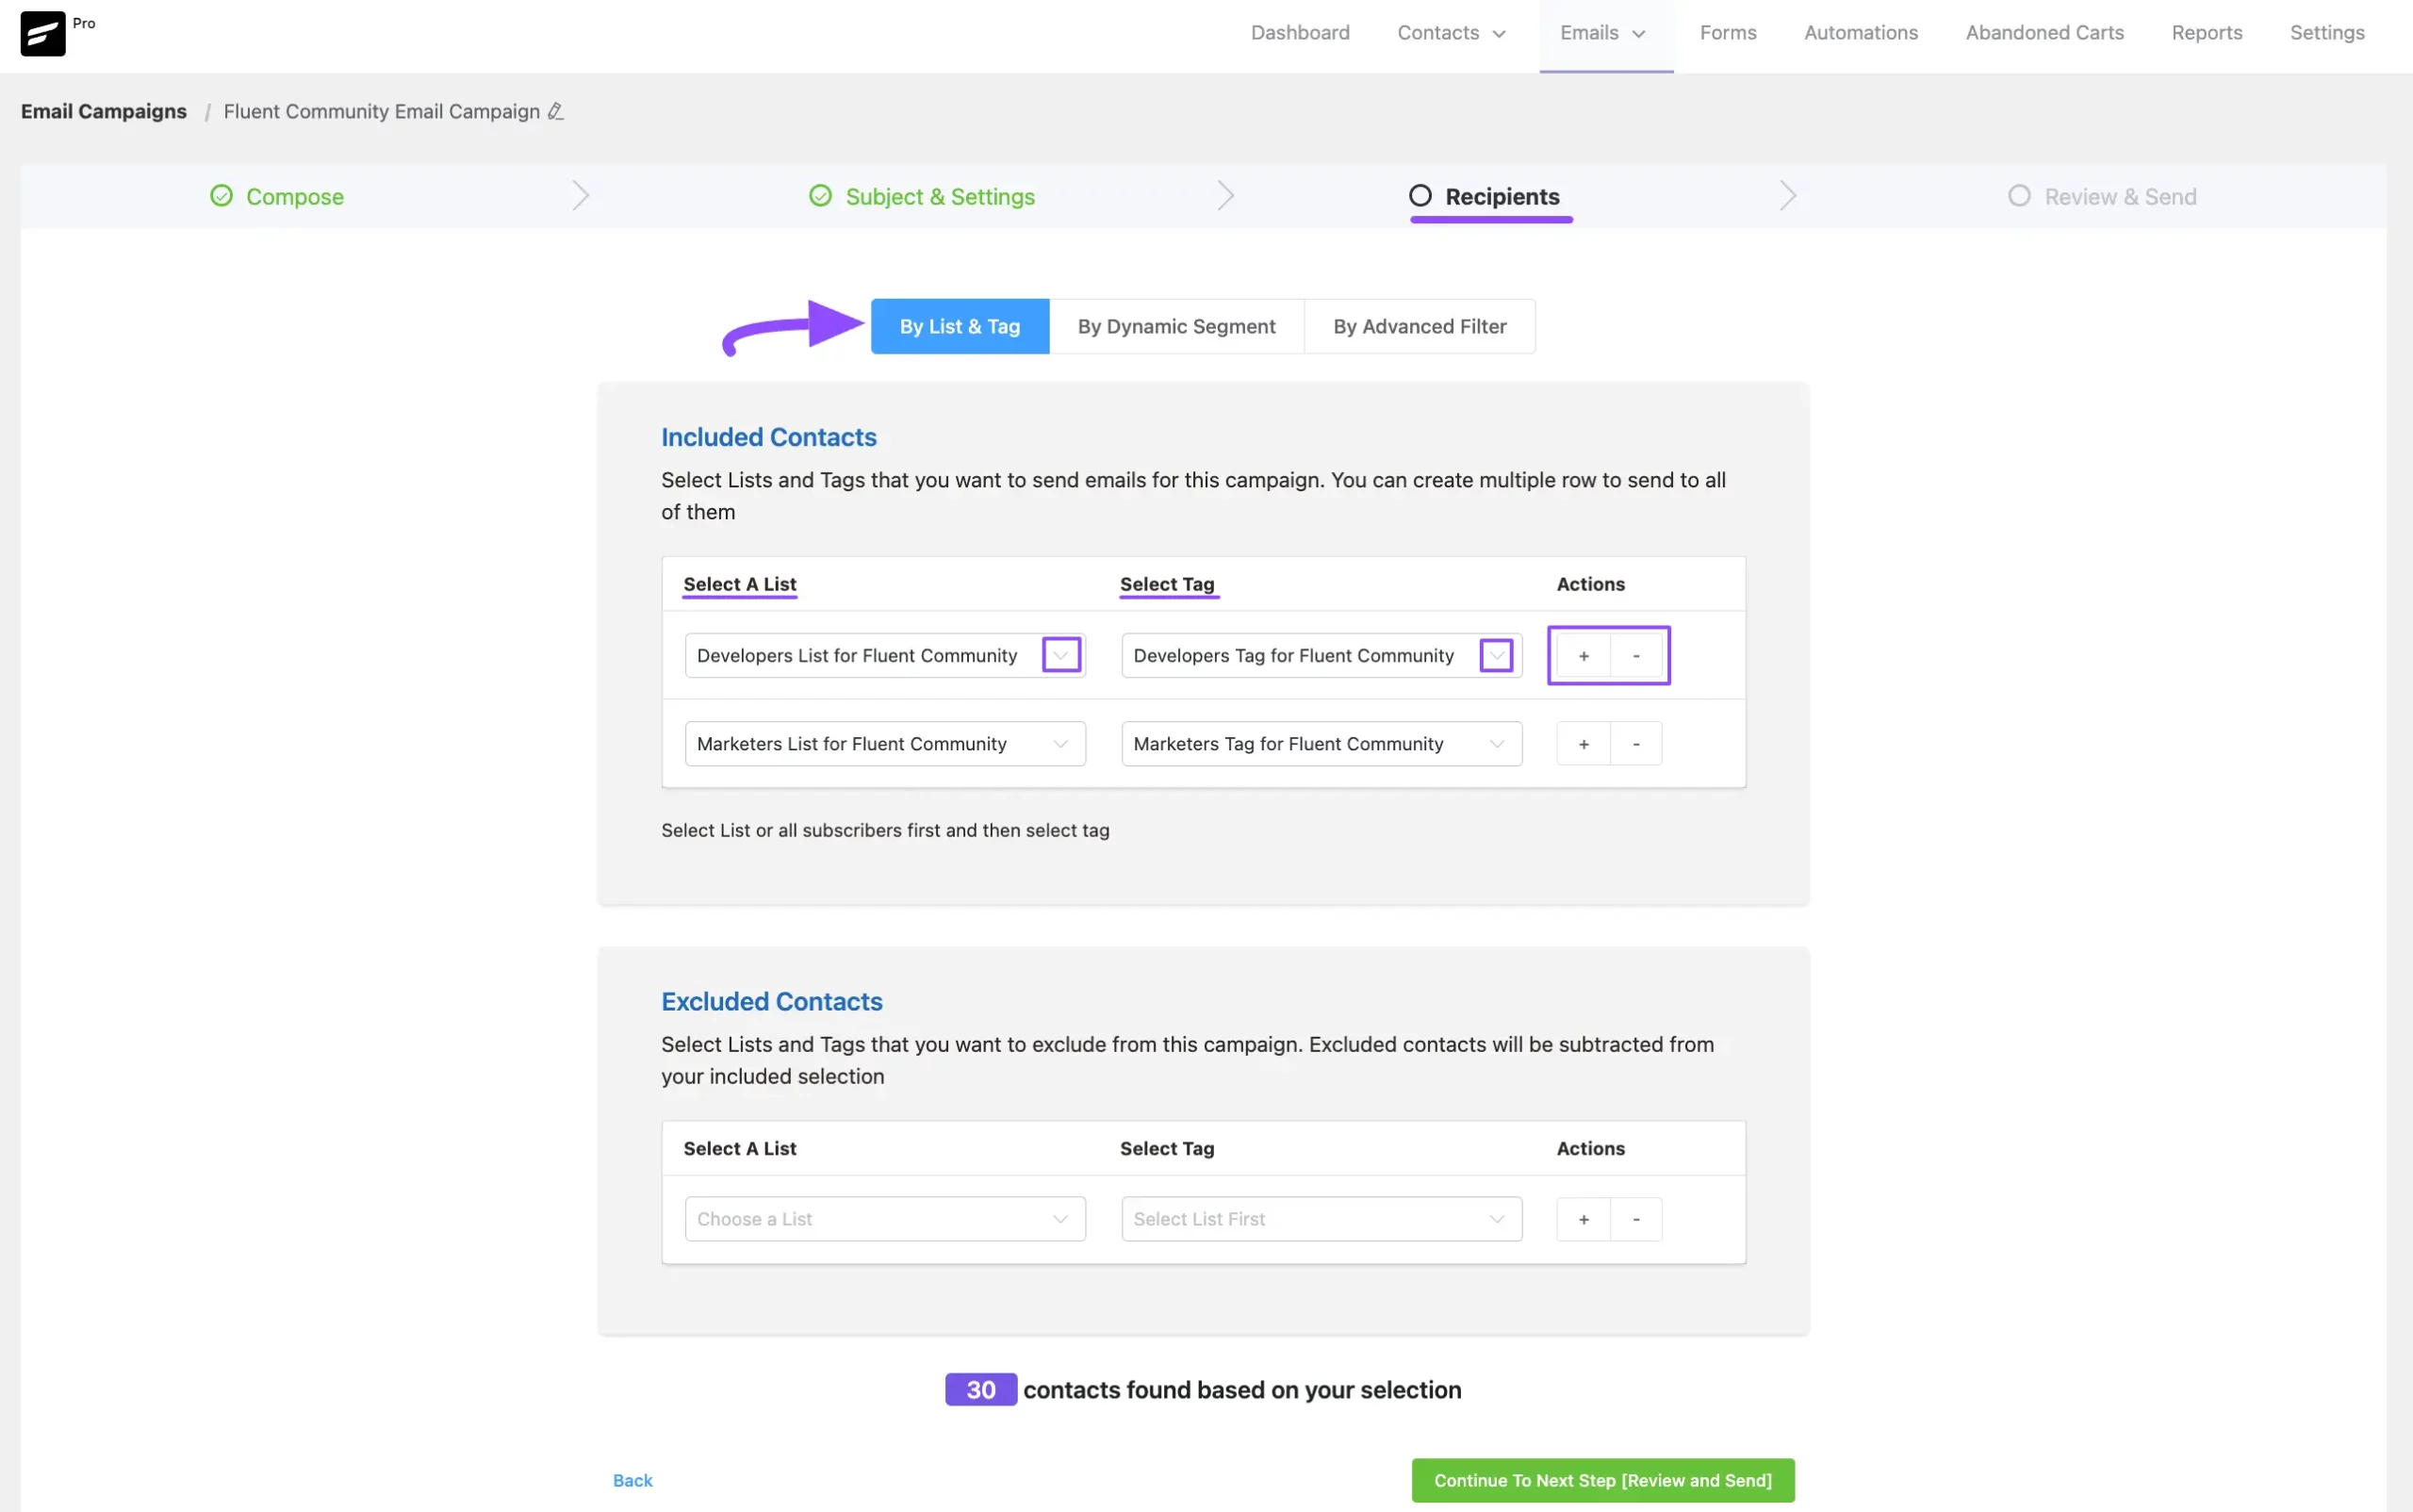
Use the By List & Tag filter to select the email campaign recipients.
First, add the FluentCommunity members/users under the desired List(s) and Tag(s) manually through Automation (using the appropriate FluentCommunity Triggers and applying the Apply List and Apply Tag actions).
Then, select your desired List and Tag using the Dropdown Arrow. Add as many Lists or Tags as you need by clicking the Plus icon, and remove them by clicking the Minus icon.
By Advanced Filter
TIP
To use the advanced filter to select email campaign recipients, you need to have the FluentCRM Pro plugin installed and activated on your WordPress site.
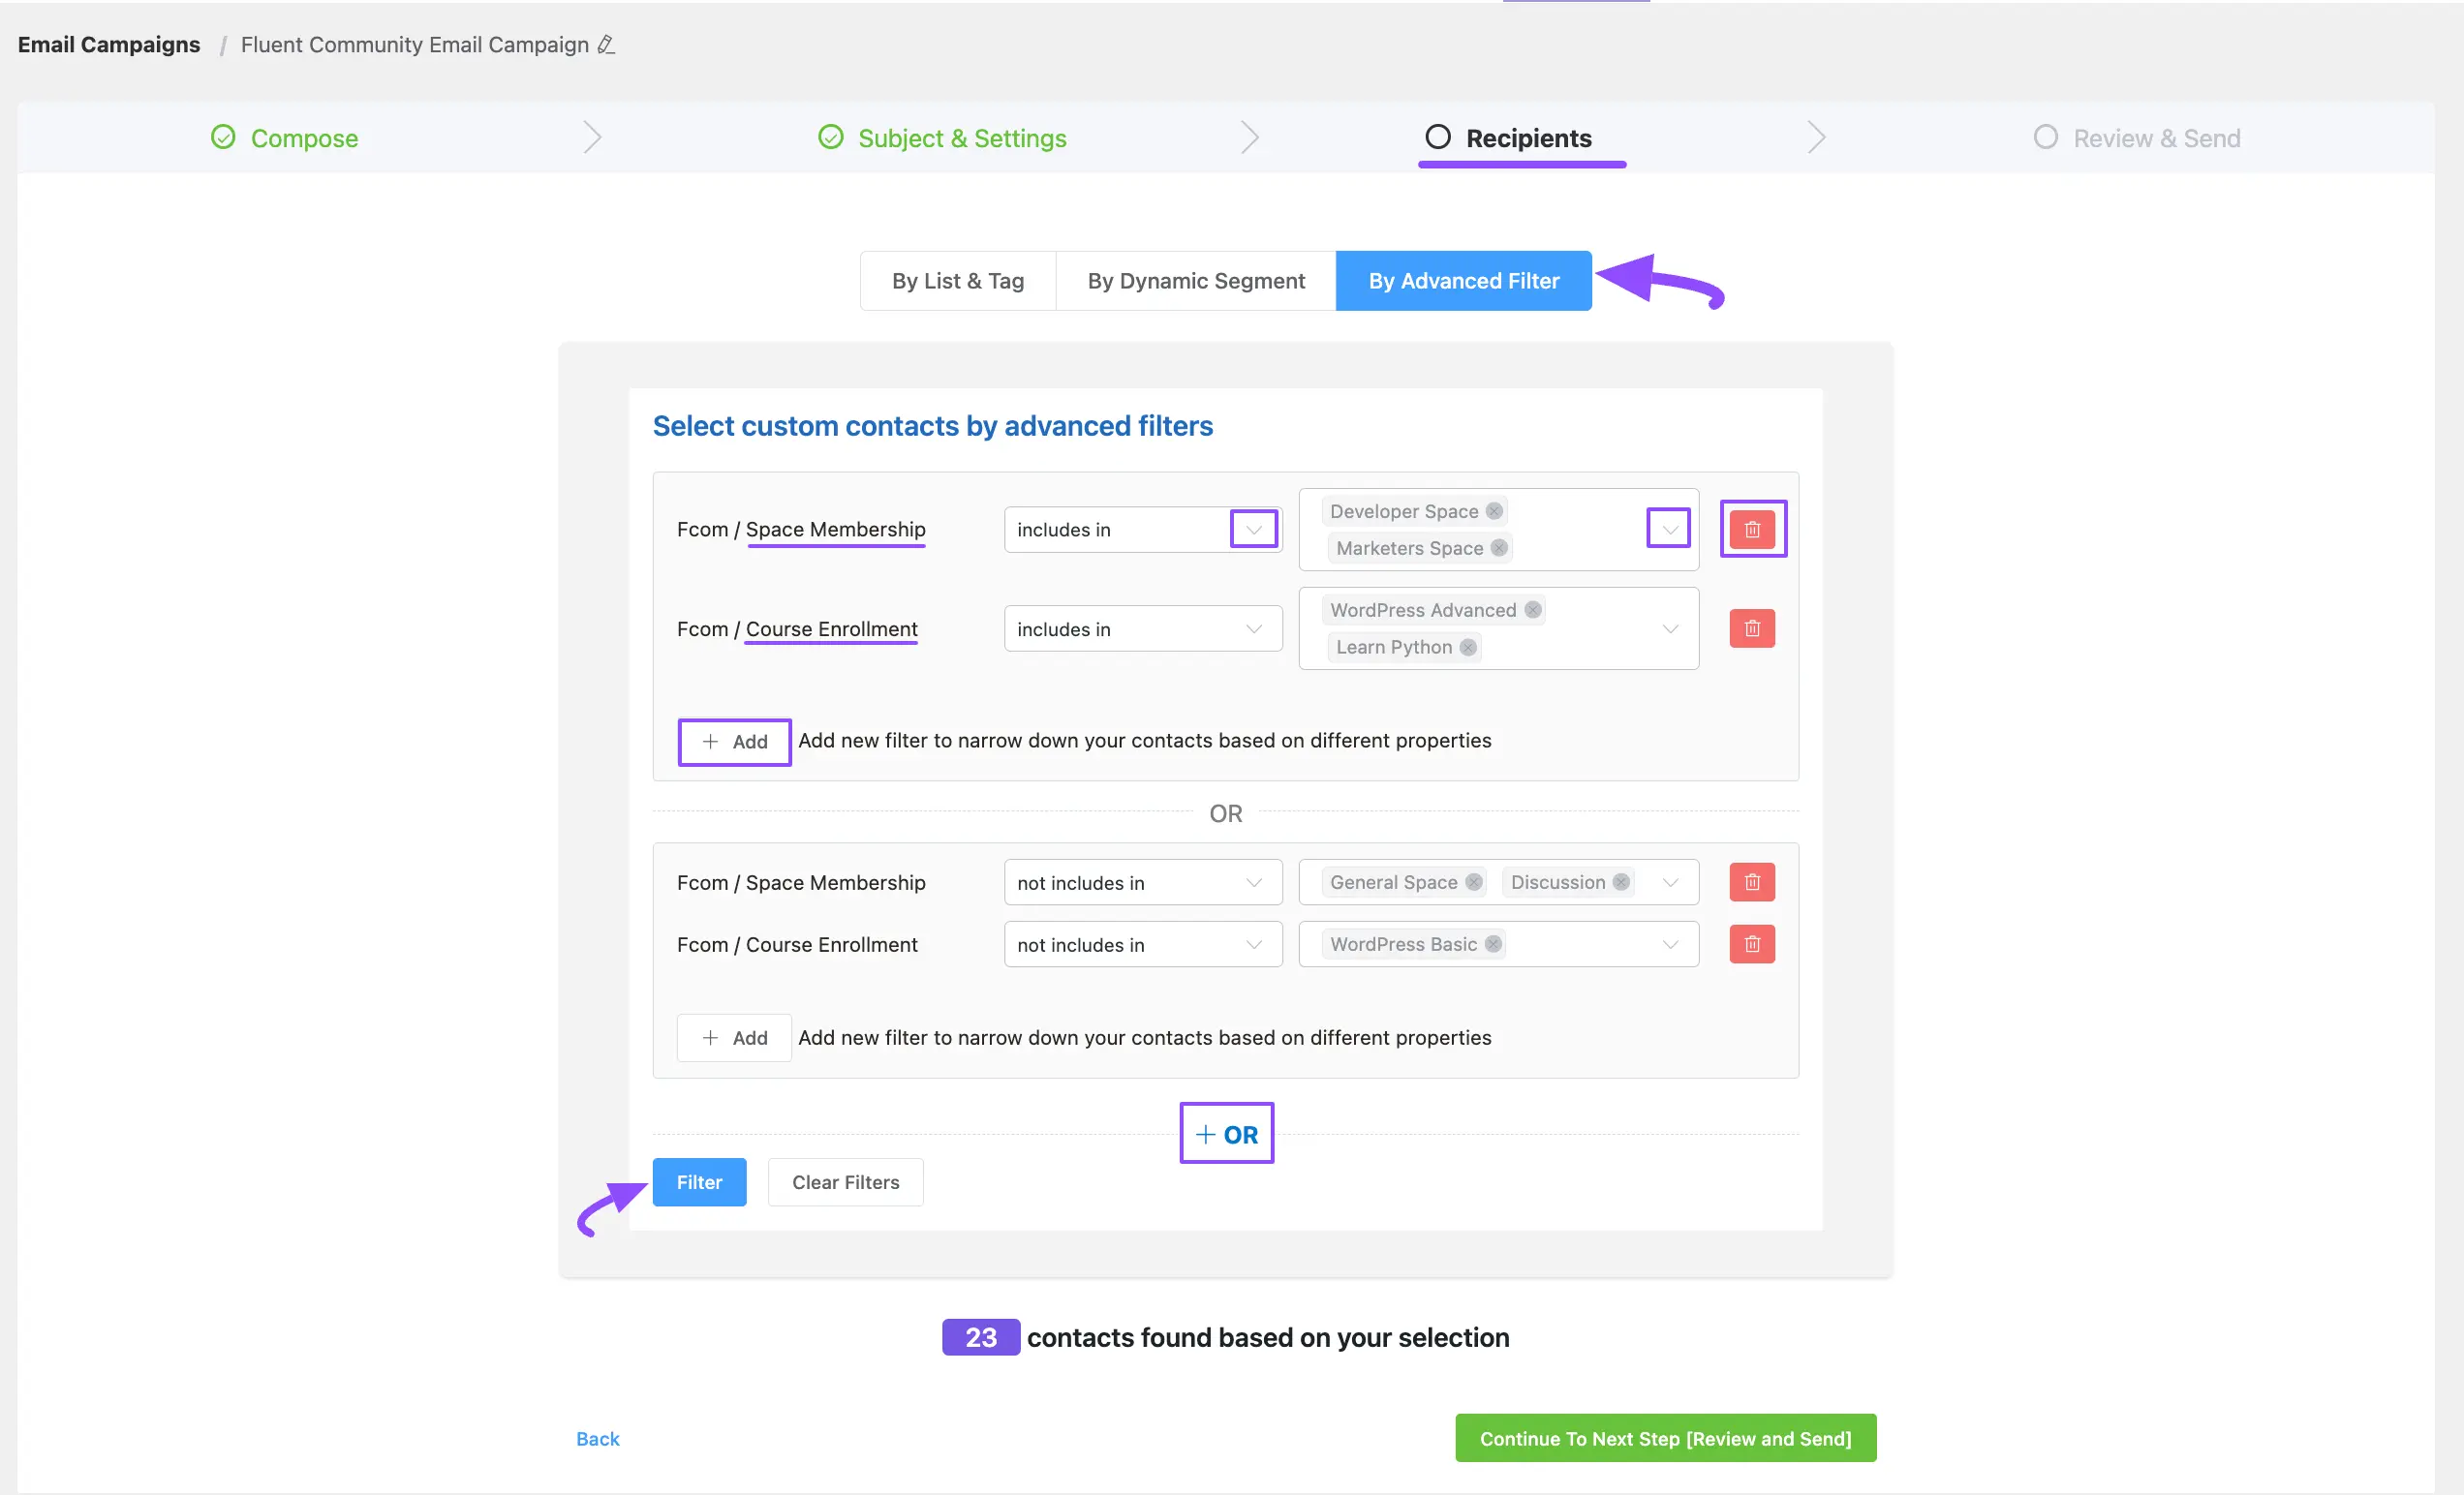
Click the + Add button to start filtering. You will get two options for FluentCommunity: Space Membership and Course Enrollment.
This allows you to directly select specified Space/Course members to include or exclude as recipients using the dropdown arrow. You can add more filters by clicking + Add, add filters against an existing filter by clicking + OR, and delete any existing filter by clicking the Trash icon.
Suppressing Emails to Bounced or Complained Contacts
If a member's FluentCRM contact is marked Bounced, Complained, or Spammed, FluentCommunity automatically stops sending that member community notification emails protecting your sender reputation instead of repeatedly emailing an address that can no longer receive mail.
This is controlled by a privacy setting Do not send emails to contacts marked as Bounced, Complained, or Spammed in FluentCRM.
Affected members aren't left guessing. Their own notification preferences screen shows their current email status, along with a Re-confirm My Email Address button that sends a fresh double opt-in email one click on their side, and notifications resume once the address is confirmed again.
NOTE
Developers can fine-tune this behavior with a filter rather than relying on the on/off setting alone.