

Appearance
Menu Settings
FluentCommunity provides the flexibility to customize your menus, allowing you to organize both the sidebar and top menus. You can easily enable, disable, or reorganize menu items based on your community's needs.
Access Menu Settings
To start customizing your menus, go to Settings, then select Menu Settings from the left sidebar. Here, you can manage each menu section.
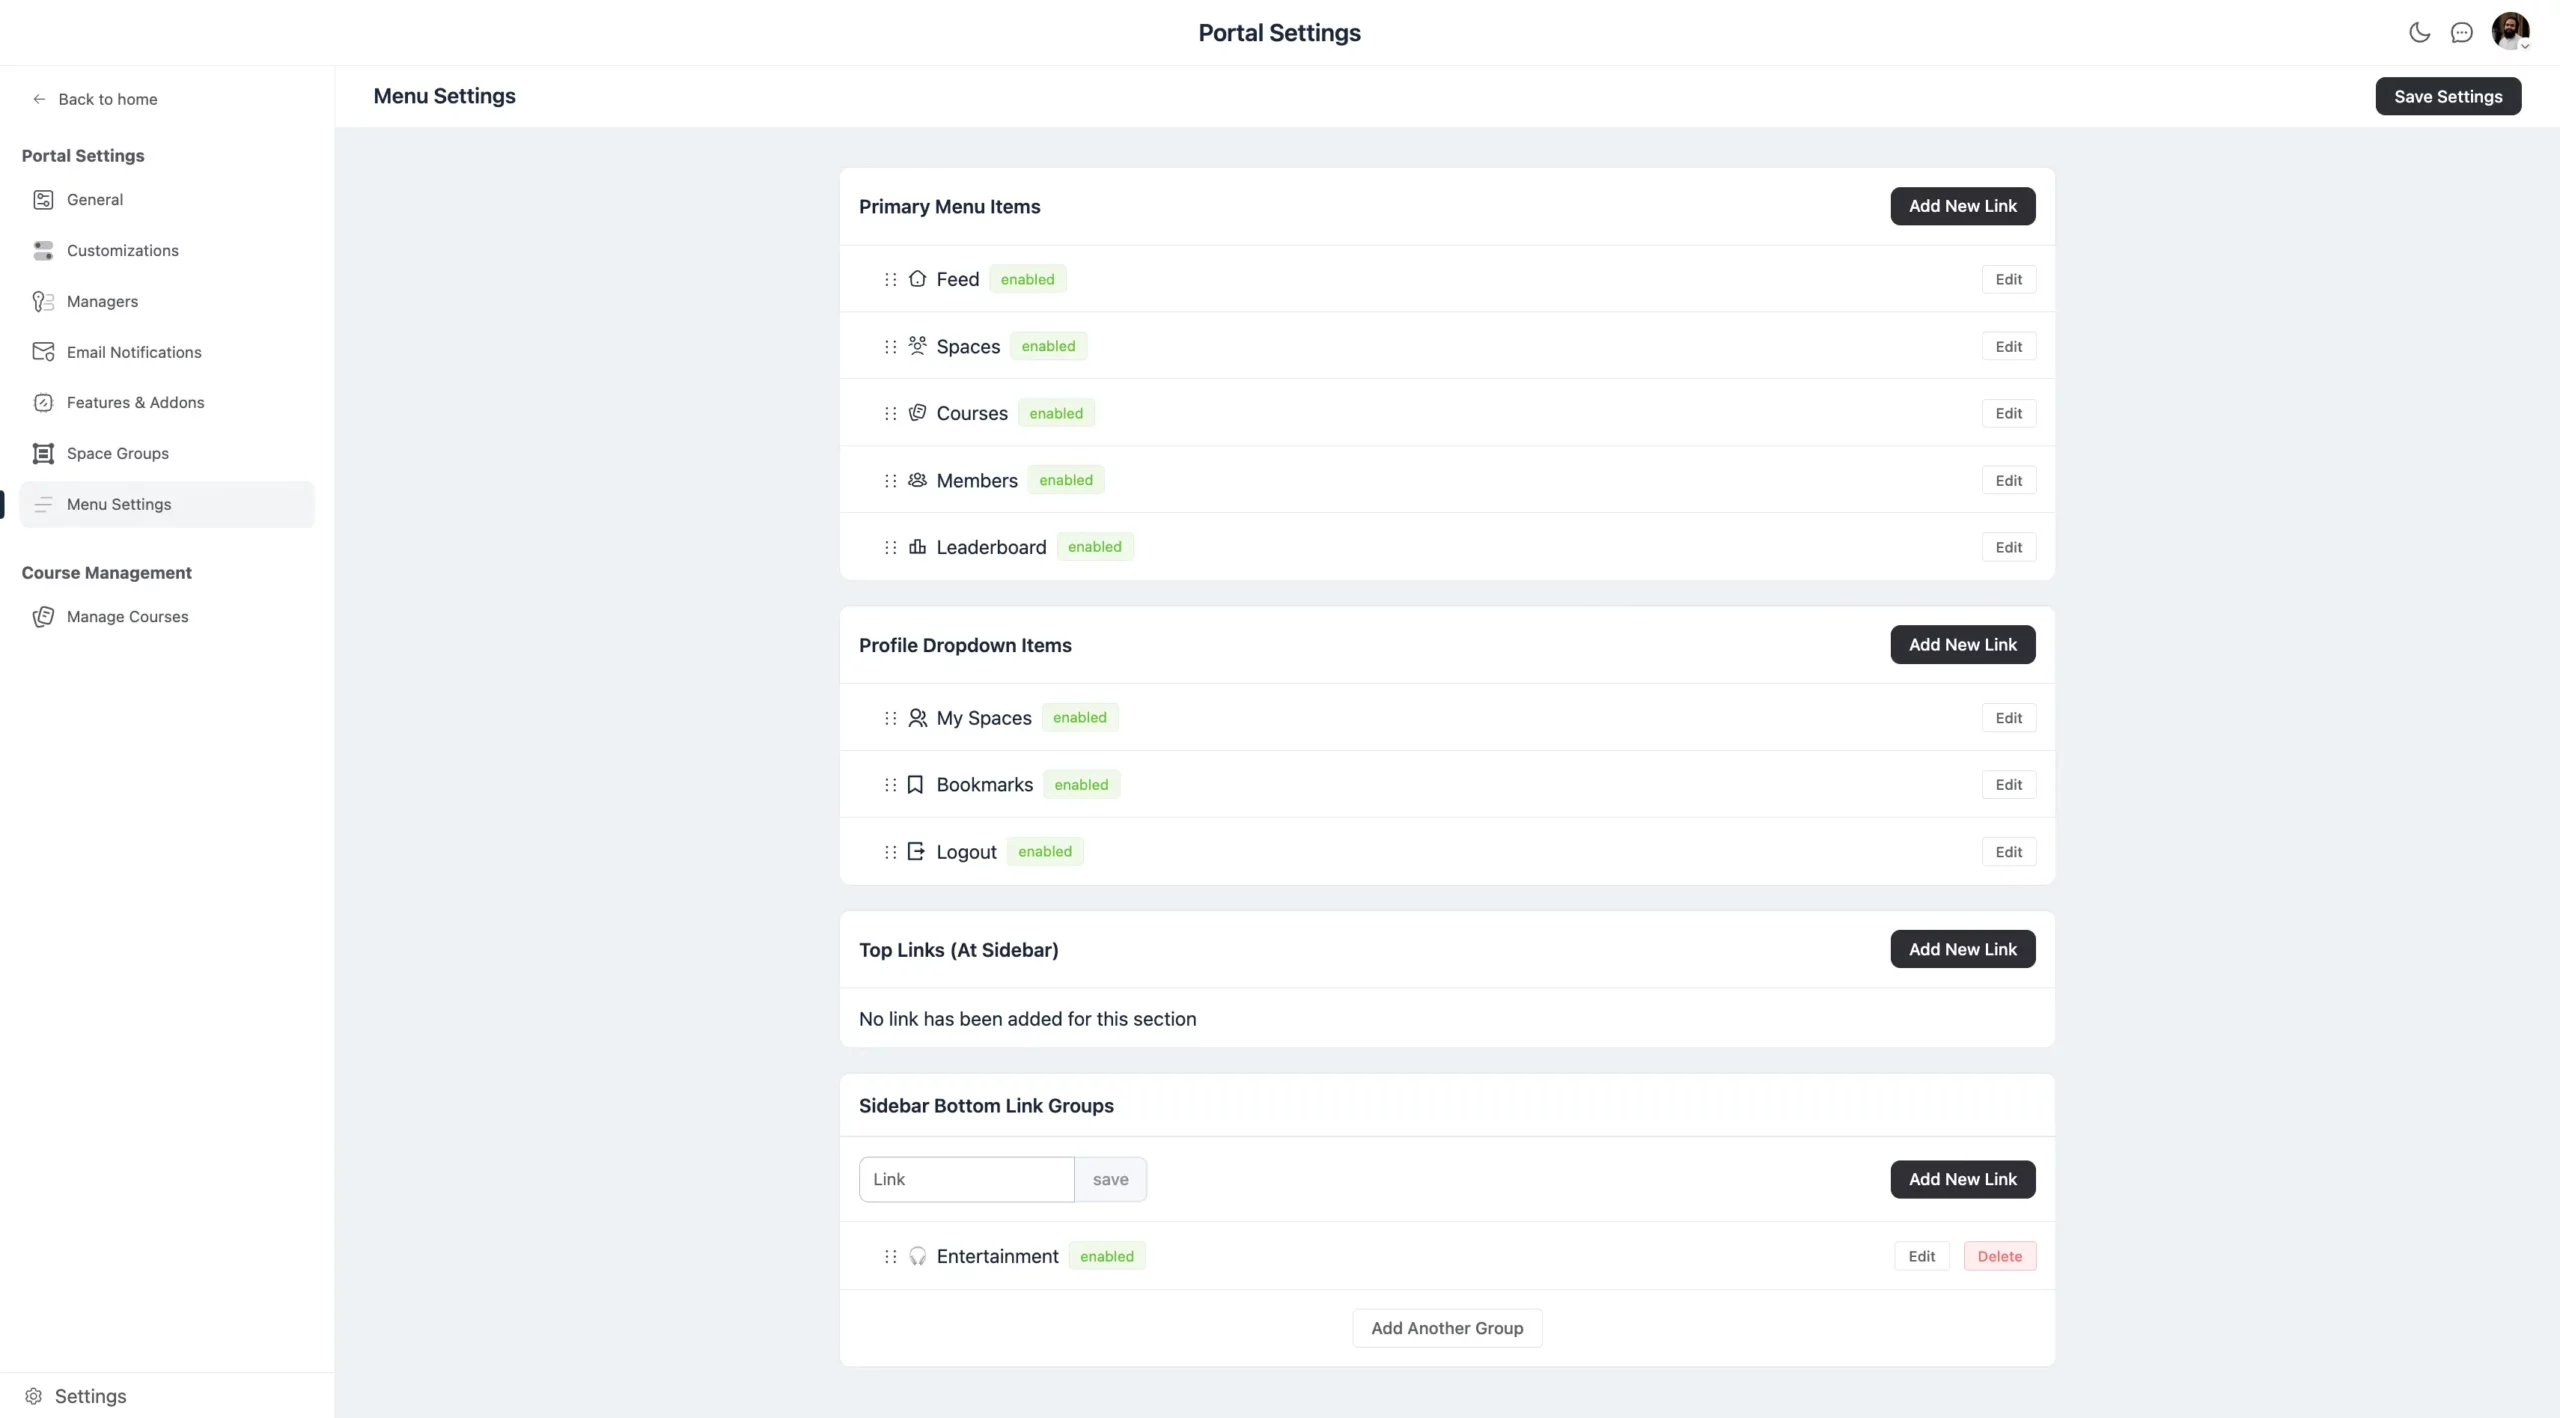
Customize Menus
There are four key menu sections available in FluentCommunity.
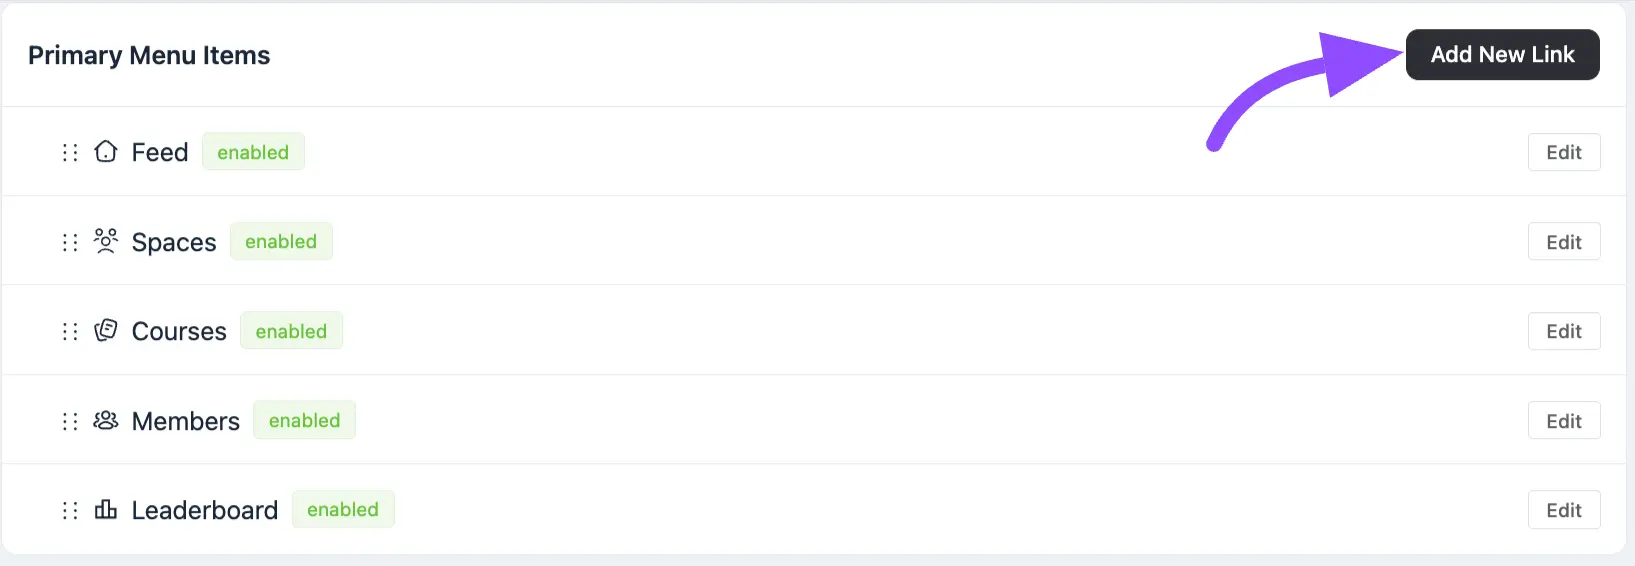
Primary Menu Items
These are the items in the top menu of your FluentCommunity Plugin. You can add any custom link here by clicking on the Add Link button.
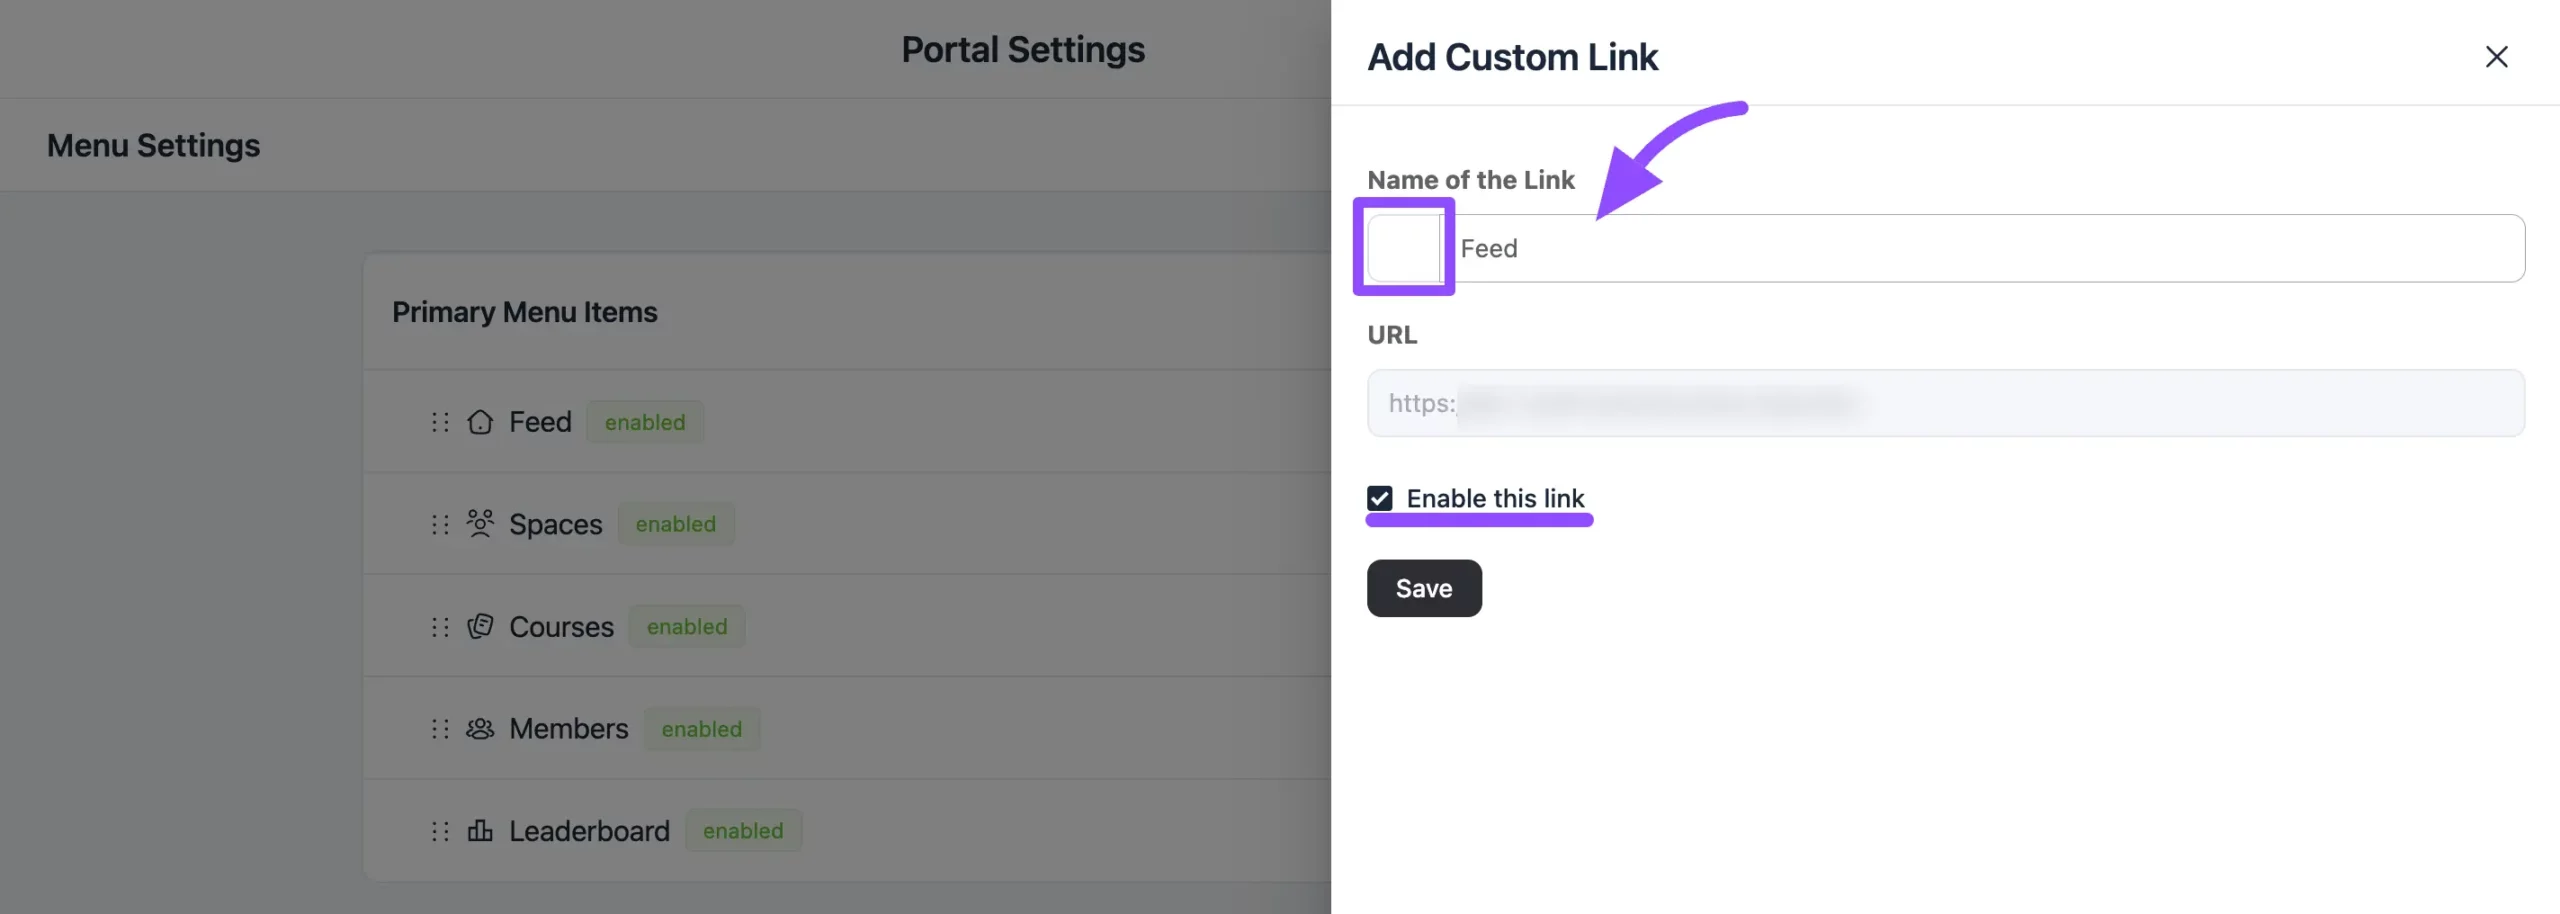
A pop-up will appear where you can give the details for your external link. Click on the Square space before the name field to add any Emoji with your custom Link.
Now give a name for your link in the Name field, then put the URL in the dedicated field. Now check the Enable this link checkbox to enable the link.
Lastly, click on the Save button to save the link and show it in your top menu.
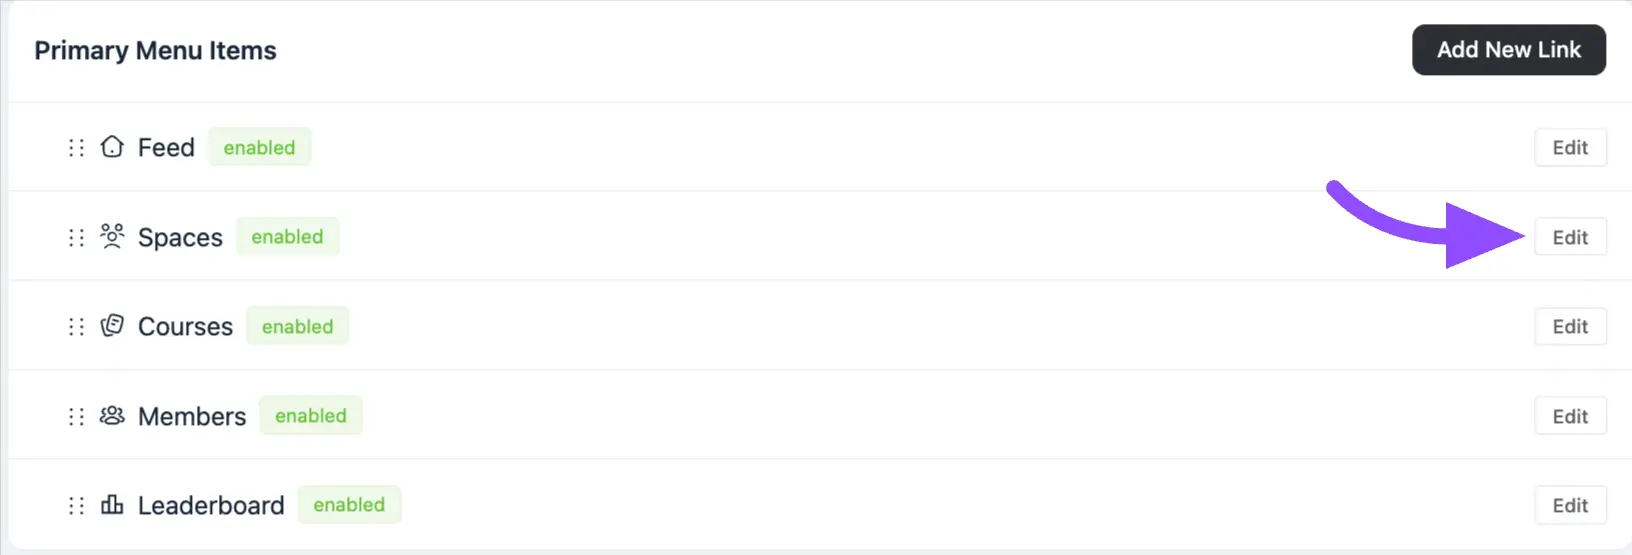
If you want to edit any menu link, click the Edit button next to the Menu Item name.
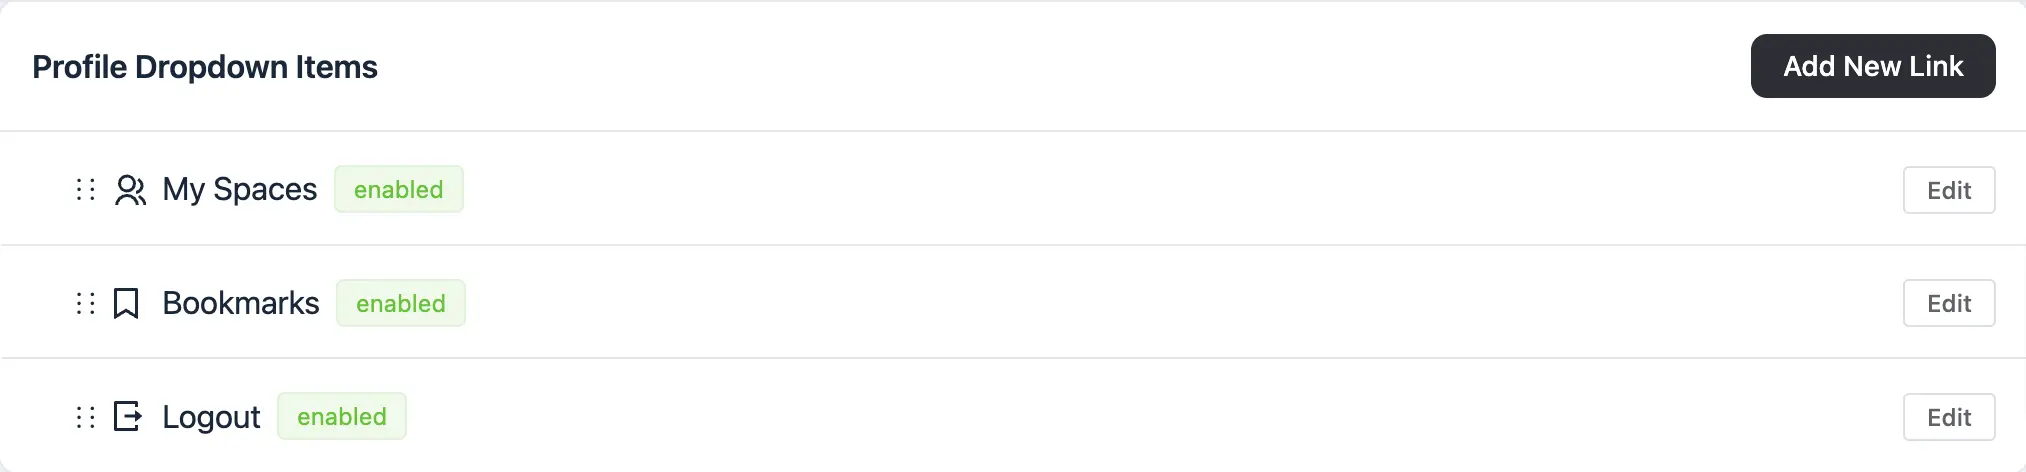
Profile Drop-down Items
These items appear in the user's profile dropdown menu, providing easy access to custom links. In the same way, you can also add custom links here.
Top Links (At Sidebar)
This section displays custom links at the top of the sidebar, making it a prime spot for important or frequently accessed links. If you want to add a link to this section, click the Add New Link button.
A pop-up will appear to give detailed information about the link. Then click on the Save button to save your link.

Bottom Links (At Sidebar)
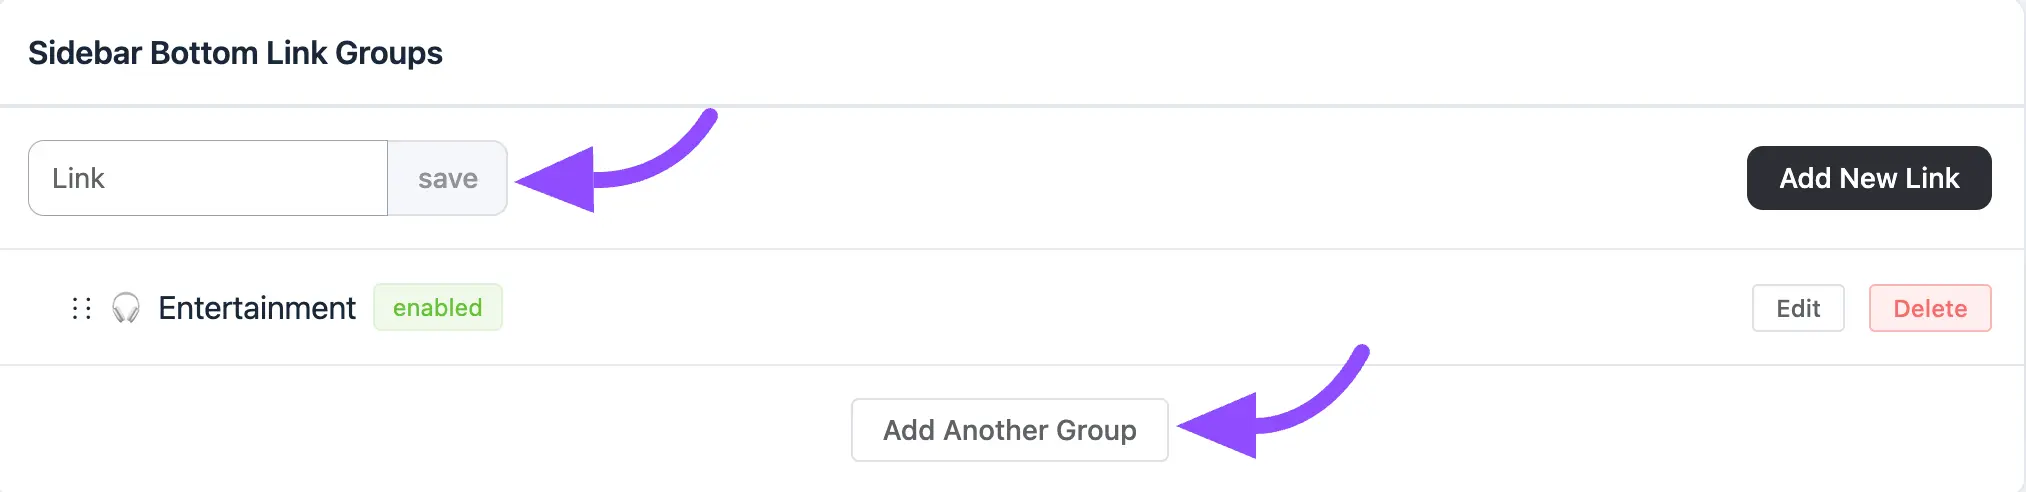
Links are displayed at the bottom of the page on the left sidebar. Links in this section can be grouped for better organization.
To organize links, you can create a new group by typing a Group Name in the text field and clicking Save. Once a group is created, click Add New Link within the group. Enter link details and click Save to include it.
To change or remove links in this section, use the Edit or Delete buttons next to each link name.
If you want to add another group, click the Add Another Group button below.
Feed Links
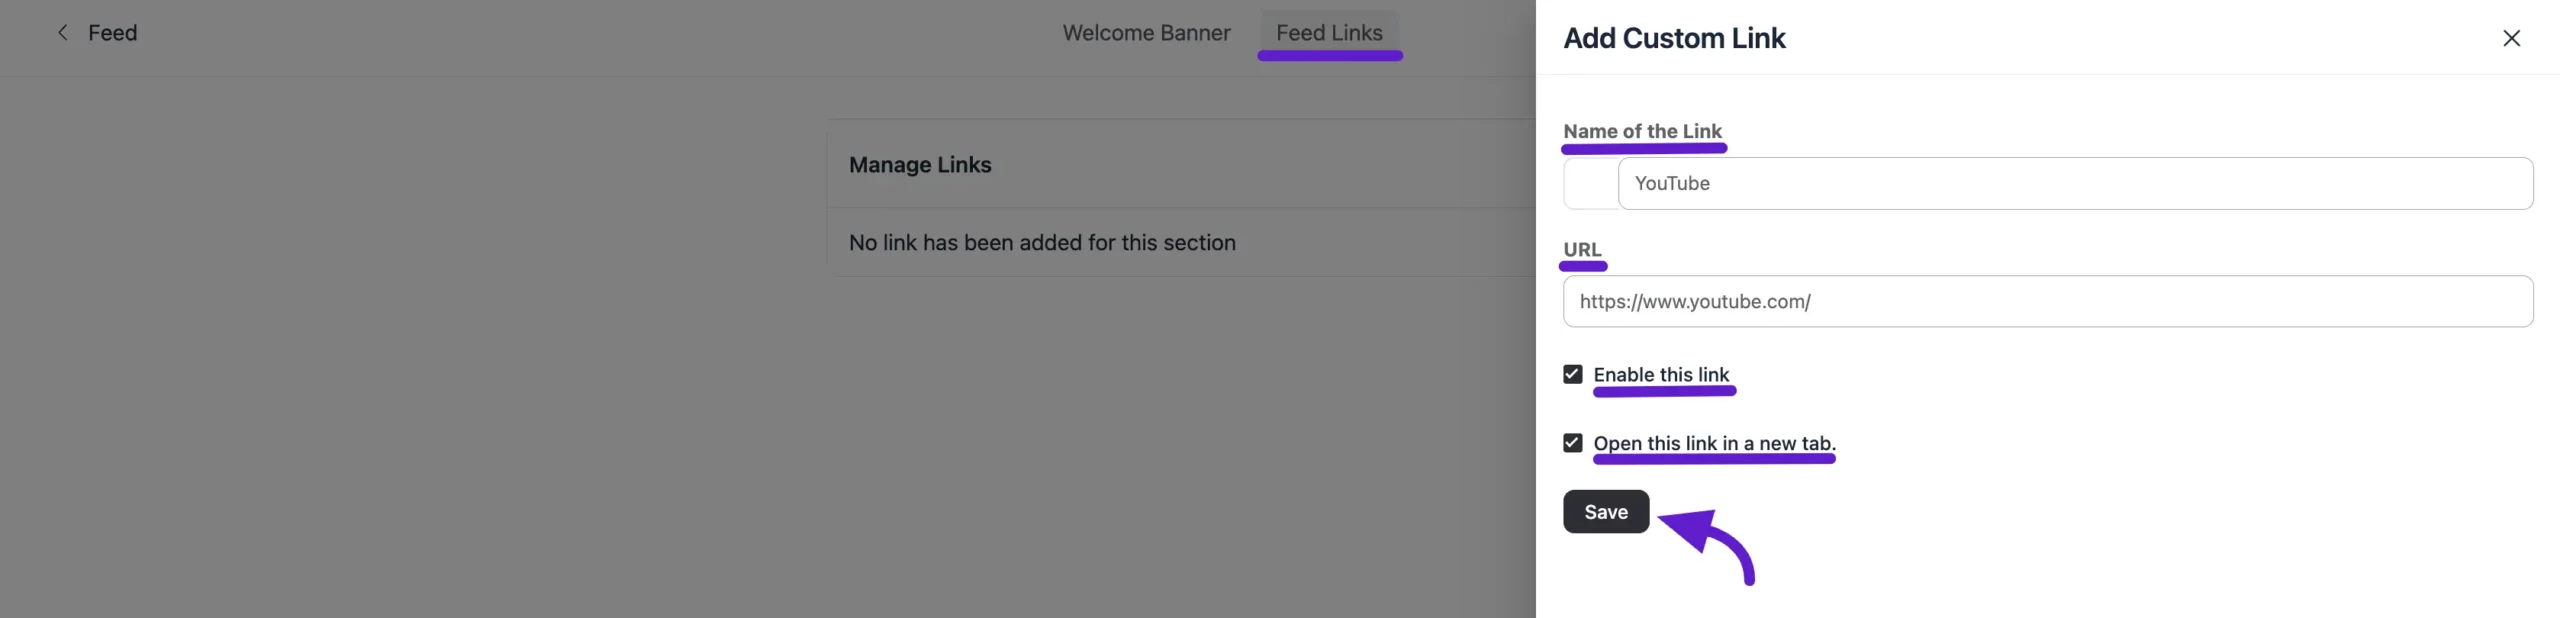
The global feed carries its own set of links, managed from the feed itself rather than the Menu Settings screen. Click the Feed Link button on your global feed, then select Add New Link.

A pop-up will appear where you can enter your link details. The fields match the Add Link pop-up above, with one addition:
- Link Name – Give your link a name. You can also add an emoji by clicking on the box beside the name field.
- URL – Enter the URL in the designated field.
- Enable This Link – By default, the link stays as a draft. To make it live, check the Enable This Link box.
- Open in a New Tab – If you want the link to open in a new tab, check this option.
Once saved, your link will appear in the Global Feed, just like in the example below.

Organizing Menu Items
Drag-and-Drop: You can arrange items in each section by dragging and dropping them into the desired order.
This flexibility helps ensure that your community's menus are tailored to your preferences, making navigation intuitive for members.
To add an installable app shortcut to the sidebar, see Progressive Web App (PWA) (Pro).