

Appearance
Using the Quiz Module
The Quiz Module in FluentCommunity lets you test your students' knowledge easily. You can add quizzes to any course to reinforce key concepts and check comprehension, making your courses more fun and more effective.
This guide shows you how to set up and add quizzes to your course.
Use Case
At the end of a module on "Social Media Marketing," add a short quiz with multiple-choice questions to make sure students have understood the core strategies before they move on to the next section.
Add a New Quiz
To use quizzes, you first need to create a new course or edit an existing one. If you're not sure how to make a course, see Creating Your First Course.
- Open your course editor.
- Click the Add New button.
- Select Quiz from the dropdown menu.
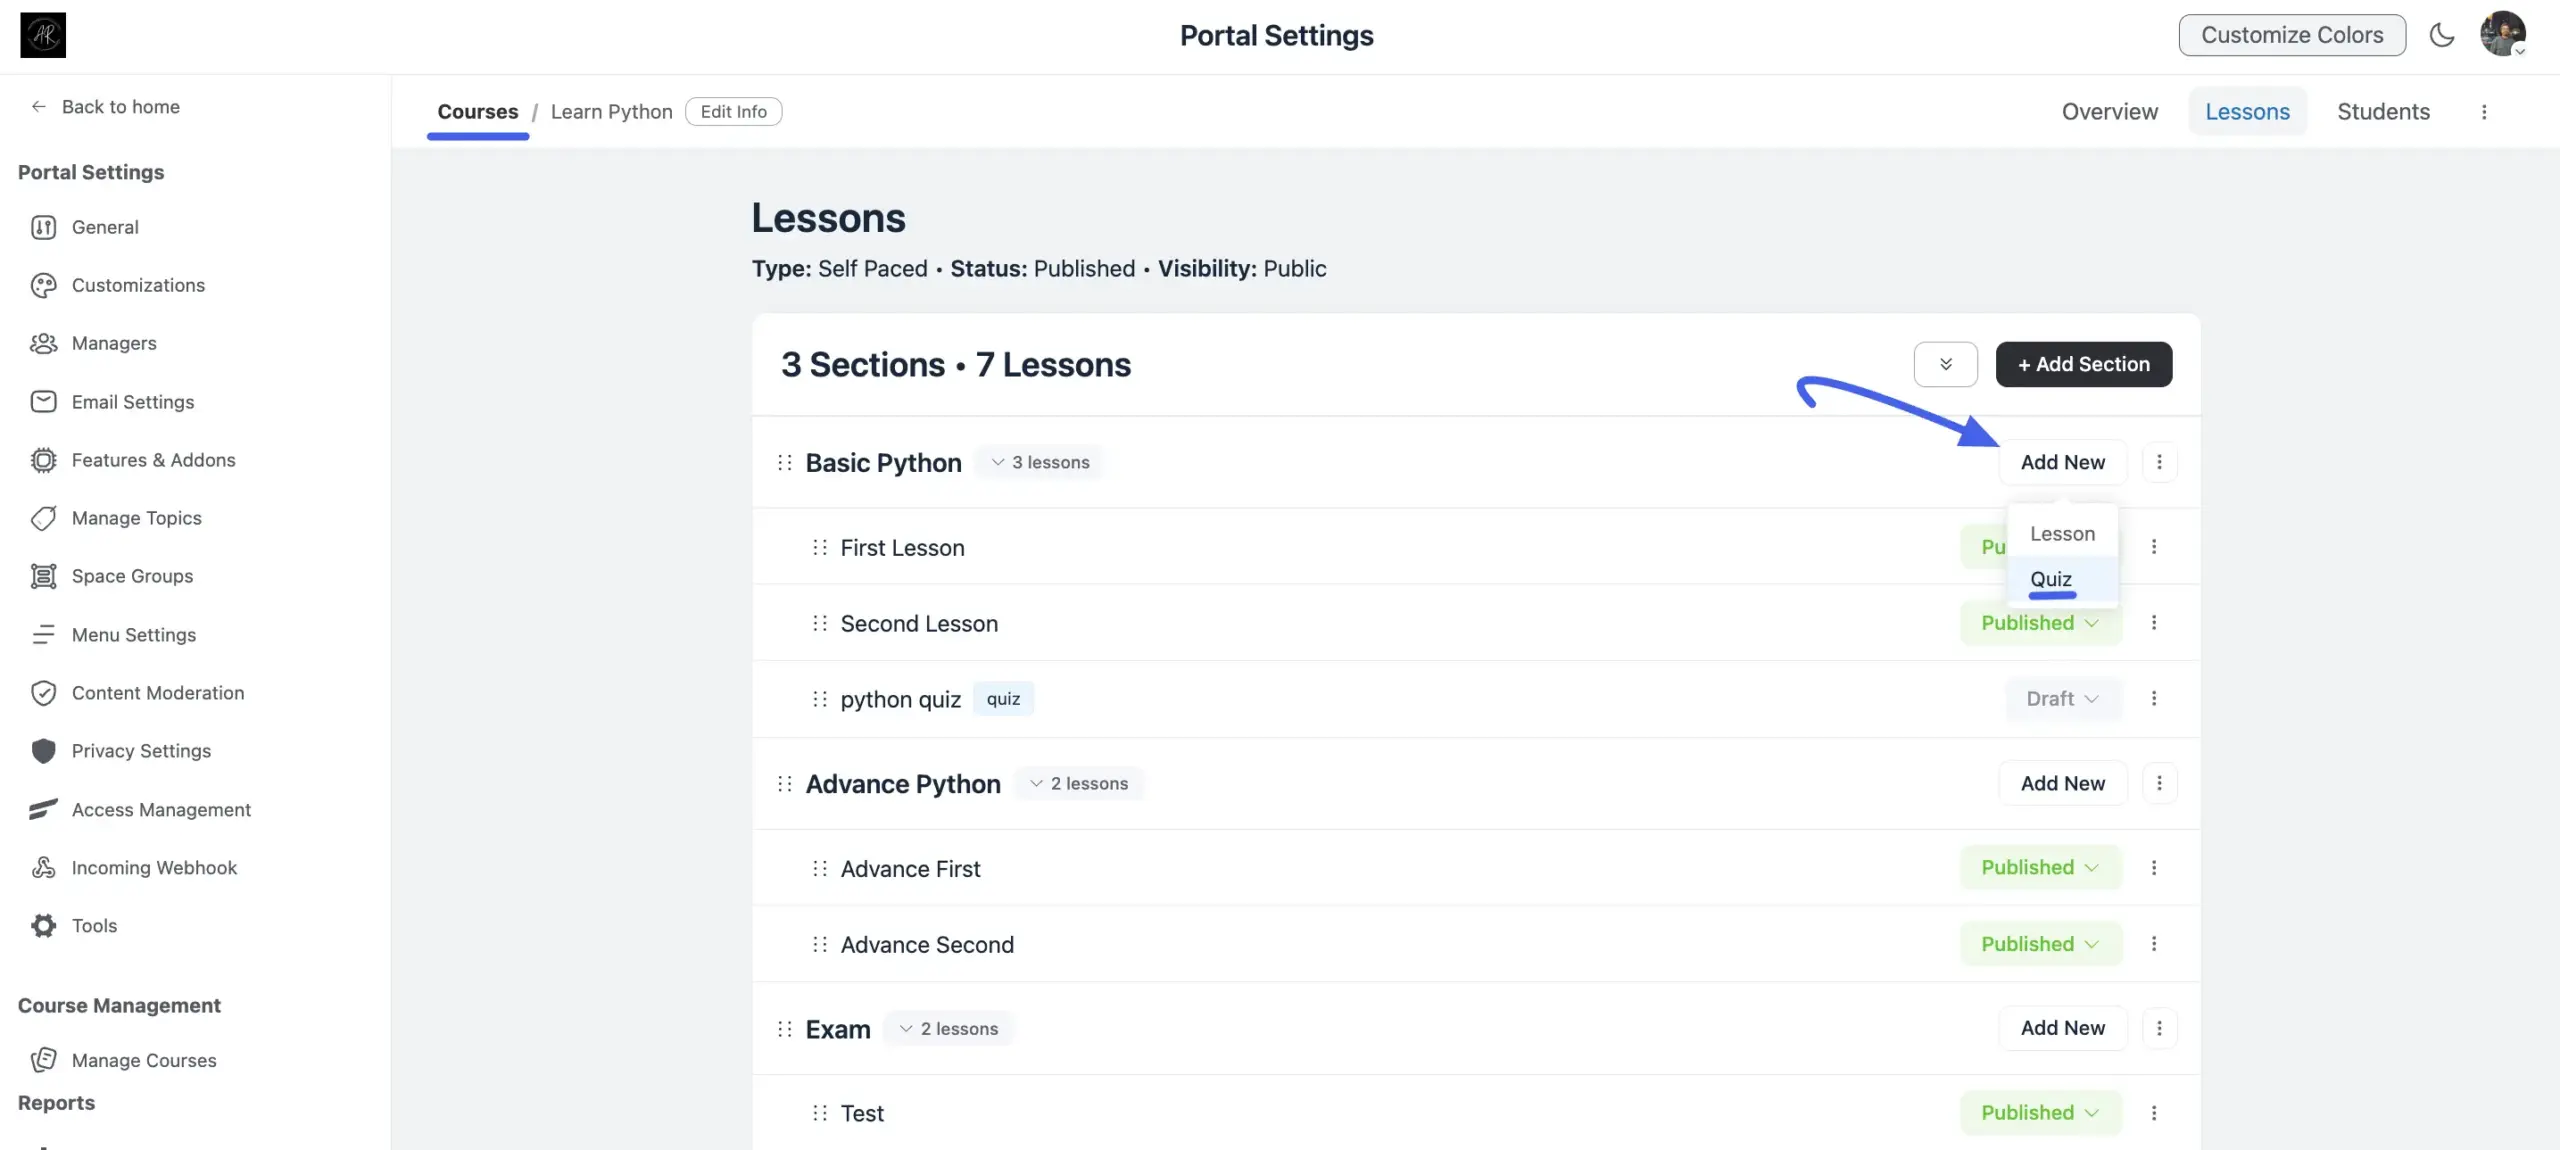
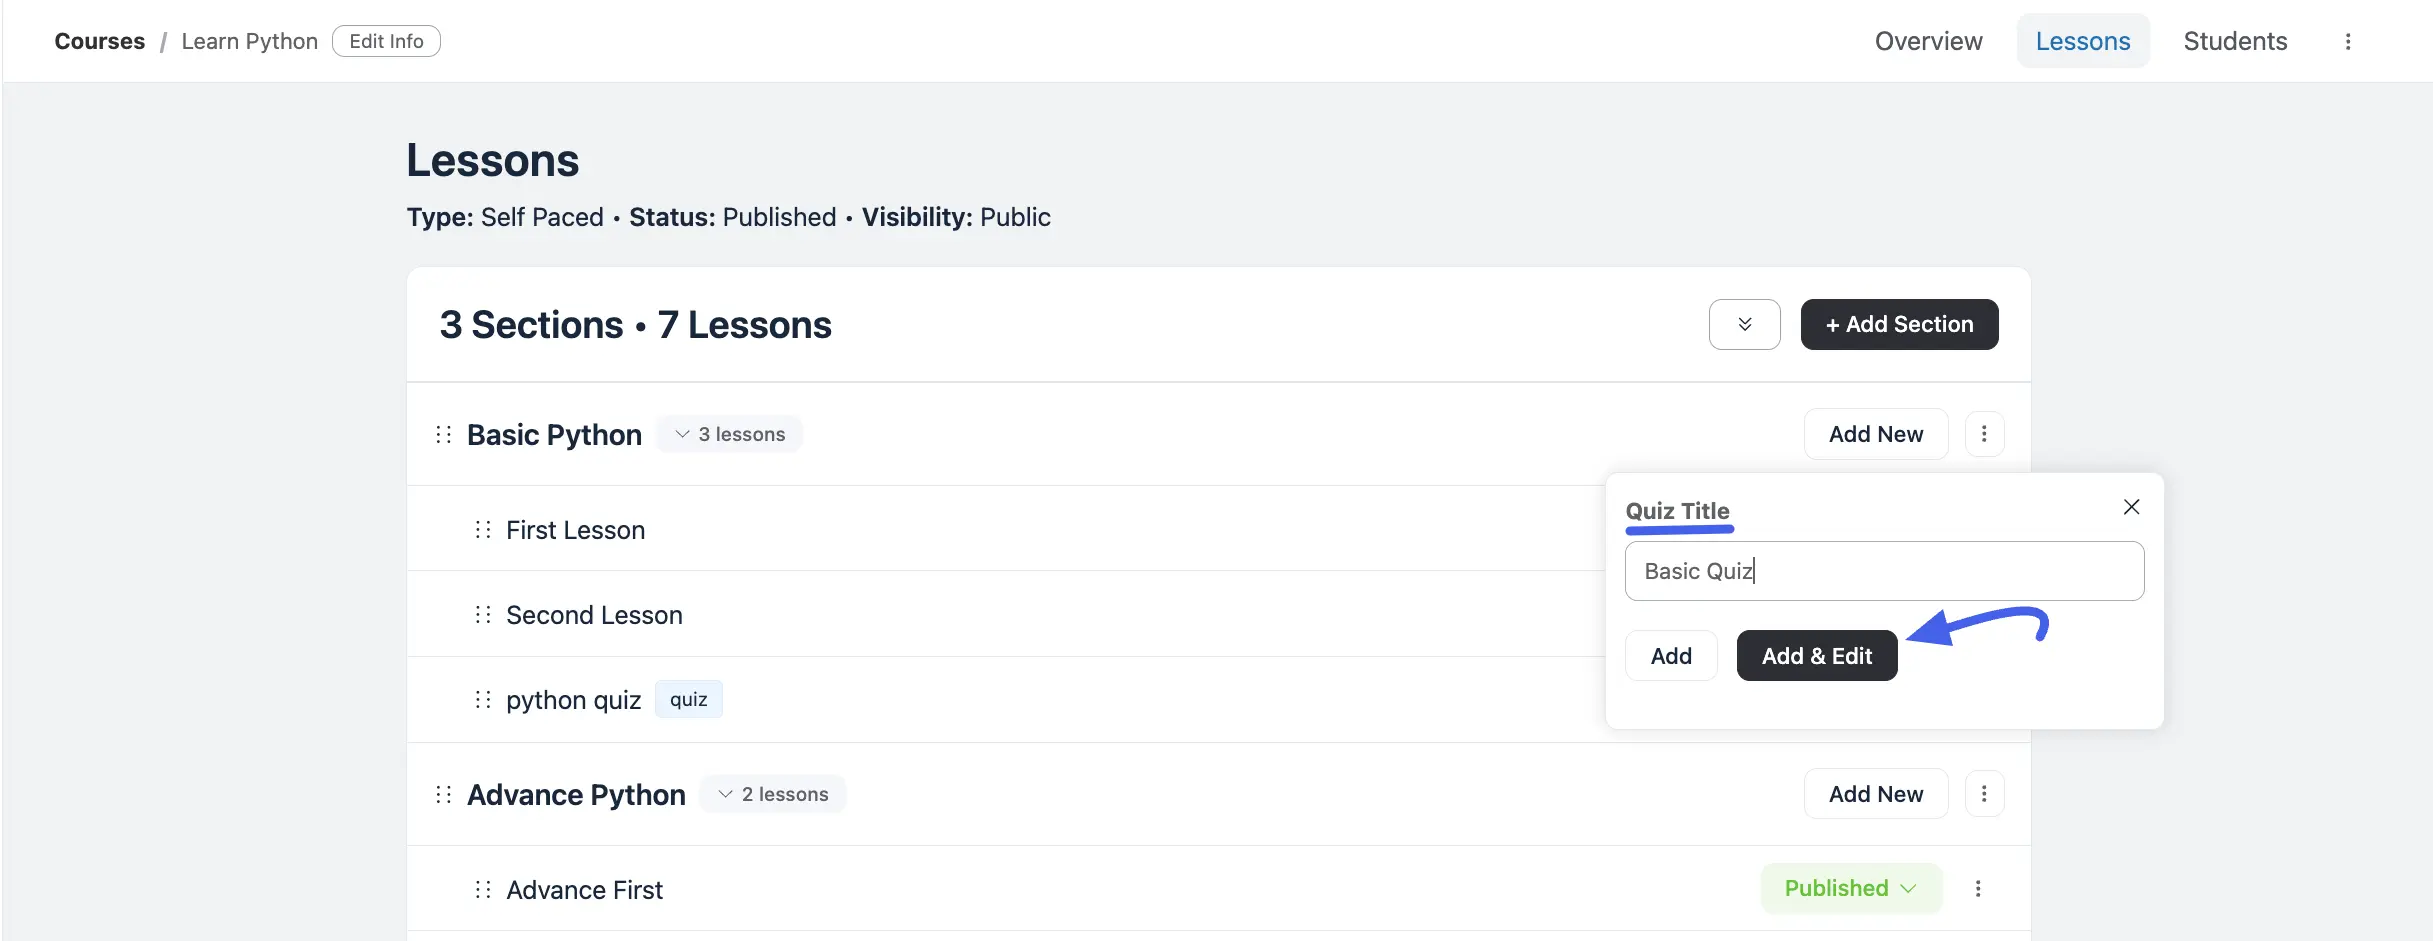
- Type your quiz name in the Quiz Title pop-up box.
- Click Add & Edit to open the quiz builder.
Configure Quiz Settings
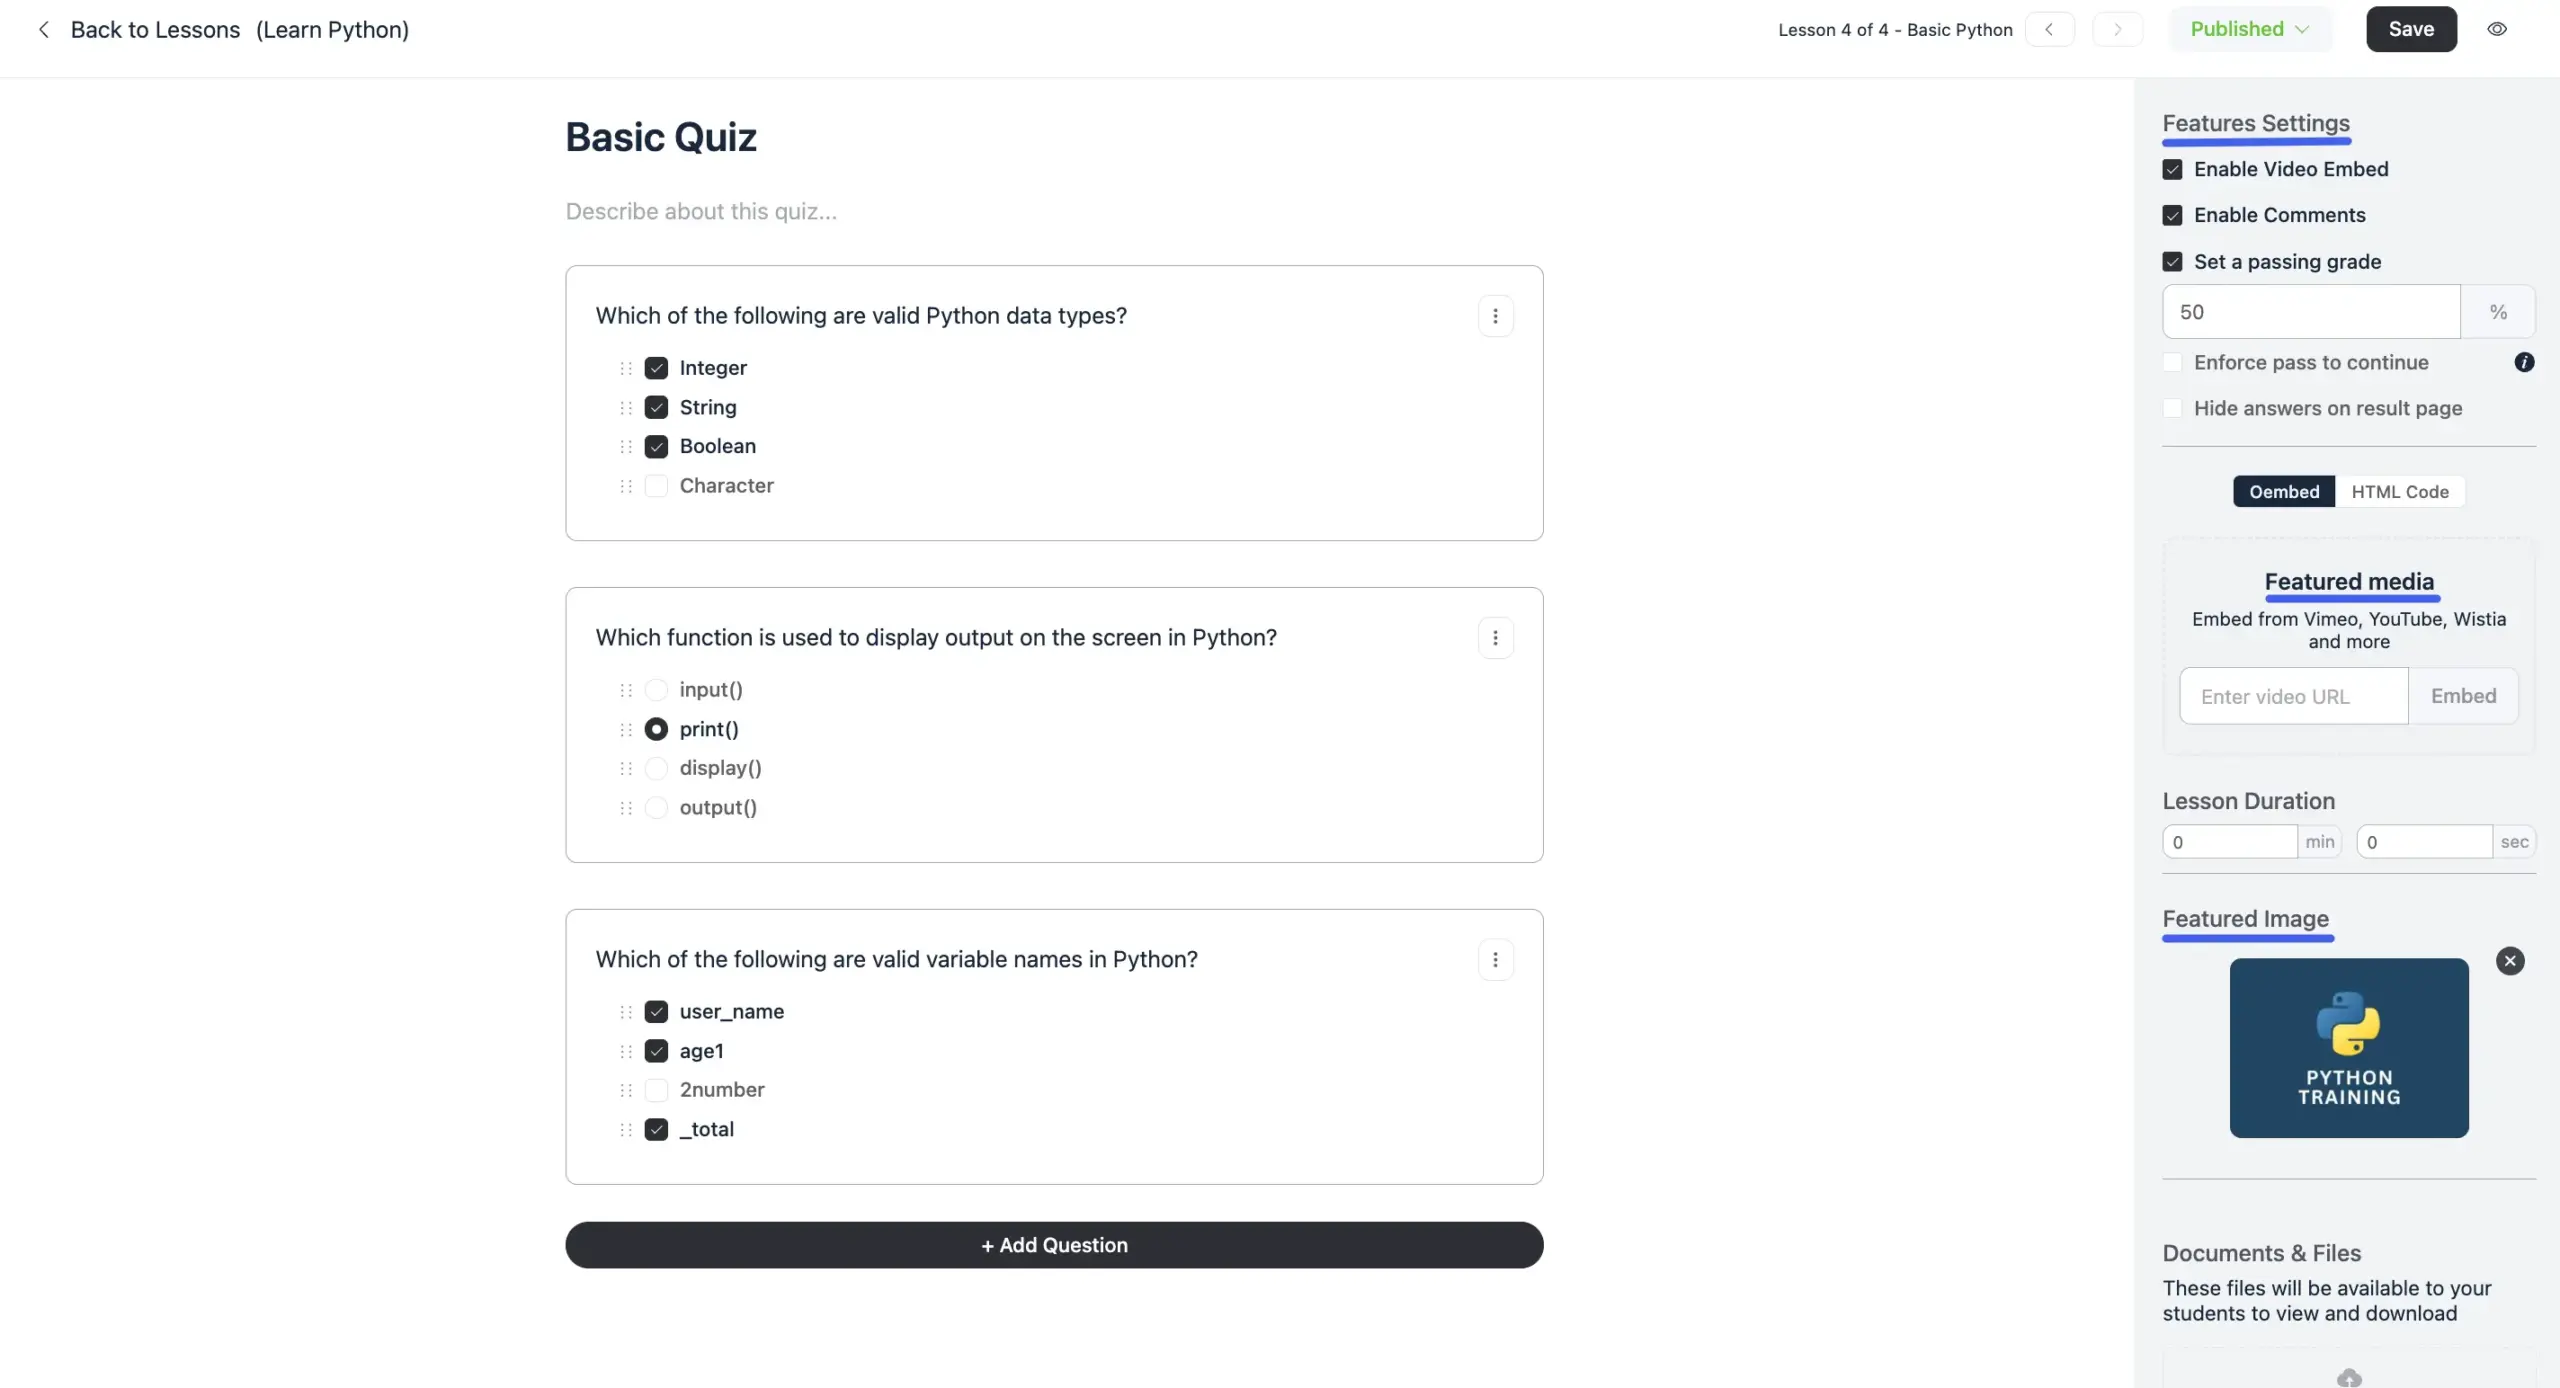
The right side of the quiz editor holds your settings panel. This is your control center for how the quiz behaves for your learners.
- Enable Video Embed: Show a video at the top of your quiz page.
- Enable Comments: Allow students to leave comments or ask questions below the quiz.
- Set a passing grade: Turn this on to require a specific score to pass. Enter the required percentage (for example, type
80for 80%). - Hide answers on result page: Keep the correct answers hidden after a student finishes the quiz. This is useful if you let students retake the test.
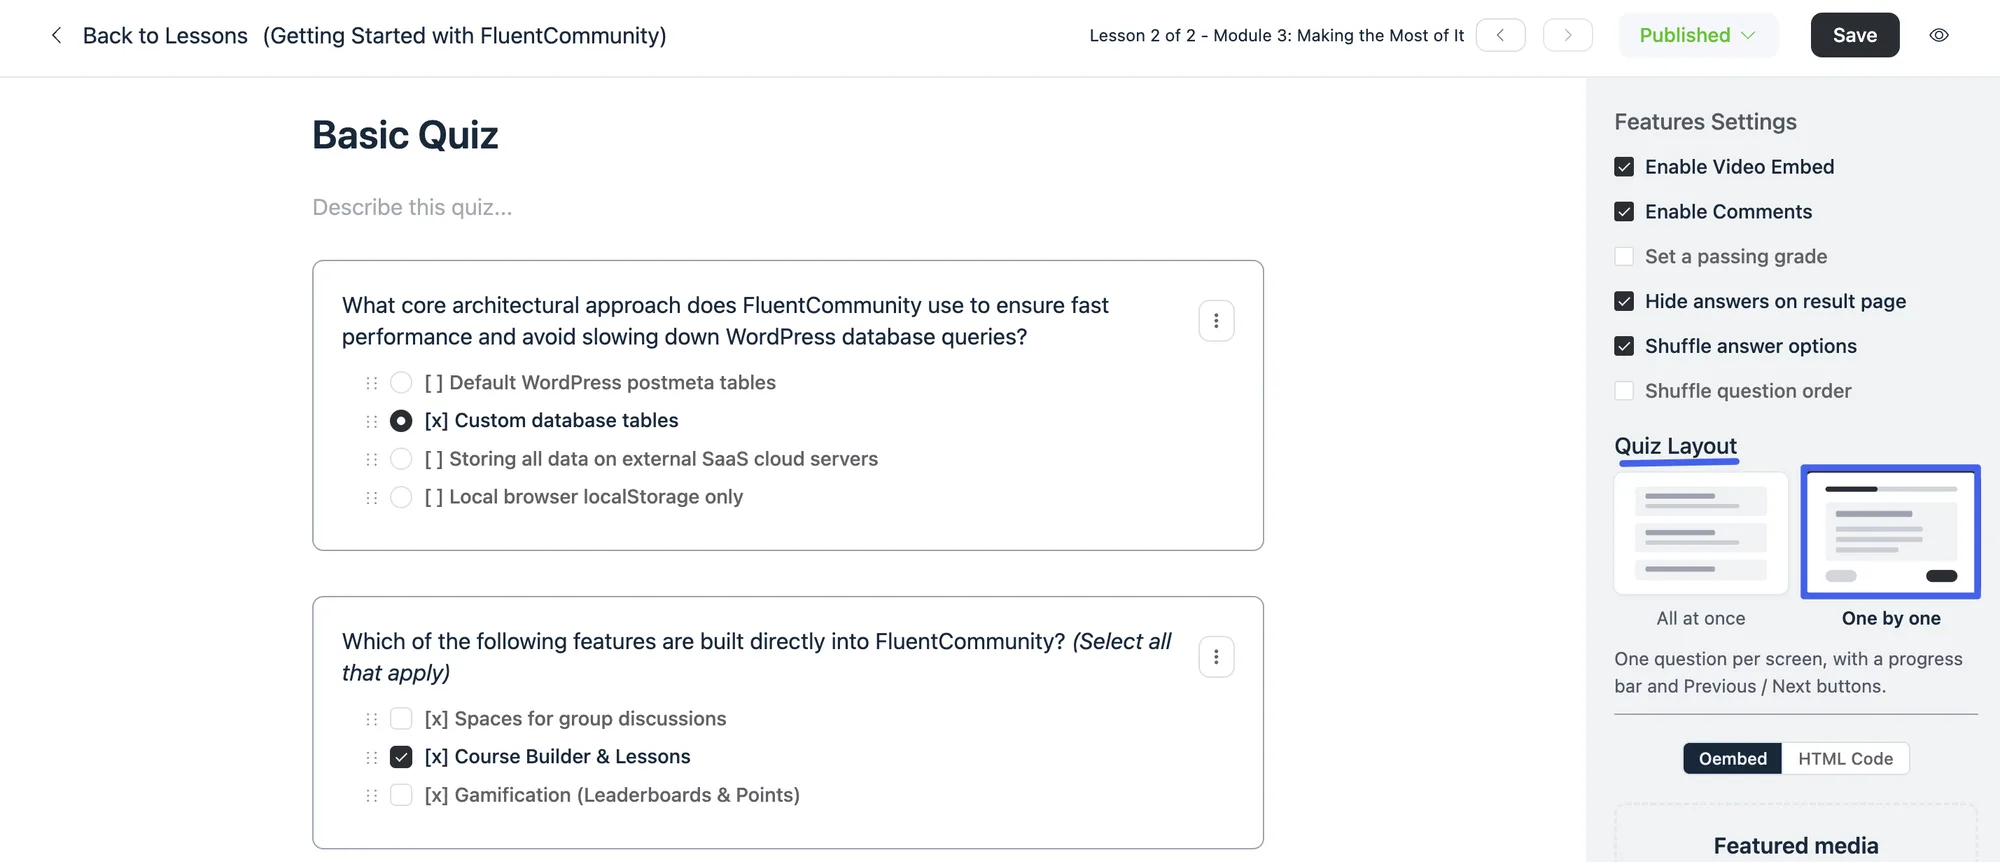
- Quiz Layout: A long quiz on a single page can feel like a wall of questions. Choose between All at once, the classic single page, and One by one, which shows one question per screen with a progress bar and Previous / Next buttons. This only changes how the quiz looks, grading works the same way either way, and the result page still lists every question so students can review the whole quiz.
- Shuffle answer options: Shows each question's answer choices in a random order for every student.
- Shuffle question order: Shows the questions themselves in a random order for every student. Turn on either shuffle setting and students stop being able to memorize where the right answer sits, your own editing order in the builder stays exactly as you left it.
- Featured media: Paste a video URL (YouTube, Vimeo) into the Embed tab, or paste code into the Custom HTML Code tab to place a video at the top of the quiz.
- Lesson Duration: Enter the expected time in minutes and seconds it will take a student to complete the quiz.
- Featured Image: Click Upload Image to add a thumbnail graphic for your main course page.
- Documents & Files: Drag and drop extra materials, like PDF study guides, for students to download before they start.
Build Your Questions
The quiz editor is fast, clean, and fully keyboard-accessible, you can add and build entire quizzes without ever touching your mouse.
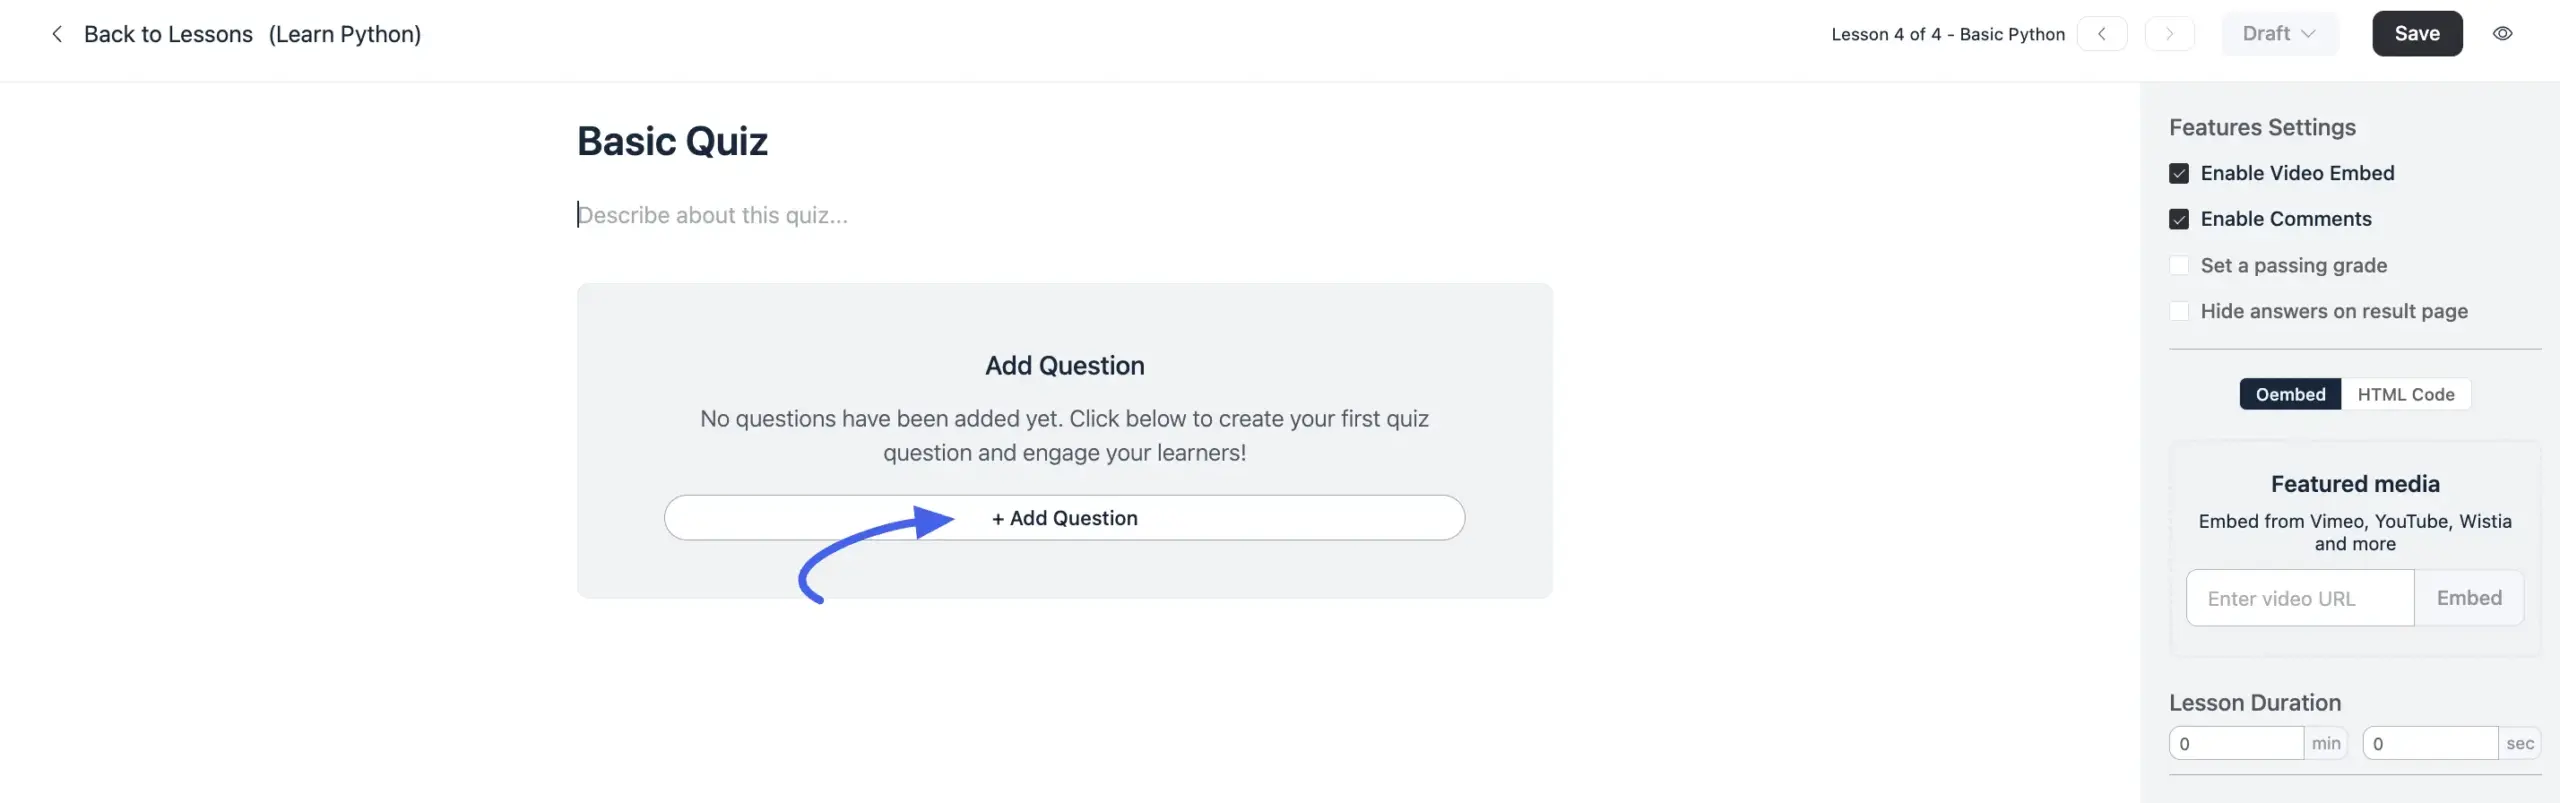
- Click the + Add Question button at the bottom of the screen.
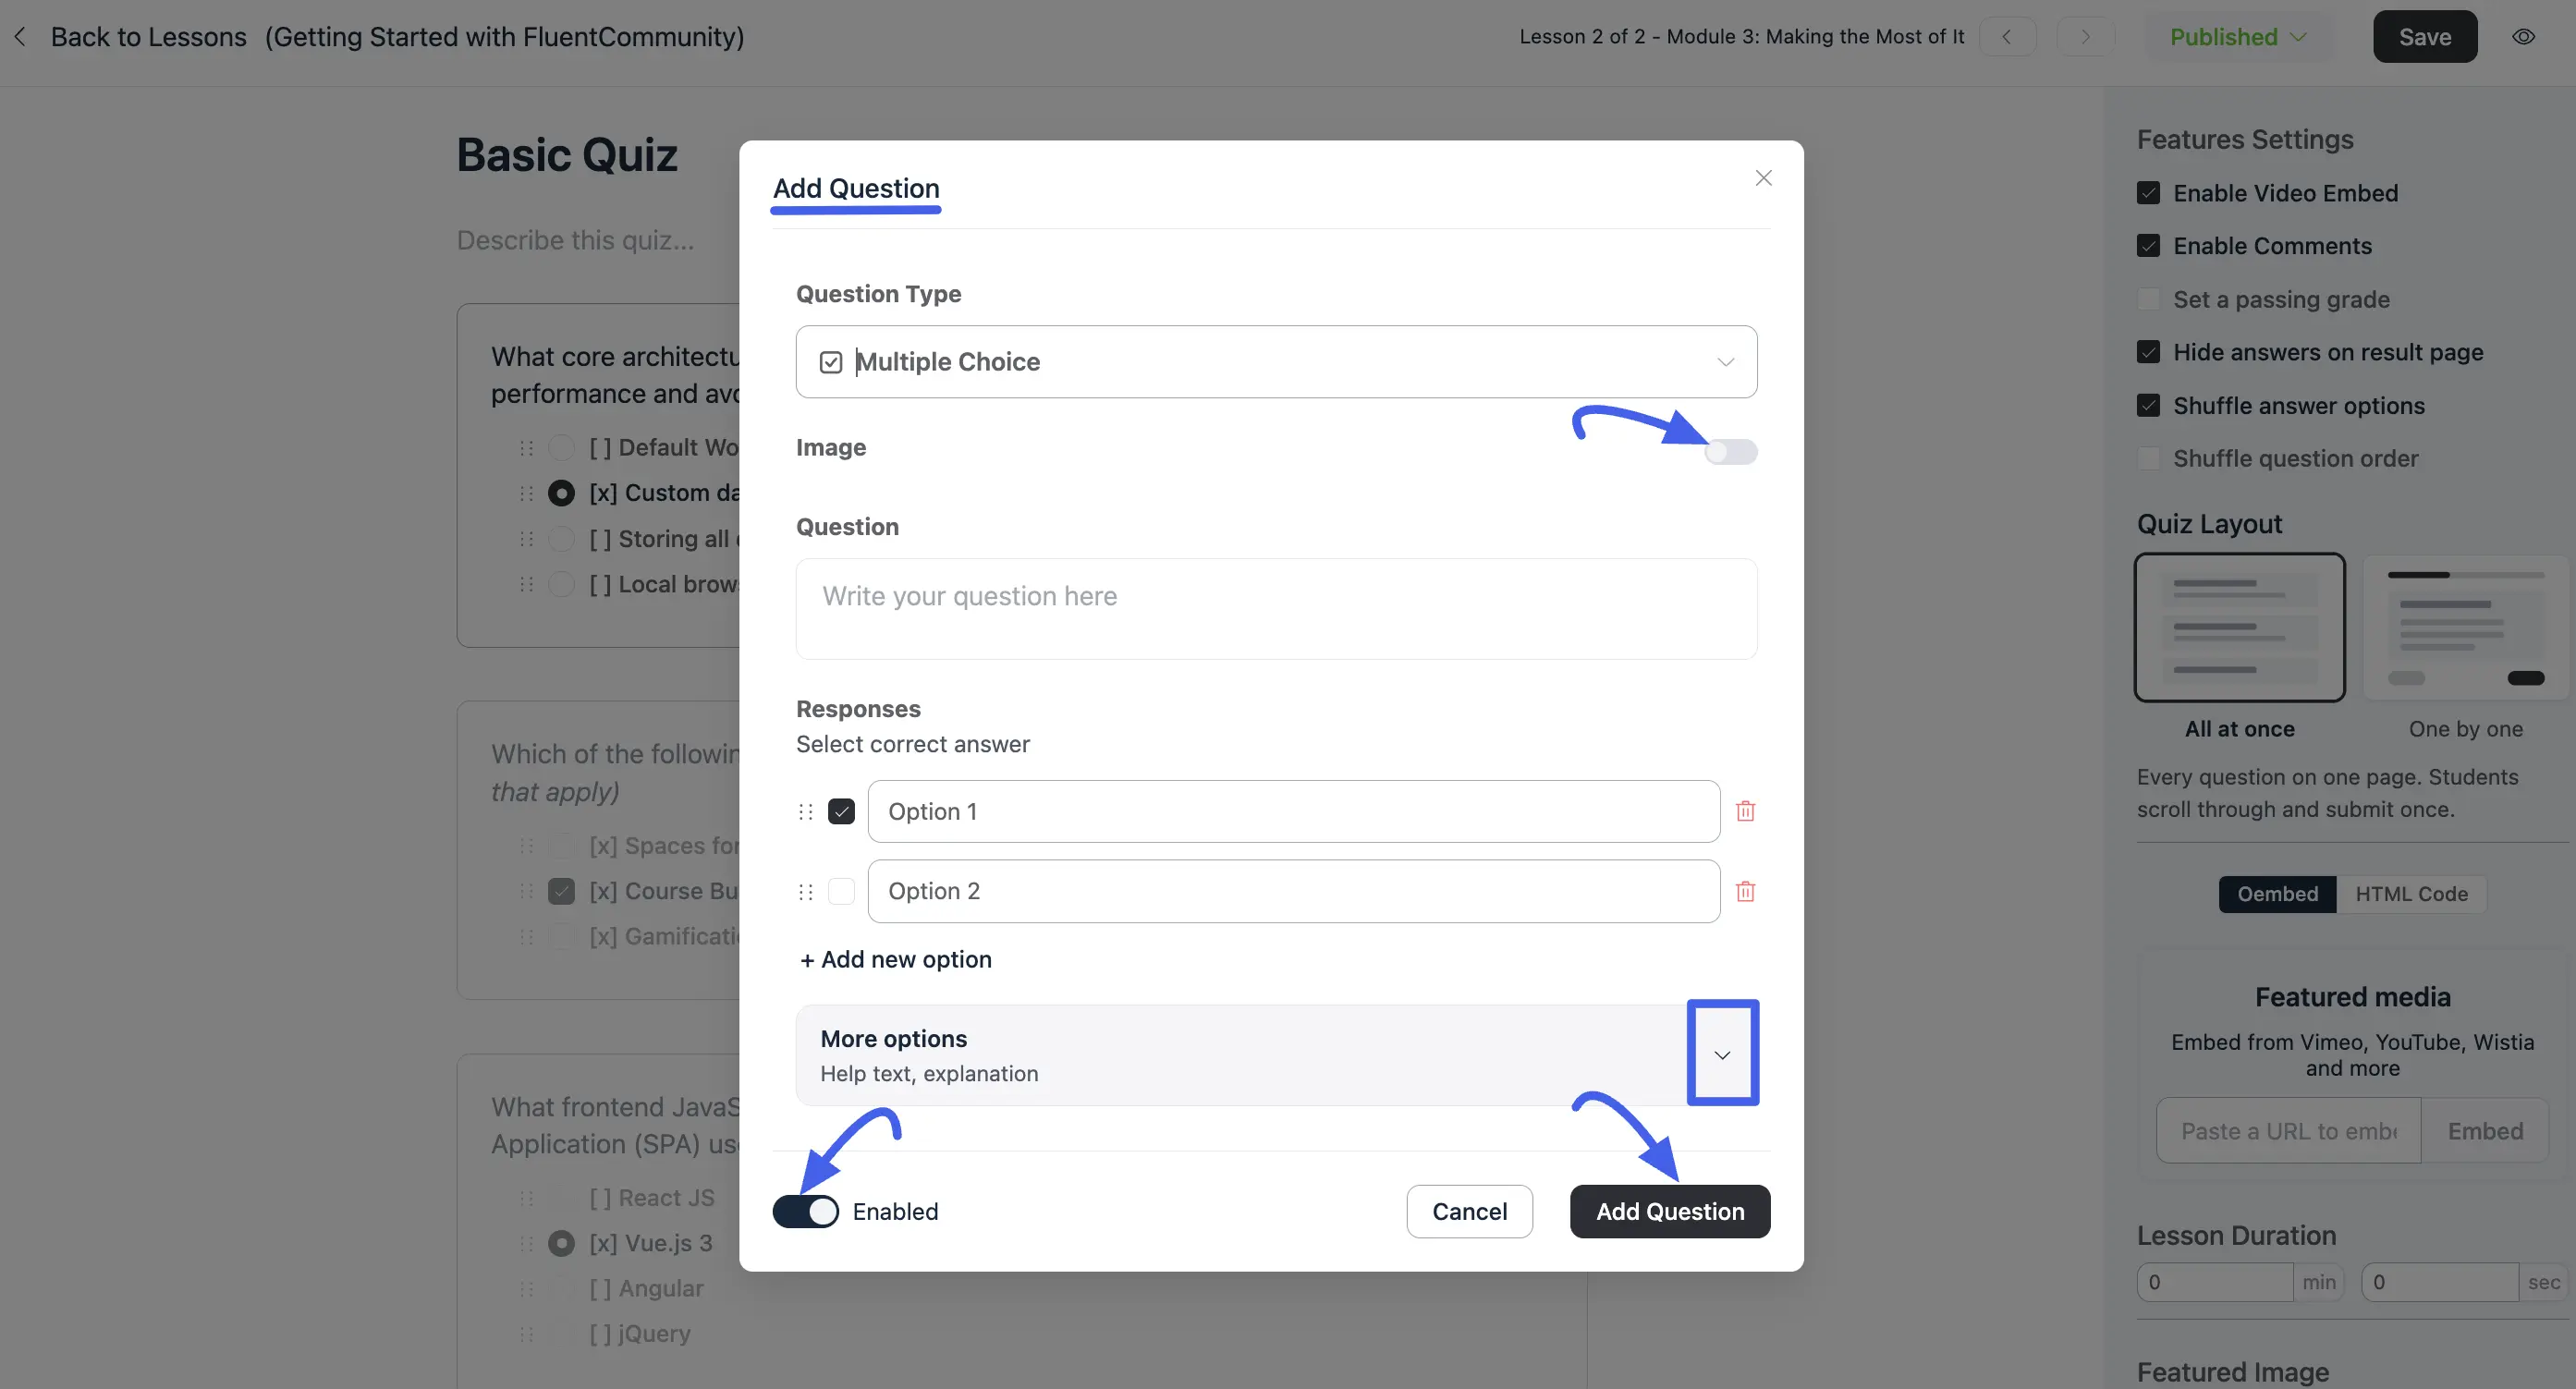
- Choose your question Type from the dropdown (see Question Types below).
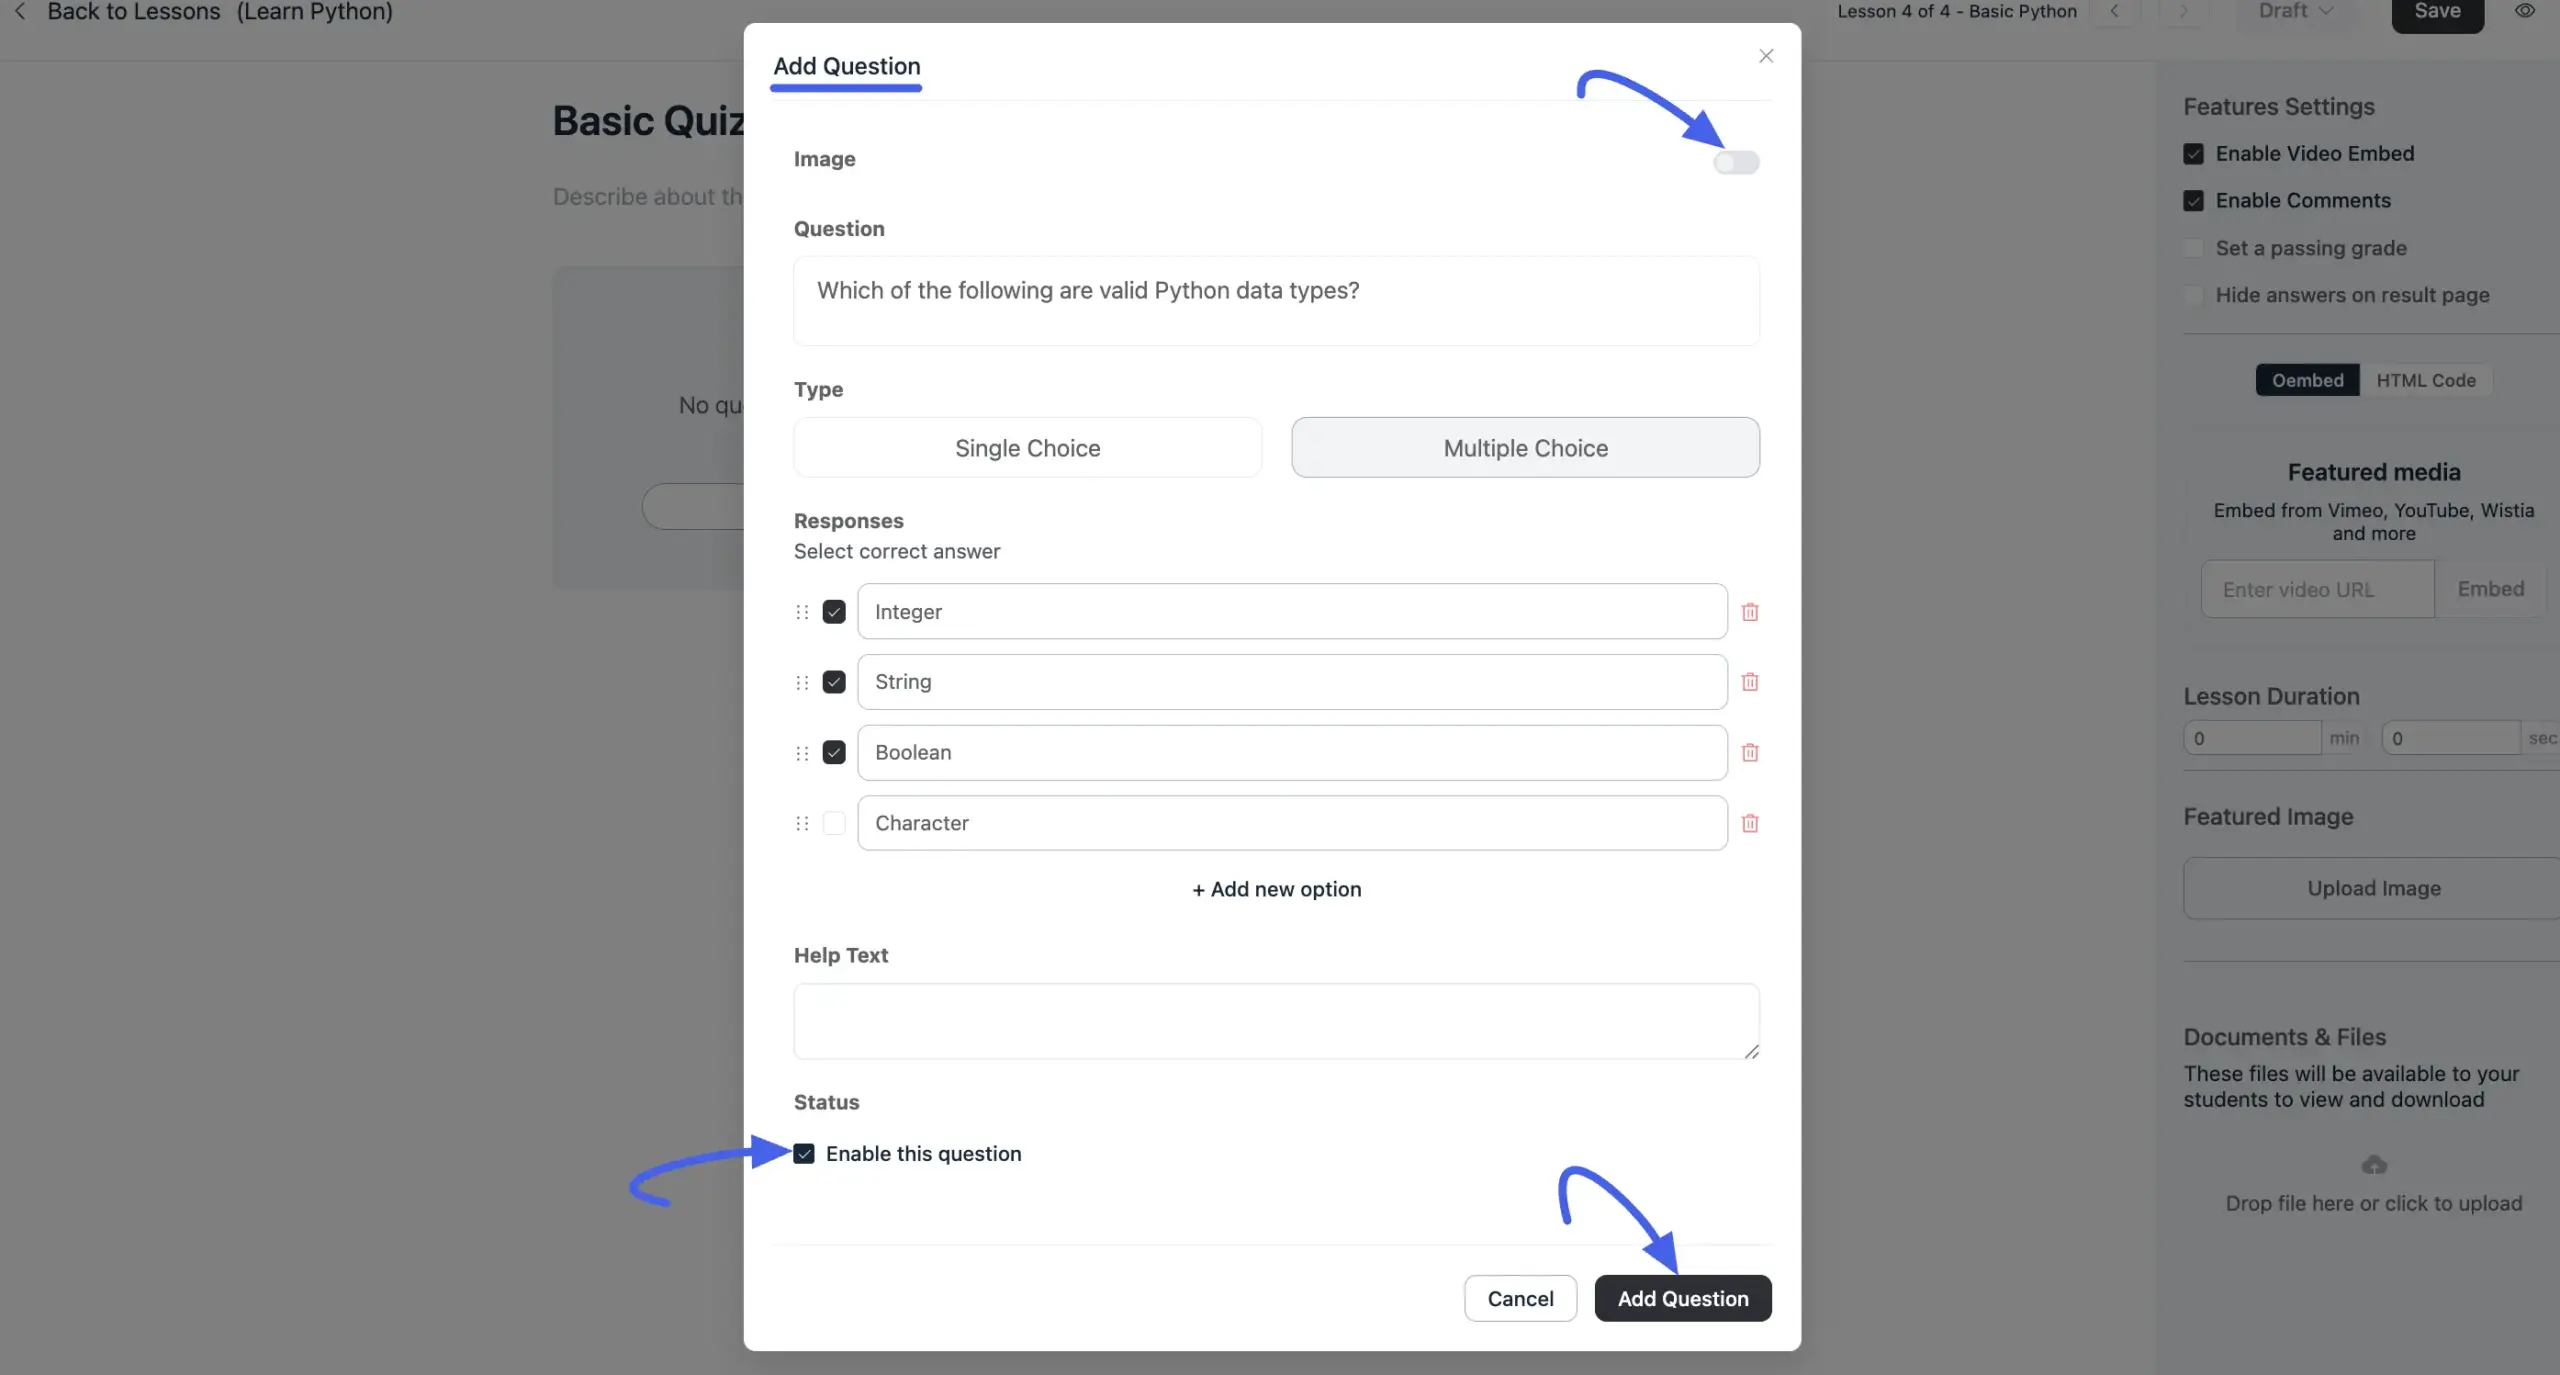
- Toggle Image on if you want to upload a picture at the top of the question.
- Type your question in the Question box.
- Fill in the responses under Responses, the fields shown depend on the Type you picked.
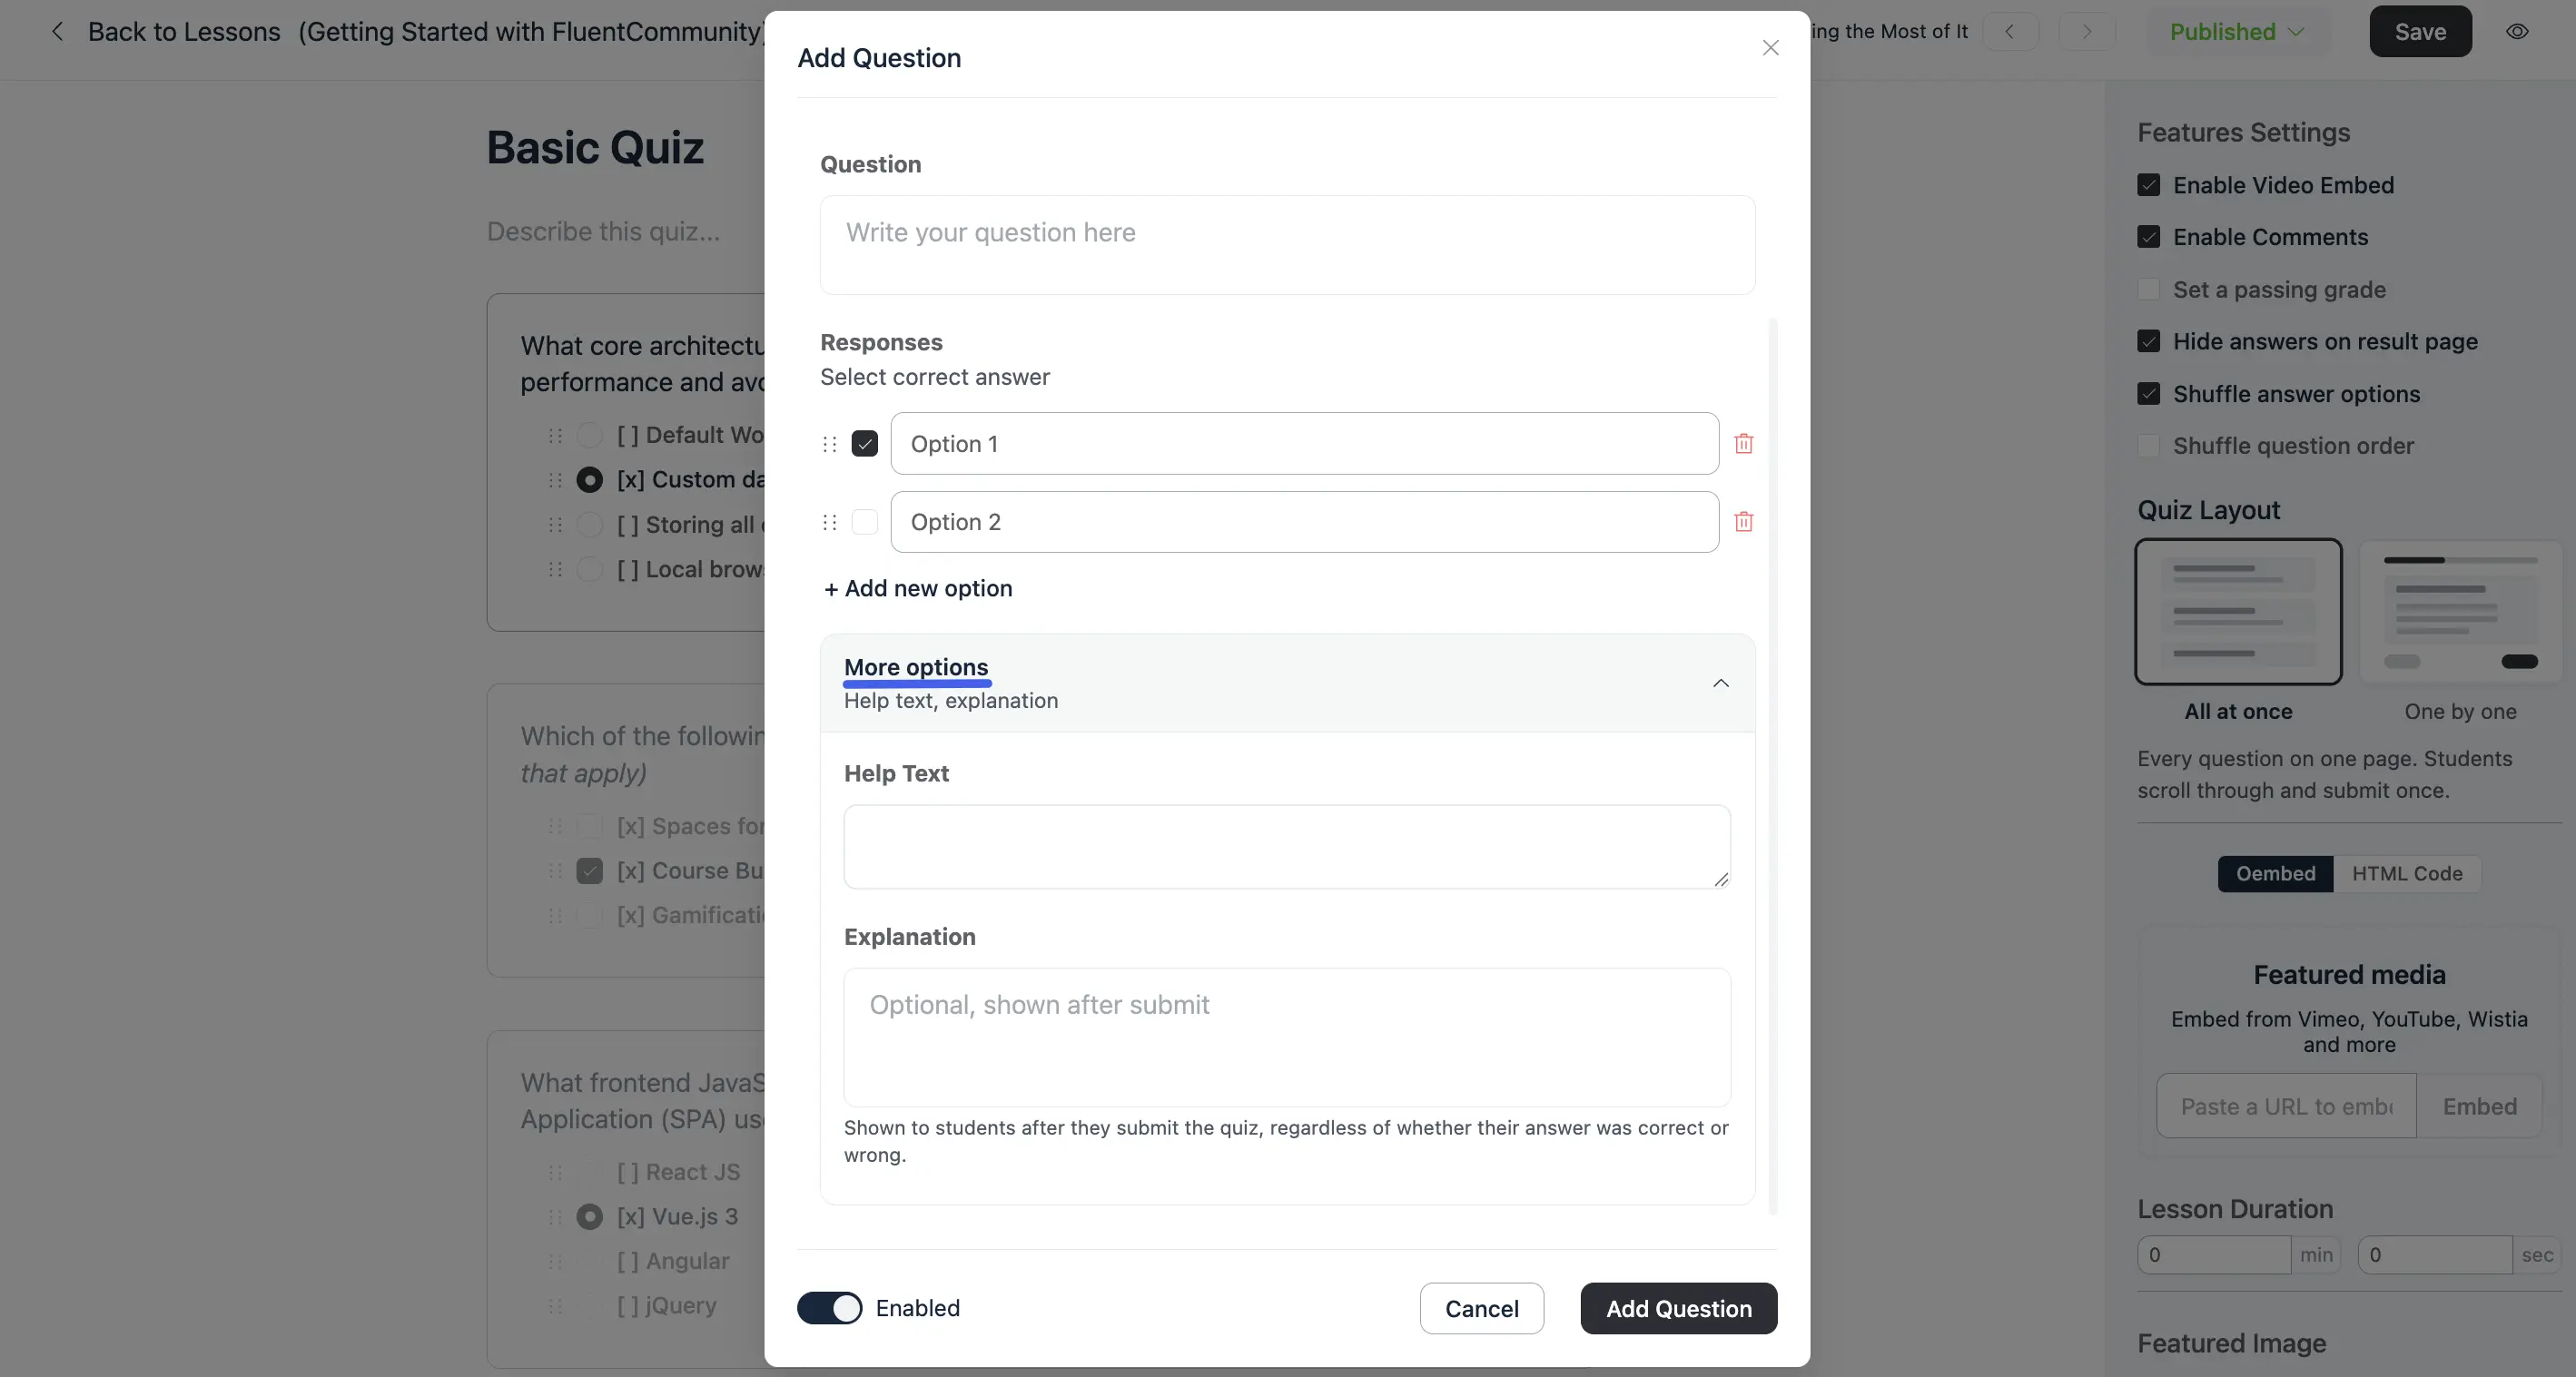
- Click More options to expand two optional fields:
- Help Text — a hint shown to students while they're answering.
- Explanation (Pro) — written with the same formatting tools as a post, so it can be more than a one-line note. A score tells a student how they did; an explanation tells them what to learn from it. See Viewing Explanations below for how students see it.
- Use the Enabled toggle to control whether the question is live right away.
- Click Add Question to save it to the list.
Repeat this process to add as many questions as your quiz needs.
Question Types
FluentCommunity supports seven question types, so you can match the format to what you're actually testing.
- Single Choice: One correct option. Students pick one answer from the list.
- Multiple Choice: Several correct options. Students can select more than one; all correct options must be chosen to get credit.
- True / False: Students judge a statement as true or false.
- Fill in the Blank: Your question text includes one or more blanks. Students type the missing word or phrase directly into each blank.
- Ordering: Give students a list of items in the wrong order. They drag and drop the items into what they believe is the correct sequence.
- Matching: Give students two columns of items. They pair each item on the left with the item it matches on the right.
- Written Answer: Open or exact-match text, students type a free-form response instead of picking from options. Choose how it's scored:
- Open grading: The response isn't auto-scored. You review each answer yourself and assign credit manually.
- Exact match: You provide the expected answer text, and FluentCommunity auto-grades the student's response against it.
Manage and Reorder Questions
It is easy to organize your quiz layout directly from the editor.
- Reorder Answers: Grab and move answer choices up or down to change their order.
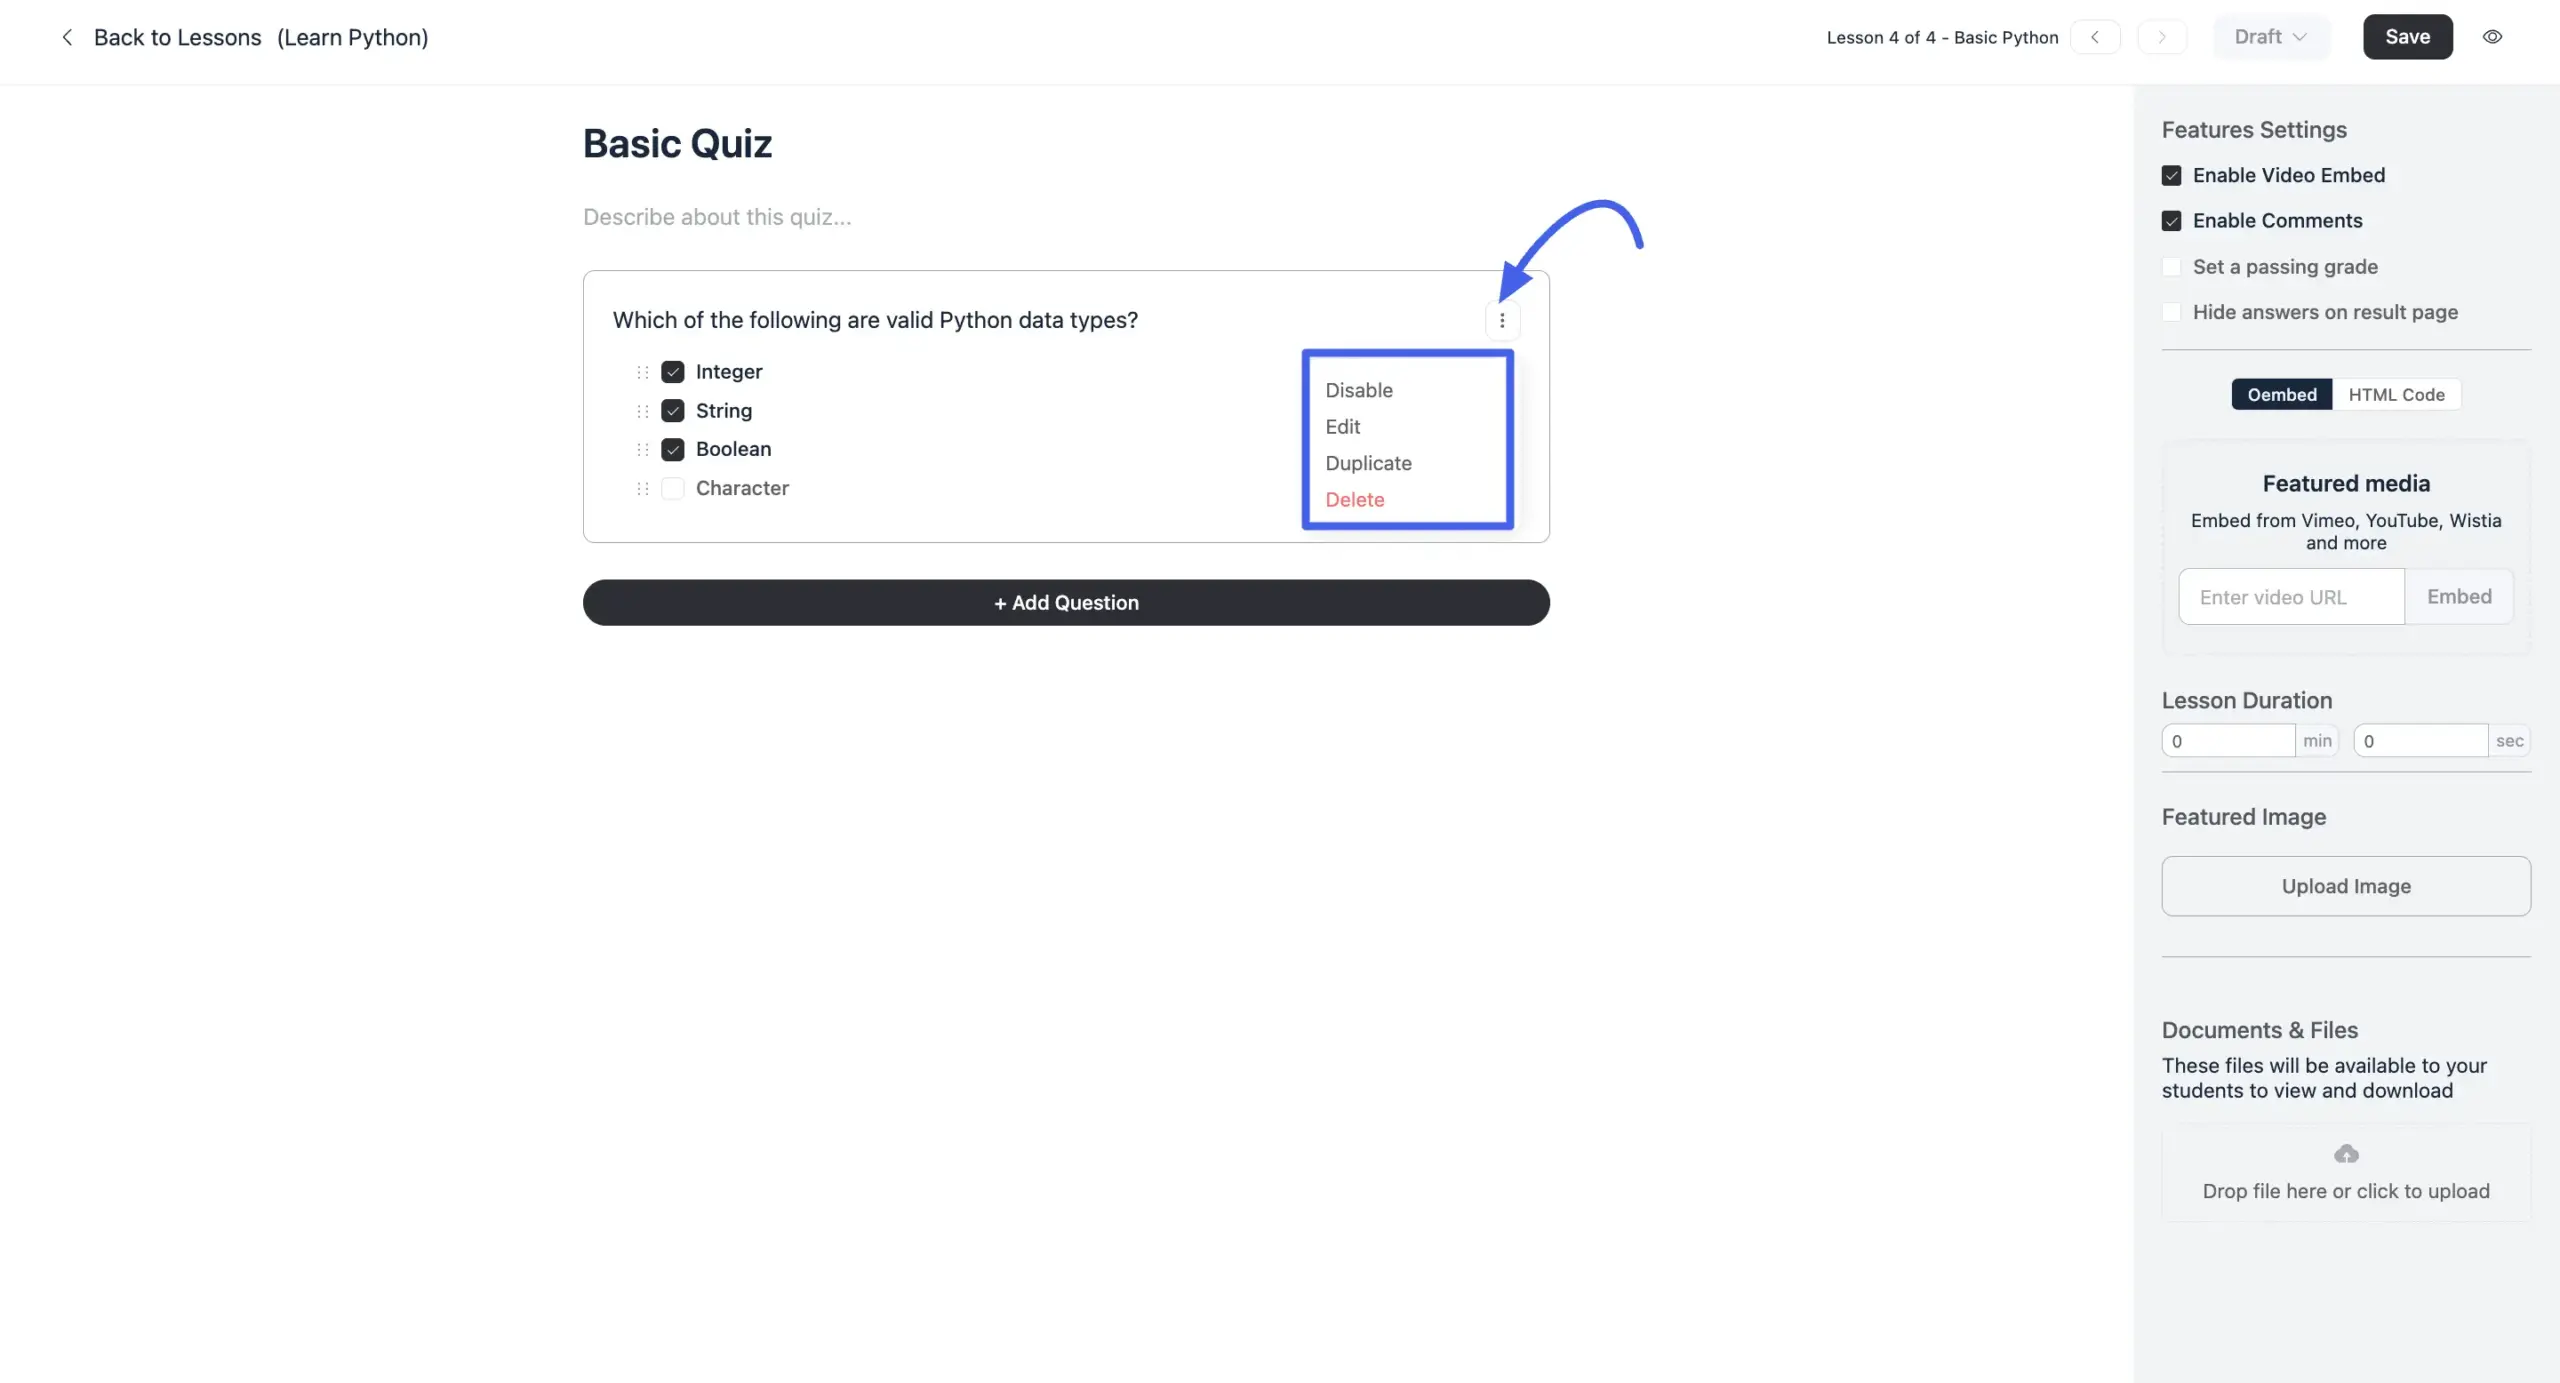
- Edit or Delete: Click the three-dot menu next to any question to edit its text, temporarily disable it, or delete it permanently.
- Duplicate a Question: Click the three-dot menu and select Duplicate. This instantly copies the question and its exact answers. The new copy will glow so you spot it instantly, letting you tweak just a few words for your next question.
Save and Preview Your Quiz
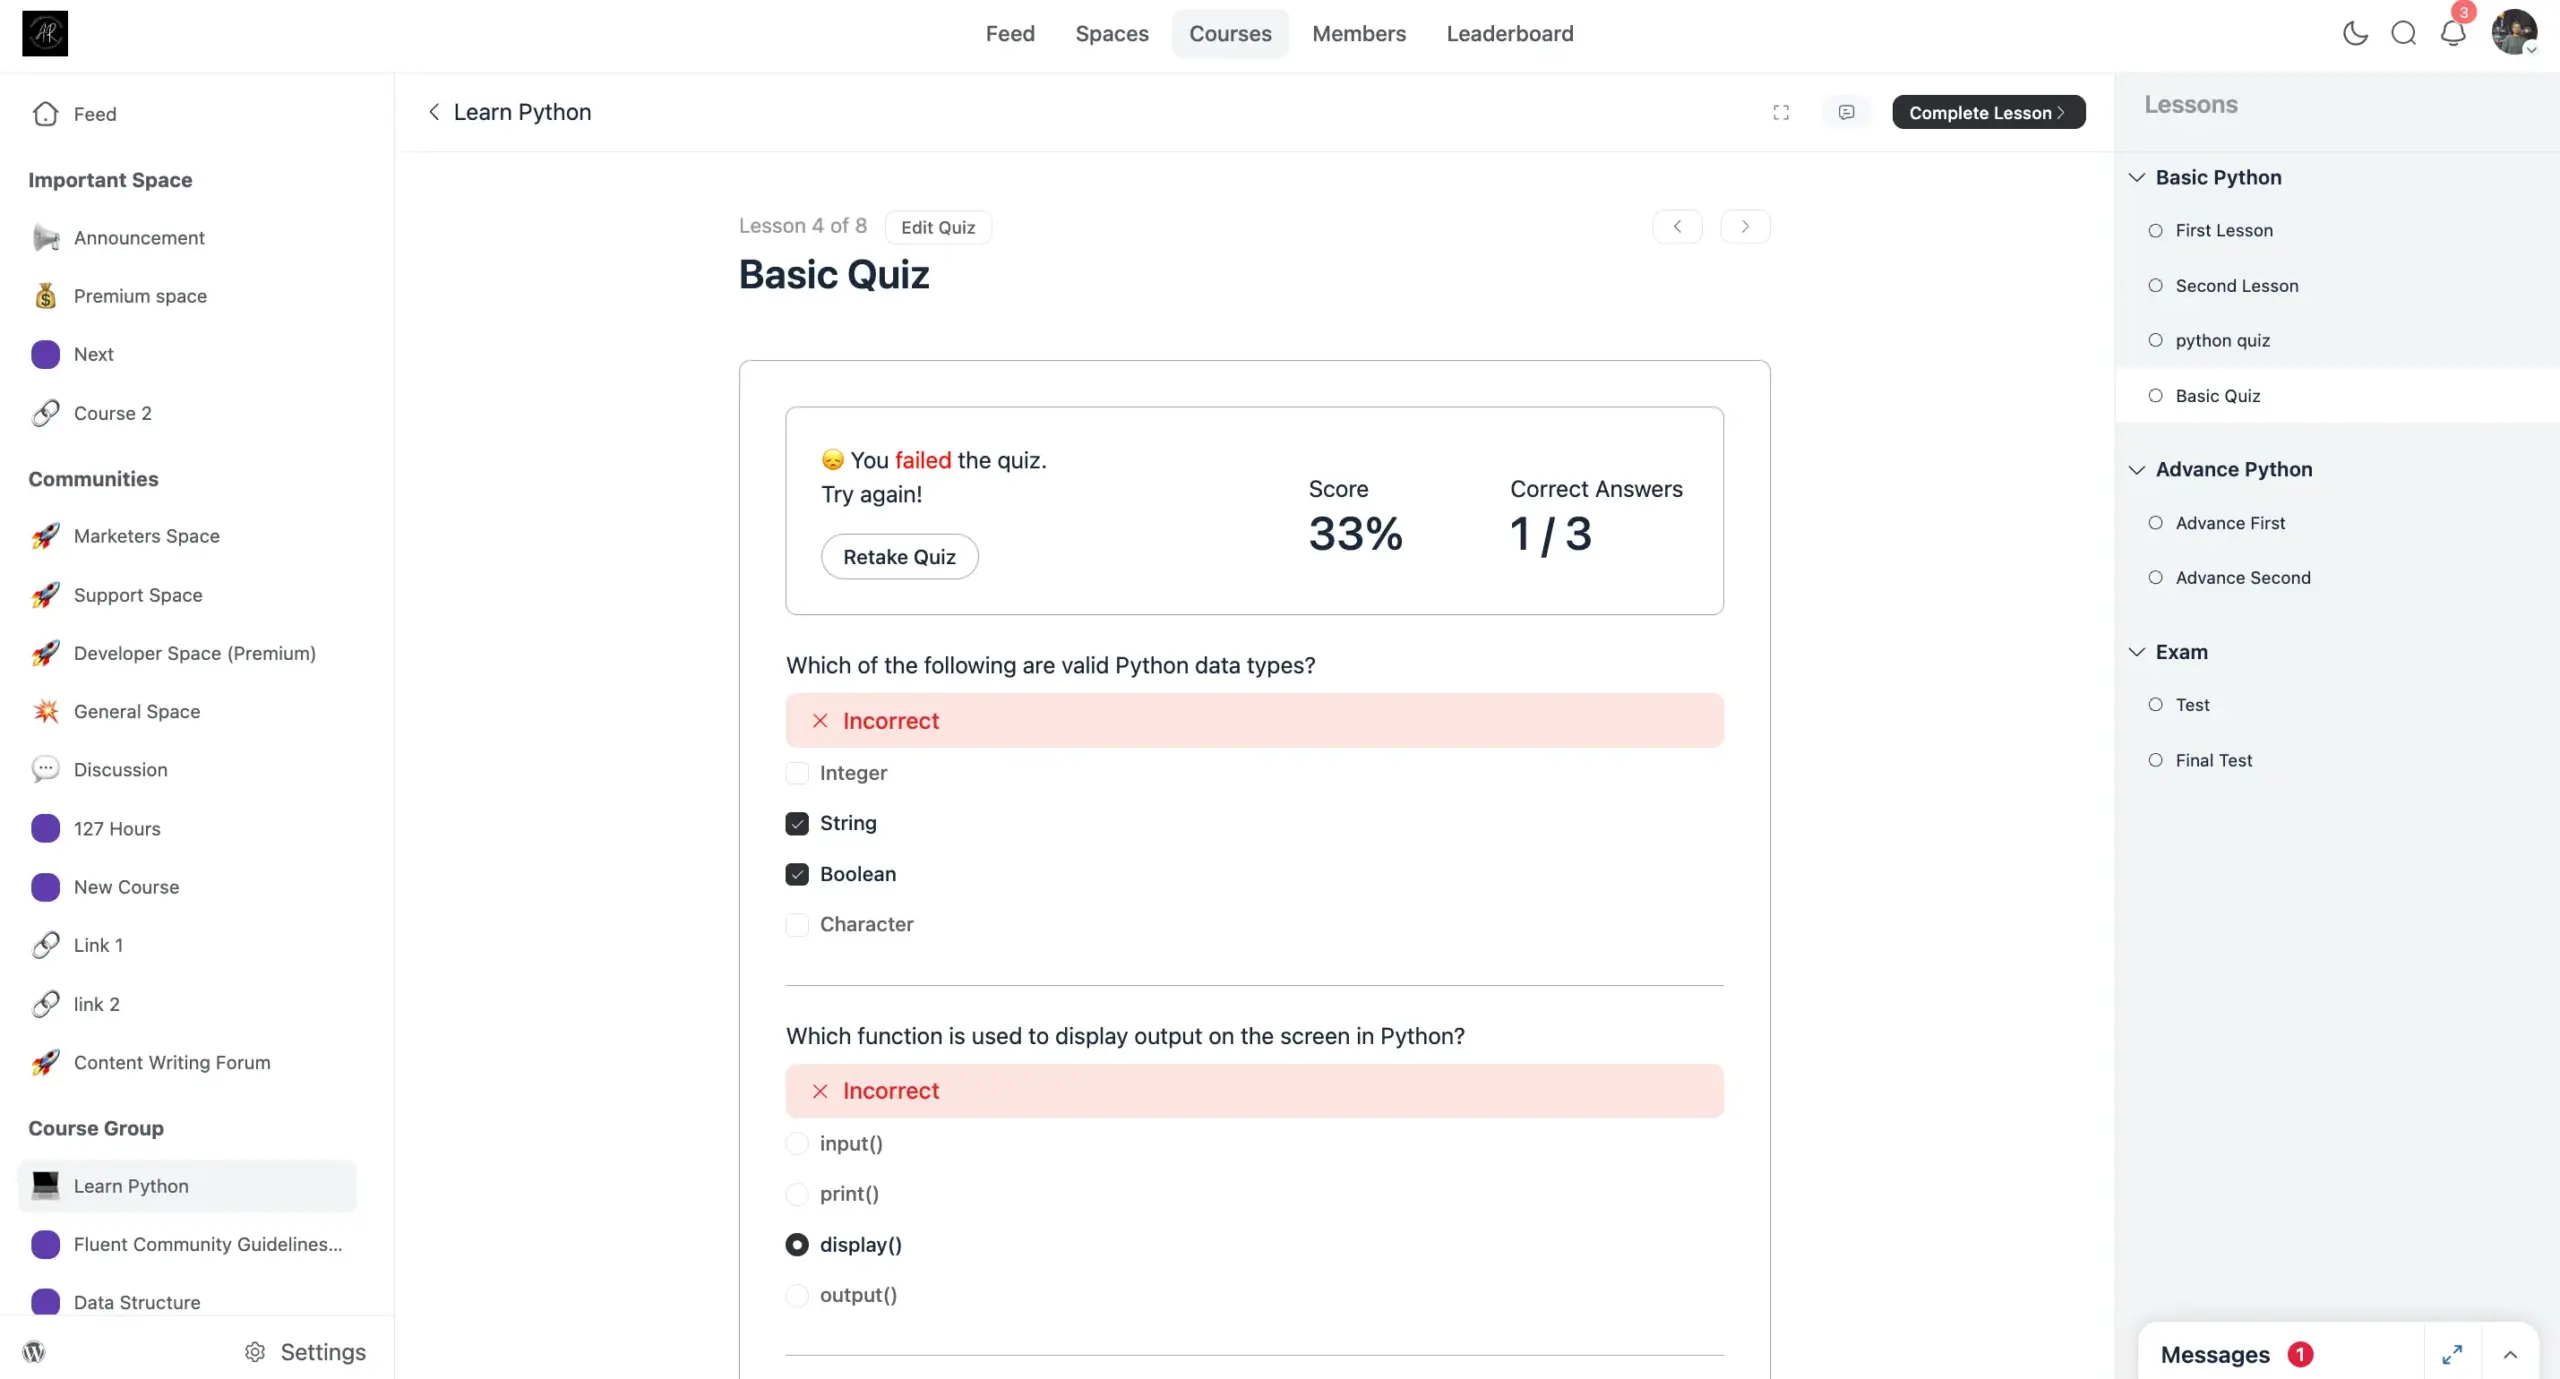
When students take the quiz, they will see their results right away after submitting their answers. Always remember to click the dark Save button in the top-right corner to keep everything updated.
Non-enrolled students
If a student is not enrolled in the course, the Submit button will be disabled. A short message will explain why they cannot submit the form.
Don't forget
Before students can see or take the quiz, make sure you publish your quiz questions.
One Question at a Time
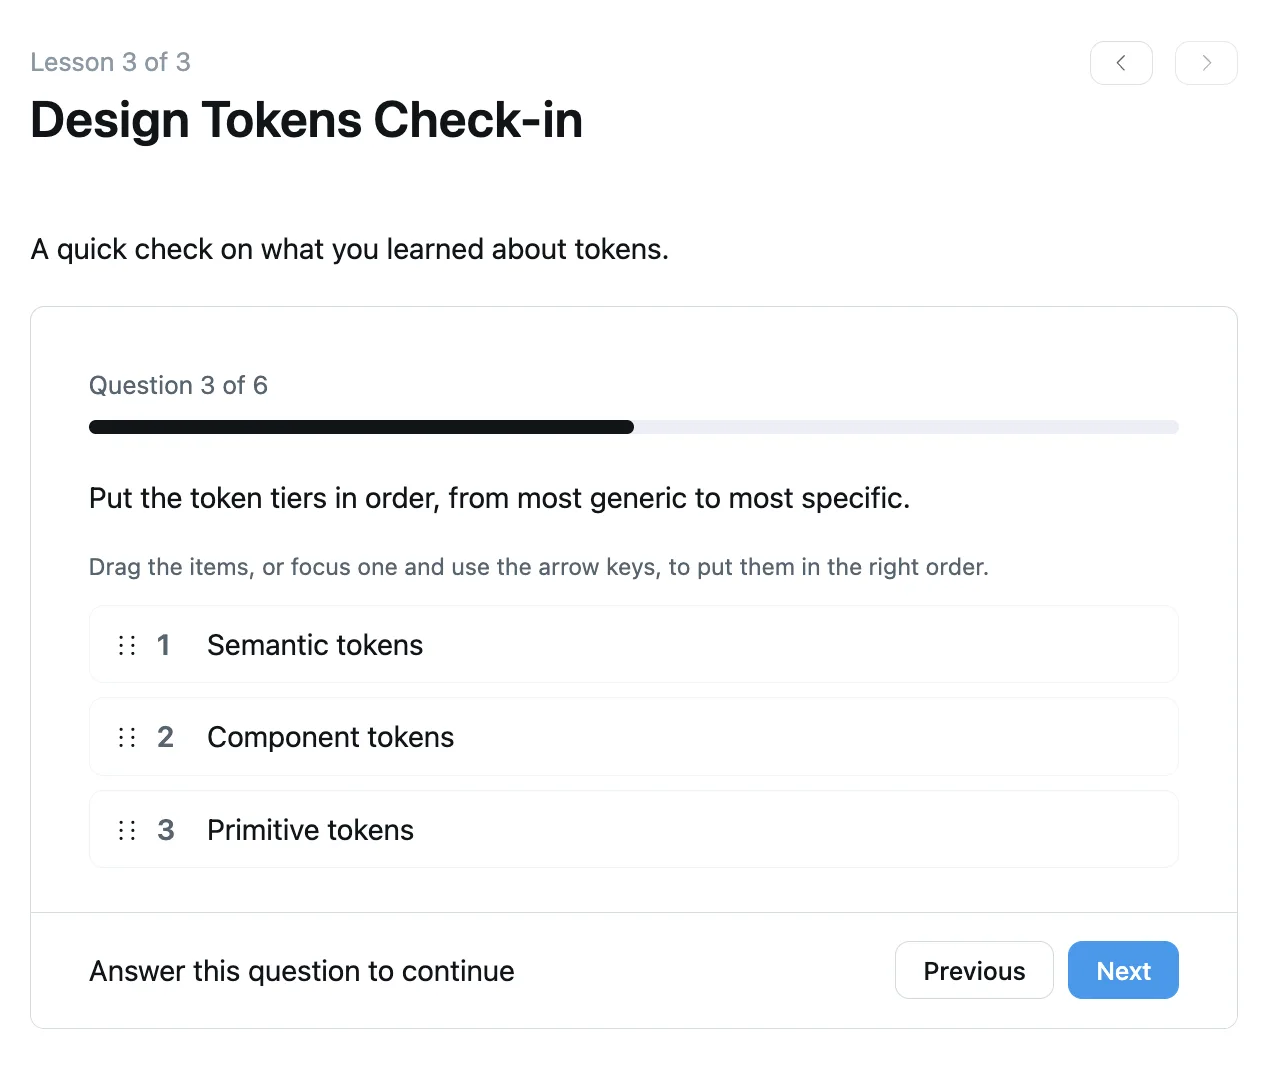
With Quiz Layout set to One by one, students see a single question per screen, with a progress bar counting up (e.g. "Question 3 of 6") and Previous / Next buttons to move between questions.
Viewing Explanations
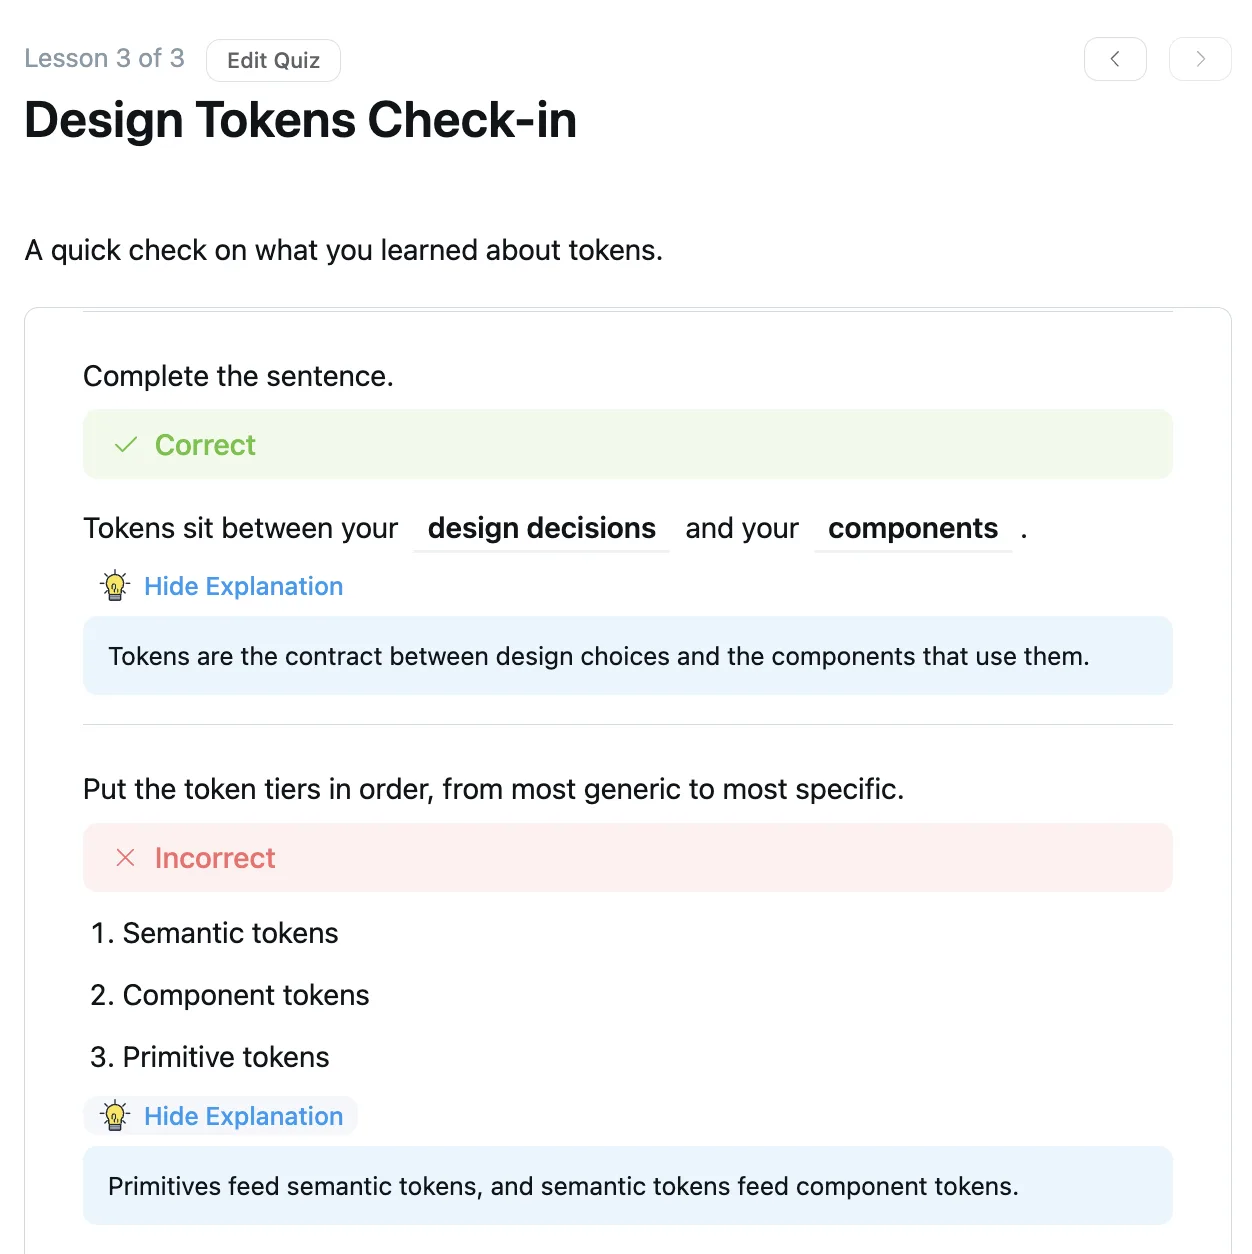
After a student submits, a View Explanation link appears under every question that has one — whether the student got it right or wrong.
INFO
Students can't see a question's explanation before they've attempted the quiz. If Hide answers on result page is turned on, explanations stay hidden along with the answers.