Appearance
Theme Compatibility
The Theme Compatibility feature lets you turn any WordPress page into part of your community portal. If you want a regular page to appear inside your FluentCommunity portal, complete with its frame and layout, this feature makes it possible.
Use Case: You have a custom "About" or "Landing" page built with your theme, and you want it to display seamlessly within your community portal so members never feel like they've left the site.
✨ Note: FluentCommunity integrates seamlessly with popular WordPress themes like Blocksy, Astra, Kadence, GeneratePress, OceanWP, Neve, Hello Elementor, and Bricks, and is fully compatible with the WordPress default themes. It also works with most other themes, though some functions may not behave perfectly outside the themes listed above.
How to Apply the FluentCommunity Frame to a Page
- Open the Page where you want to apply the FluentCommunity portal frame.
- In the right sidebar, find and click the Template option. A popup appears showing the theme currently in use.
- Click the dropdown box to reveal the available template options.
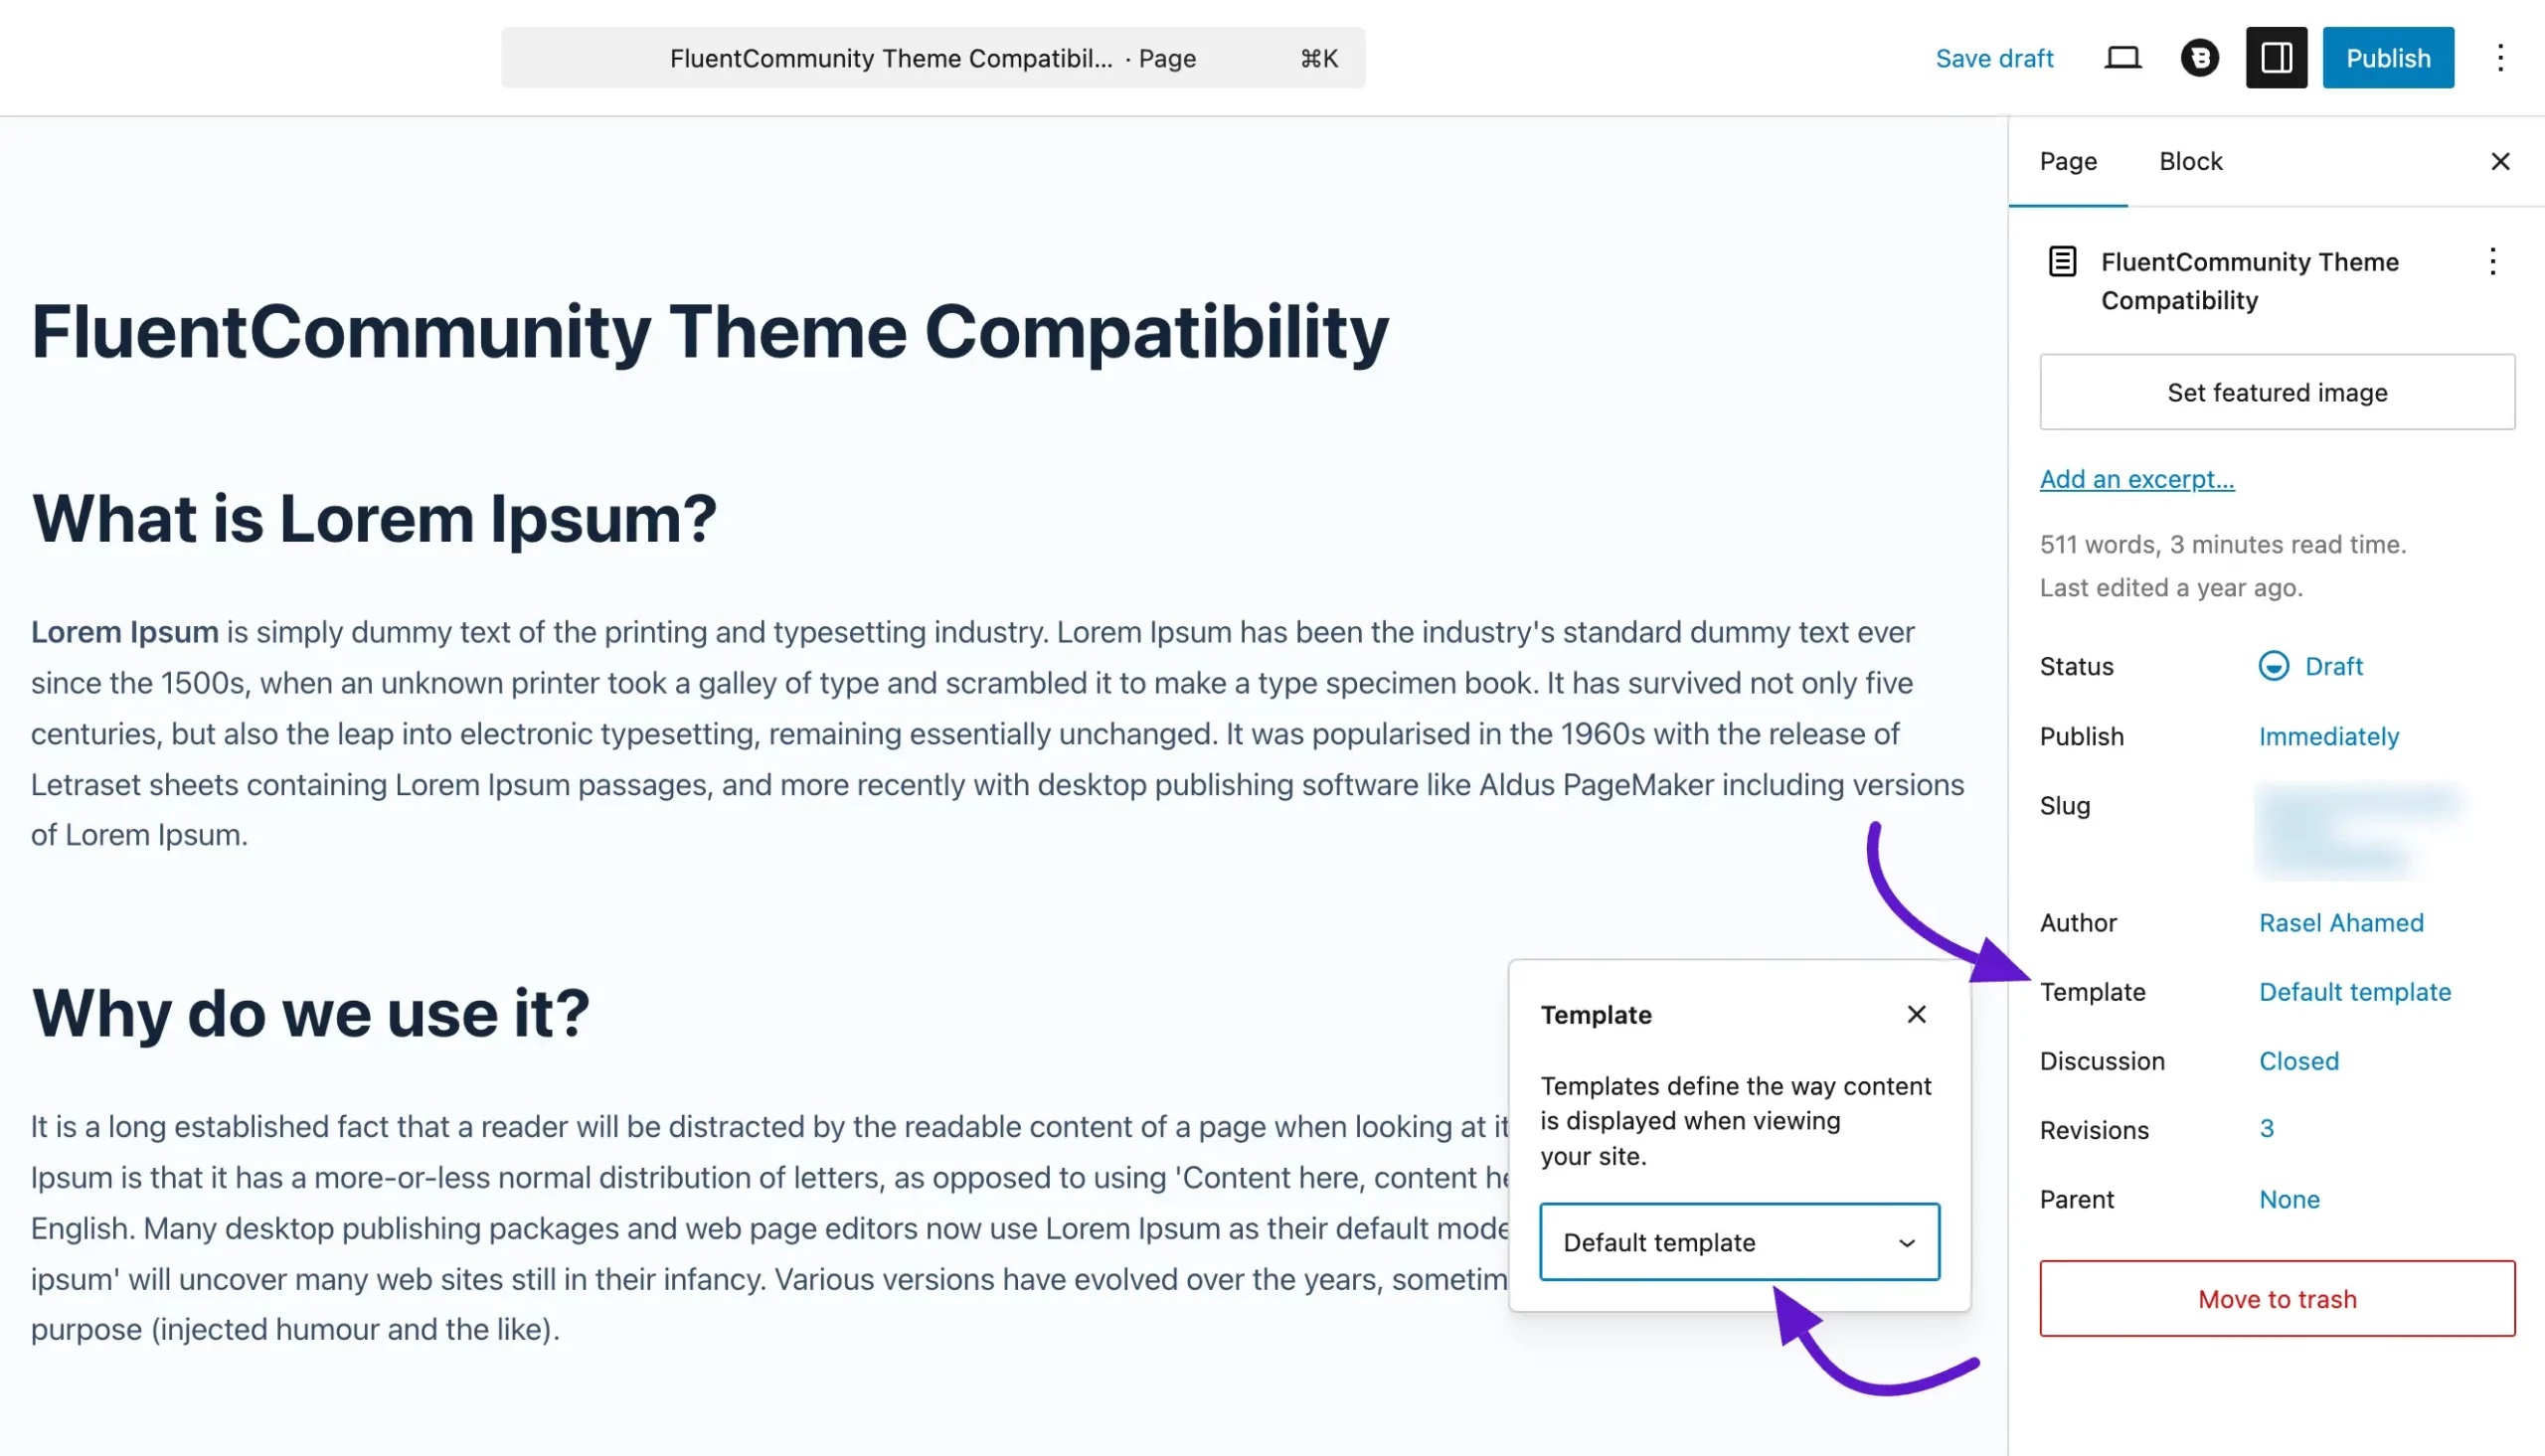
In the dropdown you'll find the FluentCommunity frames:
- FluentCommunity Frame: Applies the default FluentCommunity portal along with its standard layout and preferences.
- FluentCommunity Full Width Frame: If your theme supports full-width layouts, this option displays your content in full width for a cleaner, more spacious look.
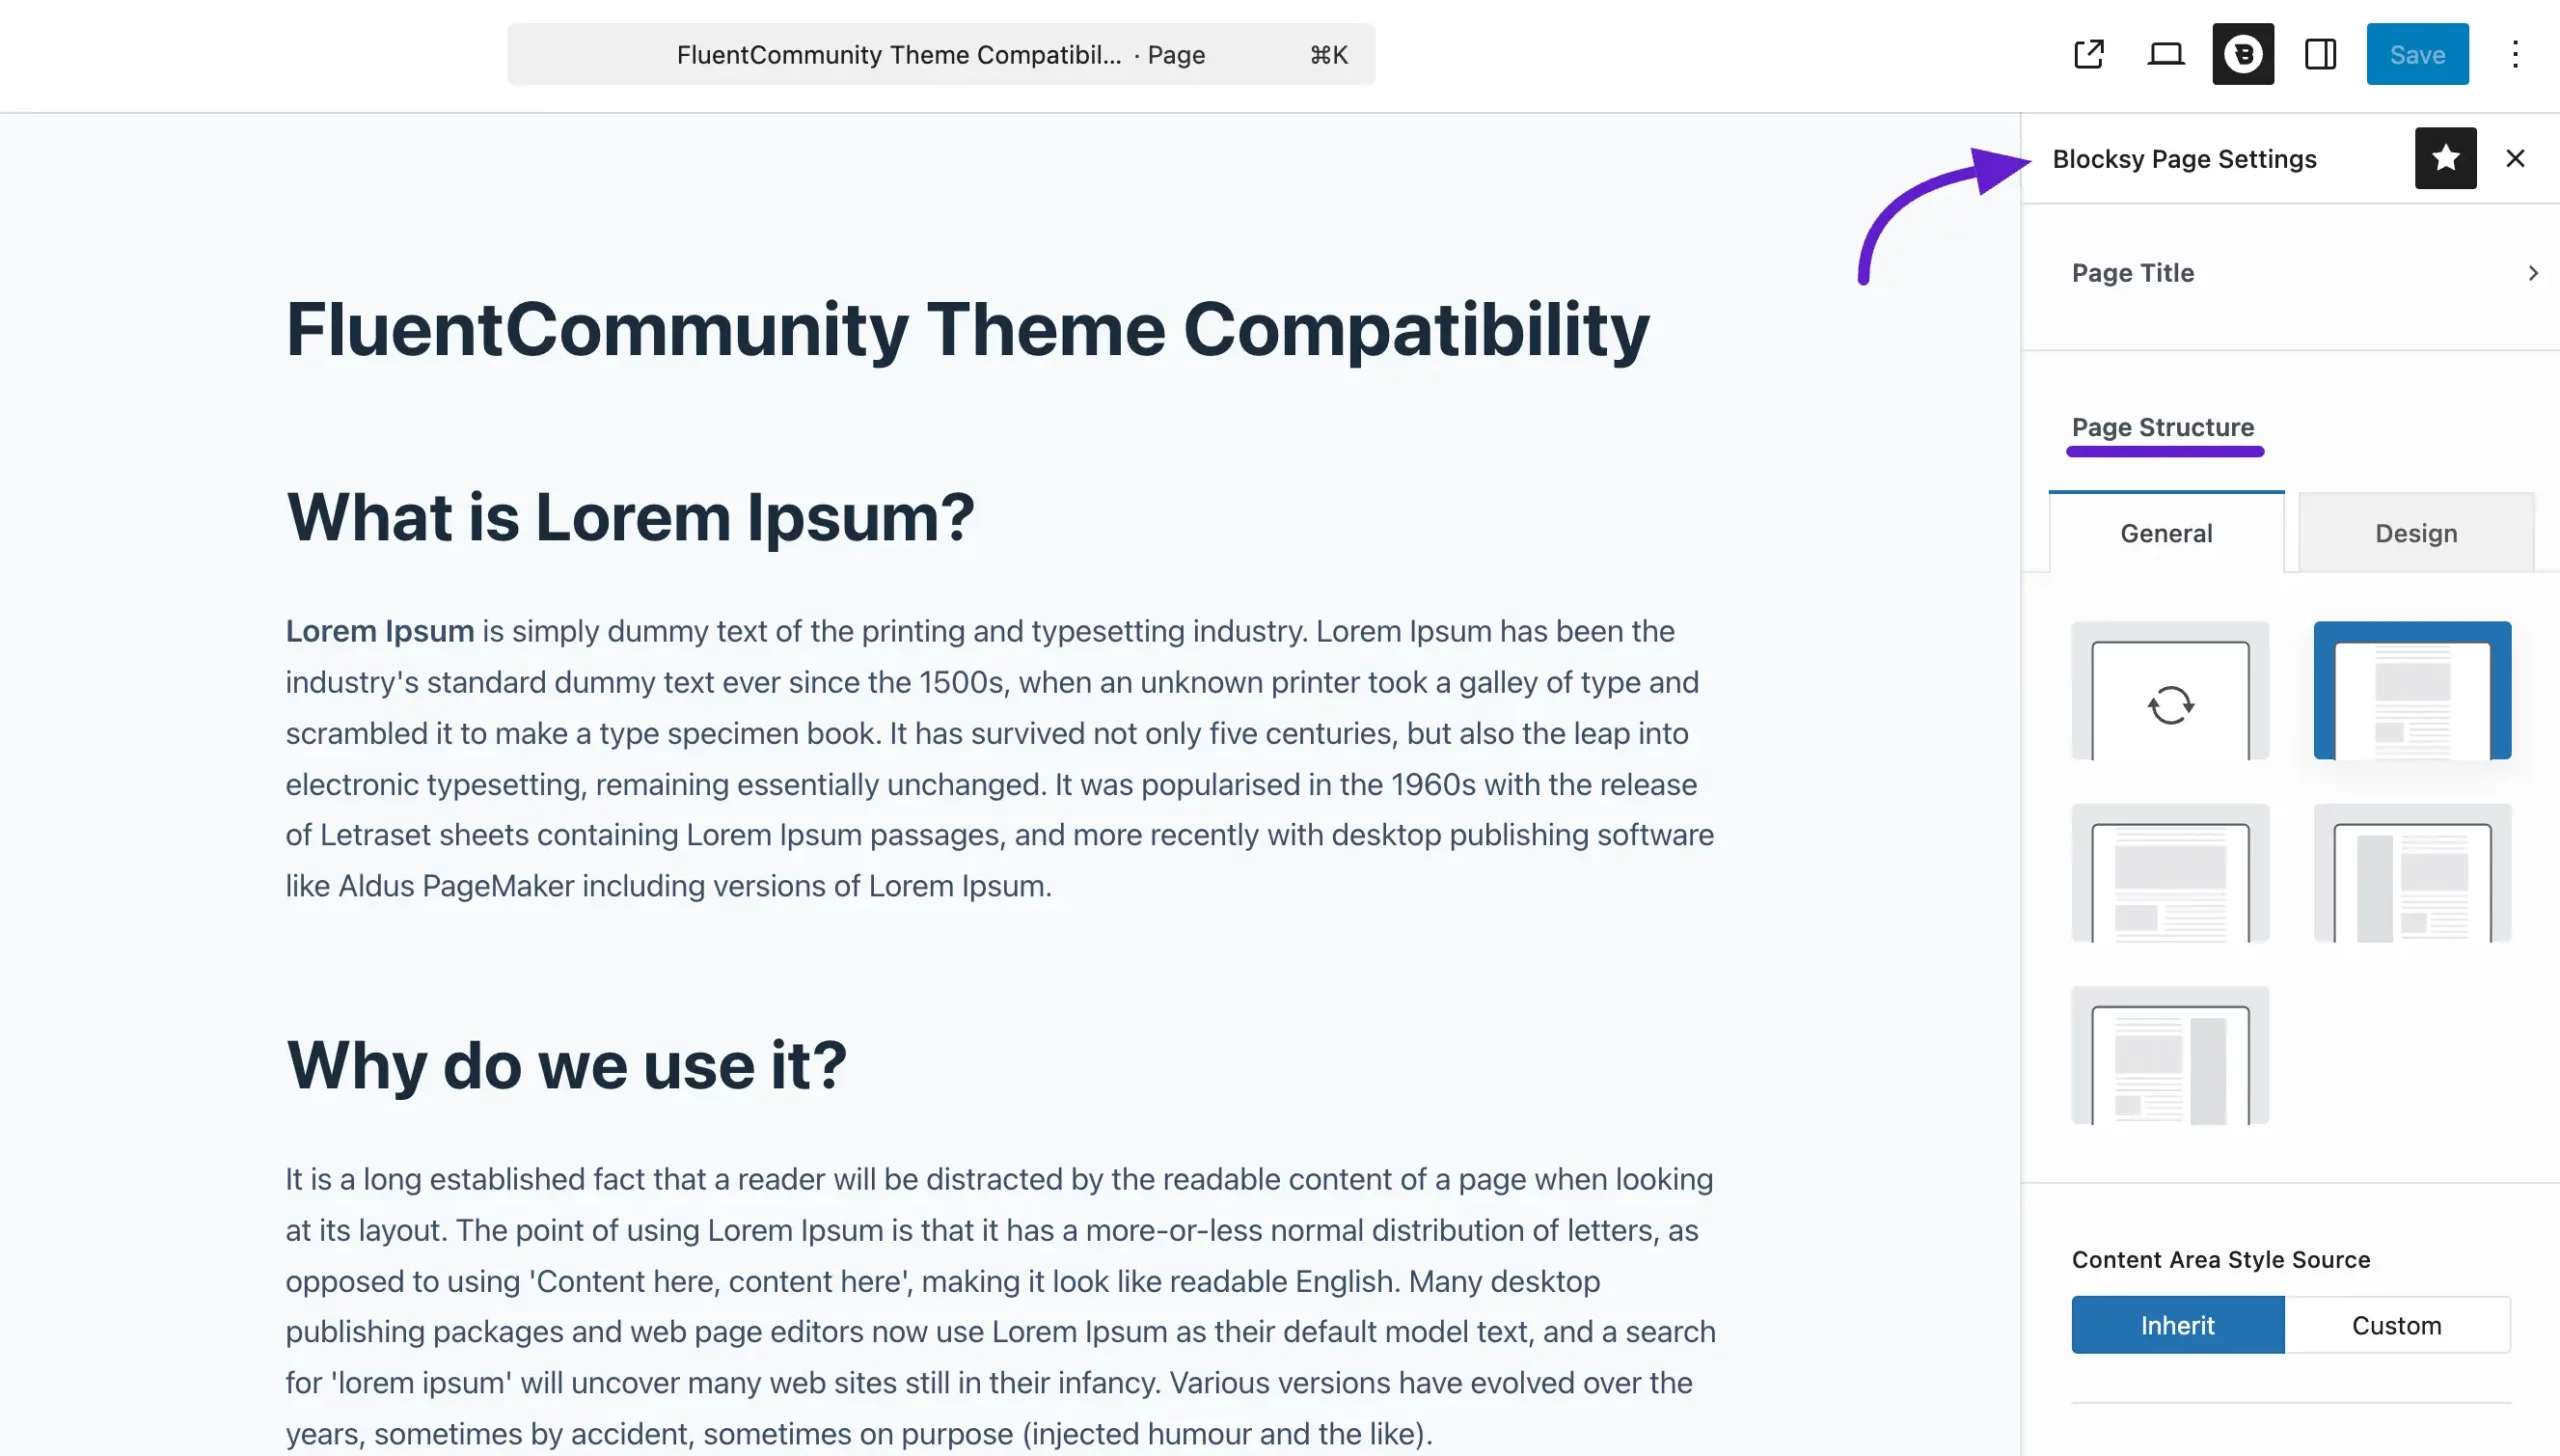
Customize Using the Theme Editor
You can also customize your framed page using your theme's built-in editor. For example, if you're using the Blocksy theme, the Blocksy editor options appear in the right sidebar. Make your design changes, then click Save to apply them.
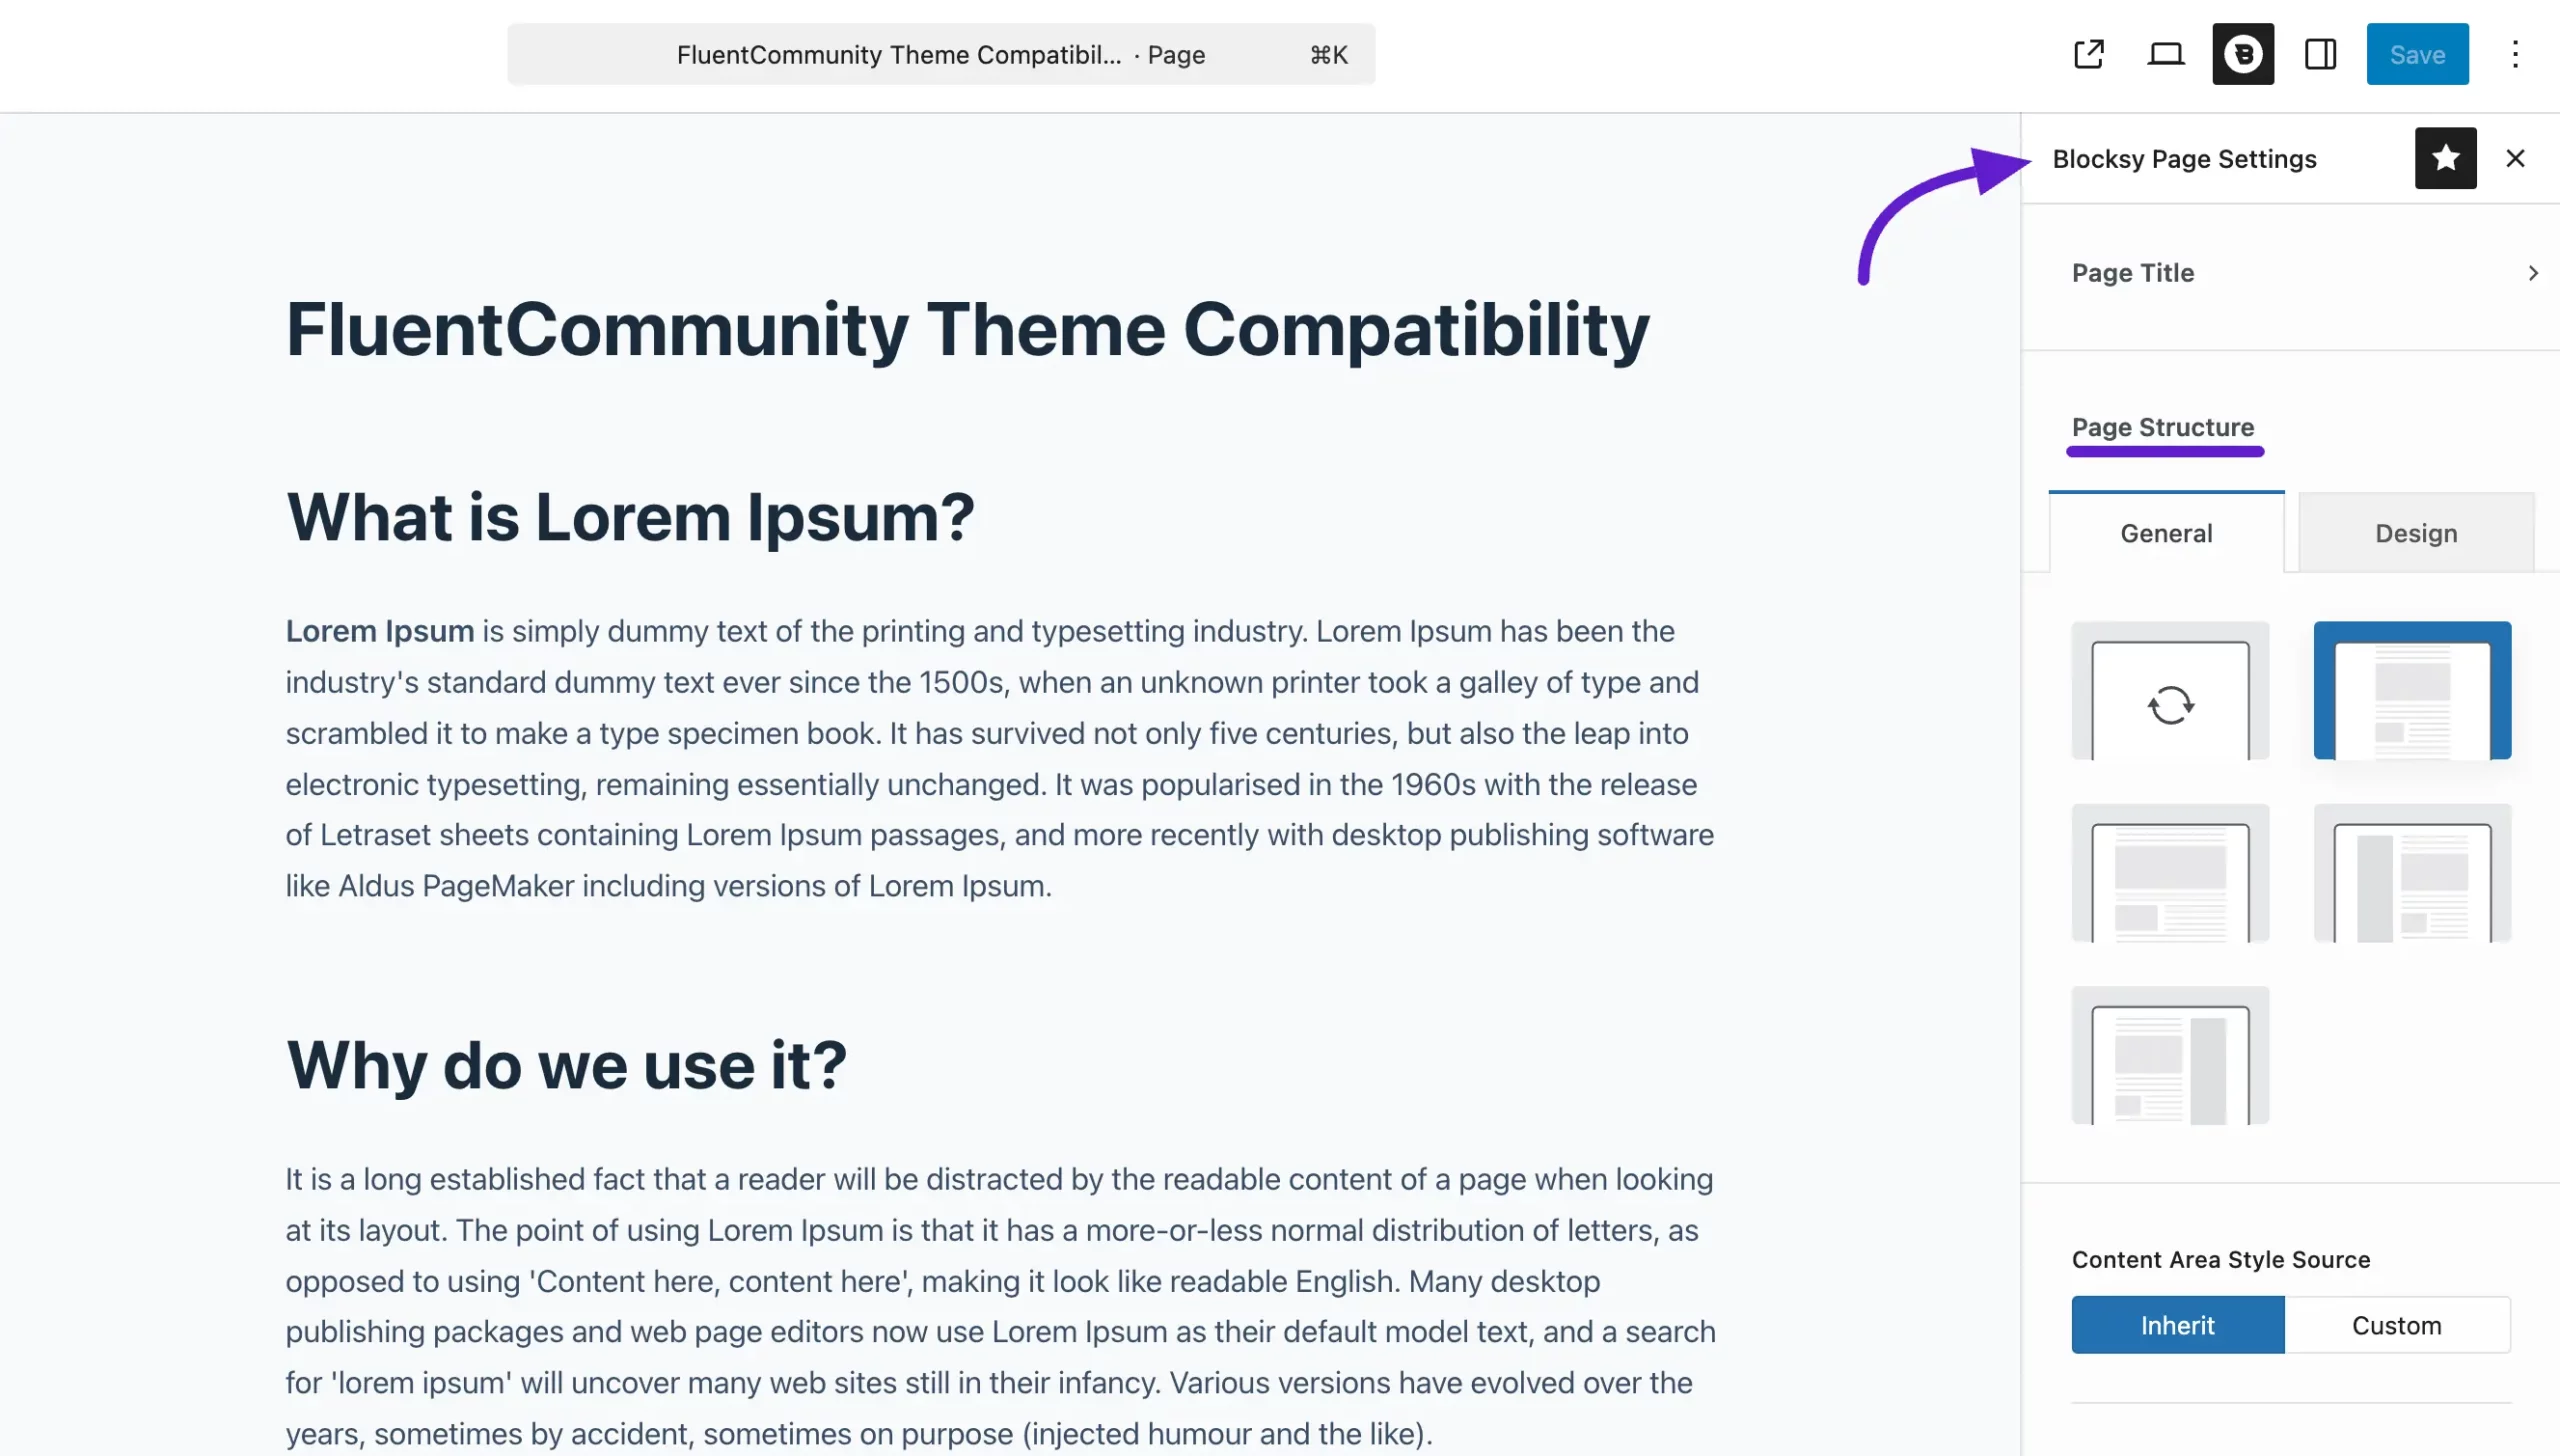
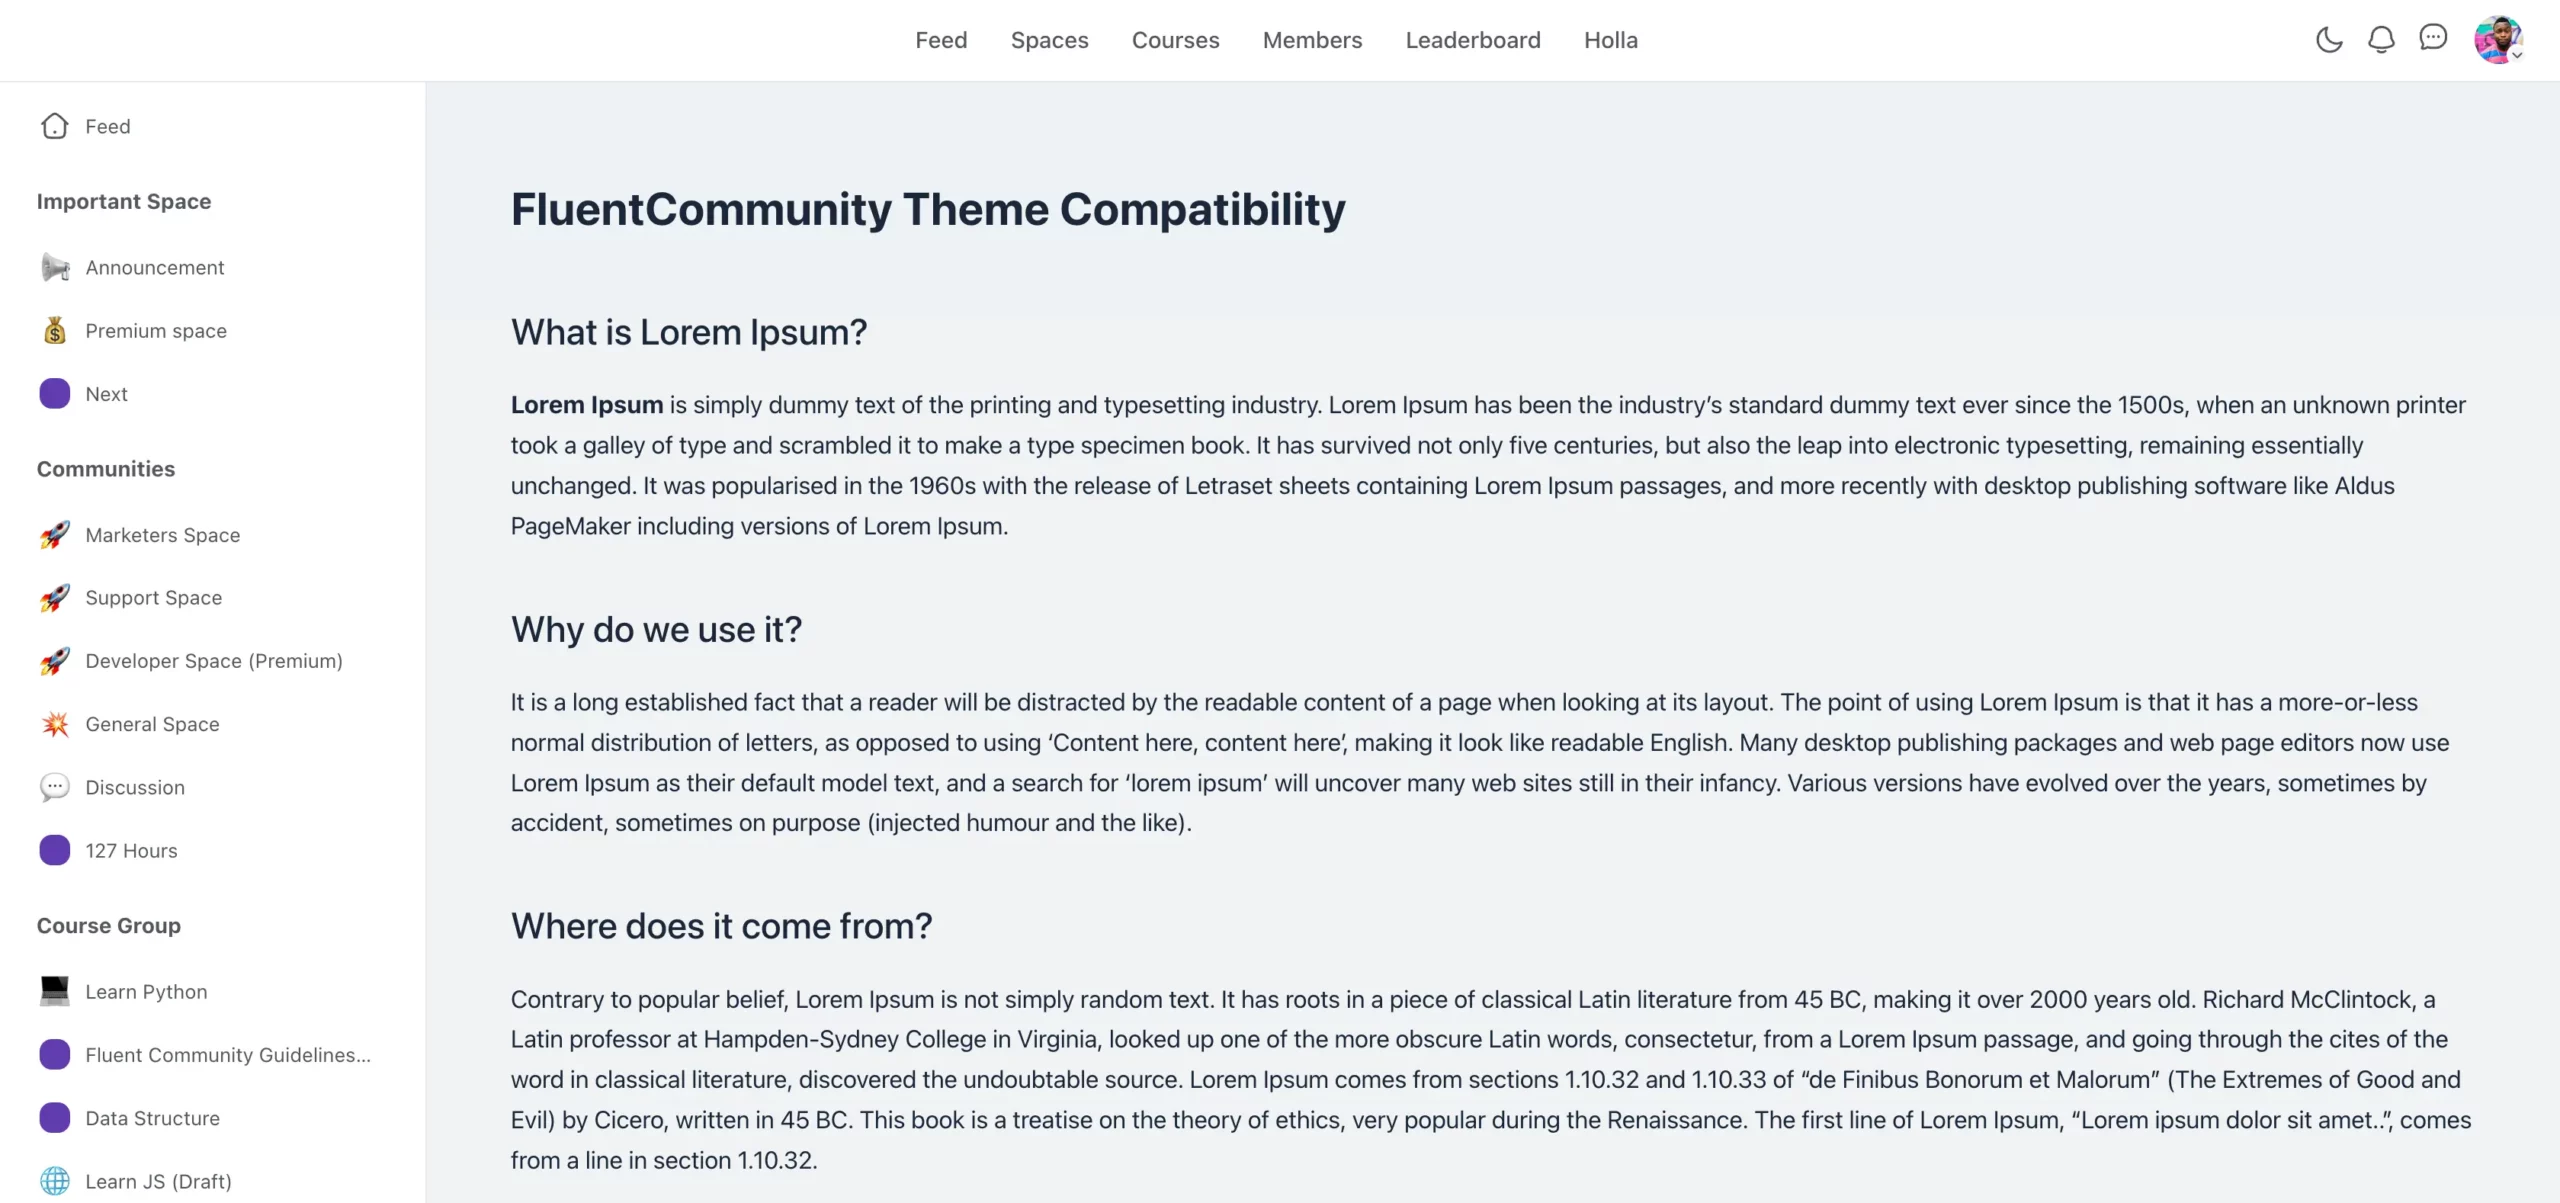
Your page now appears with the FluentCommunity frame applied, just like this.
How to Create a Custom Template with the FluentCommunity Block
If you want to build a custom template around the FluentCommunity portal frame, you can do it with any WordPress block theme.
Step 1: Open the Site Editor
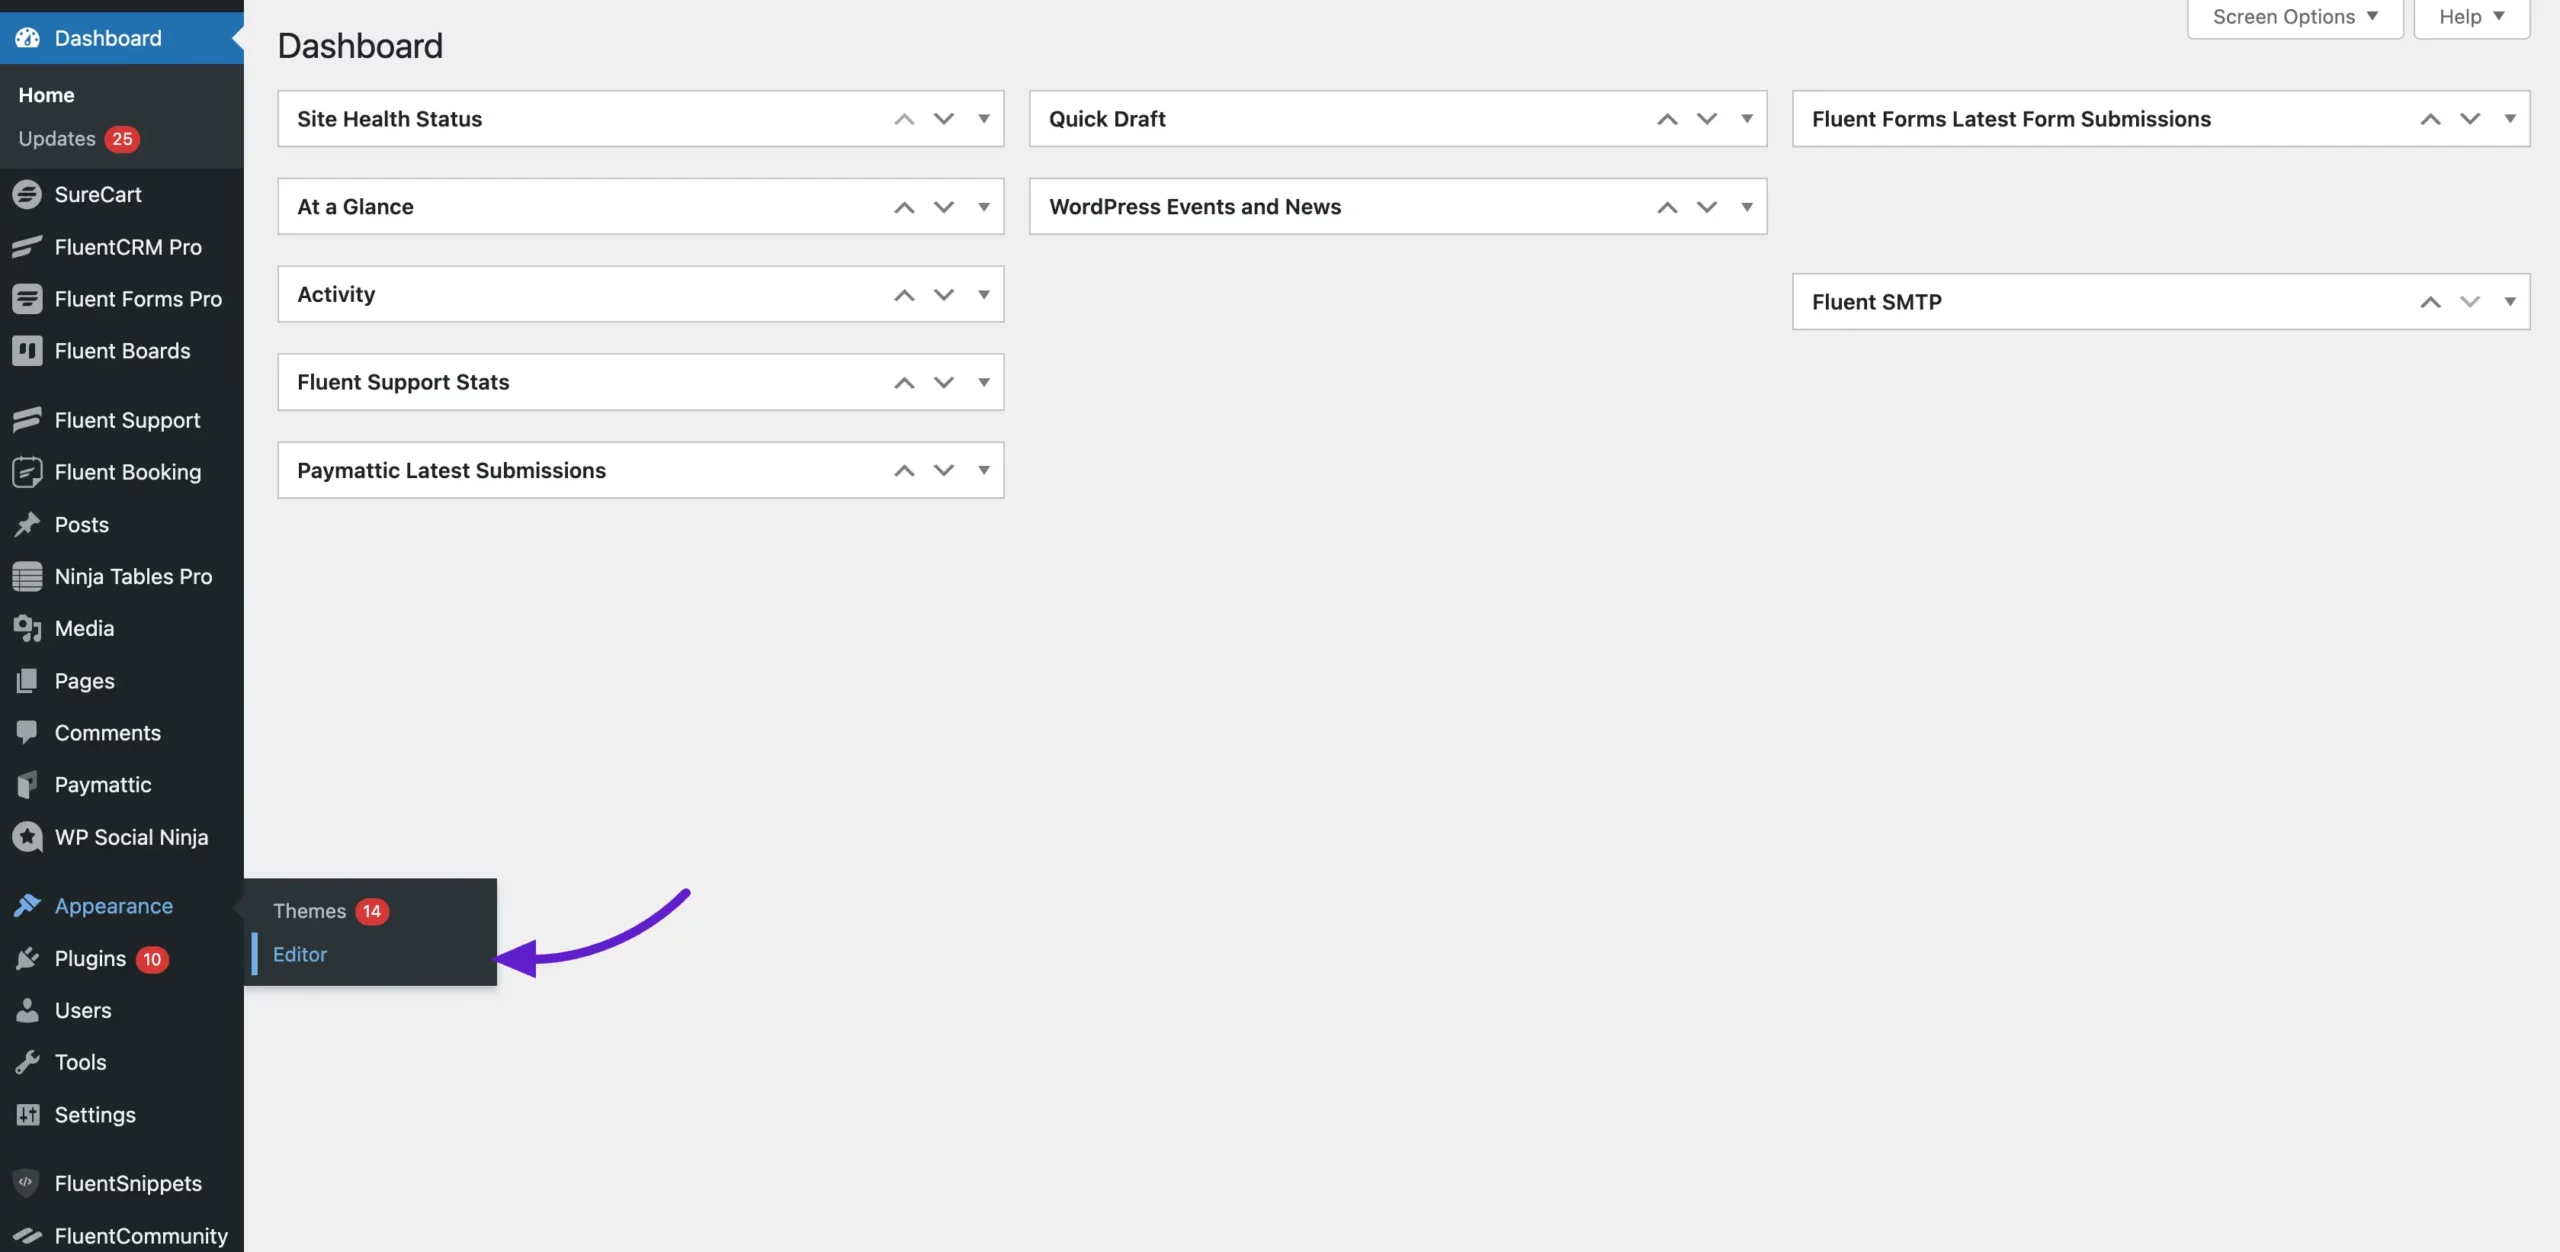
Activate a WordPress block theme, then go to Appearance in the WordPress left sidebar and click Editor.
Step 2: Choose a Template
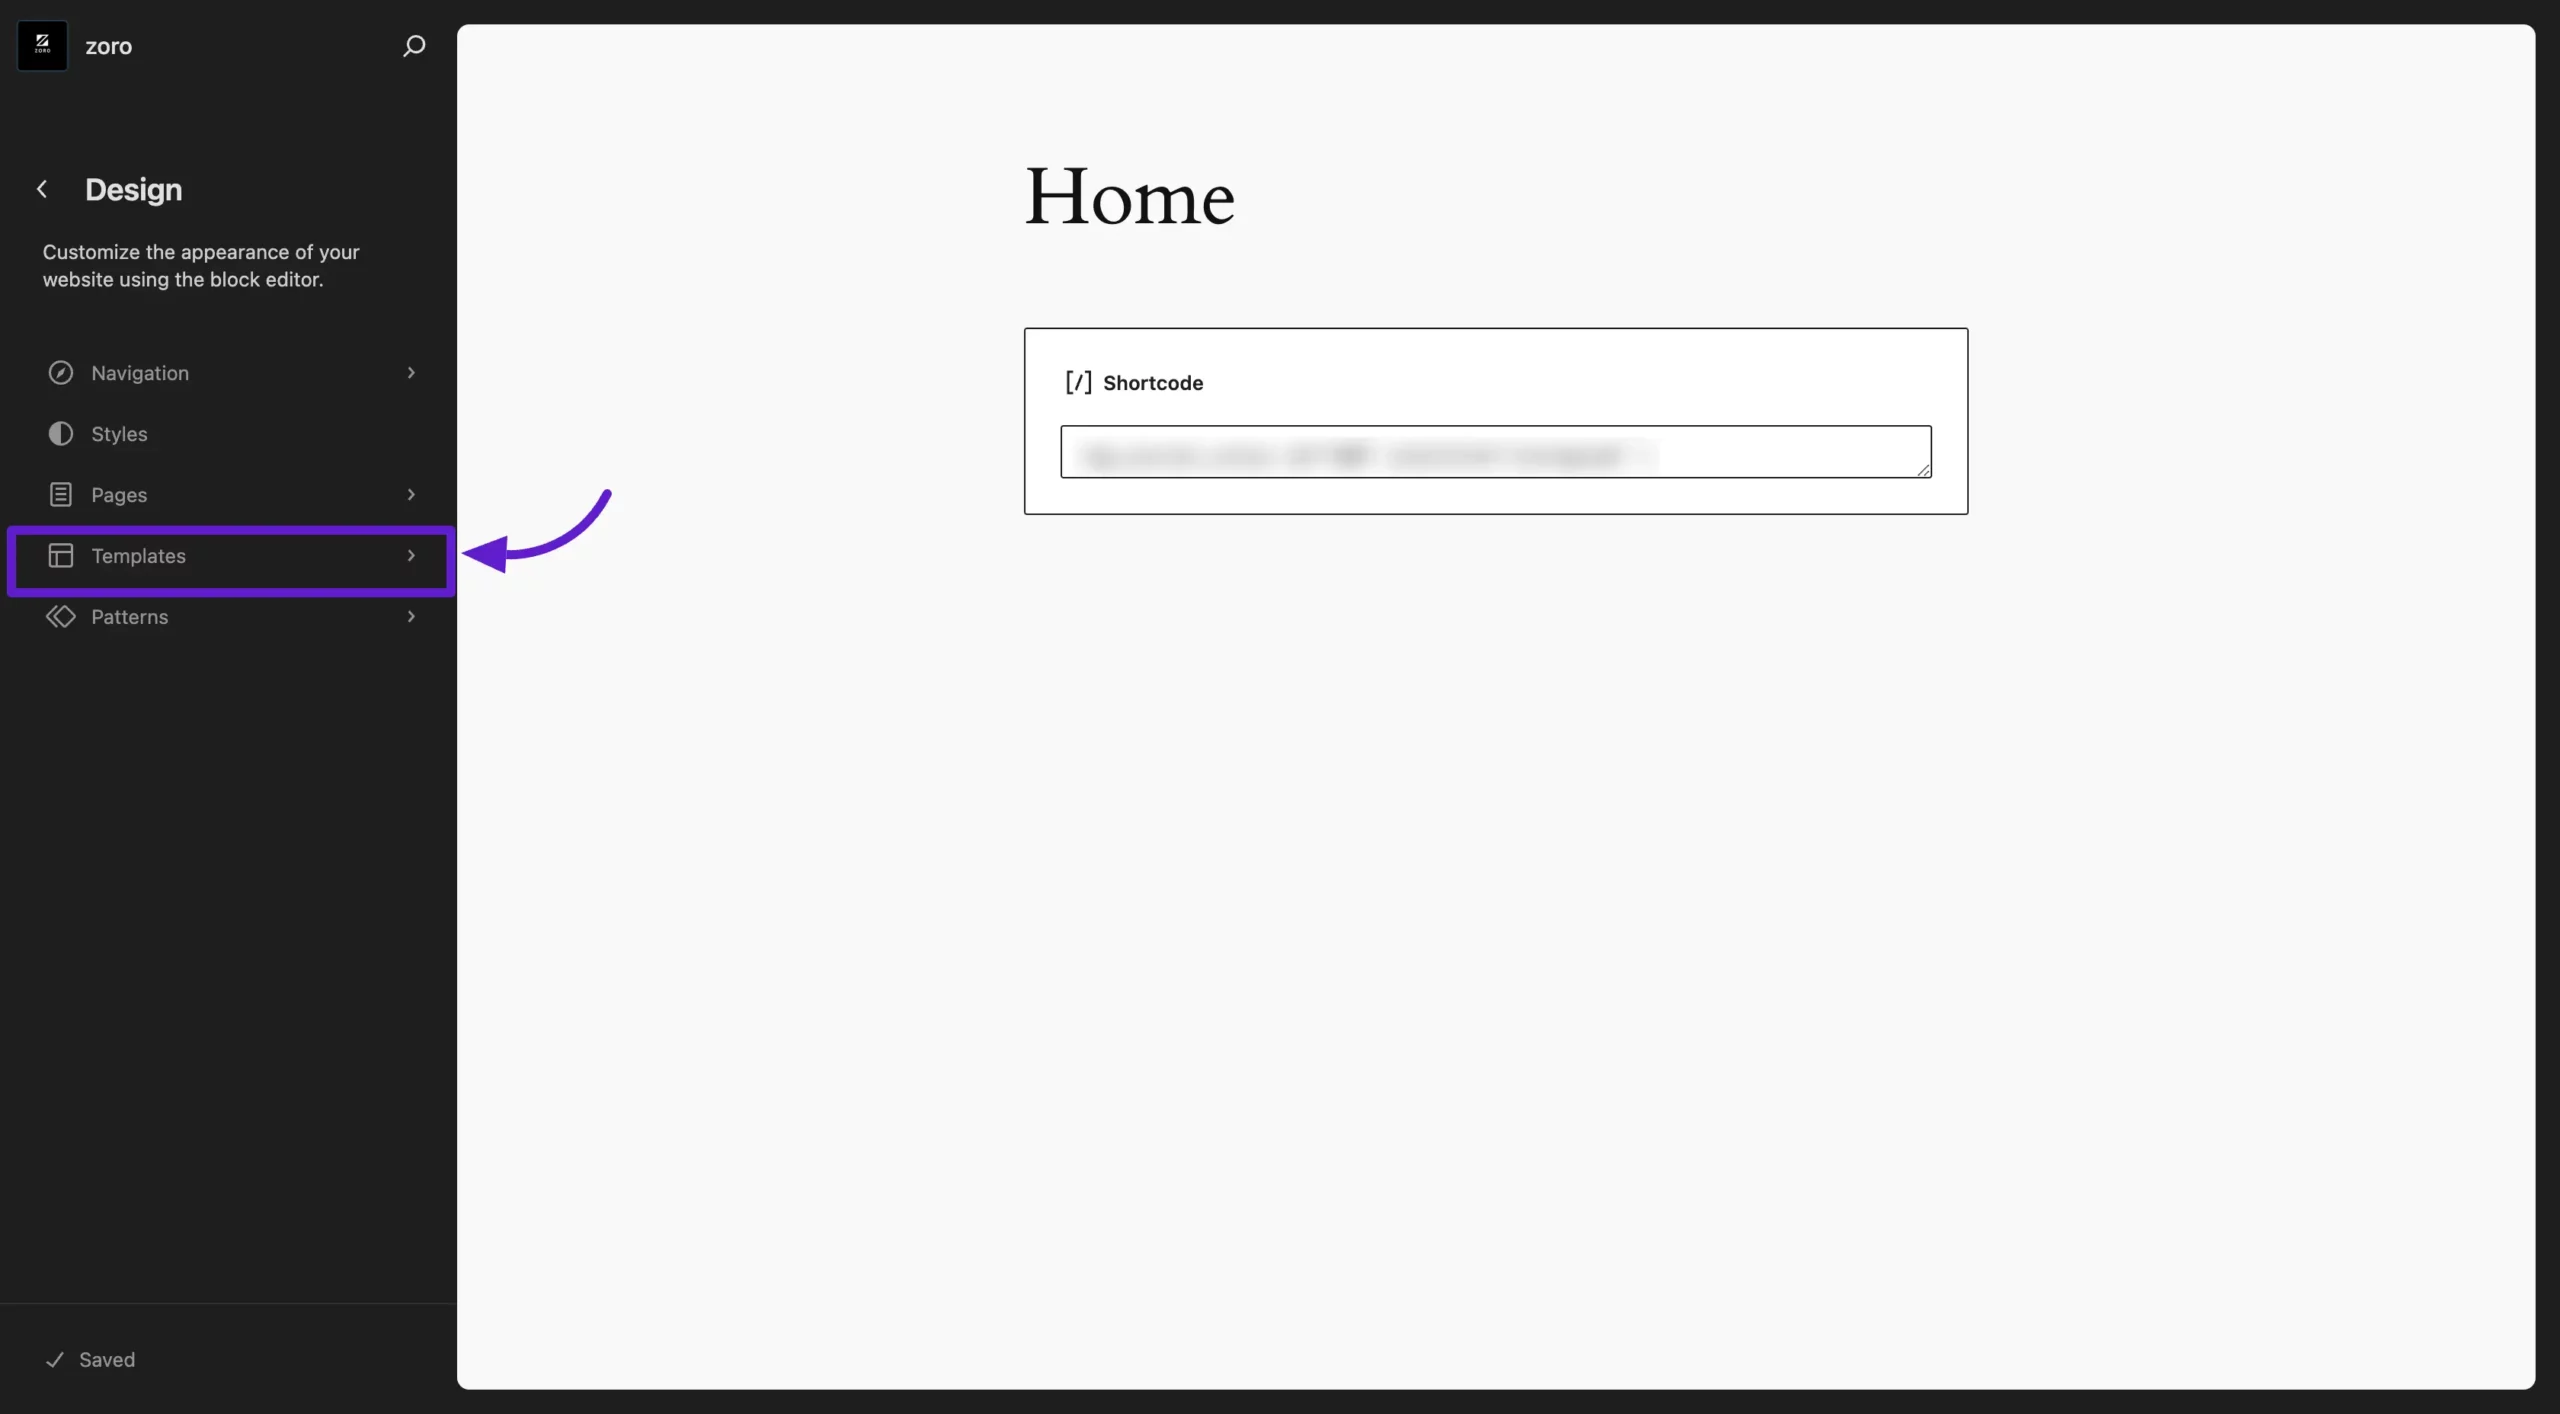
In the Site Editor's left sidebar, click Templates to view and manage all available templates.
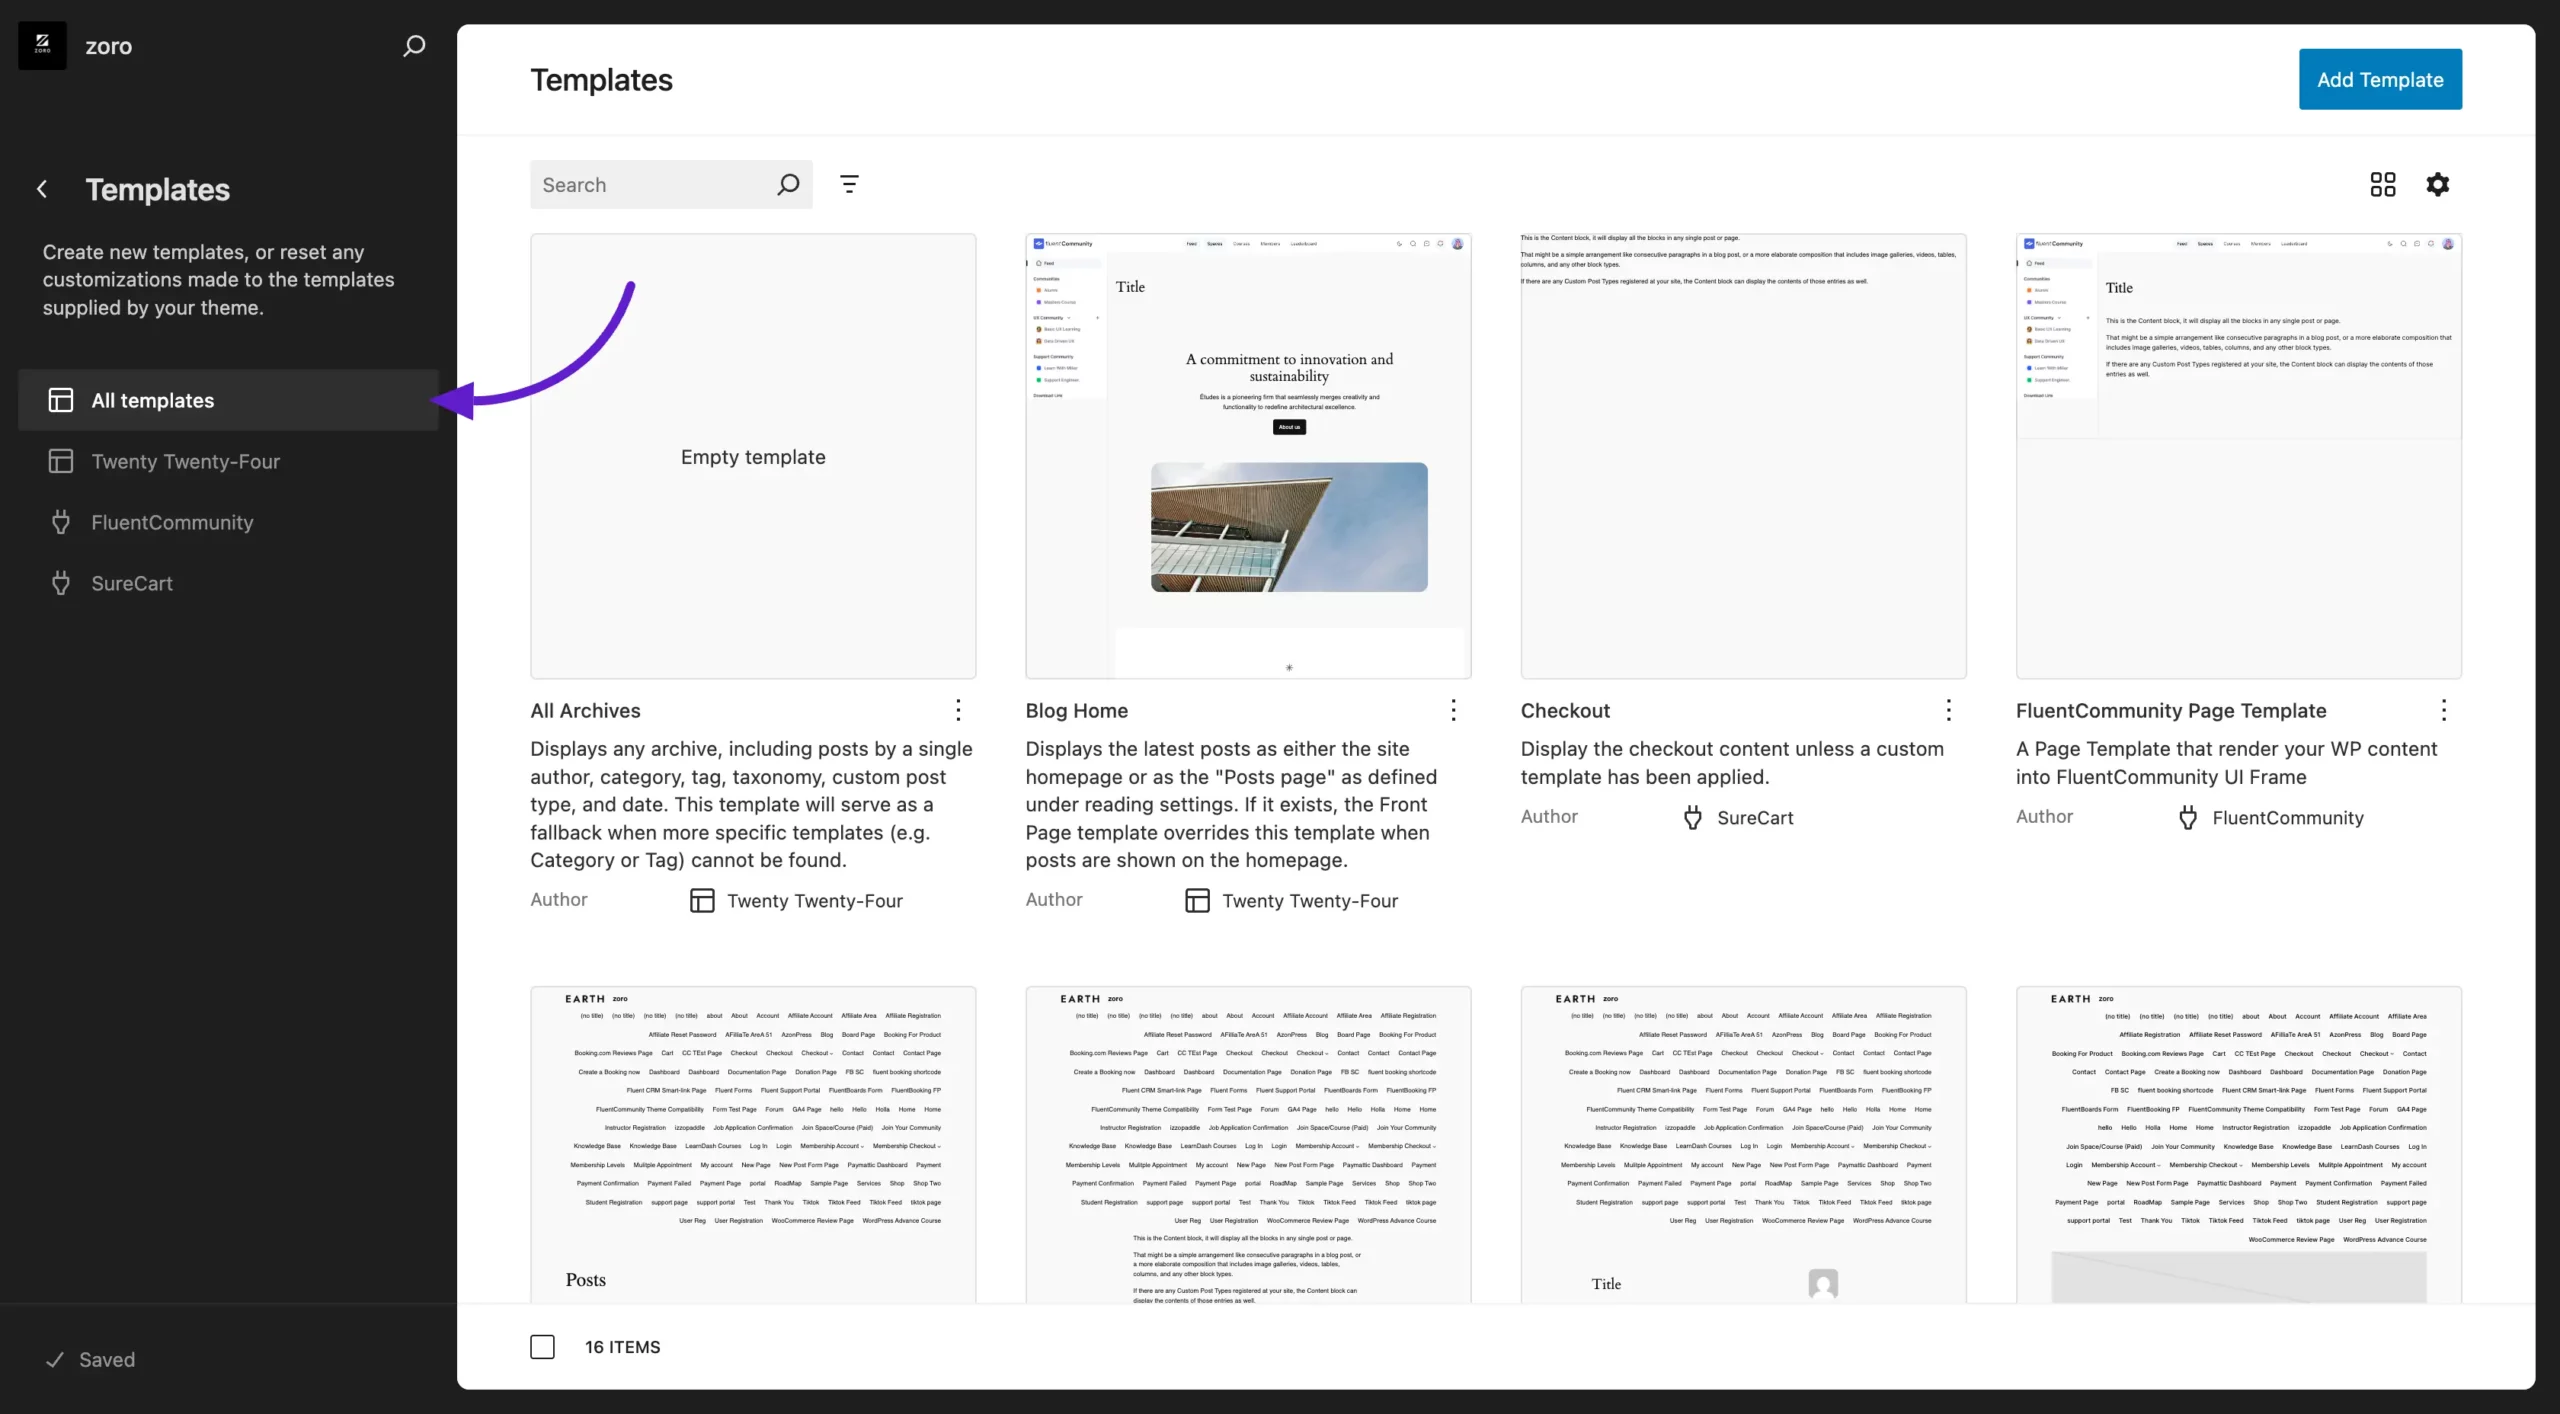
You can either edit an existing template or create a new one by clicking Add Template. For this guide, we'll edit an existing one.
Step 3: Add the FluentCommunity Block
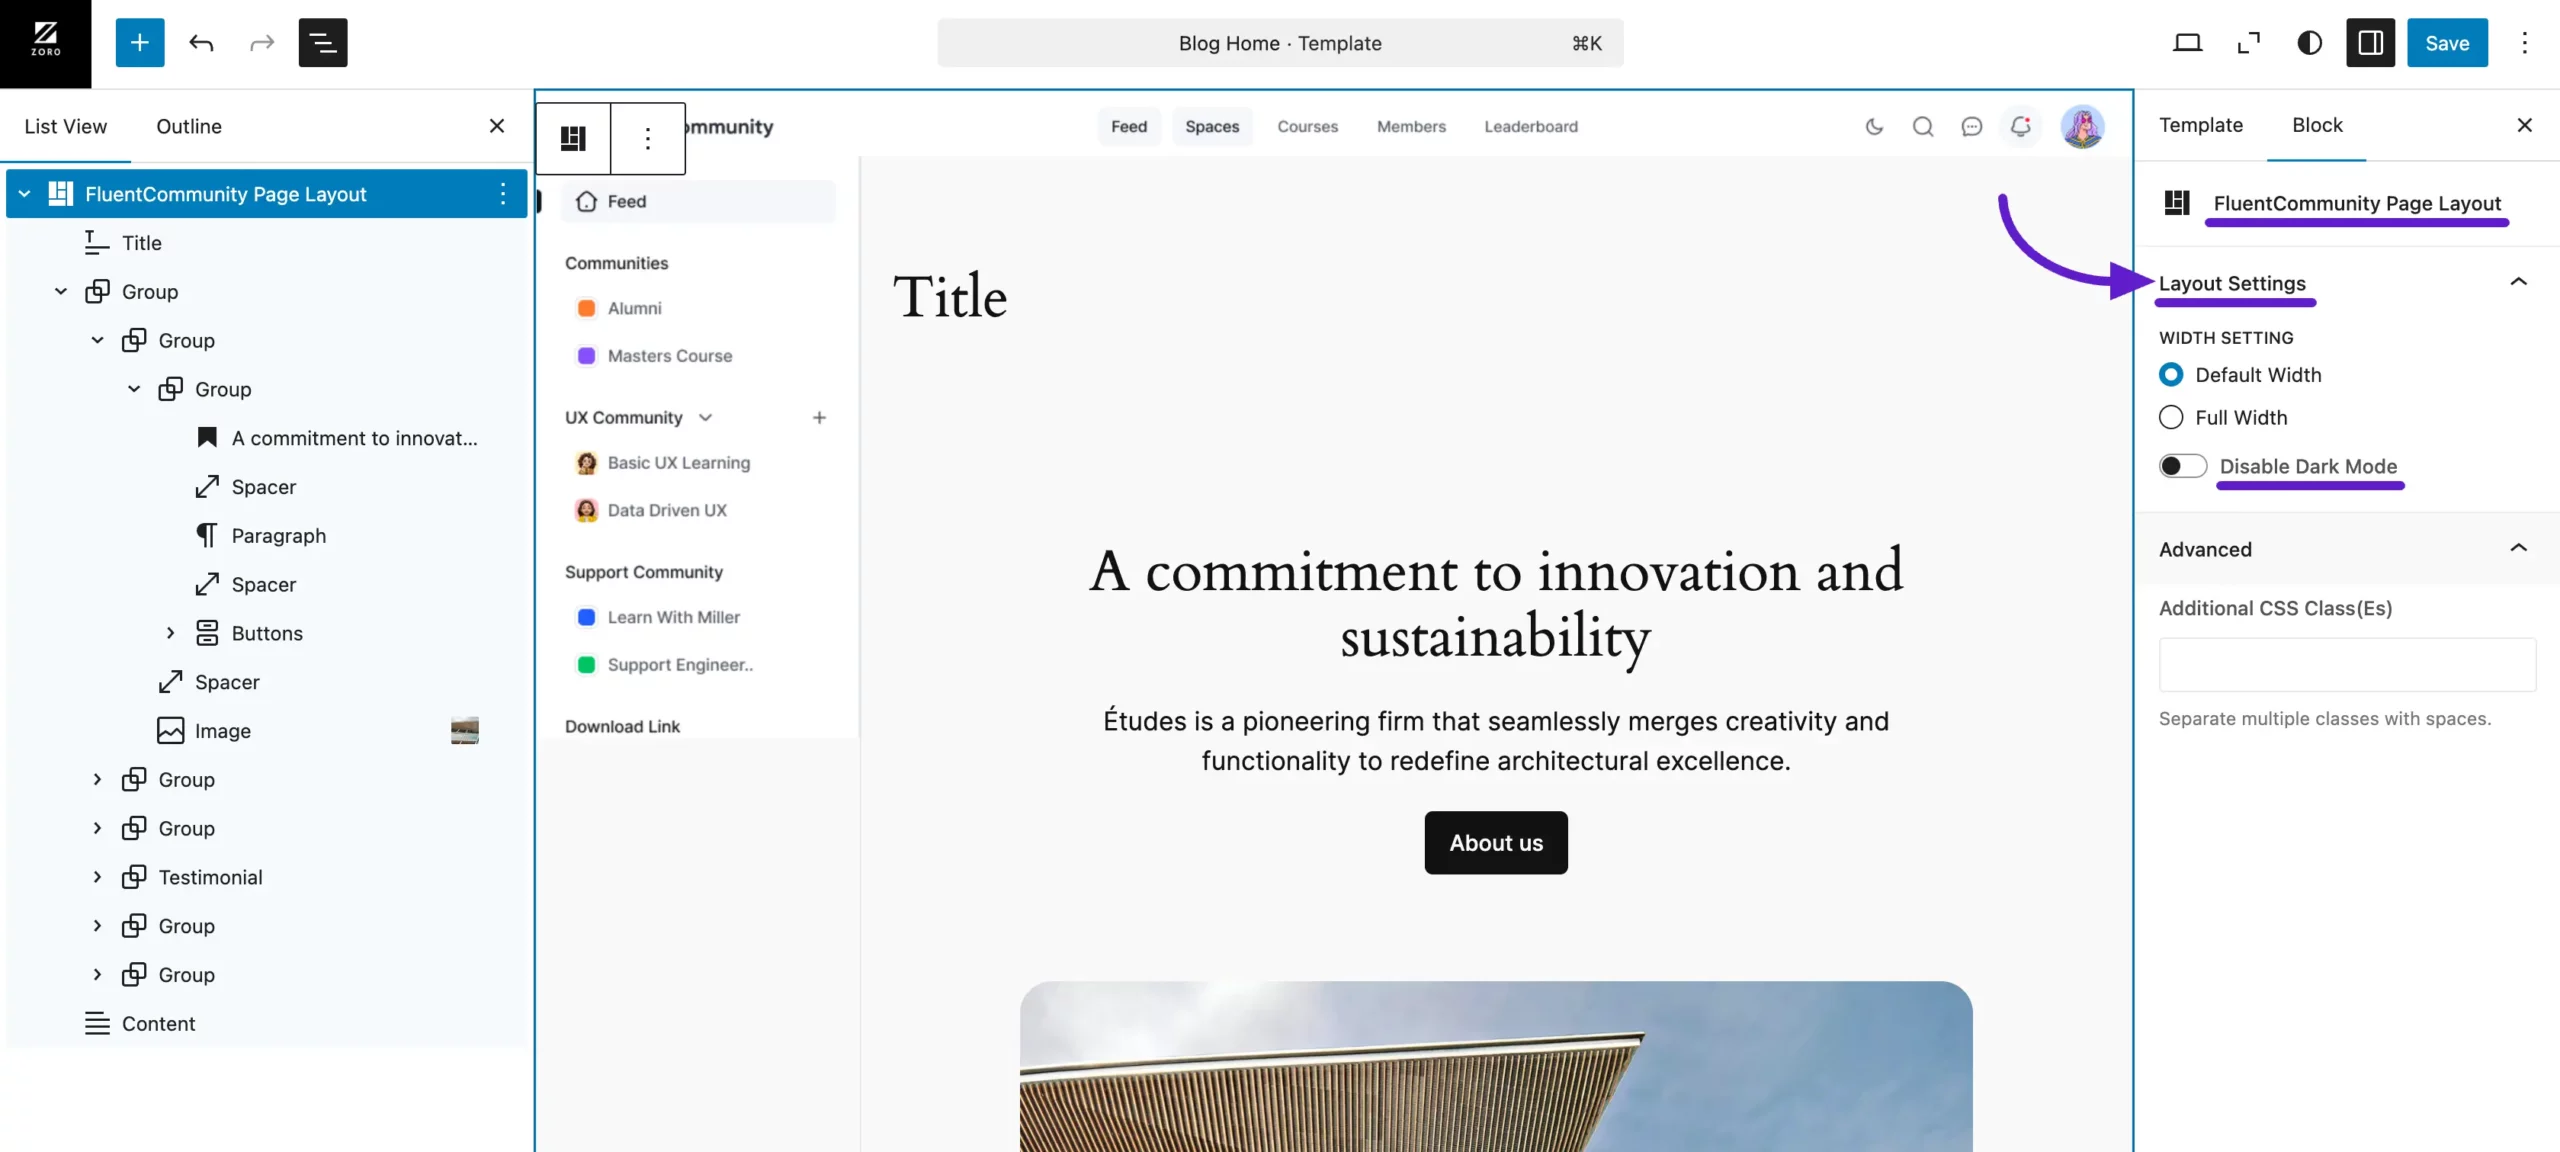
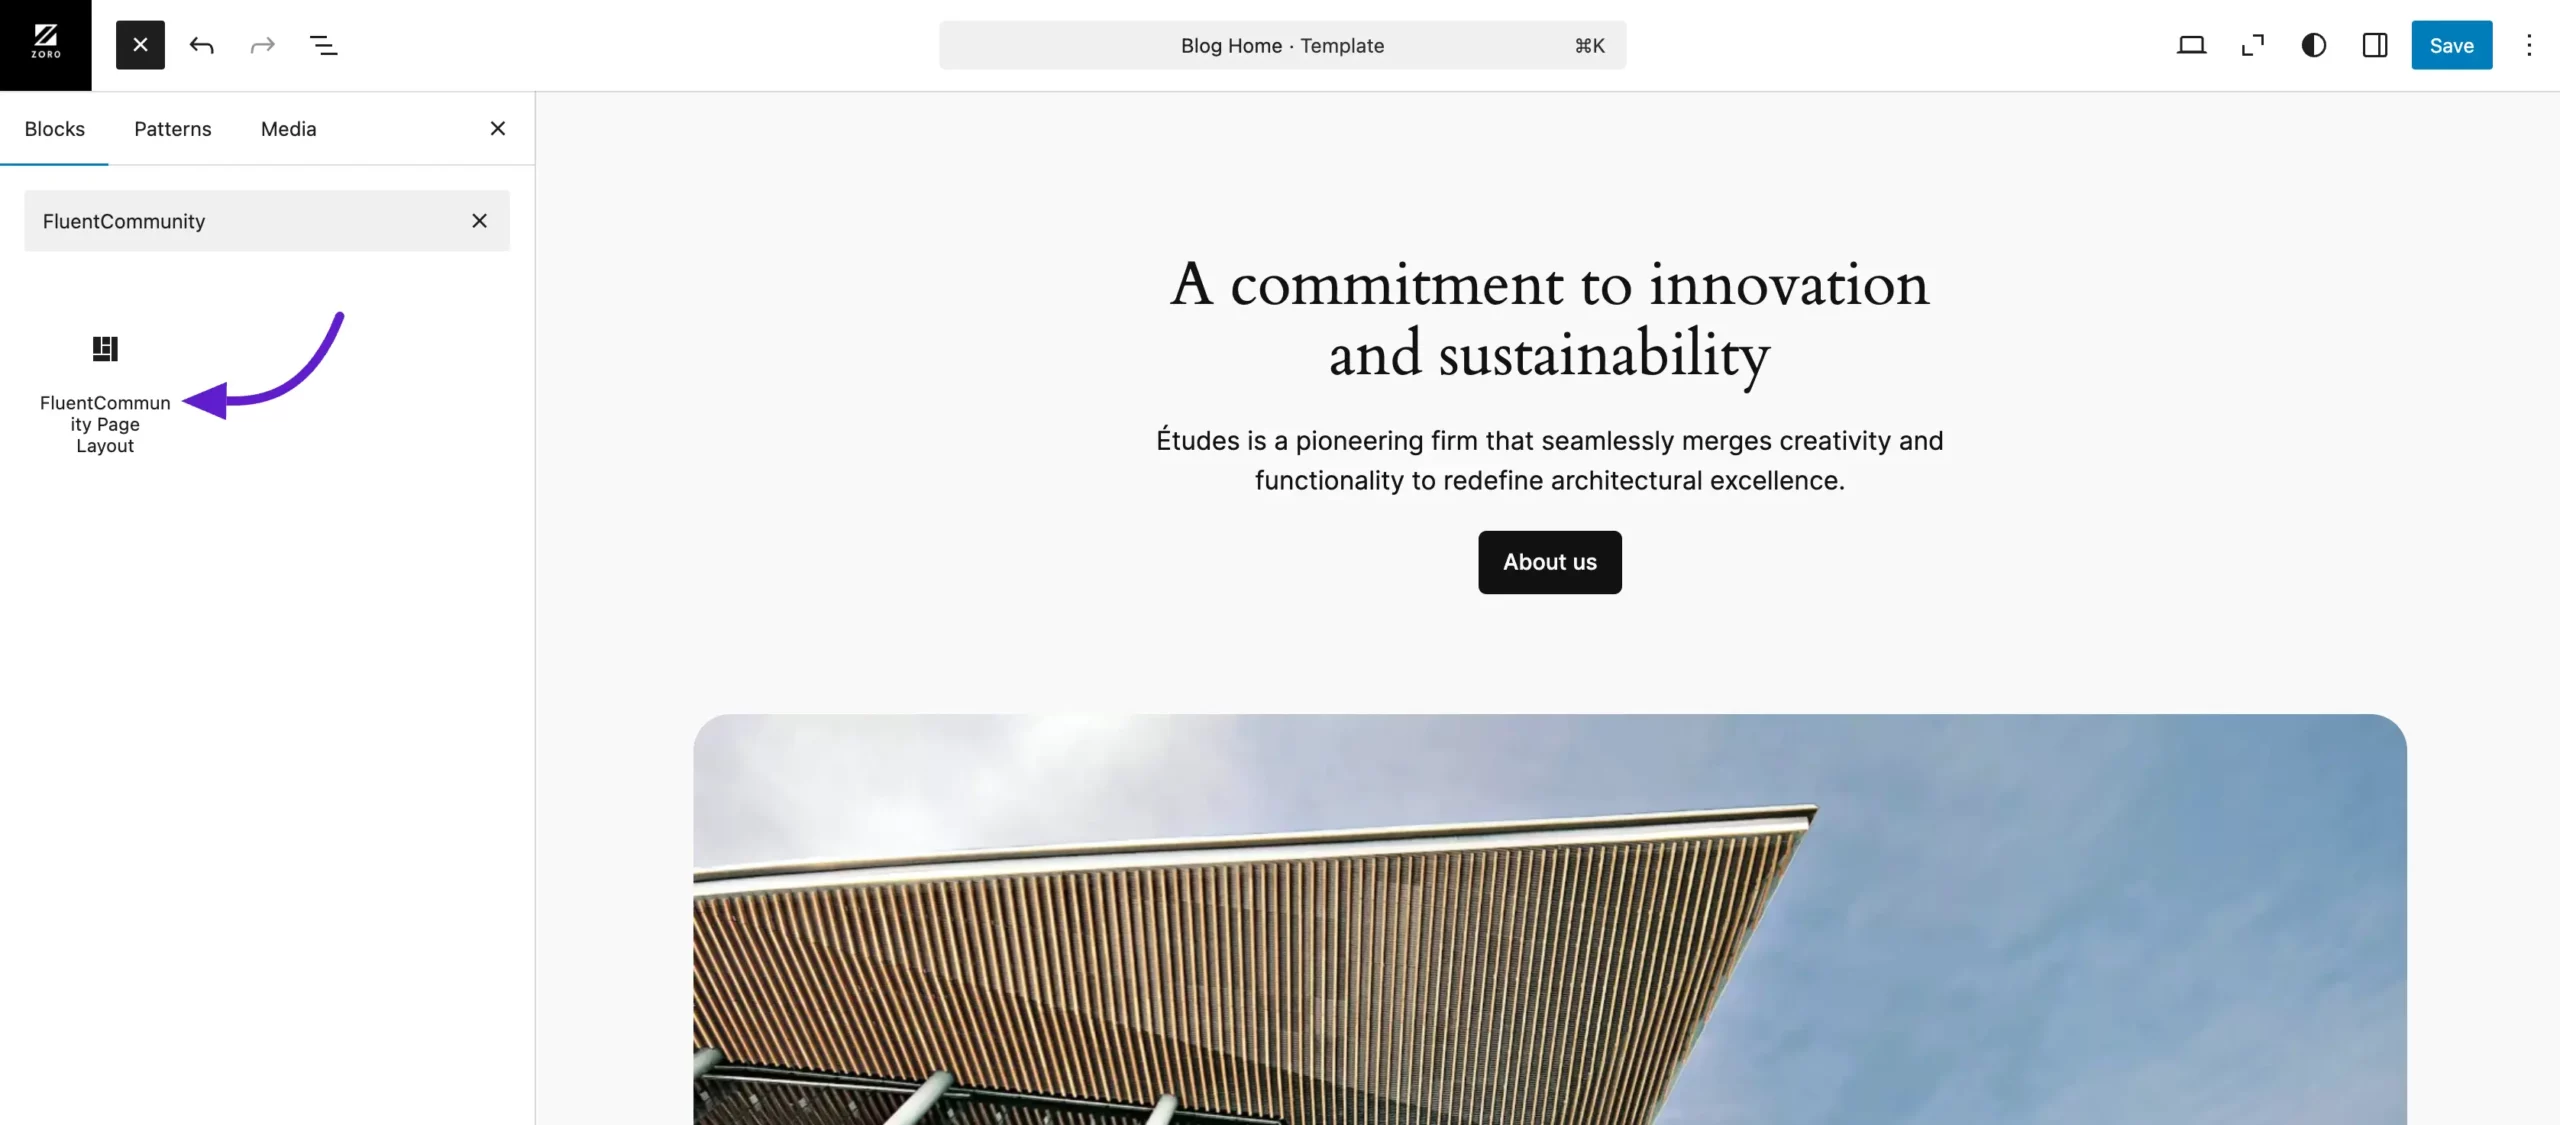
With the template open, click the Plus icon to add a Gutenberg block and search for the FluentCommunity Page Layout block.
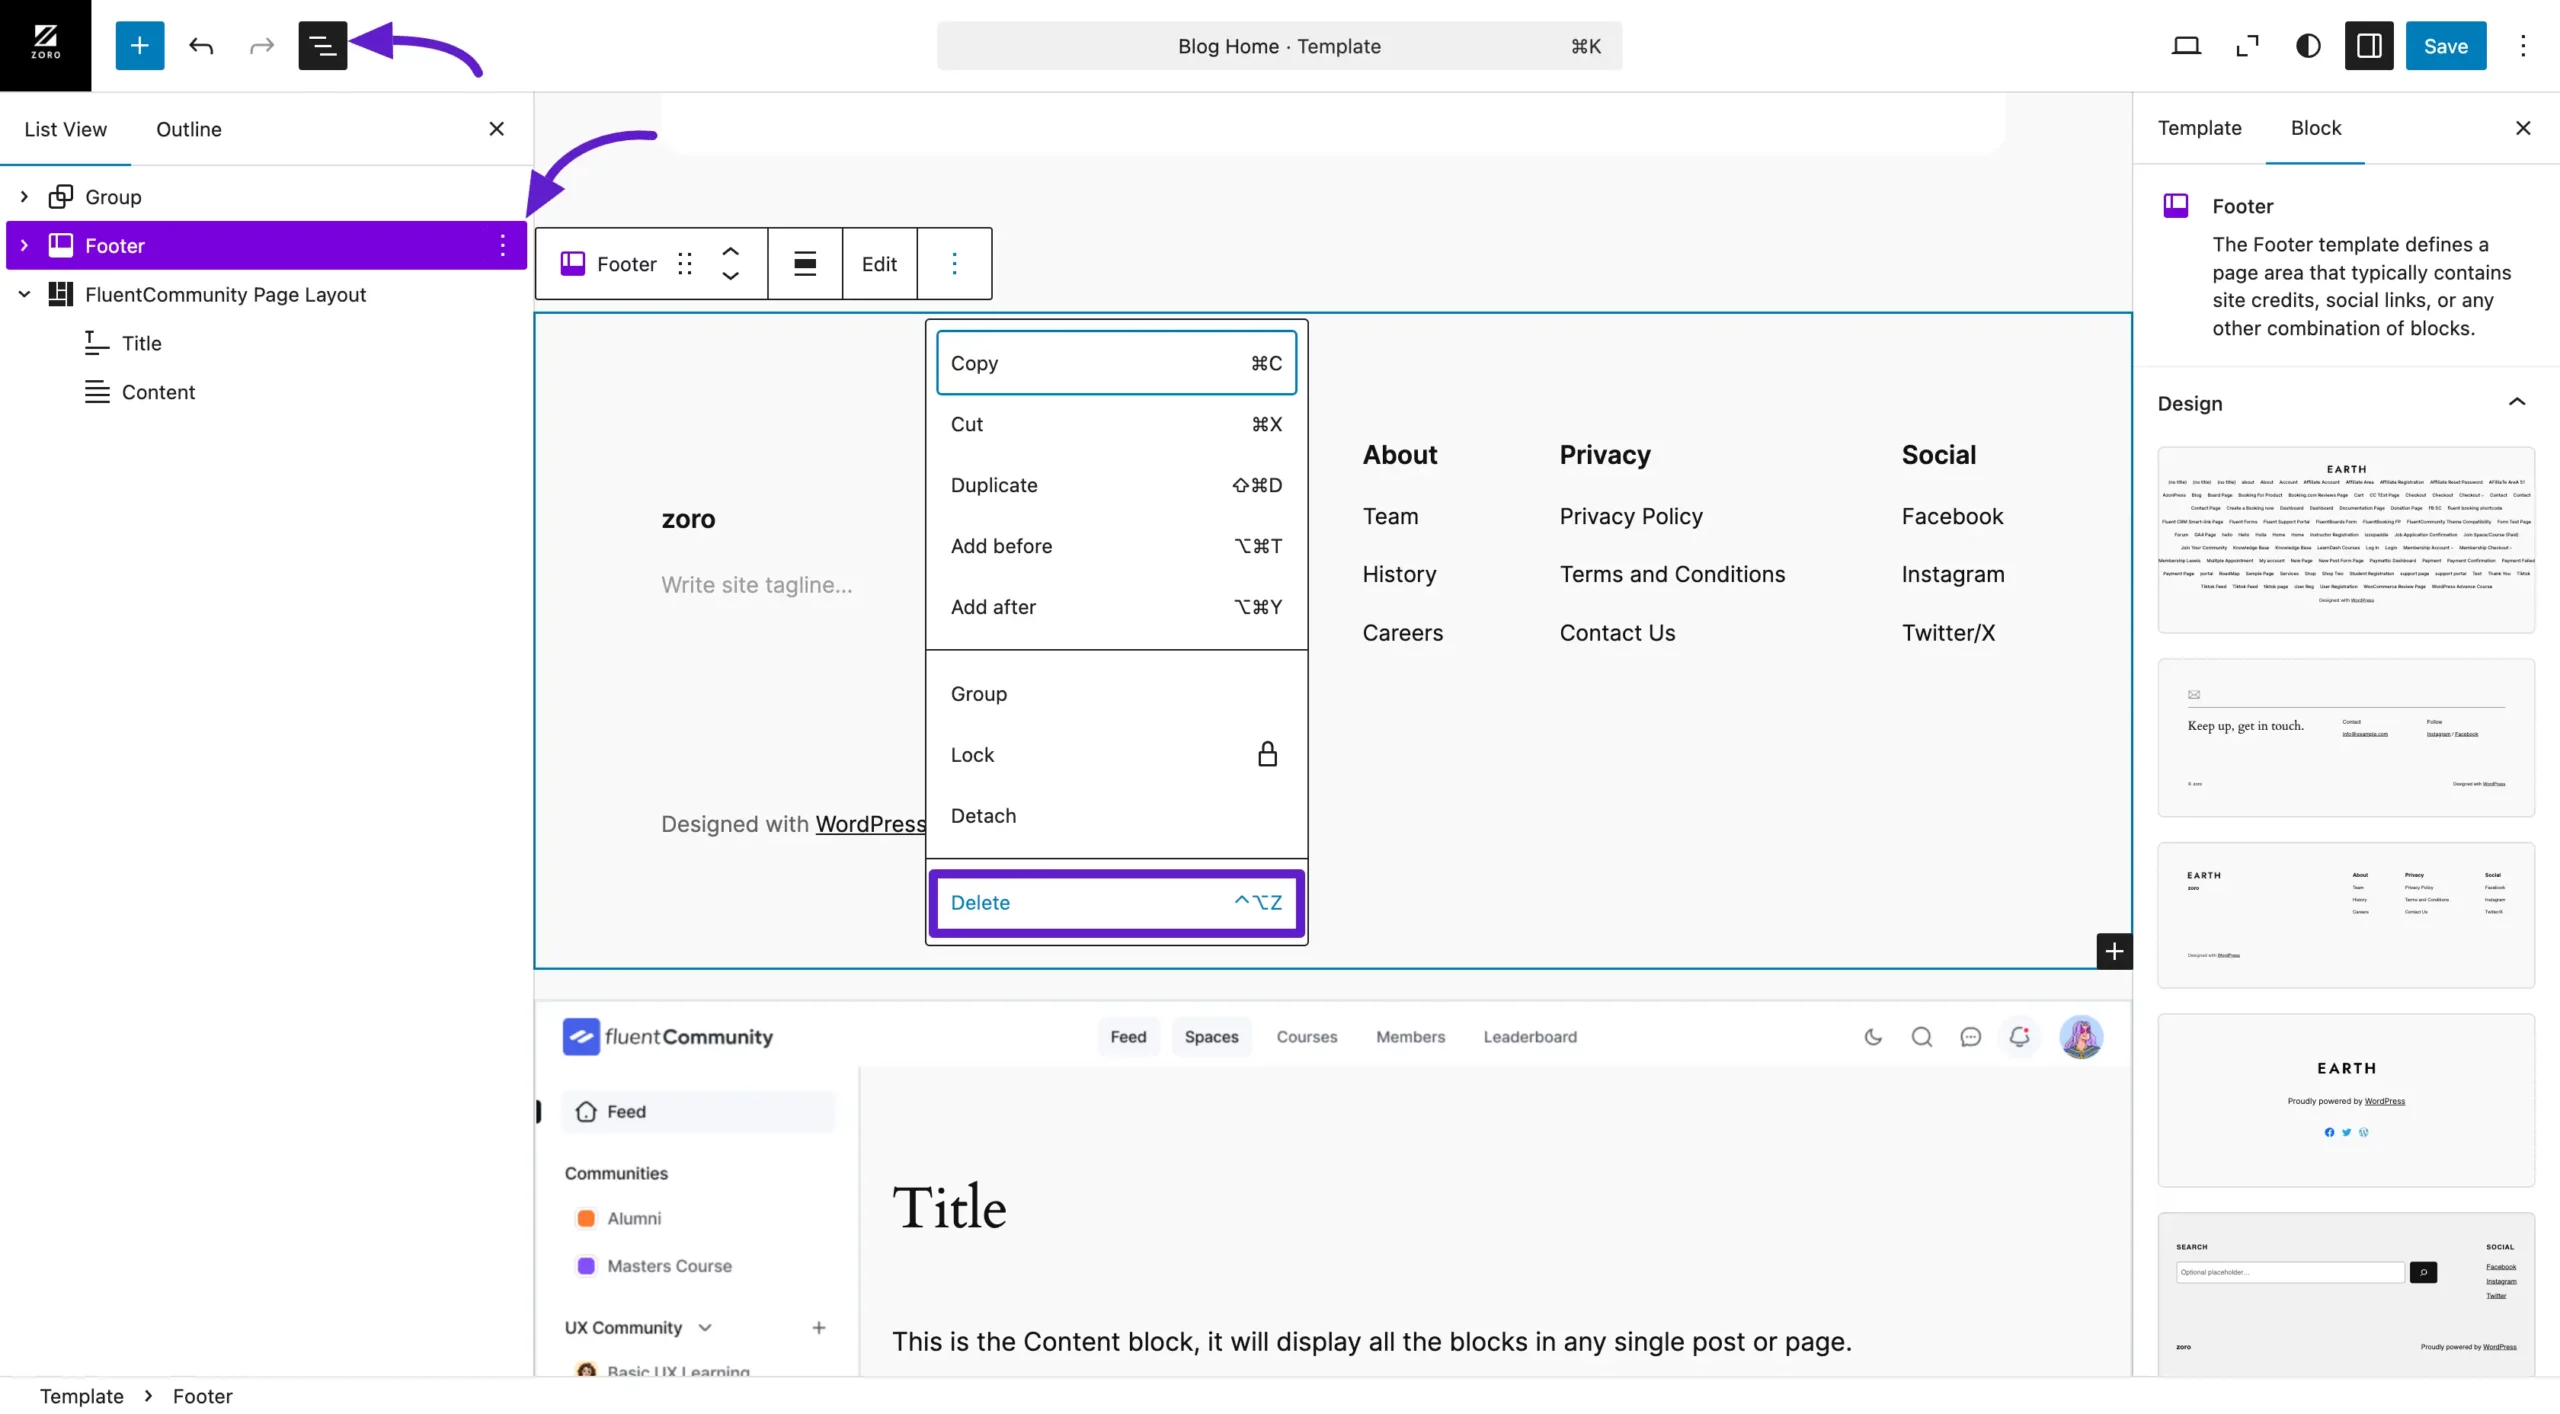
Once the FluentCommunity template block appears, you can remove any existing content by clicking the Layer icon in the top menu and selecting the section you want to edit from the left sidebar. For example, to remove the Header and Footer, click the Footer section, click the three-dot button, and select Delete.
Step 4: Build Your Layout
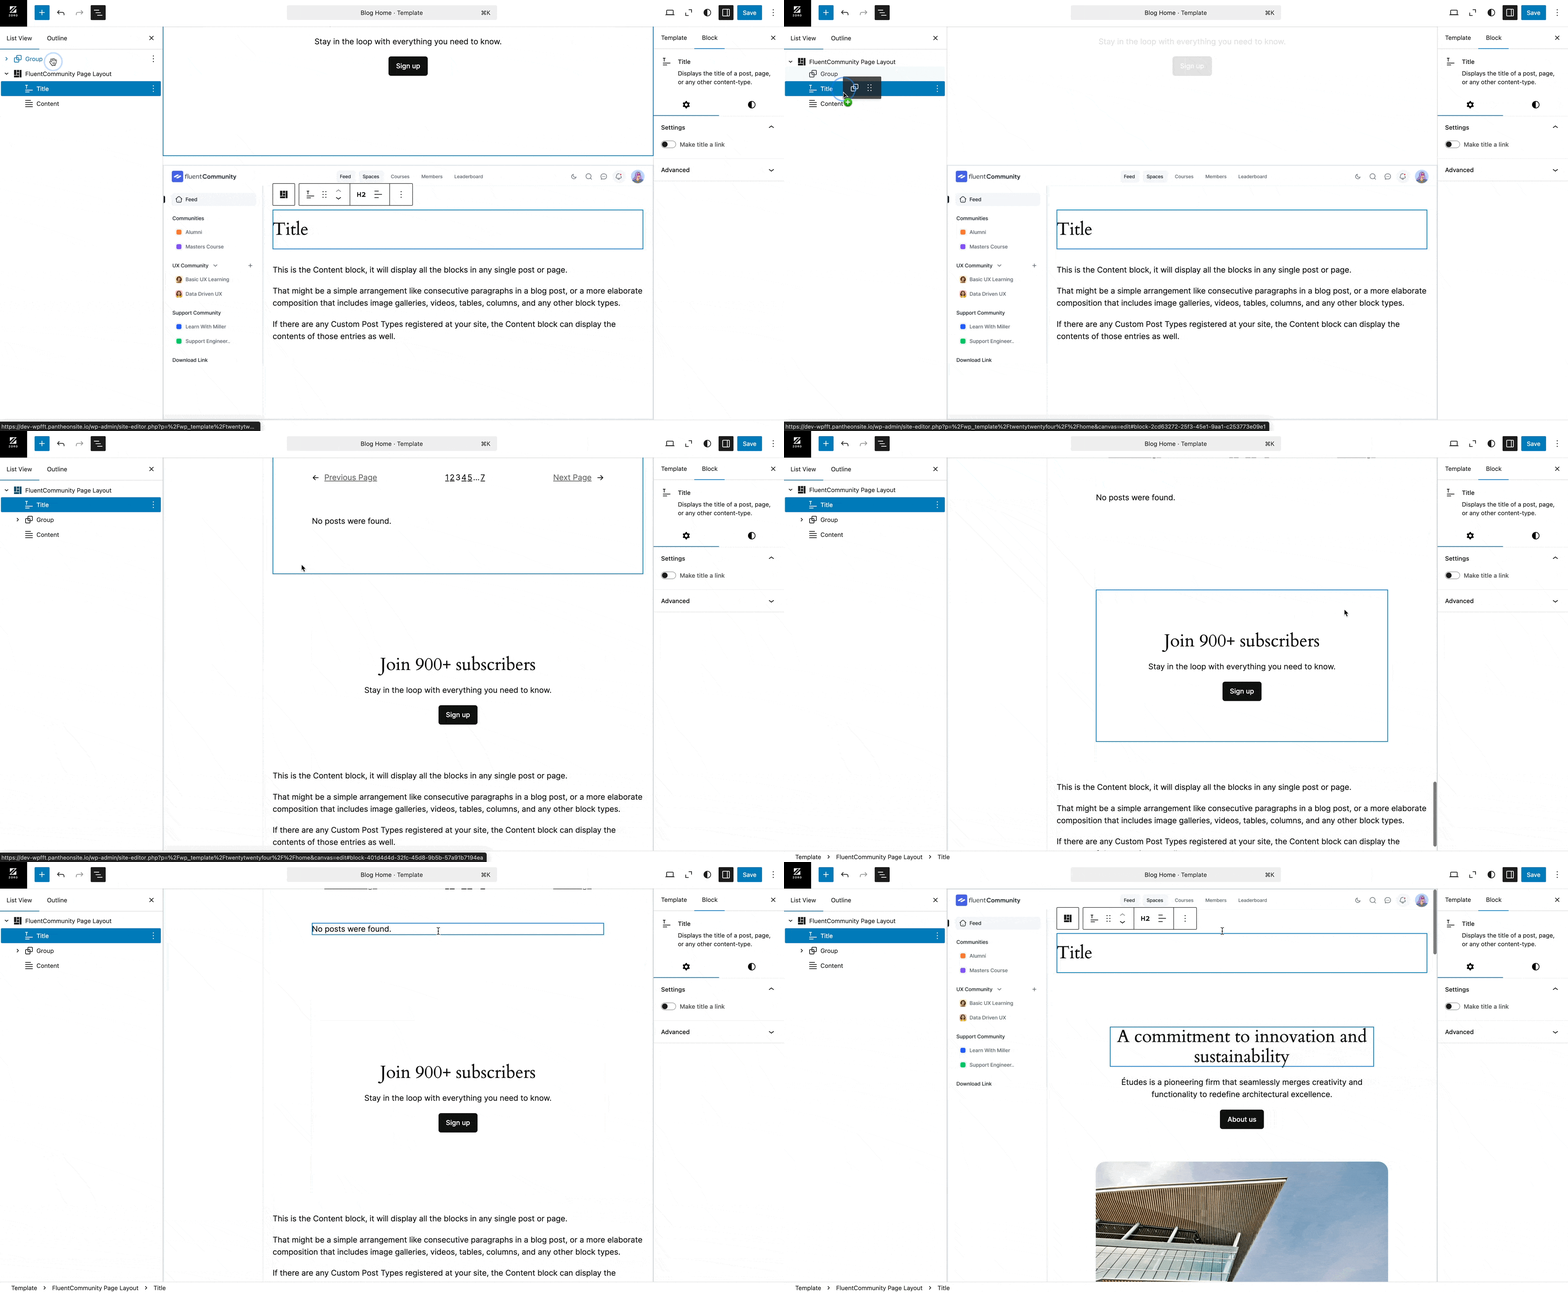
Drag and drop the Group section into the FluentCommunity Block layers to start building your template with the FluentCommunity layout.
Once your template holds the content you want, you can fine-tune its layout. Click Blocks in the right sidebar to access the Layout Settings, where you'll find two width options:
- Default Width: Keeps the content width at your theme's default setting.
- Full Width: Expands the content to cover the entire width of the page.
You can also enable the Disable Dark Mode option. This ensures that even if your community has dark mode enabled, users always see this template page in light mode.
Advanced Options
For deeper customization, add custom CSS in the Advanced section to further tweak your template as needed.