

Appearance
Connecting with FluentPlayer
FluentPlayer turns your community into a fully branded, video-first experience. Instead of the default look of YouTube or Vimeo embeds, it makes every video match your community's style, with player controls, brand colors, and even member uploads under your control.
Use Case: You run a course-driven community and want a clean, distraction-free video player that carries your brand colors, remembers where each student left off, and lets only your team upload new videos.
Members can upload videos in popular formats like MP4, M3U8, MPD, WebM, and MOV, and you can play embedded videos from platforms like YouTube, Vimeo, HLS, and DASH. If a format isn't supported, the native player takes over automatically so playback stays smooth.
✨ Note: If you don't have FluentPlayer installed yet, install it directly from the community settings. Go to FluentCommunity > Settings > Features & Addons, find the FluentPlayer module under Recommended Plugins, and click Install FluentPlayer.
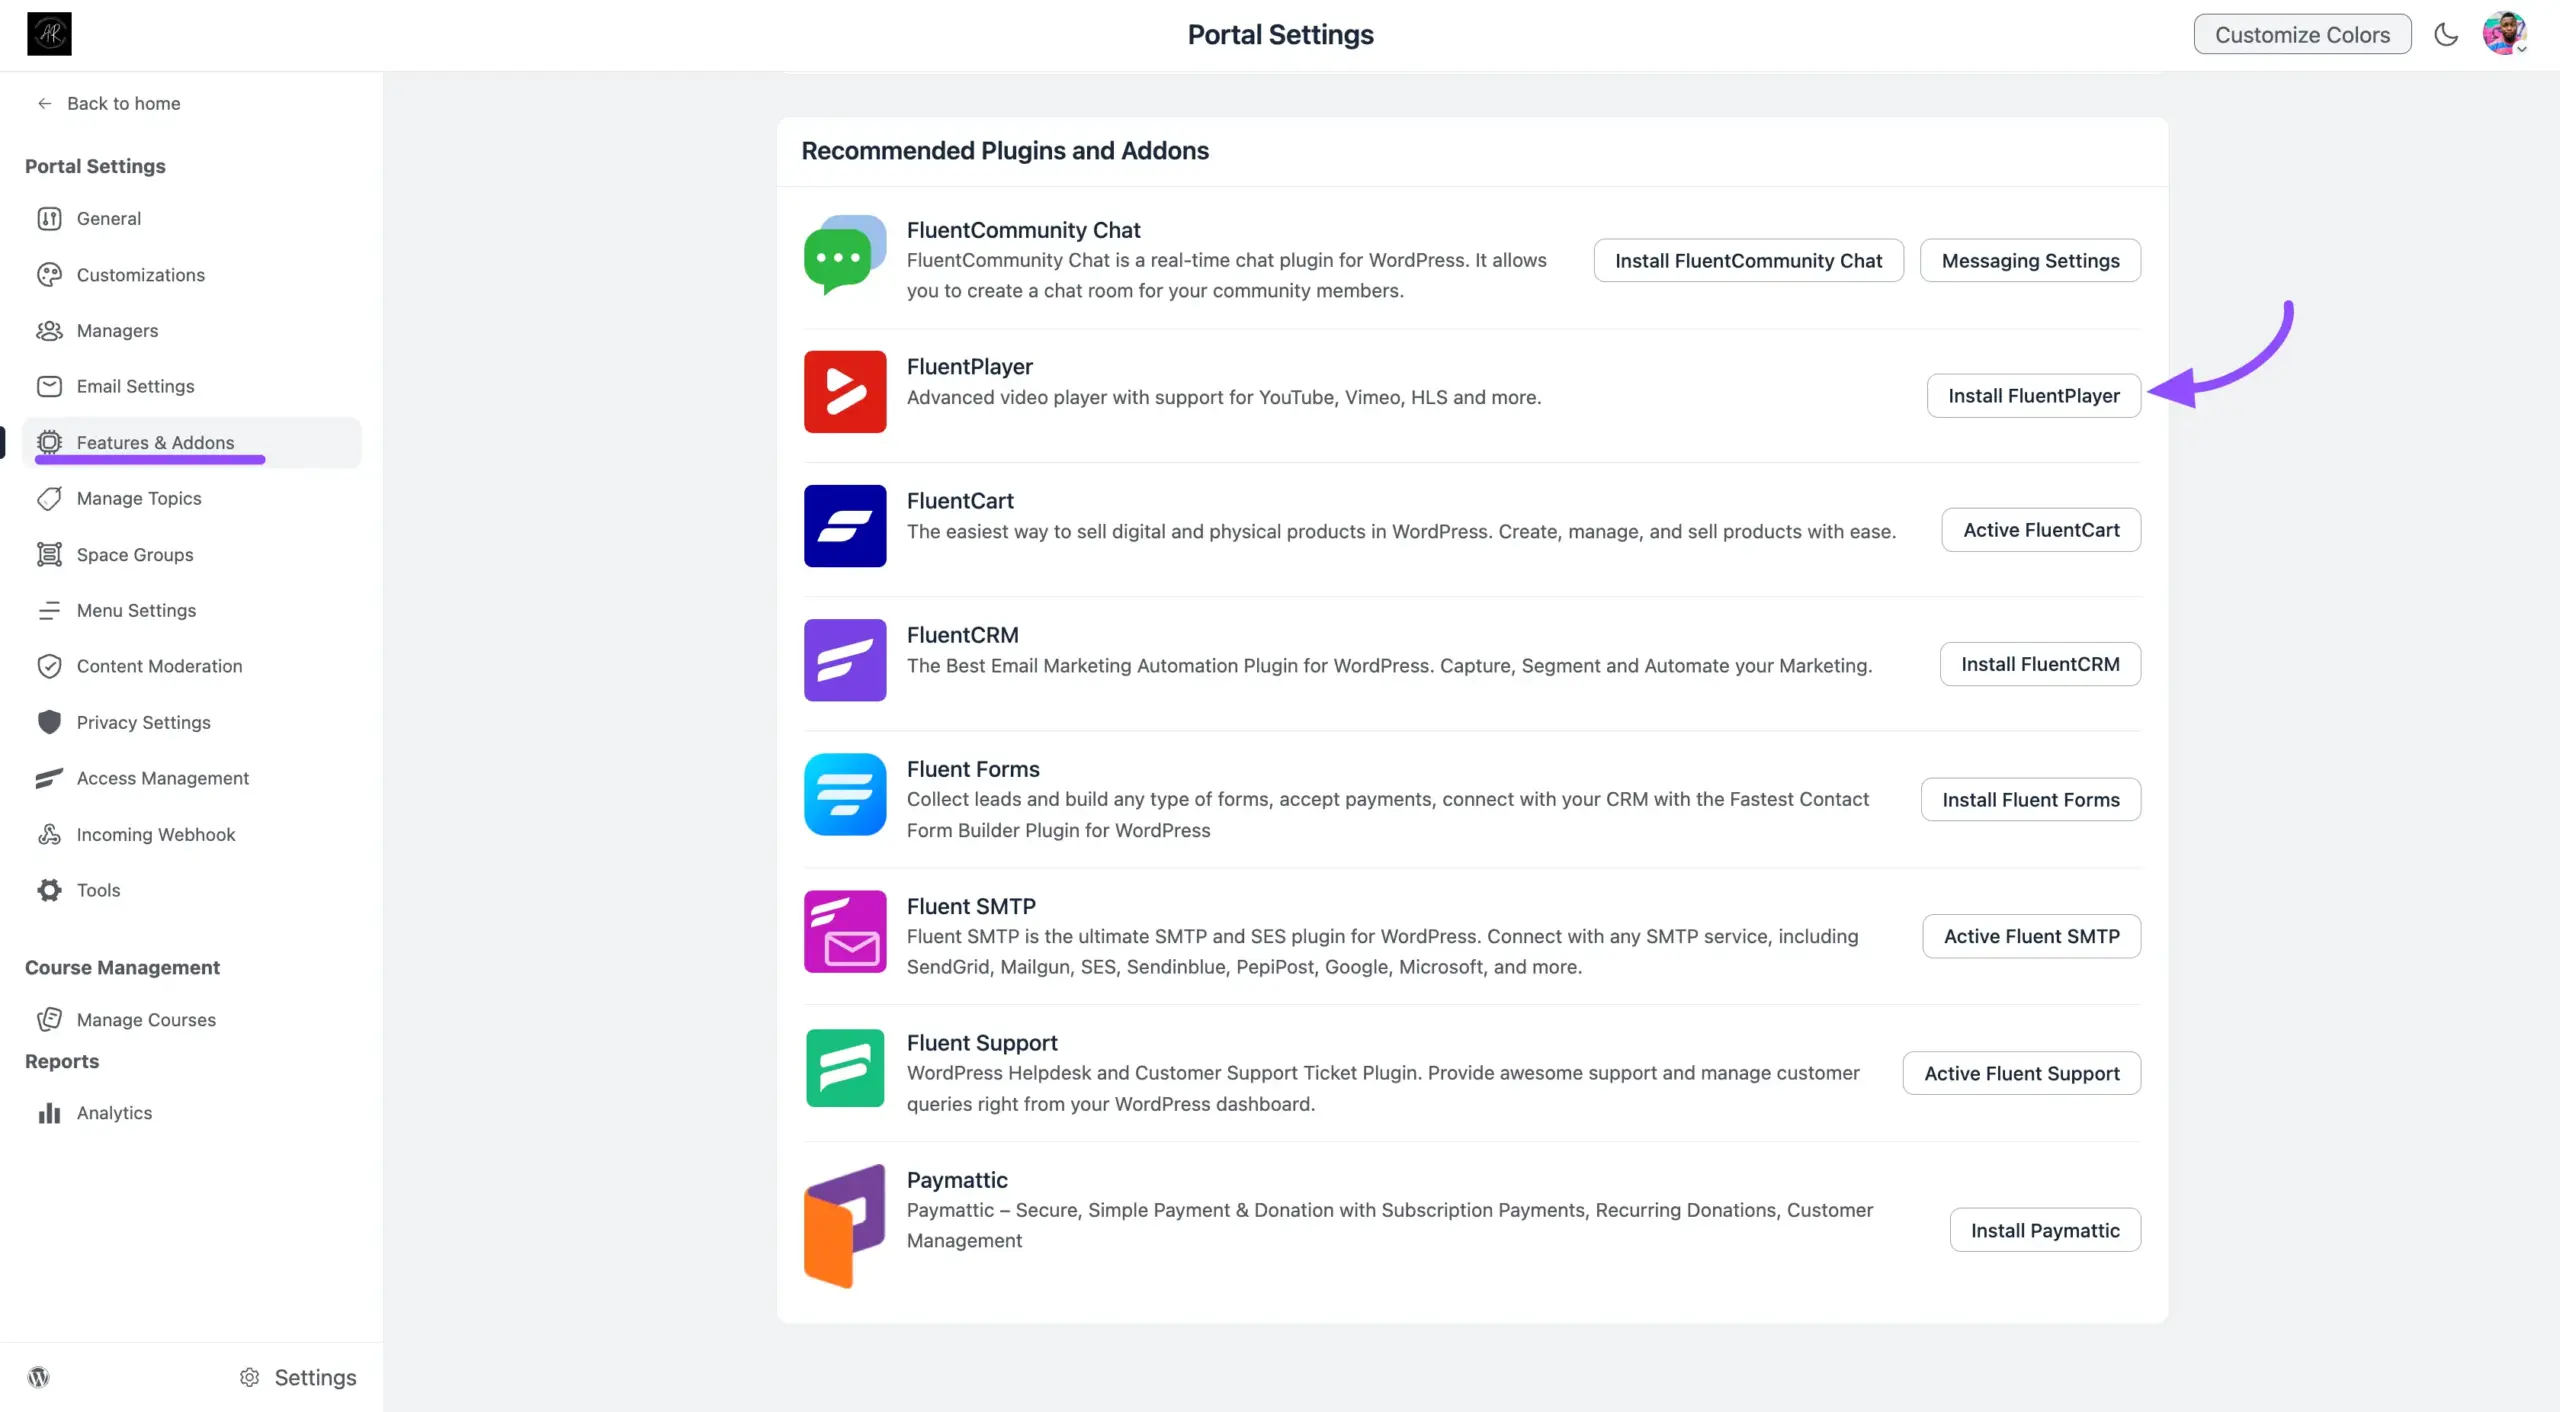
How to Enable FluentPlayer
Step 1: Enable the Integration
Once FluentPlayer is installed on your site, activate the connection.
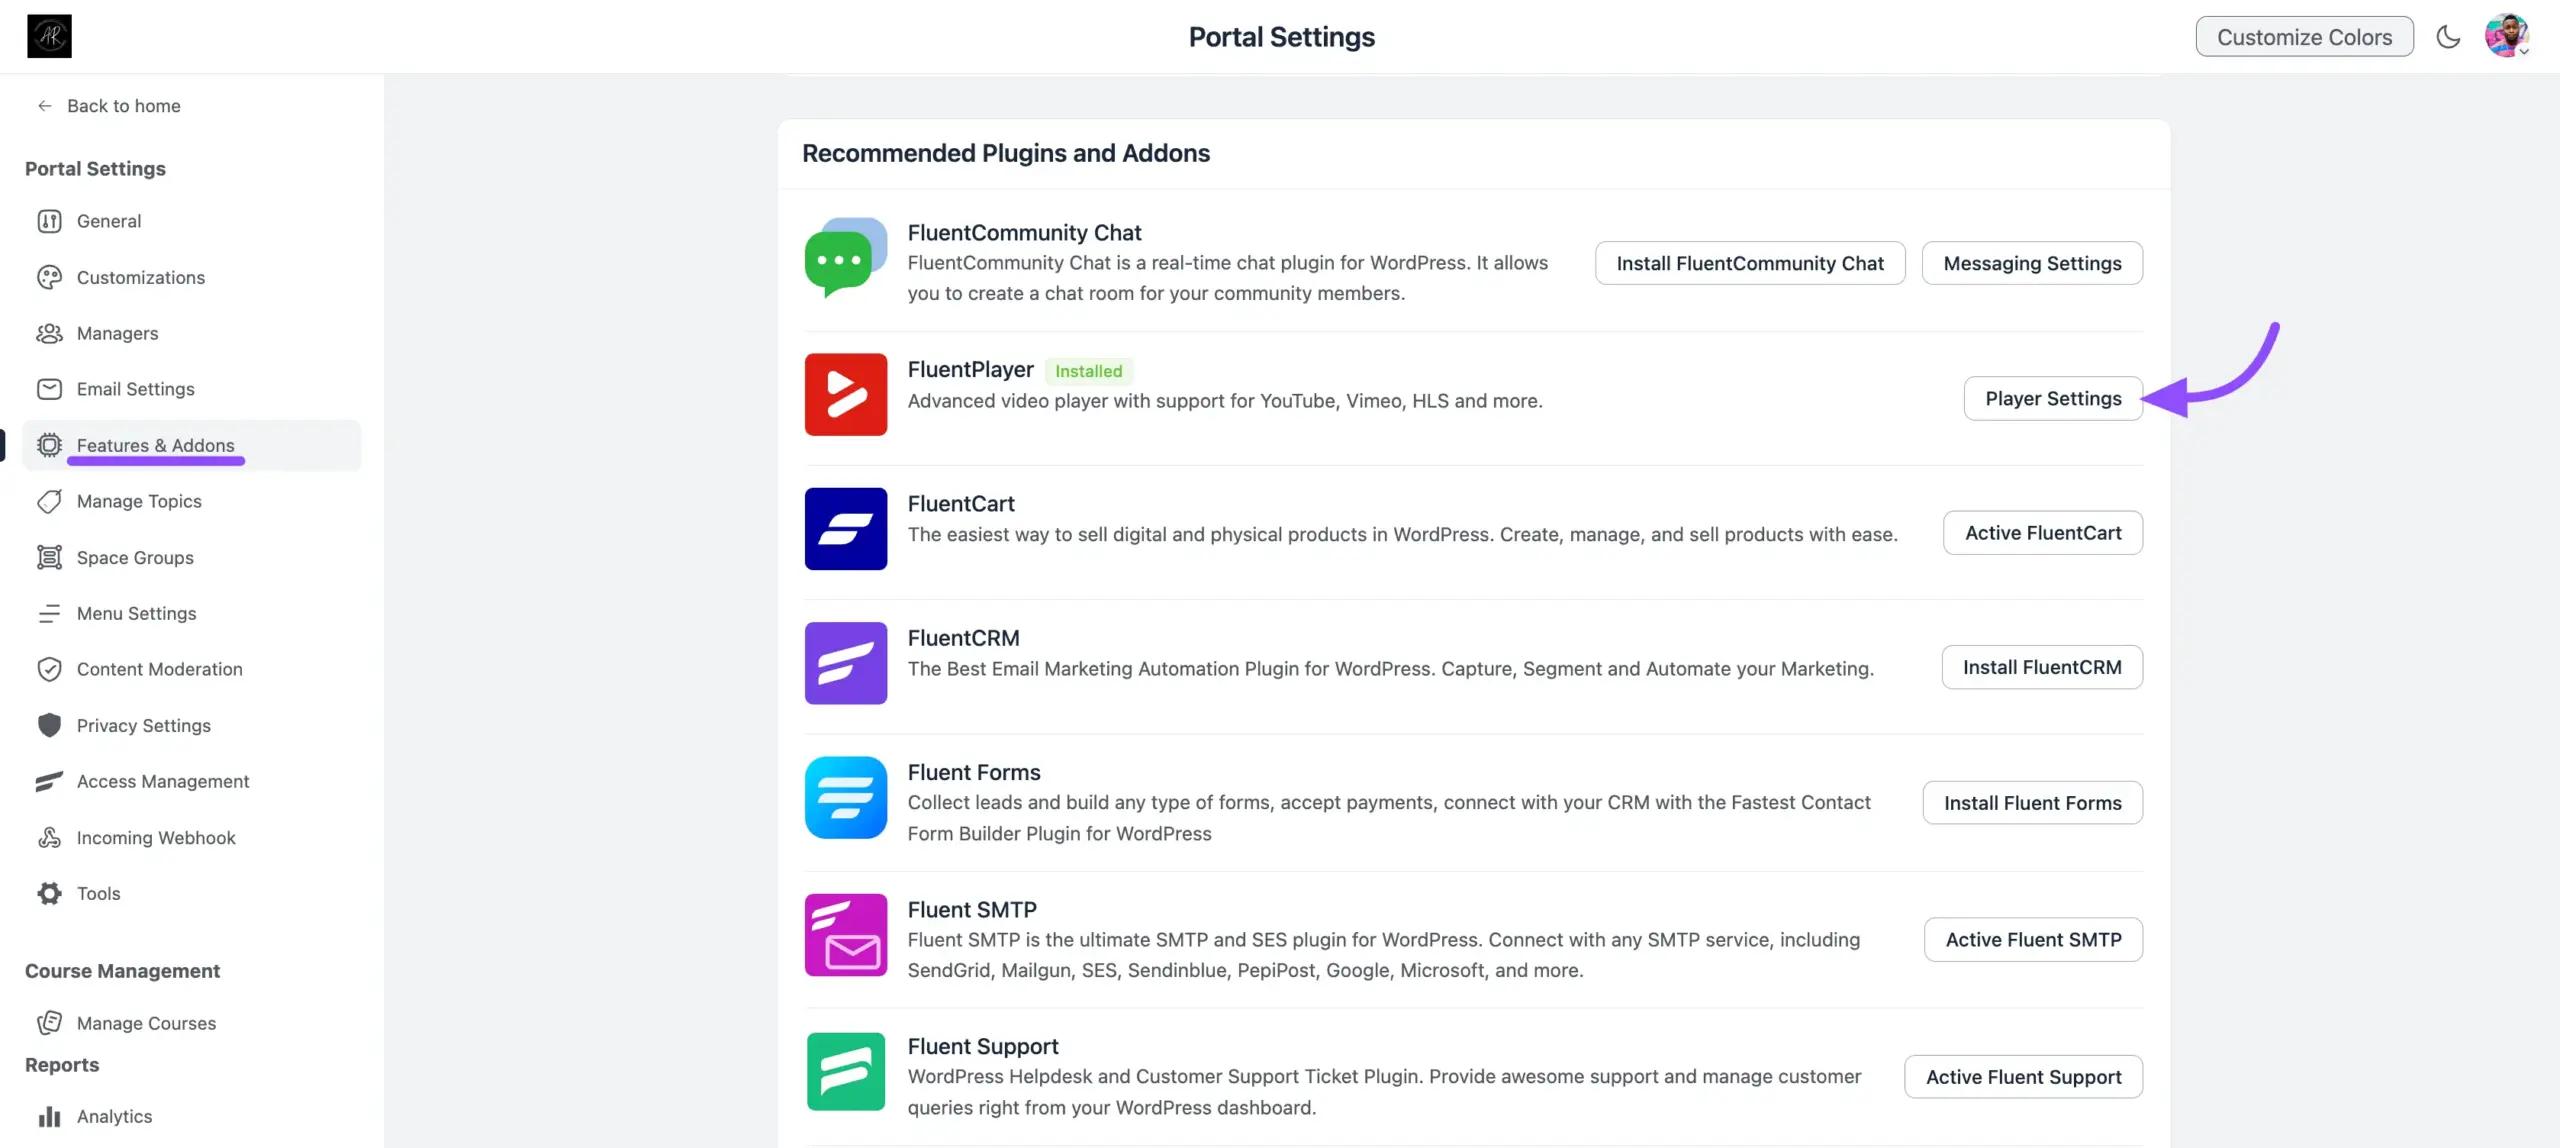
- From your WordPress dashboard, go to FluentCommunity > Settings.
- Click the Features & Addons tab in the left-hand menu.
- Locate the FluentPlayer module.
- Click the Player Settings button to open the configuration panel.
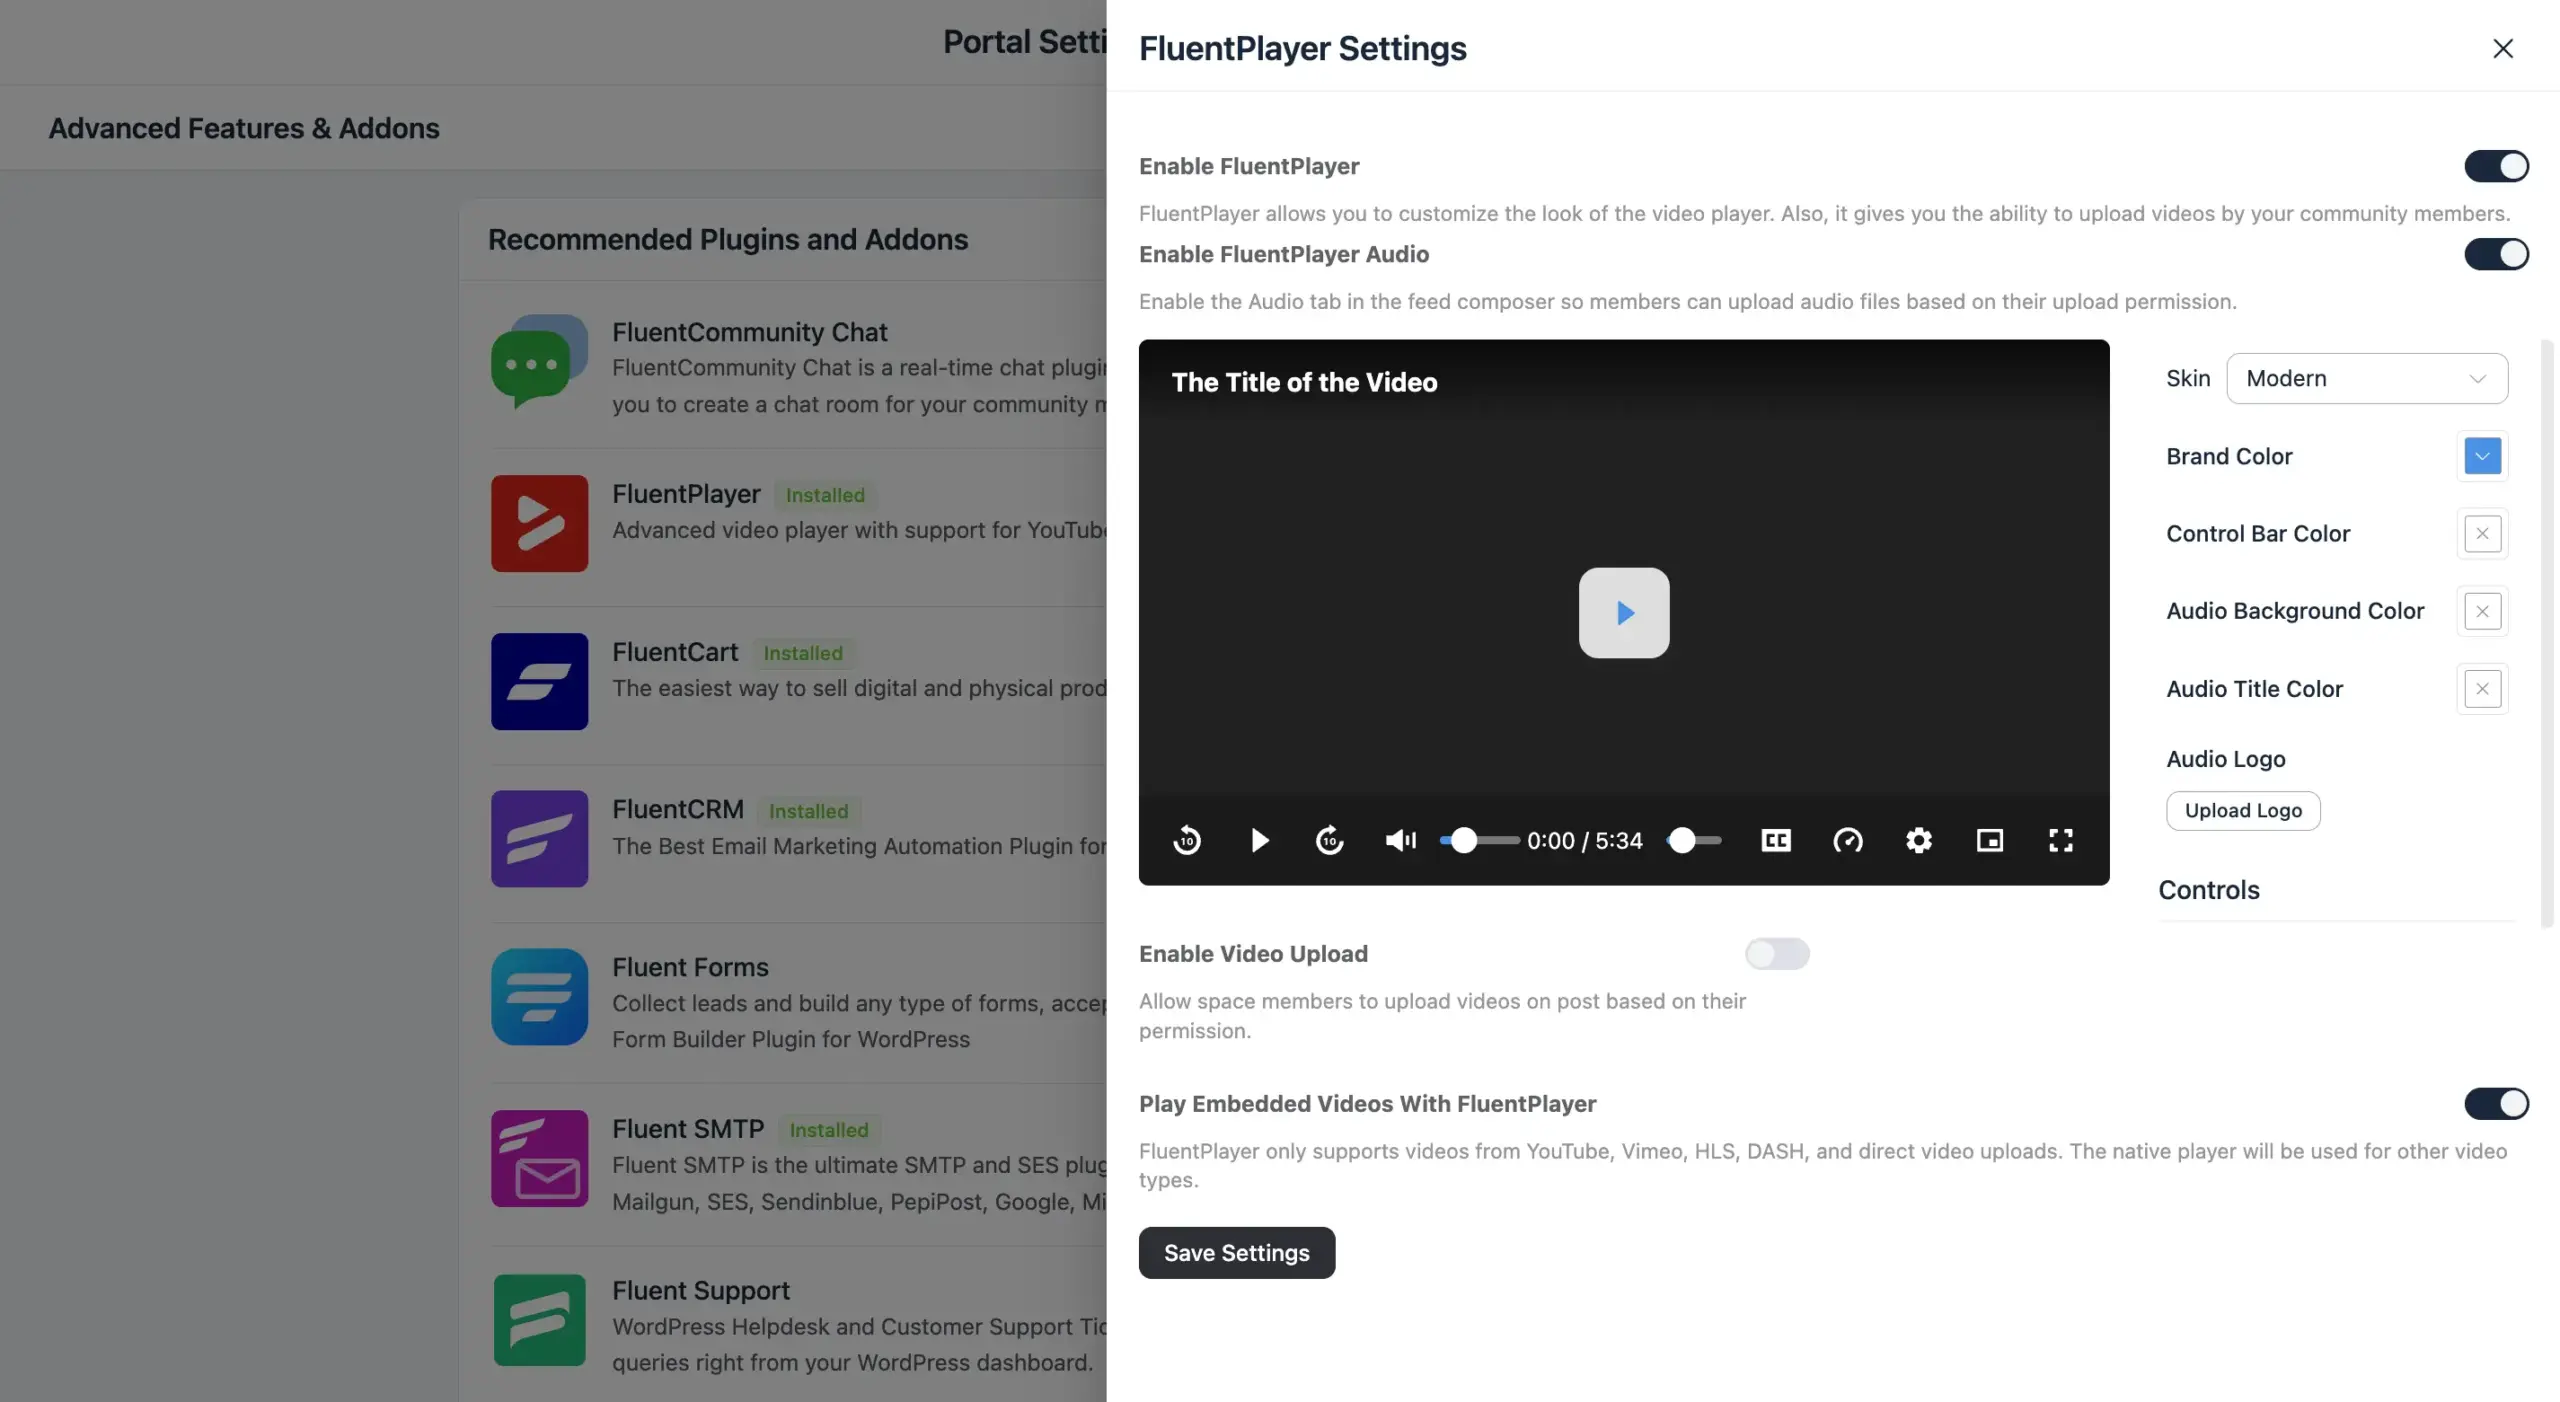
- At the top of the slide-in panel, toggle Enable FluentPlayer to ON.
Once enabled, your community posts start using FluentPlayer, and you unlock the appearance, control, and upload settings.
Step 2: Customize the Player Appearance
Match your videos to your community's look and feel. A live preview at the top of the panel updates as you adjust these settings.
- Player Skin: Choose from multiple layouts — Modern, Classic, Simple, Floating, or Minimal. Use Modern for a feature-rich look, or Minimal for a distraction-free learning environment.
- Brand Color: Define your community's primary hex color. It applies to key highlights like the progress bar and play button.
- Control Bar Color: Customize the background color of the control bar independently of your brand color.
Audio Appearance
With FluentPlayer Audio enabled, three extra options control how uploaded audio tracks look:
- Audio Background Color: The background color shown behind uploaded audio tracks.
- Audio Title Color: The text color used for the audio track's title.
- Audio Logo: Upload a custom logo to display on the audio player.
Step 3: Configure the Player Controls
This section gives you full control over how members interact with your videos. Toggle each setting on or off to suit your needs.
Player Controls
- Play/Pause: The standard button to start or stop the video.
- Volume: Let members adjust or mute the sound.
- Fullscreen: Let members expand the video to fill their screen for immersive viewing.
- Picture in Picture: Let the video pop out into a small floating window so members can keep watching while browsing other areas of your community.
- Captions Toggle: Let members turn subtitles on or off, if your video includes caption files.
Playback Behaviors
- Muted Autoplay: Start the video automatically as soon as it loads, with the sound muted — great for social feed environments.
- Save Play Position: Remember exactly where a member left off, so the video resumes from that spot when they return.
- Hide Top Controls: Remove the top bar of the player for a cleaner look.
- Hide Center Controls: Hide the large play/pause buttons in the middle of the screen.
- Hide Bottom Controls: Remove the timeline and bottom bar completely — useful for background videos or restrictive course environments.
Step 4: Manage Video Uploads and Embeds
The most powerful part of this integration is controlling how videos are added to your community.
- Enable Video Upload: Turn this on to allow video files to be uploaded directly into community posts. Use the Who Can Upload? option to restrict uploads to Admins only, Admins and Moderators, or Everyone.
✨ Note: If you have a large community, we recommend restricting uploads to Admins or Moderators to save your server's storage space.
- Play Embedded Videos With FluentPlayer: Turn this ON to force external links, like YouTube or Vimeo, to render using your custom FluentPlayer design. This hides external branding and keeps your community interface clean and uniform.
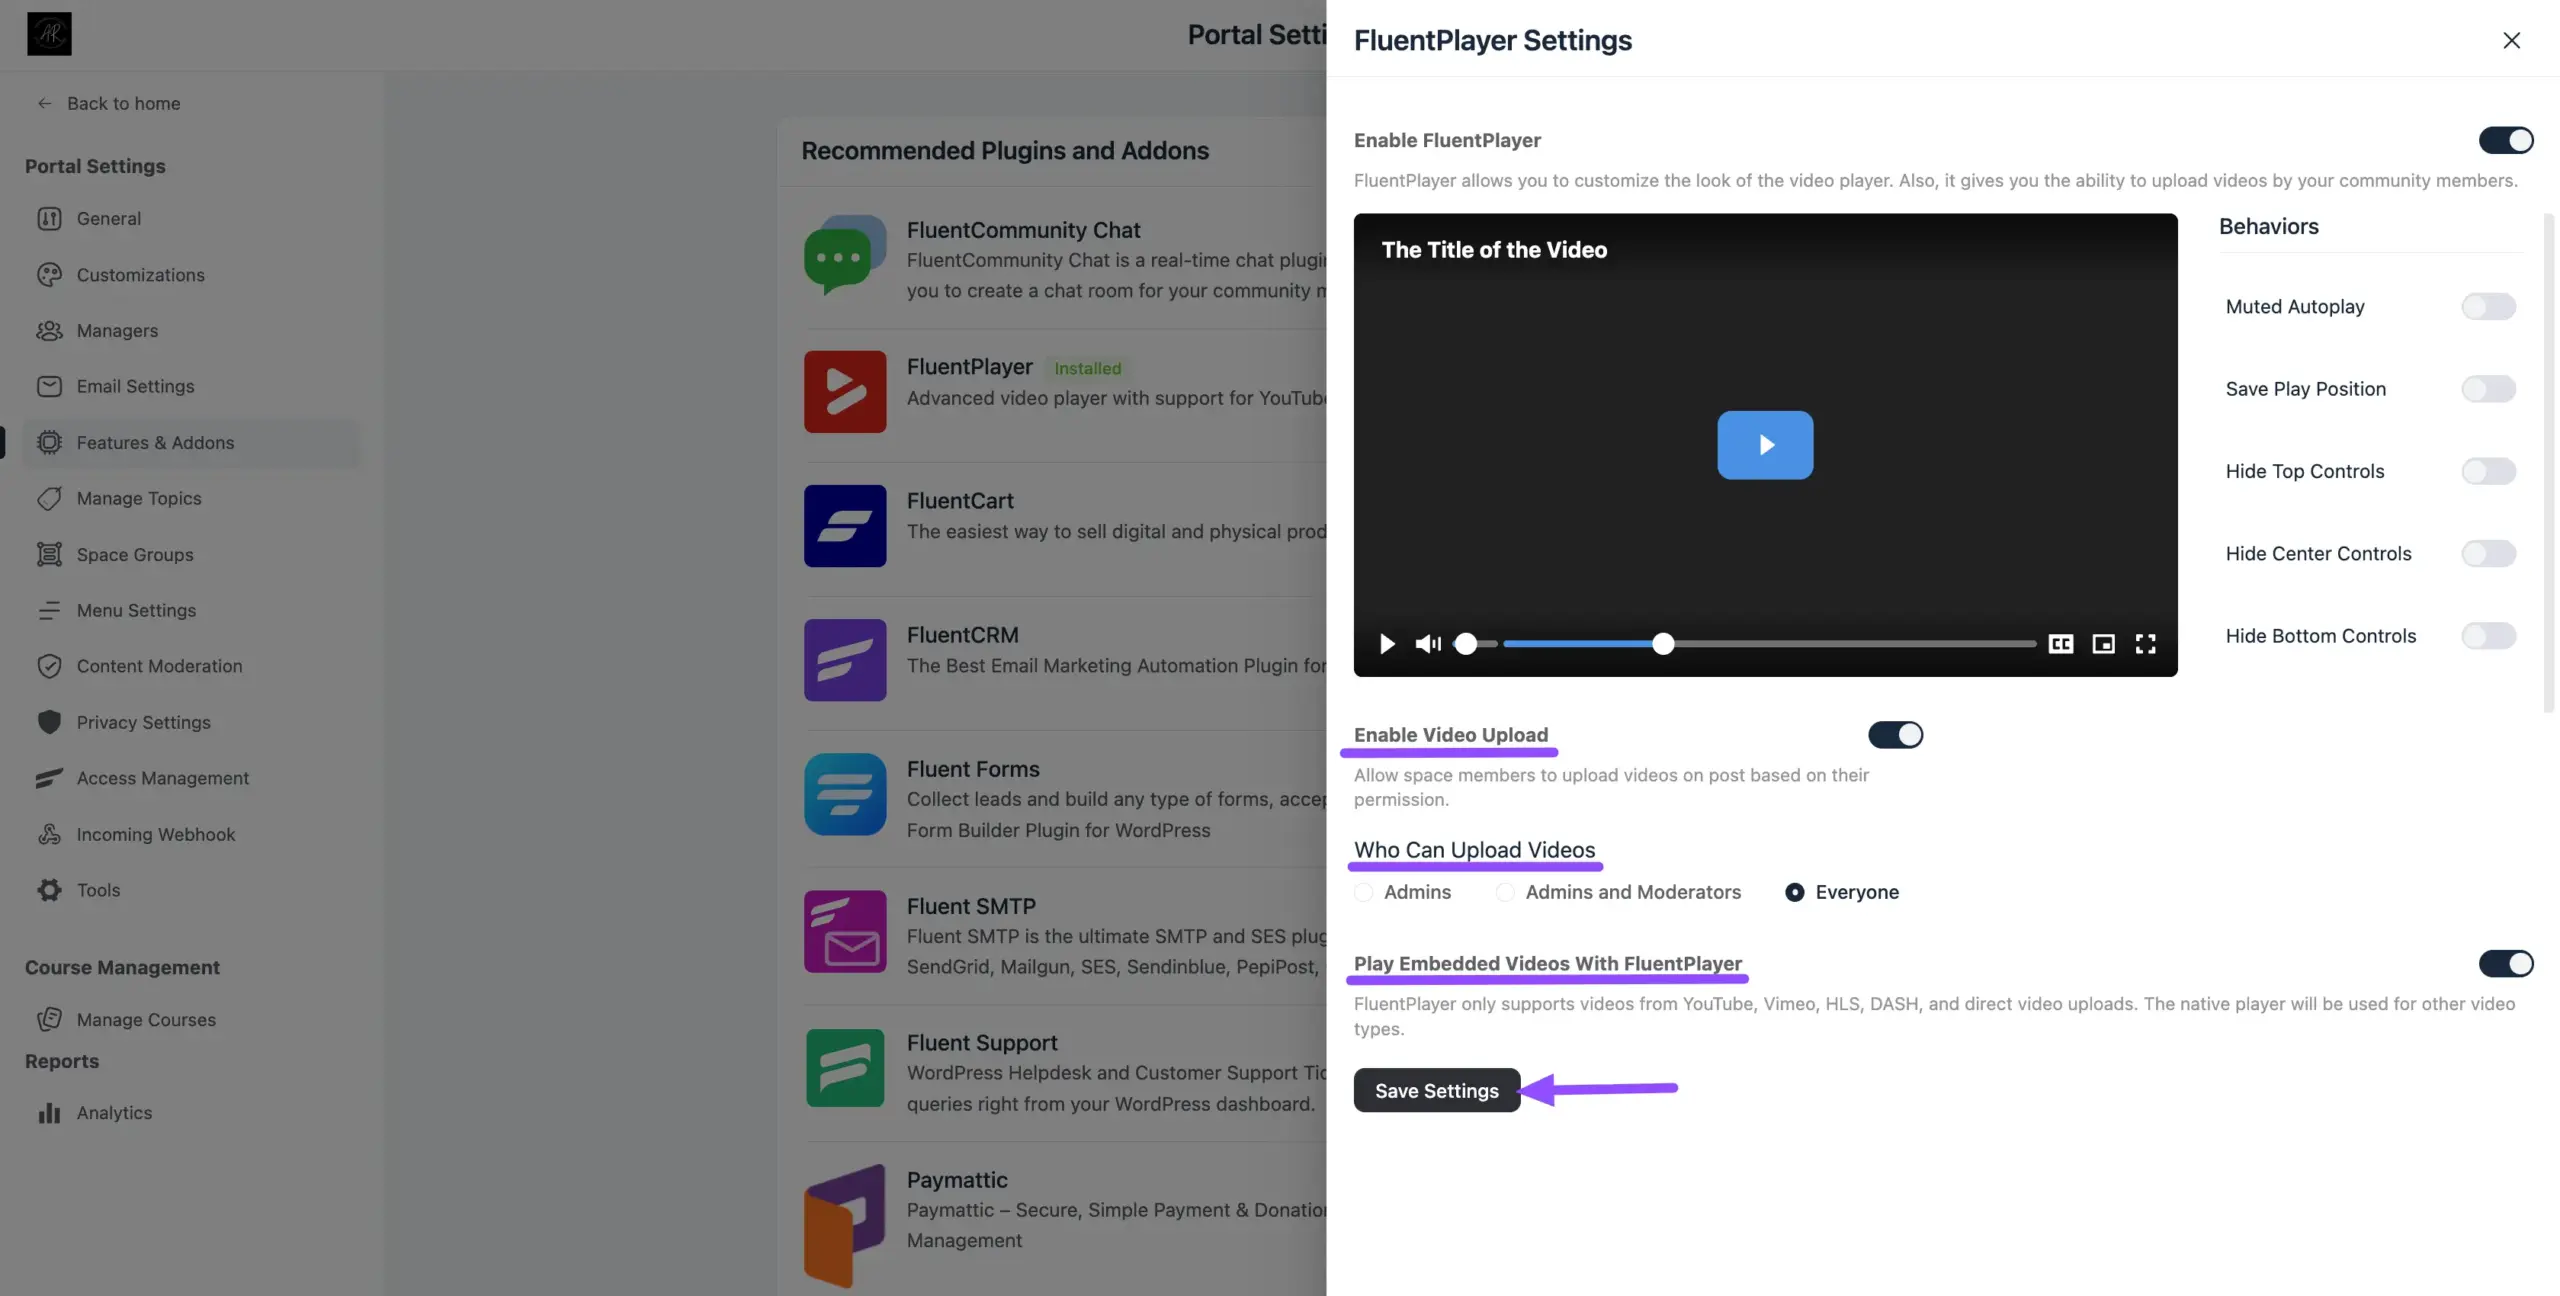
Once you've configured your preferences, click the Save Settings button at the bottom of the panel.