

Appearance
Portal Access Settings
Portal Access Settings let you control how members reach and interact with your community. From here you decide who can view the portal, which login and signup pages they use, and where non-members are sent when they try to access restricted content.
Use Case: You run a paid membership community and want only logged-in members to see the content, while everyone else is redirected to a signup landing page.
How to Configure Portal Access Settings
In your WordPress dashboard, go to FluentCommunity, then open the General Settings tab. Within General Settings, find the Portal Access Settings section.
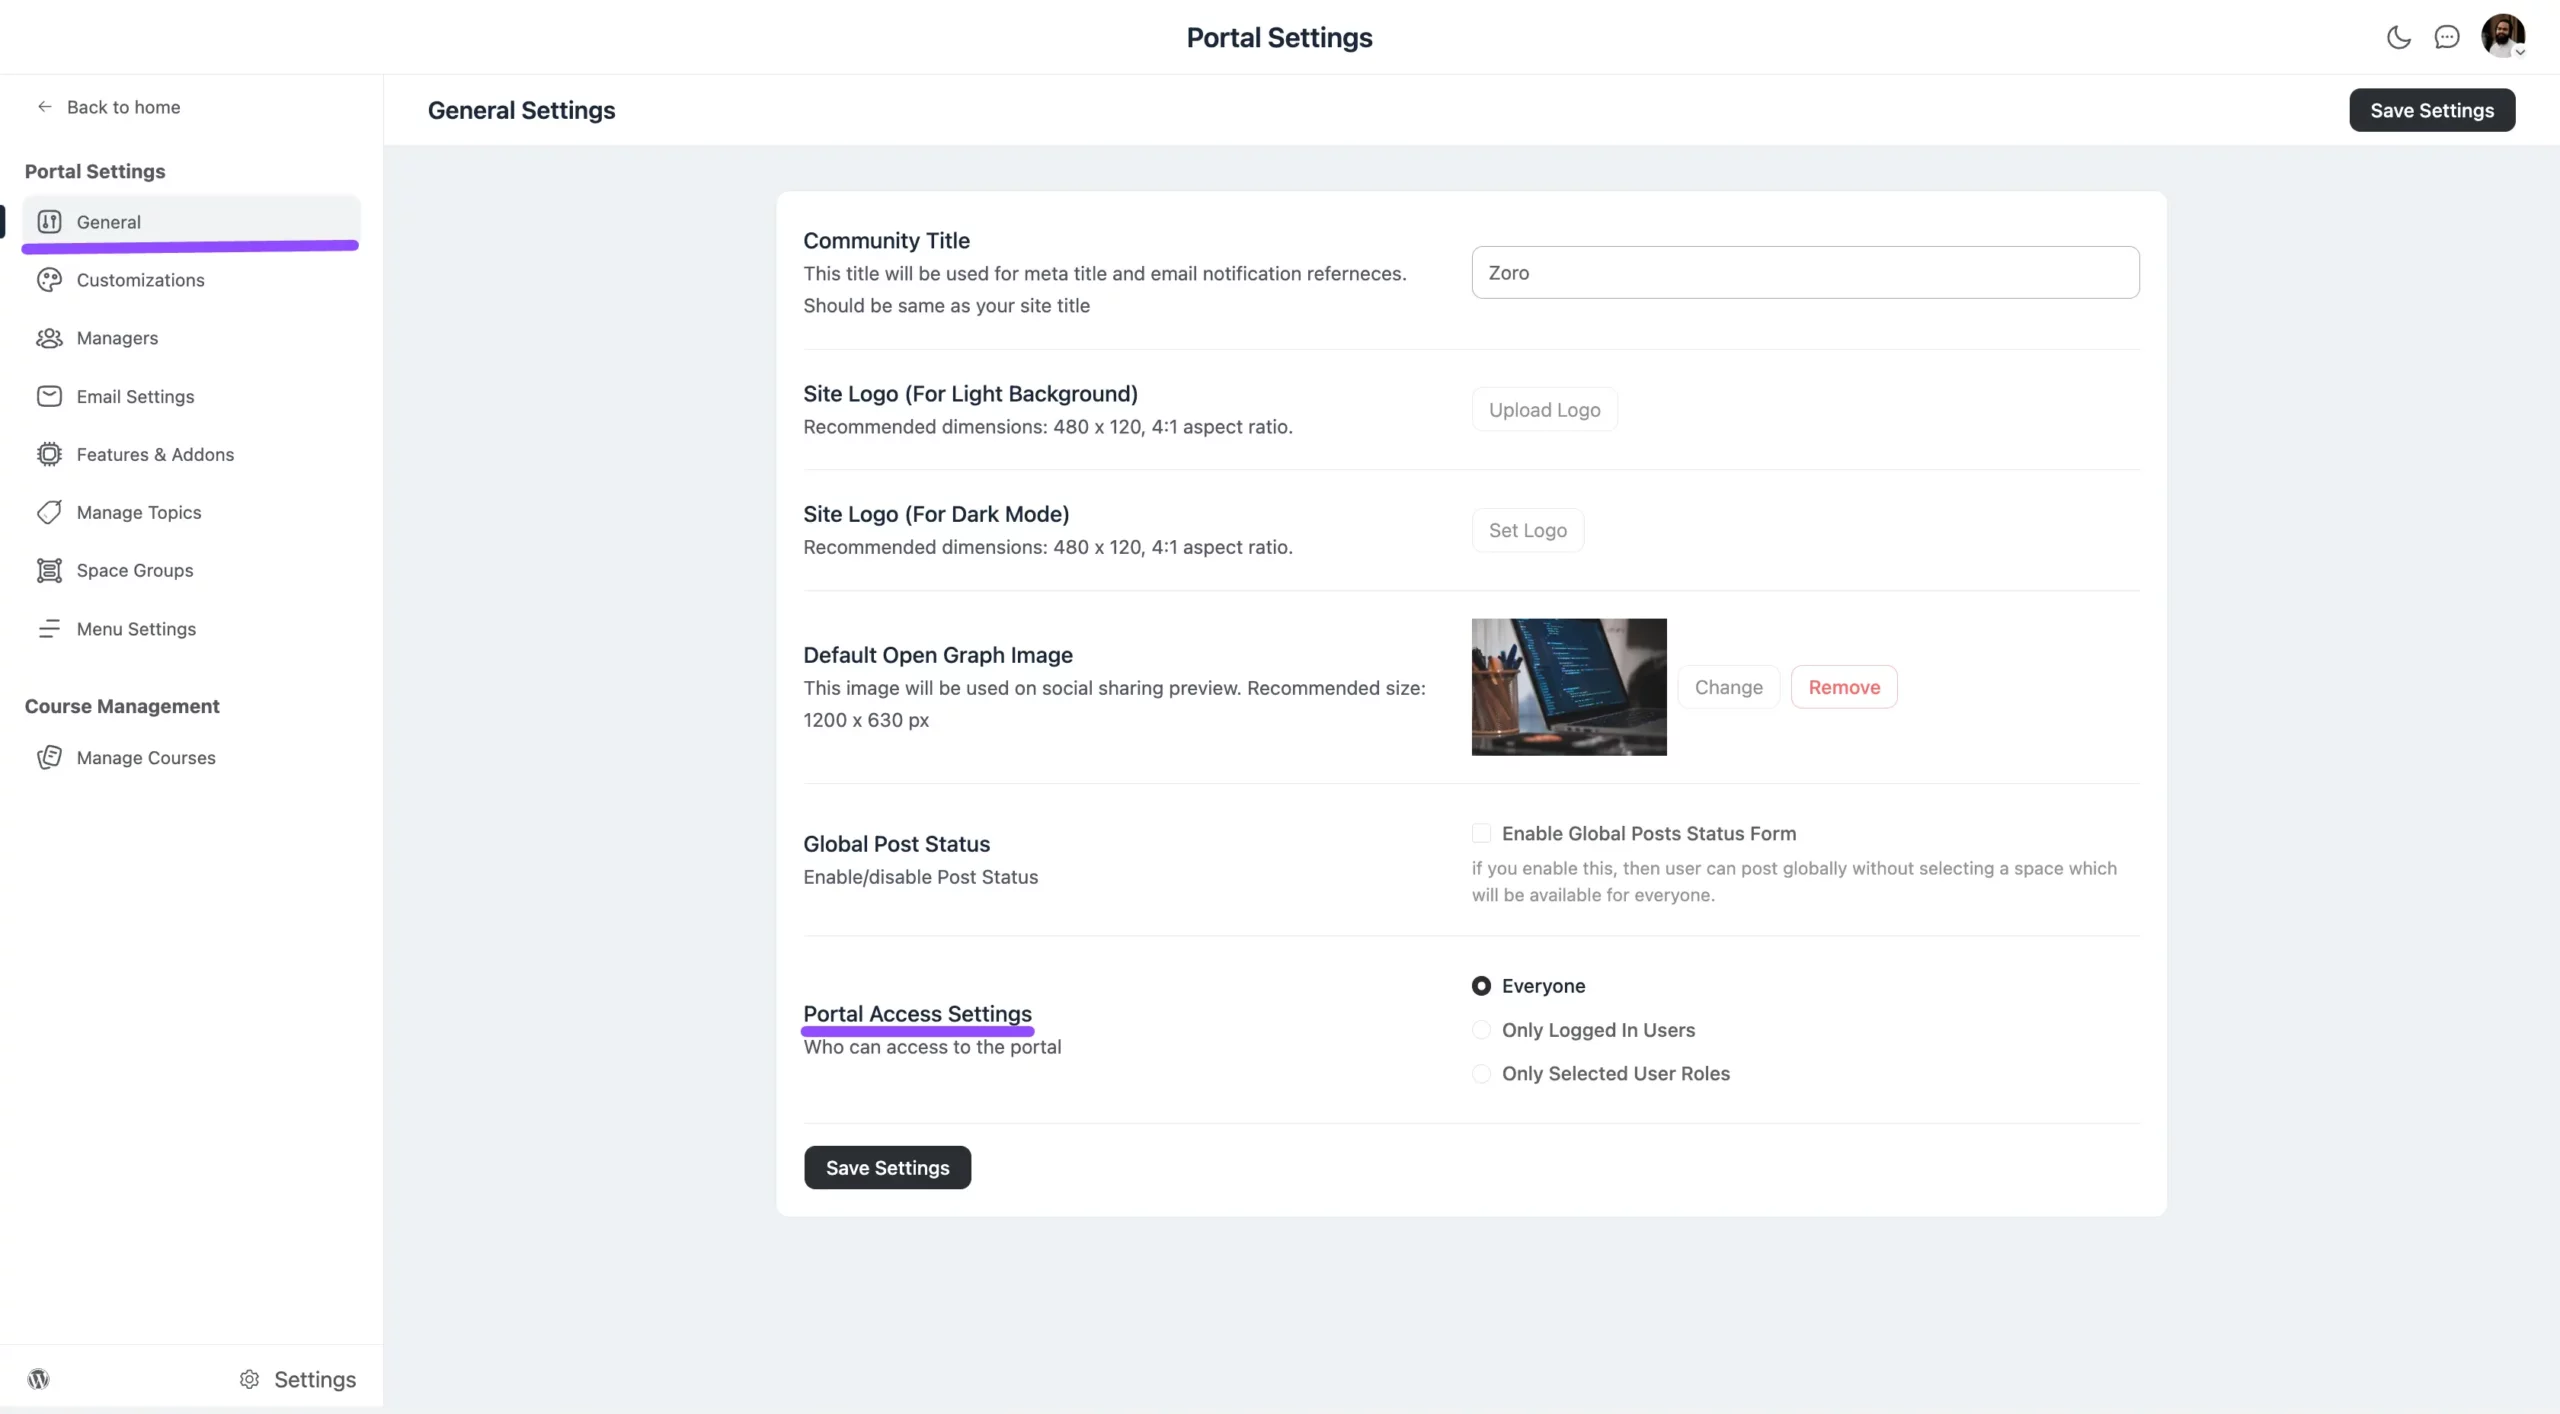
Portal Access offers three levels of access, described below.
Everyone
With this option, anyone can access the portal and view the public spaces feed. However, they cannot take actions or interact until they log in.
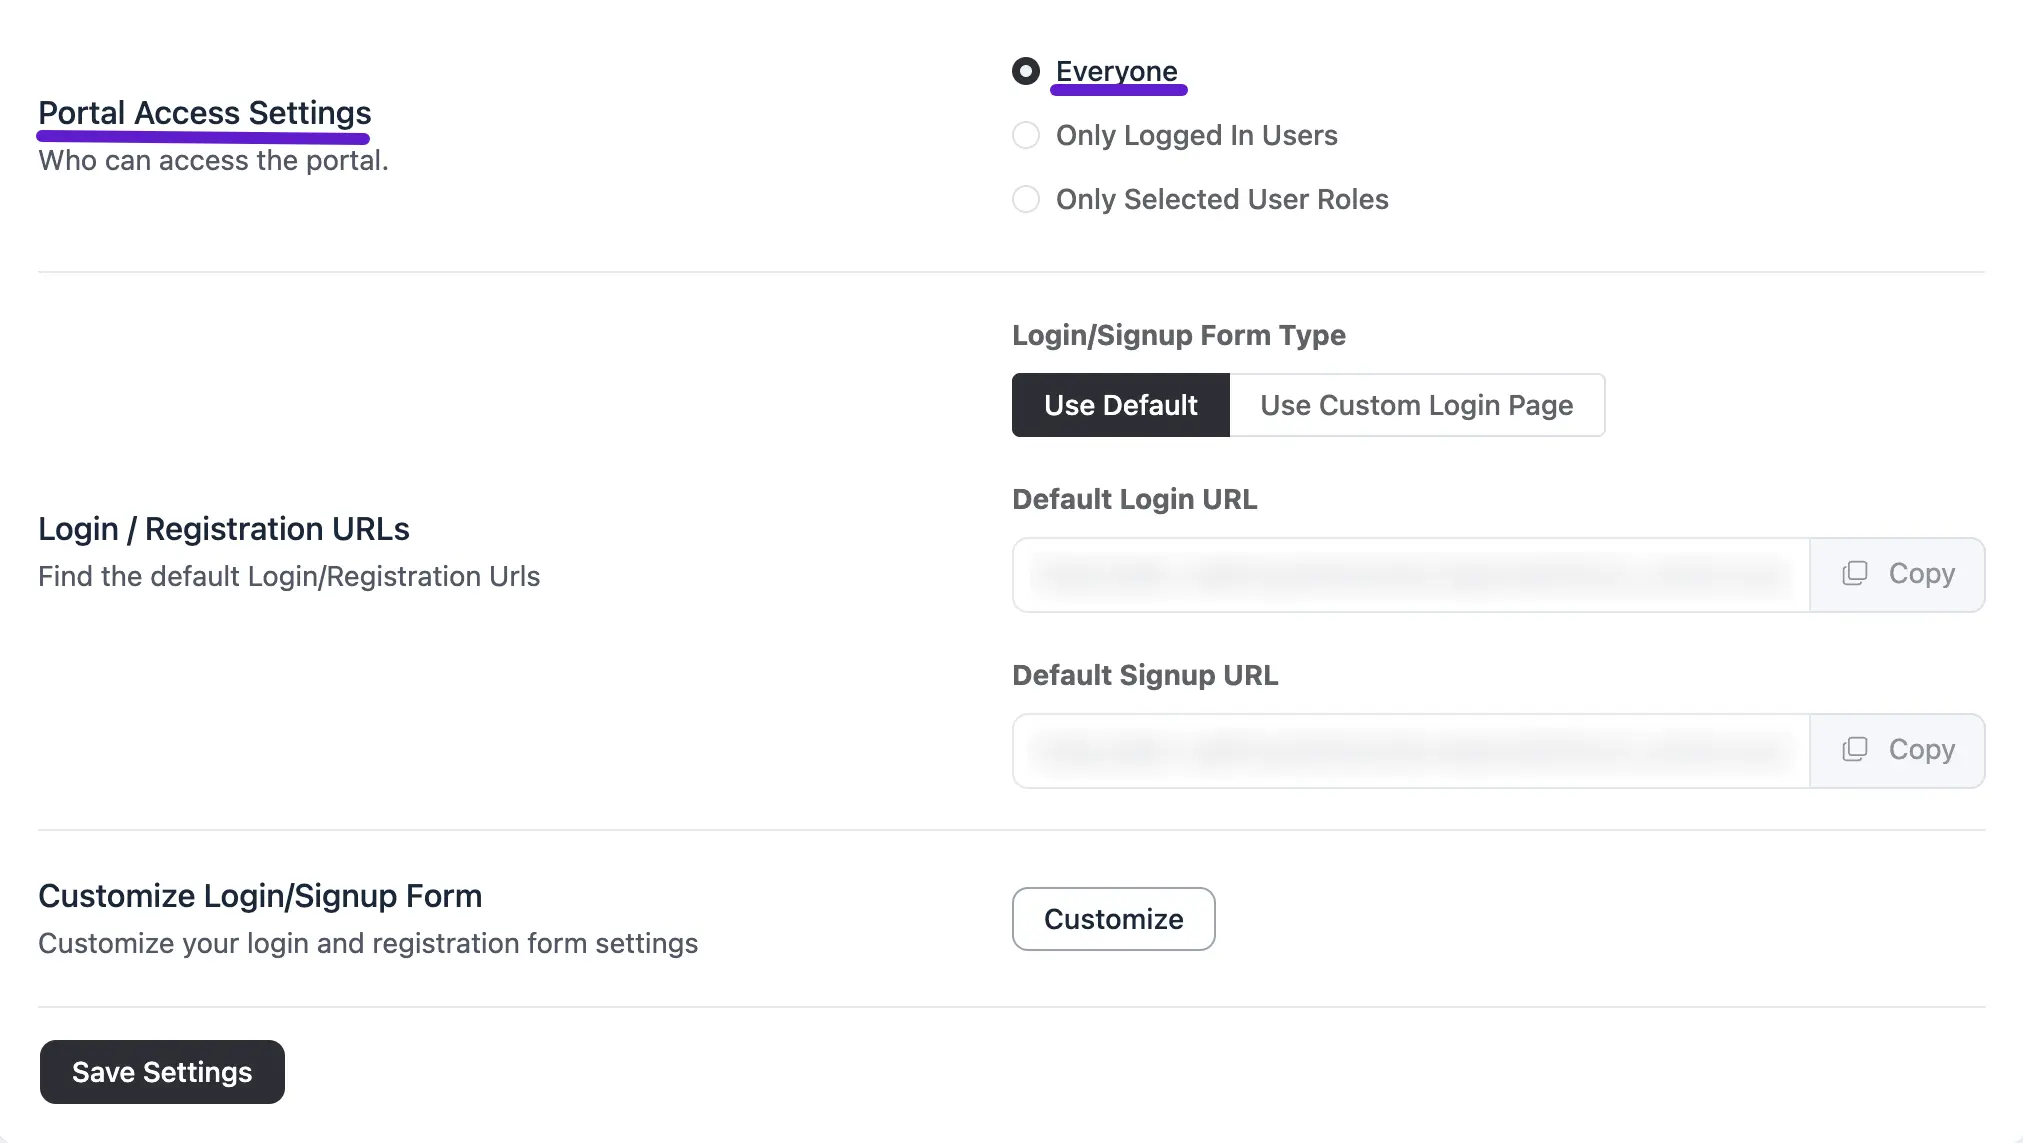
Login / Registration URLs
Under this option, you can choose which login and signup pages members use. This works the same way for the other access levels too.
- Use Default:
- Default Login URL: The standard login URL for the FluentCommunity portal.
- Default Signup URL: The default signup URL for the FluentCommunity portal.
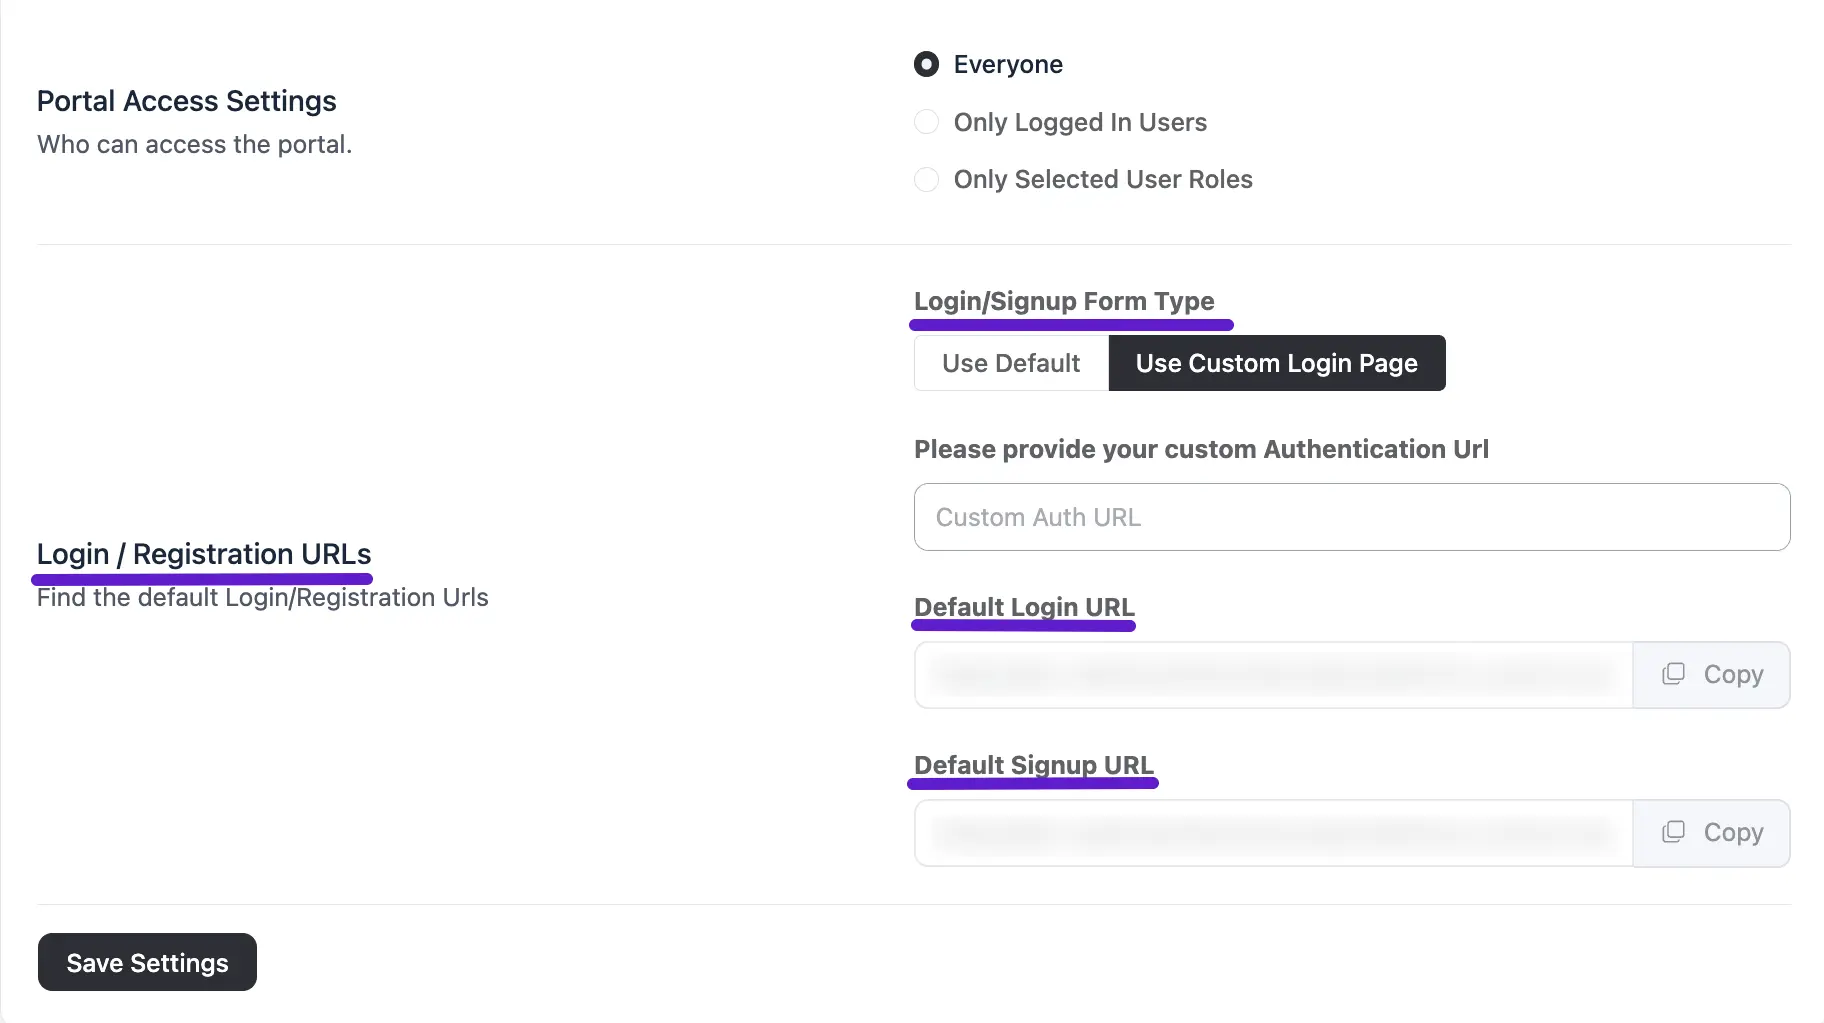
- Use Custom Login Page:
- Custom Authentication URL: Enter a custom login or registration URL to override the default WordPress authentication system, directing users to a specific login or registration page.
- Default Login URL / Default Signup URL: These remain unchanged and cannot be modified.
✨ Note: If you select Use Custom Login Page, the option to Customize the Login/Signup Form will no longer appear on the FluentCommunity settings page.
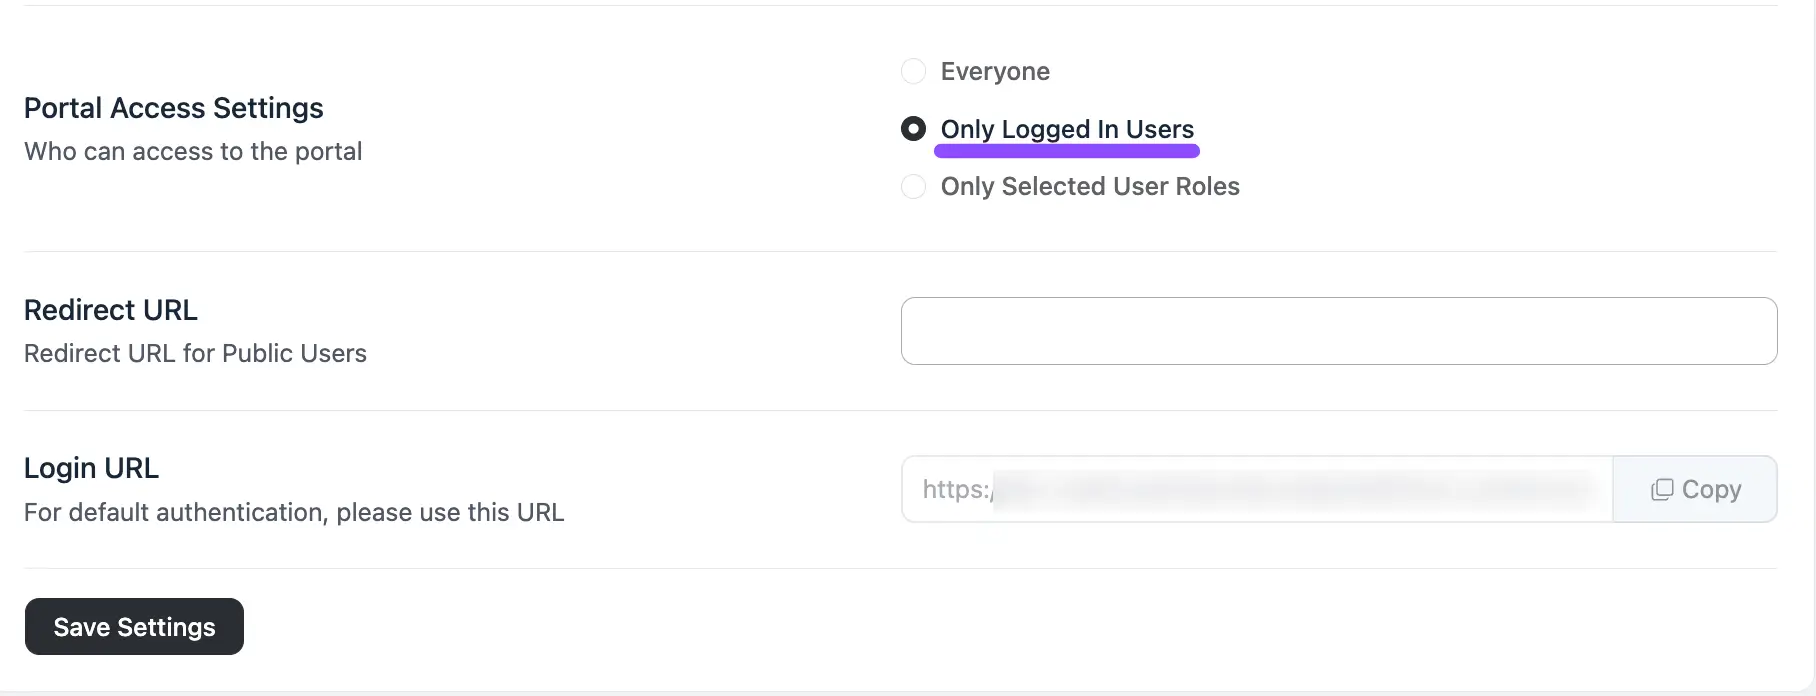
Only Logged In Users
This option limits access to registered members. Users must log in to view and interact with community content.
- Redirect URL: Specifies where non-logged-in users are sent when they try to access community content, such as a landing page or signup page that encourages them to log in or sign up.
Only Selected User Roles
This option restricts access to specific user roles (such as Admins, Members, or custom roles). Only users with the selected roles can access the community, allowing for targeted engagement.
- User Roles: Select the roles (like Admin, Member, and others) that can access the community. Only users with these roles can view the portal. Choose the roles from the dropdown field.
- Not Matched User Roles: A message shown to users who don't have the specified roles. It explains why they don't have access or prompts them to take action, like logging in or upgrading their role. Type your notice into the Text field.
- Redirect URL: Redirects users without access to a page like a landing or signup page, encouraging them to log in or sign up.
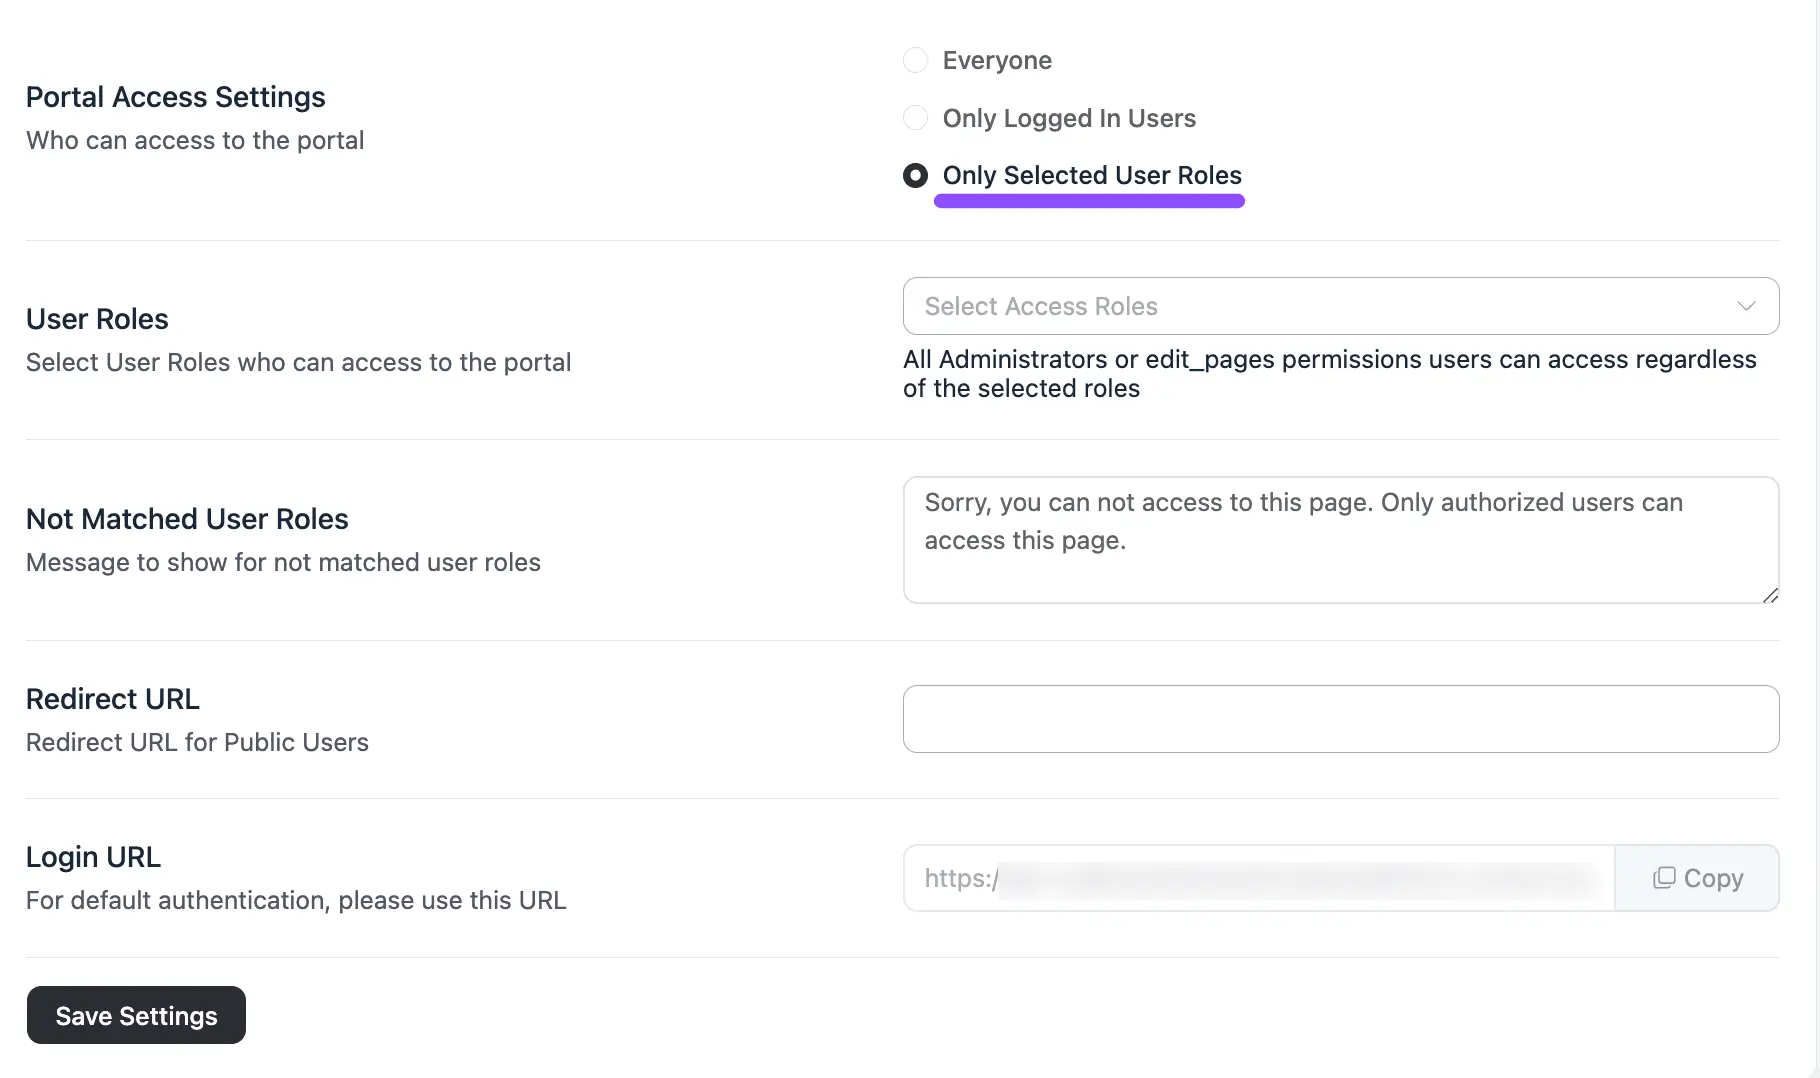
Always click the Save Settings button after making changes to ensure your Portal Access Settings are applied.