

Appearance
Community Events With FluentEvent
Events bring members together, online or in person. With FluentEvent, you can post an event in a Space, let members say they are going, and show it in the feed and on an Events page in your portal.
FluentEvent is a separate plugin that works with FluentCommunity. It keeps track of the guests and sends them confirmation and reminder emails. This guide covers the community side: how to turn events on, create an event from the portal, and what members see.
Use Case: You run a weekly Friday Q&A for your members and a few public workshops. You post each one from the portal. Members RSVP with one click, and visitors register with their name and email.
Looking for guests, calendars, or email settings?
Those are managed in the FluentEvent admin in WordPress. See the FluentEvent documentation for the full guide.
Requirements
- FluentCommunity, installed and active. The free version is enough.
- The FluentEvent plugin, installed and active.
- A site administrator account to turn events on and create events.
To install FluentEvent, go to Plugins → Add New Plugin → Upload Plugin, upload the plugin file, and click Activate. A FluentEvent menu then appears in your WordPress admin.
Step 1: Enable FluentEvent in FluentCommunity
FluentEvent adds nothing to your portal until you turn it on. Until then, members can't see events, the Events page, or the Events tab in Spaces.
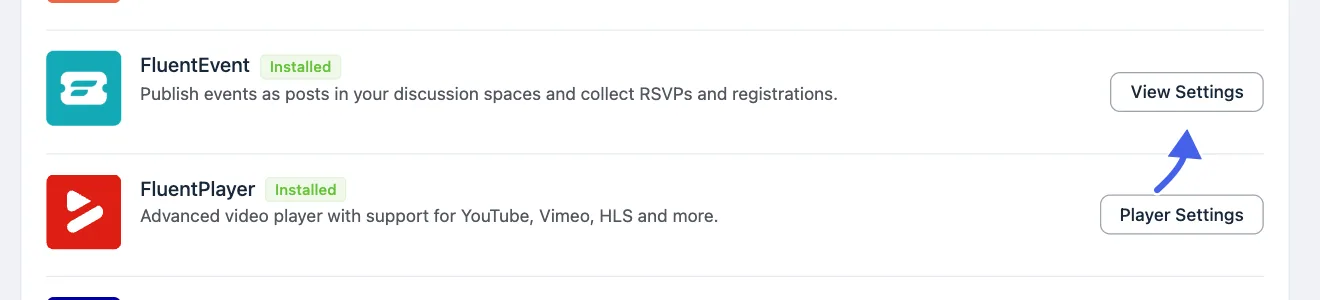
- In the portal, open Portal Settings and choose Features & Addons.
- Scroll to Recommended Plugins and Addons.
- Find FluentEvent and click View Settings. The card shows an Installed badge when the plugin is active.
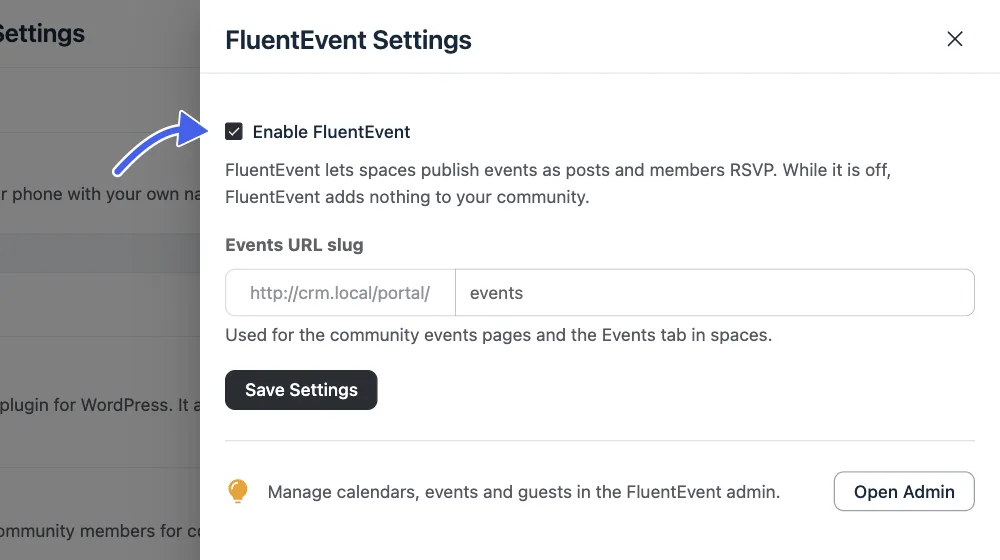
- In the FluentEvent Settings panel, tick Enable FluentEvent.
- Check the Events URL slug. The default is
events, so your Events page is atyoursite.com/portal/events. - Click Save Settings.
WARNING
Changing the Events URL slug changes the address of the Events page, so links people already have stop working. FluentCommunity refuses an empty slug, a slug used by another page, and words it reserves for Space tabs, such as home, about, post, members, invitations, documents, media, page, and settings.
To switch events off again, clear Enable FluentEvent and click Save Settings. Your events, guests, and settings stay in the FluentEvent admin.
Step 2: Show Events in the Menu and in Spaces
After you enable FluentEvent, turn on the two places where members find events.
The Events Link in the Portal Menu
- Go to Portal Settings → Menu Settings.
- Find Events under Primary Menu Items. It shows an Enabled or Disabled badge.
- Click the three dots at the end of the row. If Events is disabled, choose Enable. The menu also lets you choose Edit to rename the link or change its icon. You can drag the row to move it.
- Click Save Settings.
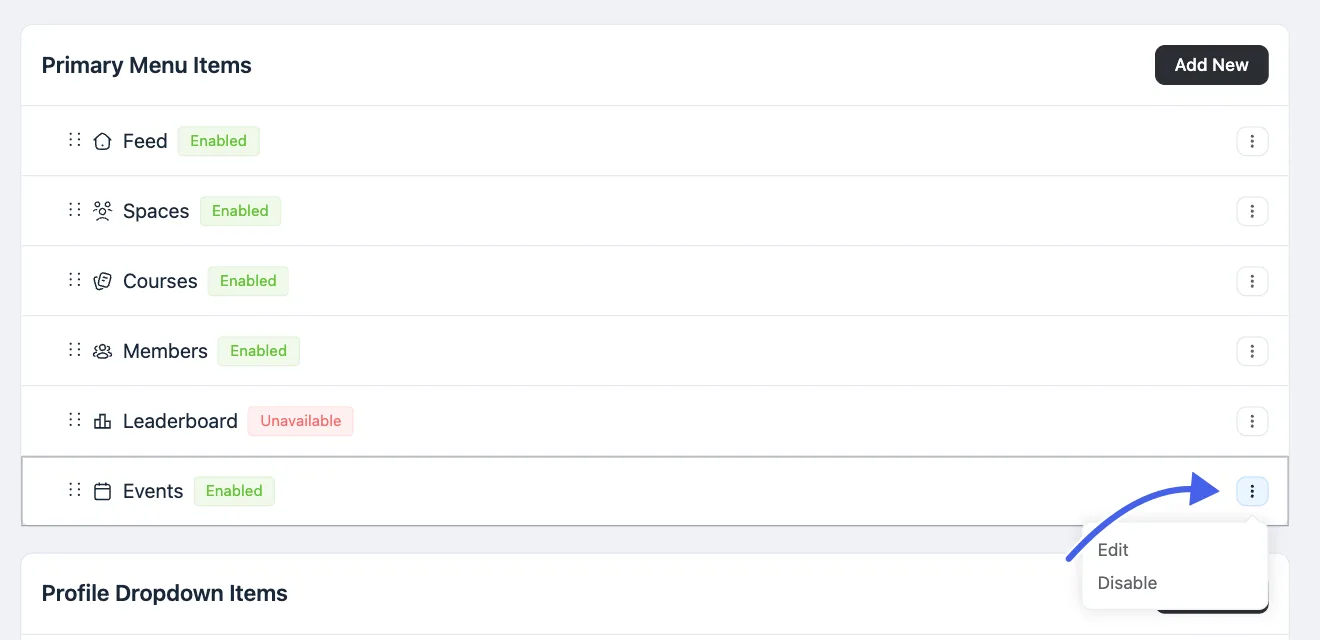
The link opens the All Events page, which lists events from the whole community.
The Events Tab in a Space
Each discussion Space can have its own Events tab that lists only that Space's events.
- Open the Space and click the three dots at the top right.
- Choose Space Settings.
- Open the Menu tab.
- Under Primary Menu, find Events and click its eye icon so the badge changes from Disabled to Enabled.
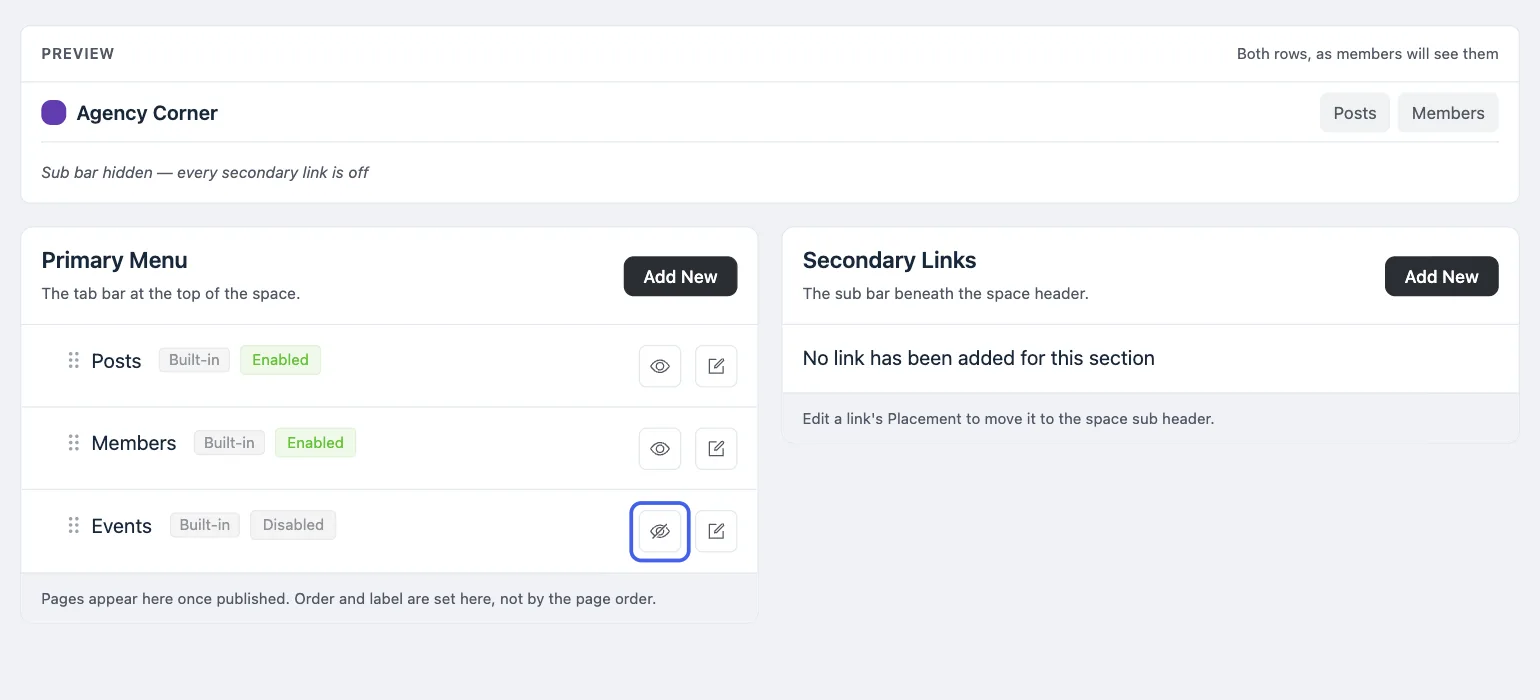
Repeat this for every Space that should show an Events tab. The tab exists only on discussion Spaces, not on Course Spaces.
Step 3: Create an Event from the Portal
Only administrators can create events. Members can RSVP but can't create events.
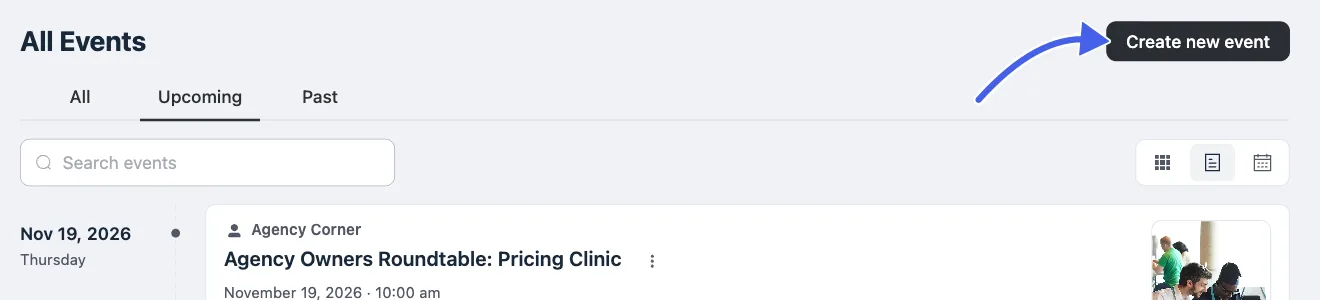
- In the portal, open Events and click Create new event at the top right.
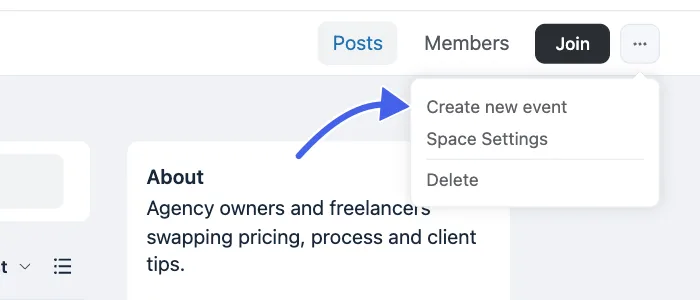
You can also click the three dots at the top right of a Space and choose Create new event. The form then opens with that Space already selected.
Under Where do you want to post this event?, choose one:
- In a space: Only members of that Space see the event. Pick the Space from the list.
- Community-wide: The event is posted on your profile, outside any Space, so every member can see it. This needs Global Post Status turned on in Portal Settings → General.
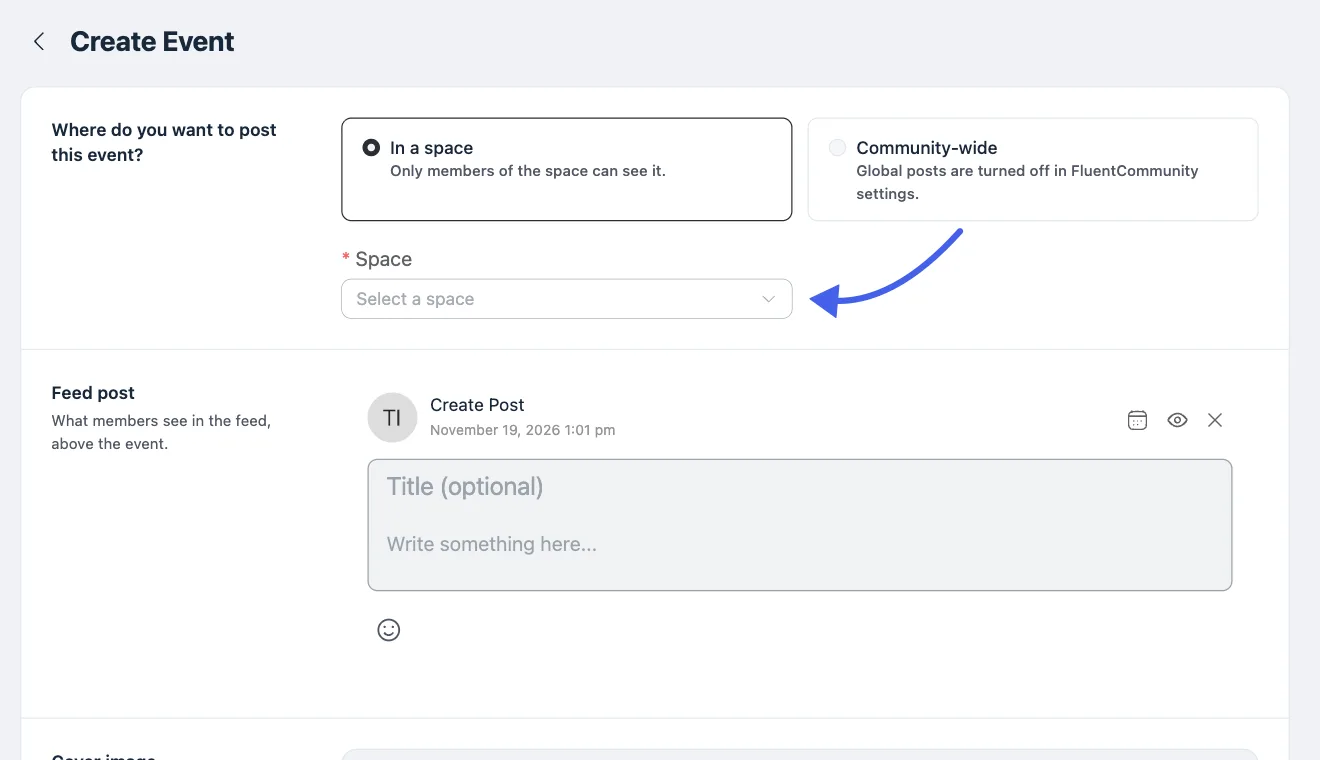
Under Feed post, write the text members see above the event. This is optional. If you leave it empty, the event's name is used.
Add a Cover image. It shows on the event page and on event cards.
Enter the Event name, for example
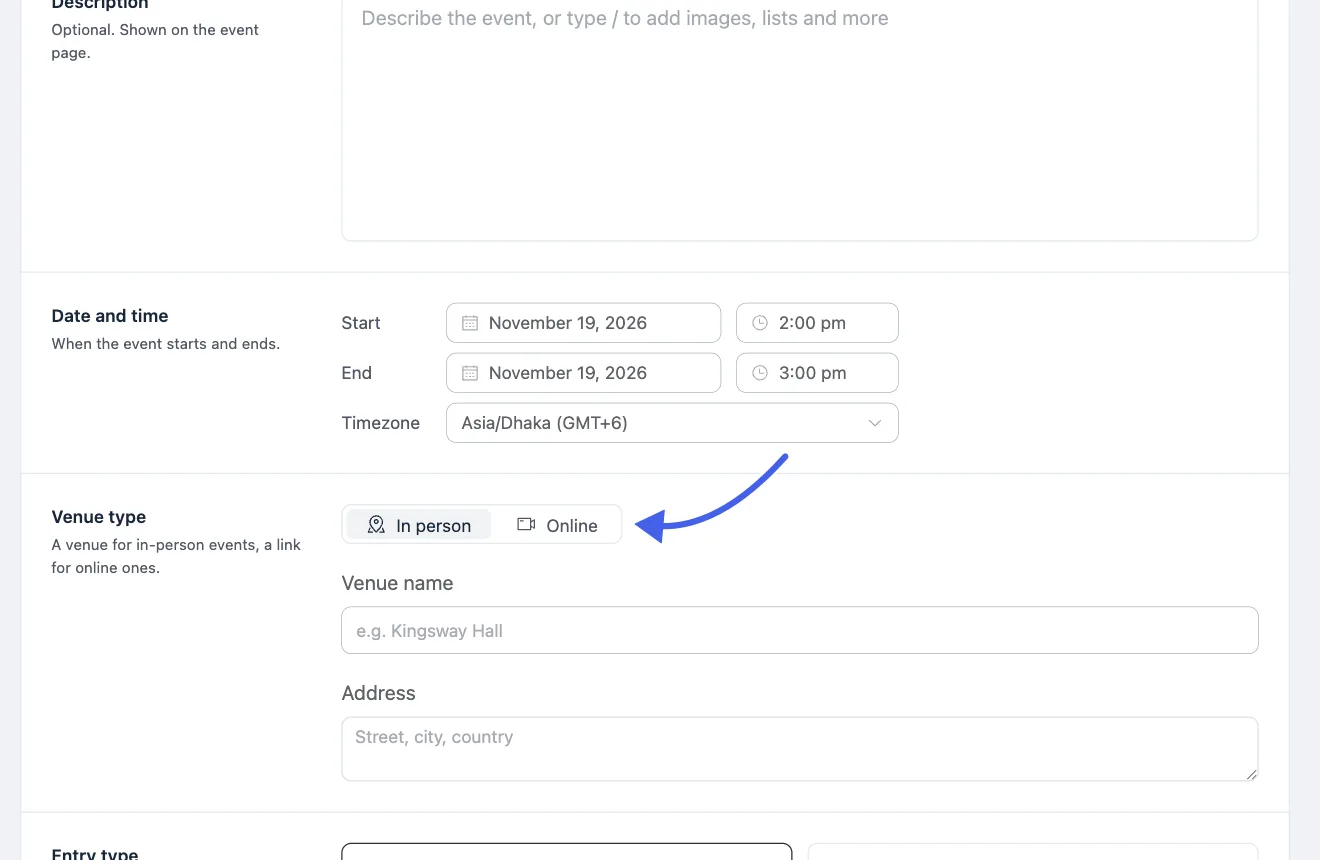
Friday Q&A. Add a Description if you want. Type/in the description to add headings, lists, quotes, images, or dividers.Set the Start and End date and time, and the Timezone.
Choose the Venue type. For In person, add the venue and address. For Online, paste a Meeting link.
- Choose an Entry type. See Choose How Guests Join.
- Click Create Event.
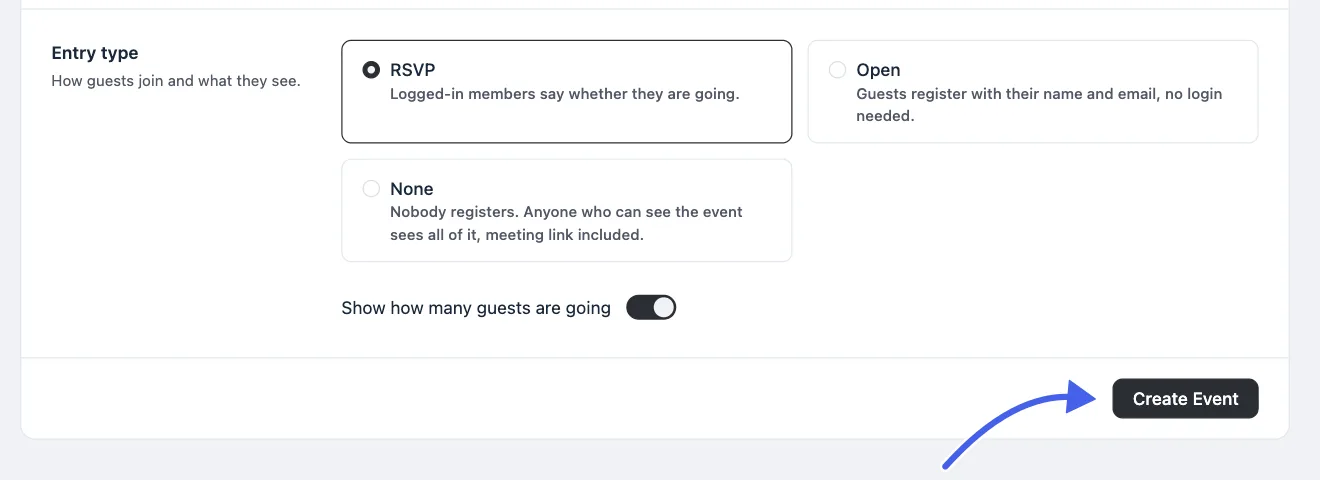
The form checks that you chose a place to post, that the event has a name, that the end is after the start, and that an online event has a meeting link. If something is missing, a message tells you which field to fix.
You can only post events in discussion Spaces, not in Course Spaces.
Choose How Guests Join
The Entry type decides who can register.
| Entry type | Who registers | What happens |
|---|---|---|
| RSVP (default) | Logged-in members | Members choose Going or Not going. |
| Open | Anyone, with a name and email | Visitors register without logging in. Good for events you share outside the community. |
| None | Nobody | No sign-up. Anyone who can see the event sees all of it, including the meeting link. |
Turn on Show how many guests are going to show the count next to the RSVP button, for example "27 going". It is on by default.
What Members See
In the Feed
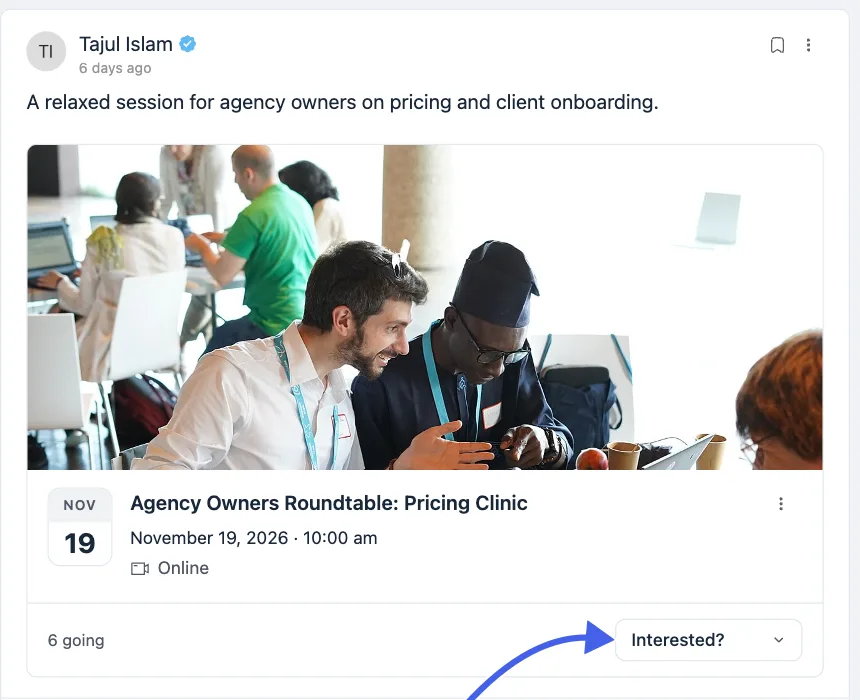
An event post appears in the feed like any other post. It shows the author, the Space, your feed text, and an event card with the date, the event name, the full date and time, and whether it is Online or In person. Below it, members see the going count and the RSVP button.
On the Events Page
The Events page lists events from the whole community. Members can:
- Switch between All, Upcoming, and Past events.
- Use Search events to find an event by name.
- Switch the layout: Cards (a grid with cover images), Timeline (events listed by date), or Calendar (a month grid with Month, Week, and Day views).
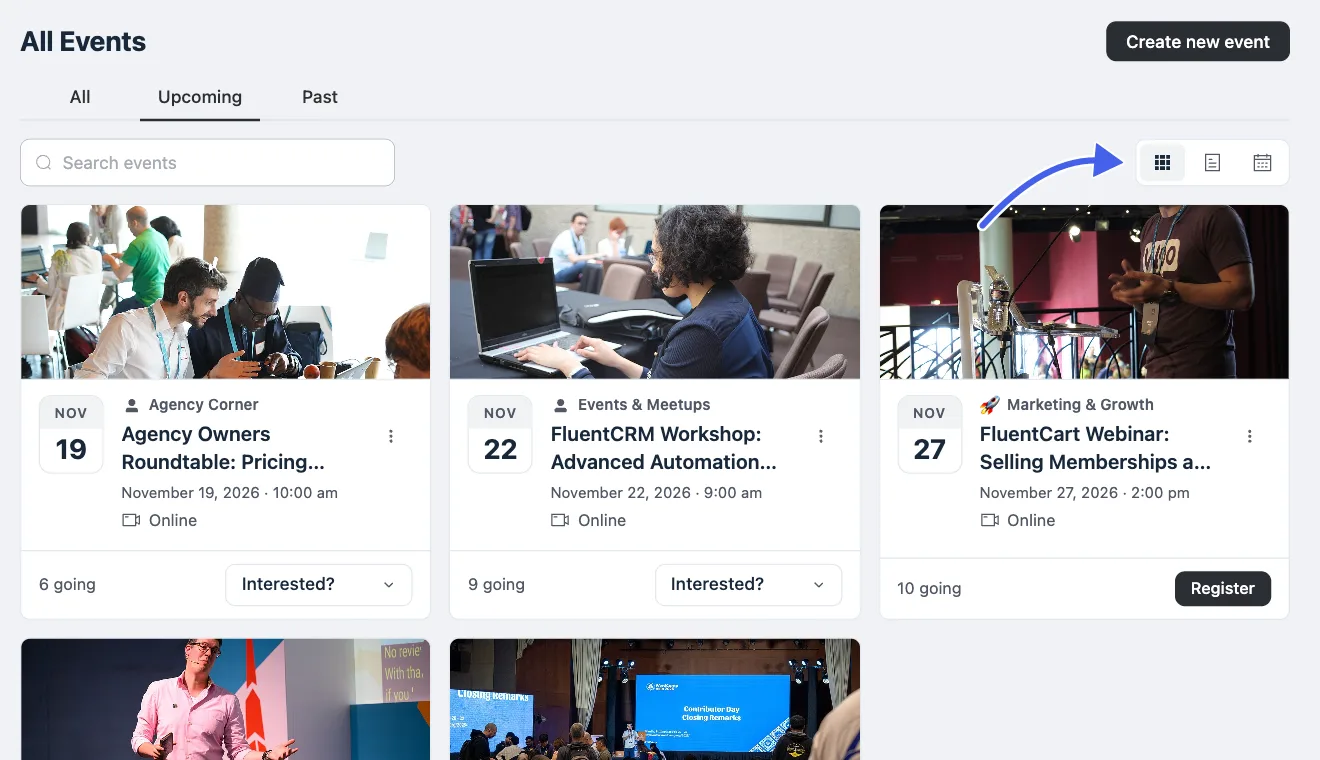
Which layout shows first is set in the FluentEvent admin. A Space's Events tab works the same way, with only that Space's events.
On the Event Page
Click an event to open its page. It shows the cover image, the description, and a details box with the date, place, and RSVP button.
RSVP and Registration
How a member joins depends on the entry type.
RSVP events
- Open the event and click Interested?.
- Choose Going or Not going.
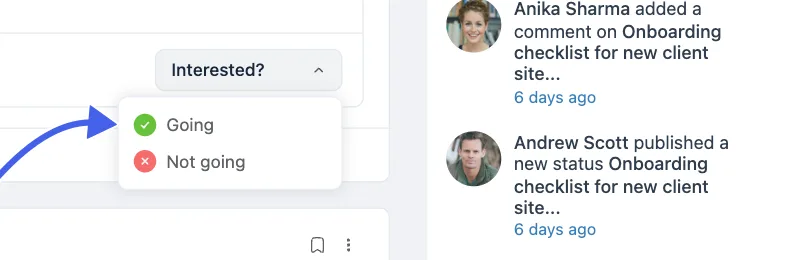
To change an answer, open the menu again and pick the other option. Visitors who aren't logged in see Log in to RSVP.
Open events
- Click Register.
- Enter your Name and Email, then click Register.
Logged-in members have their email filled in. After registering, a window opens with the event details and Add to calendar links. Guests can also choose Cancel registration. They are asked to confirm, because they lose their spot, but they can register again later.
Registration closes when the event ends. The event then shows an Ended badge and no RSVP button.
Add the Event to a Calendar
After registering for an Open event, guests see two choices:
- Google Calendar: Opens Google Calendar with the event filled in.
- Apple / Outlook: Downloads an
.icsfile that Apple Calendar, Outlook, and other calendar apps can open.
Meeting Link Visibility
On RSVP and Open events, the meeting link stays hidden until a member registers. Before that, the event shows "Please register for the event to see the meeting link." After registering, a Join online button appears and opens the link.
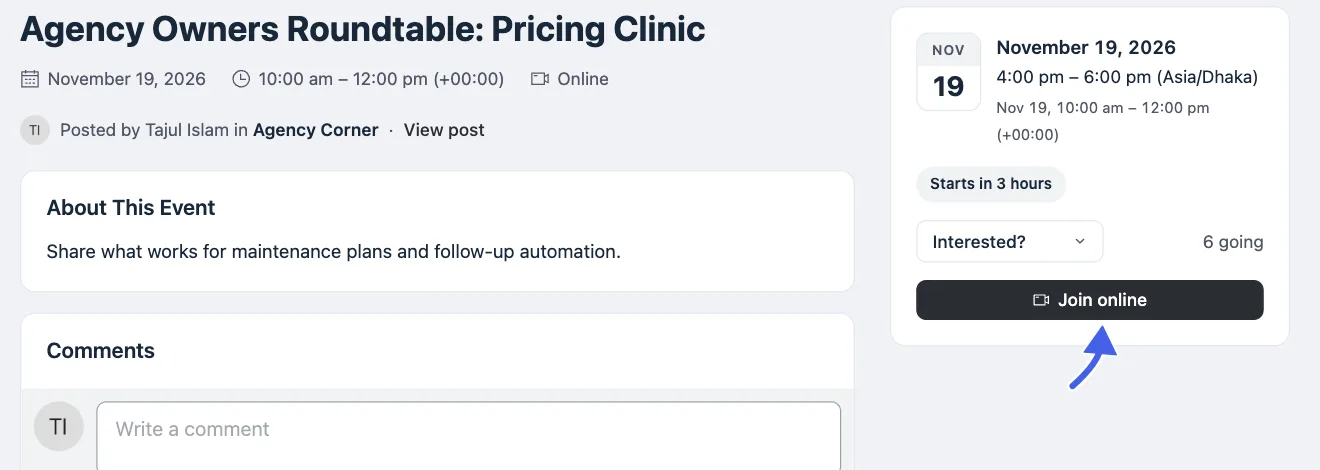
On None events, nobody registers, so anyone who can see the event sees the meeting link.
Who Can See an Event
Events follow the same visibility rules as any FluentCommunity post. FluentEvent adds no separate permissions in the community.
- Events in a public Space: Visitors who aren't logged in see them only if your portal access settings allow public access.
- Events in a private Space: Only members of that Space see them.
- Community-wide events: Every logged-in member can see them.
- Draft events: An event set to Draft in the FluentEvent admin is hidden from everyone in the community. Anyone who opens its link sees the not-found page.
To hide an event for now without losing its guests, set it to Draft instead of deleting it.
Move or Delete an Event Post
An event lives inside a post, so changes to the post or its Space also change the event. Guests are always kept safe.
- Move the post to another Space: The event moves with it and its guests stay registered. Events can only move to discussion Spaces.
- Delete the post: The event becomes a Draft and keeps all its guests. Nothing is removed until you delete the event yourself in the FluentEvent admin.
- Delete the Space: Its events become drafts and keep their guests.
- Delete the event in the FluentEvent admin: The post stays as an ordinary post without the event card. This also removes the event's guests.
Not Available Yet
Events can be posted only in discussion Spaces, not in Course Spaces. Paid tickets, recurring events, and events created by members are not available yet.