

Appearance
The File & Document Library (Pro)
FluentCommunity lets you securely upload and share documents — PDFs, worksheets, spreadsheets, reference files — directly inside your community. Uploaded files stay protected, reaching only the people you intend.
The library works in two places, and they behave a little differently:
| Spaces | Course Lessons | |
|---|---|---|
| Turning it on | Enable it per Space in Space Settings | On by default — nothing to toggle |
| Where files live | A Documents section in the Space | A Documents & Files panel on the lesson |
| Who can see them | Your choice: members, logged-in users, or public | Enrolled students only |
| Who can upload | Your choice: any member, or admins/moderators only | Admins and instructors, via the lesson editor |
TIP
Both features require the FluentCommunity Pro version installed and activated.
Pick the section below that matches what you're setting up.
Part 1: Documents & Files for a Space
FluentCommunity enables you to securely upload and manage documents for specific Spaces. These files are accessible only to authorized members of the Space, ensuring privacy and control.
Enable the Documents Feature
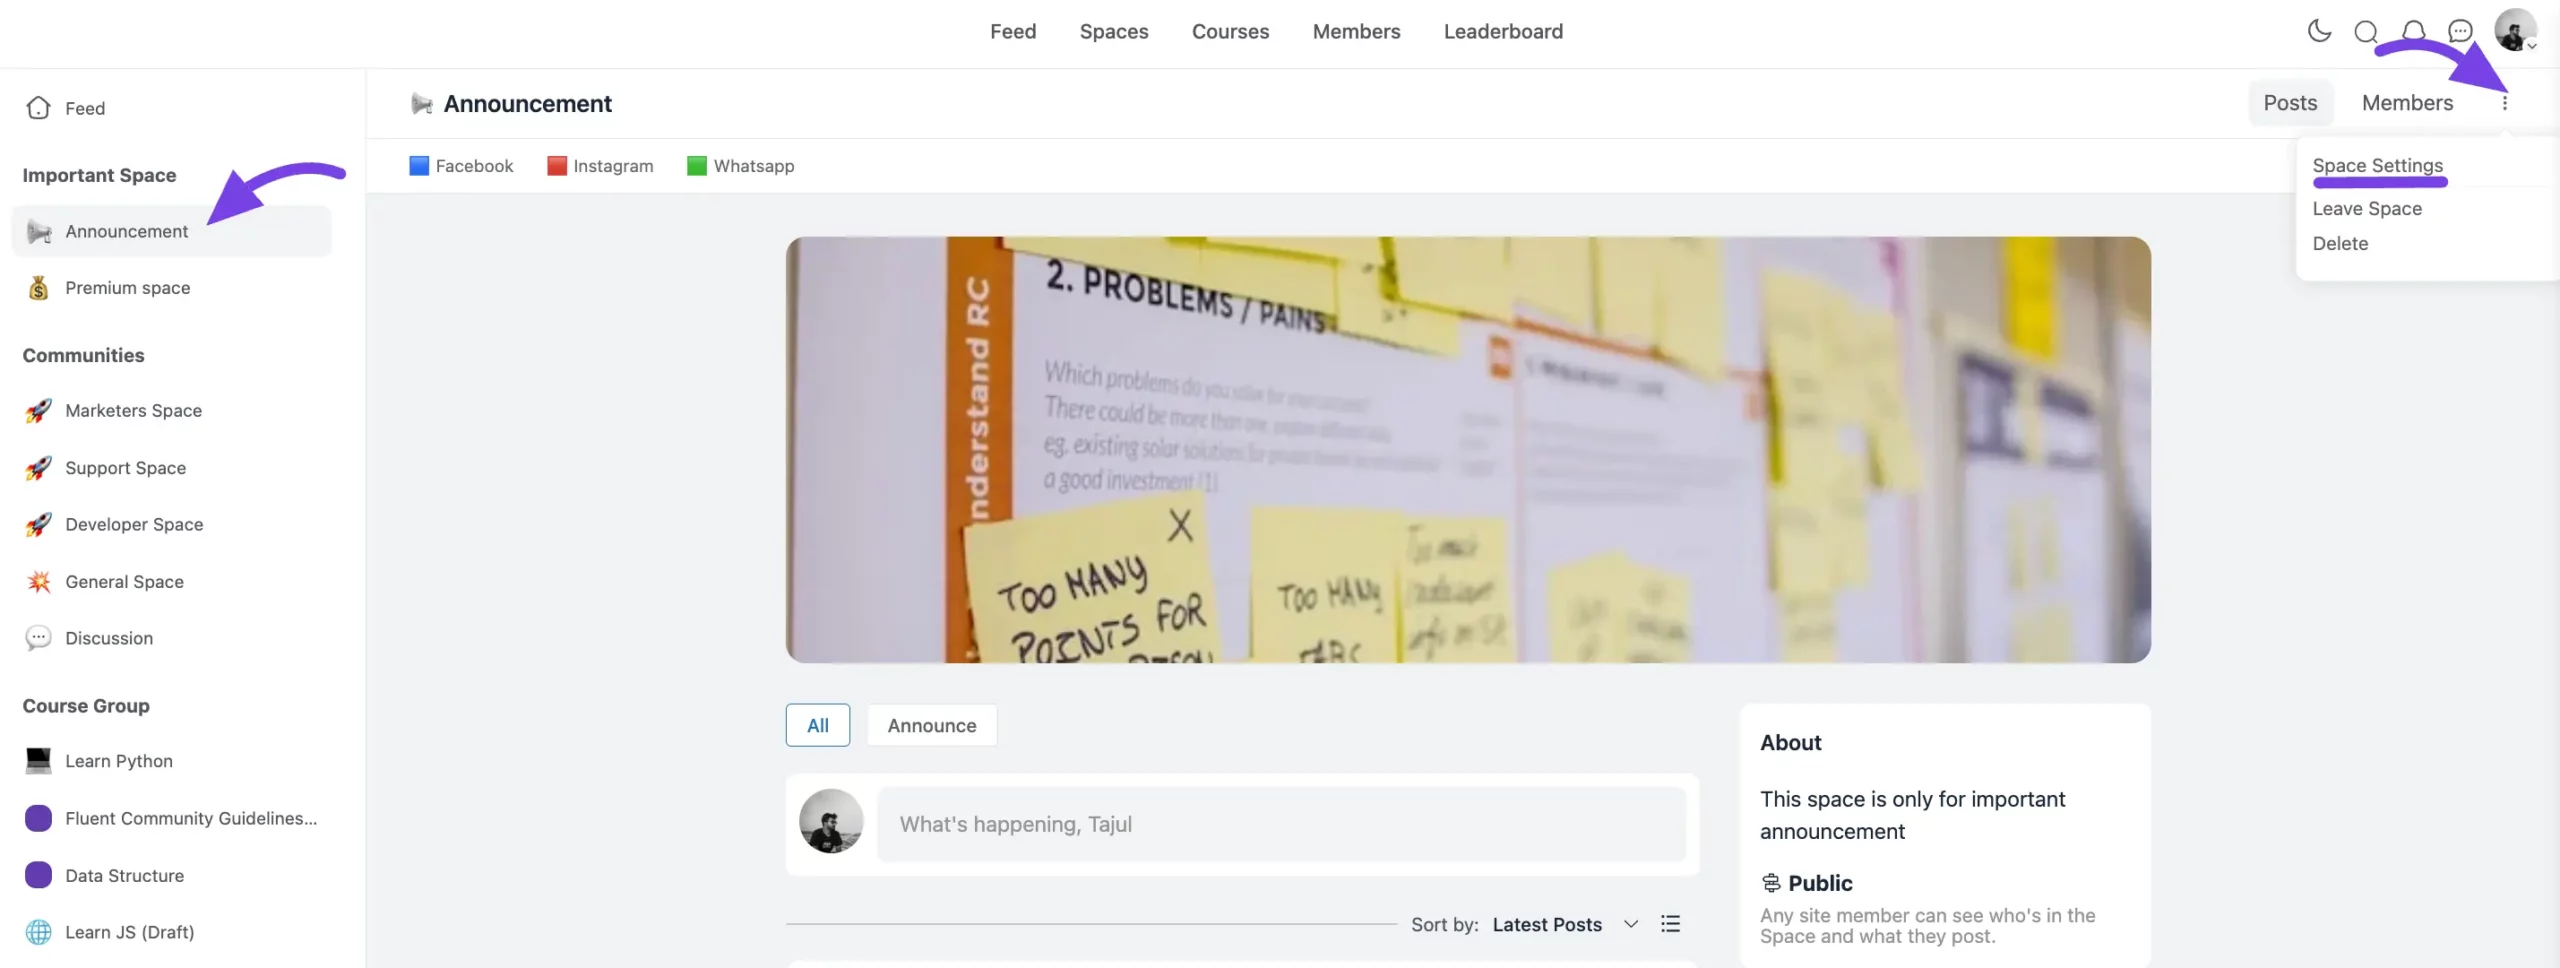
Go to the Spaces section from the FluentCommunity navbar. Open the desired Space where you want to enable the document feature. Click the three-dot menu in the top-right corner and select Space Settings.
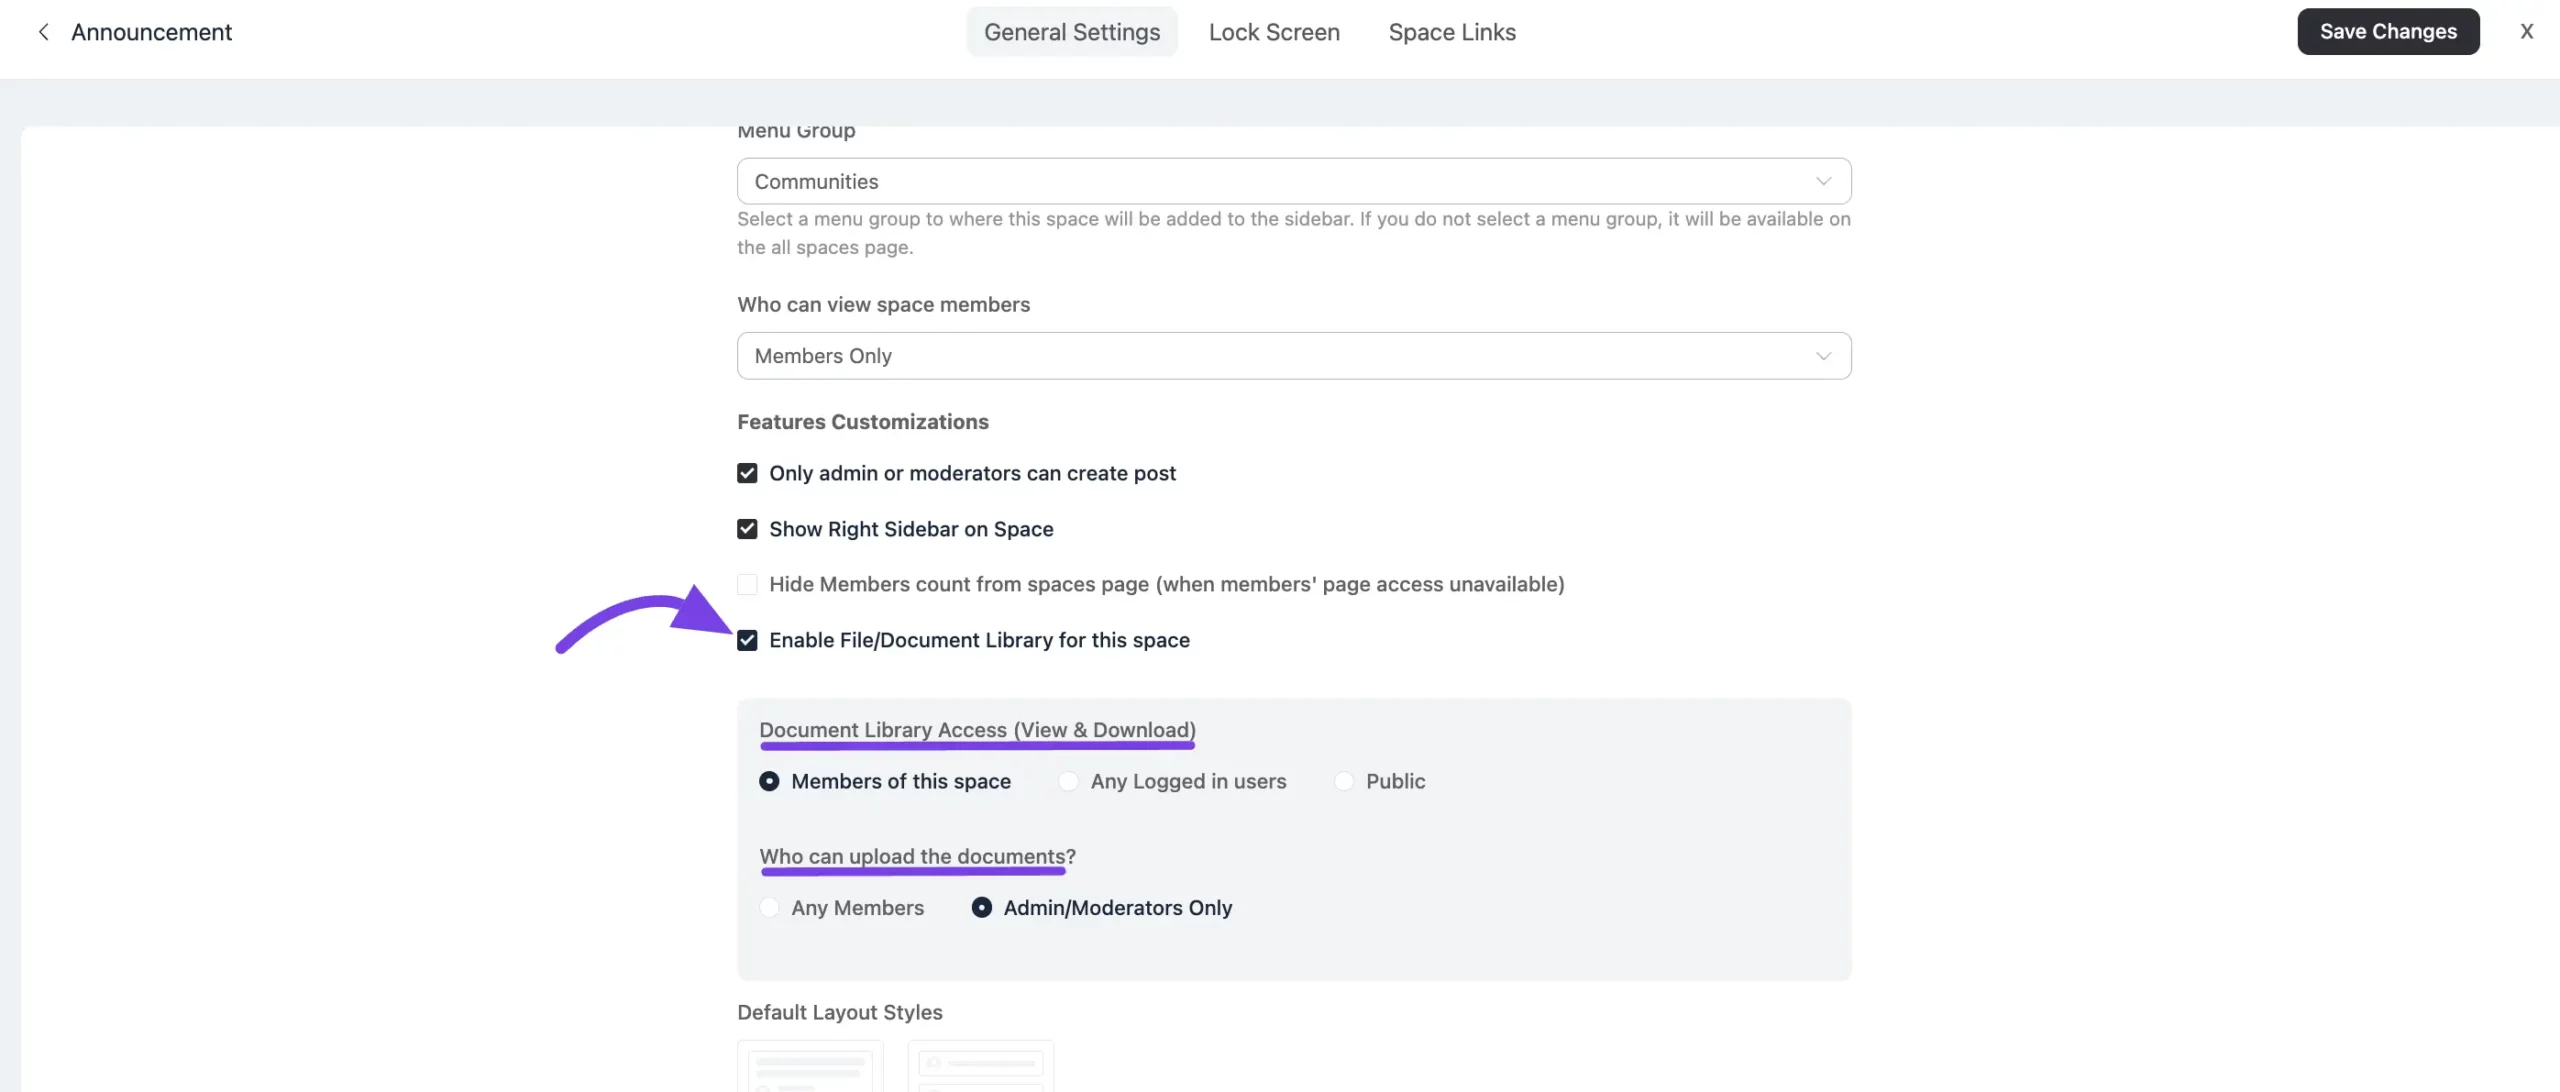
Enable Document Library: Scroll down to the Enable File/Document Library for this Space option. Check the box to activate the feature.
Document Library Access: Under Document Library Access, you can choose who can view and download the uploaded documents:
Members of this Space: Only members of the Space can access the documents.
Any Logged-In User: Any registered user can access the documents.
Public: Anyone can access the documents, even without logging in.
Who can upload Documents: Under Who can upload Documents, you can choose who can upload documents.
Any Members: All members of the Space can upload documents.
Admin/Moderators Only: Only Admins and Moderators can upload documents.
After configuring the settings, scroll down and click the Update Info button to save your changes.
Upload a New Document
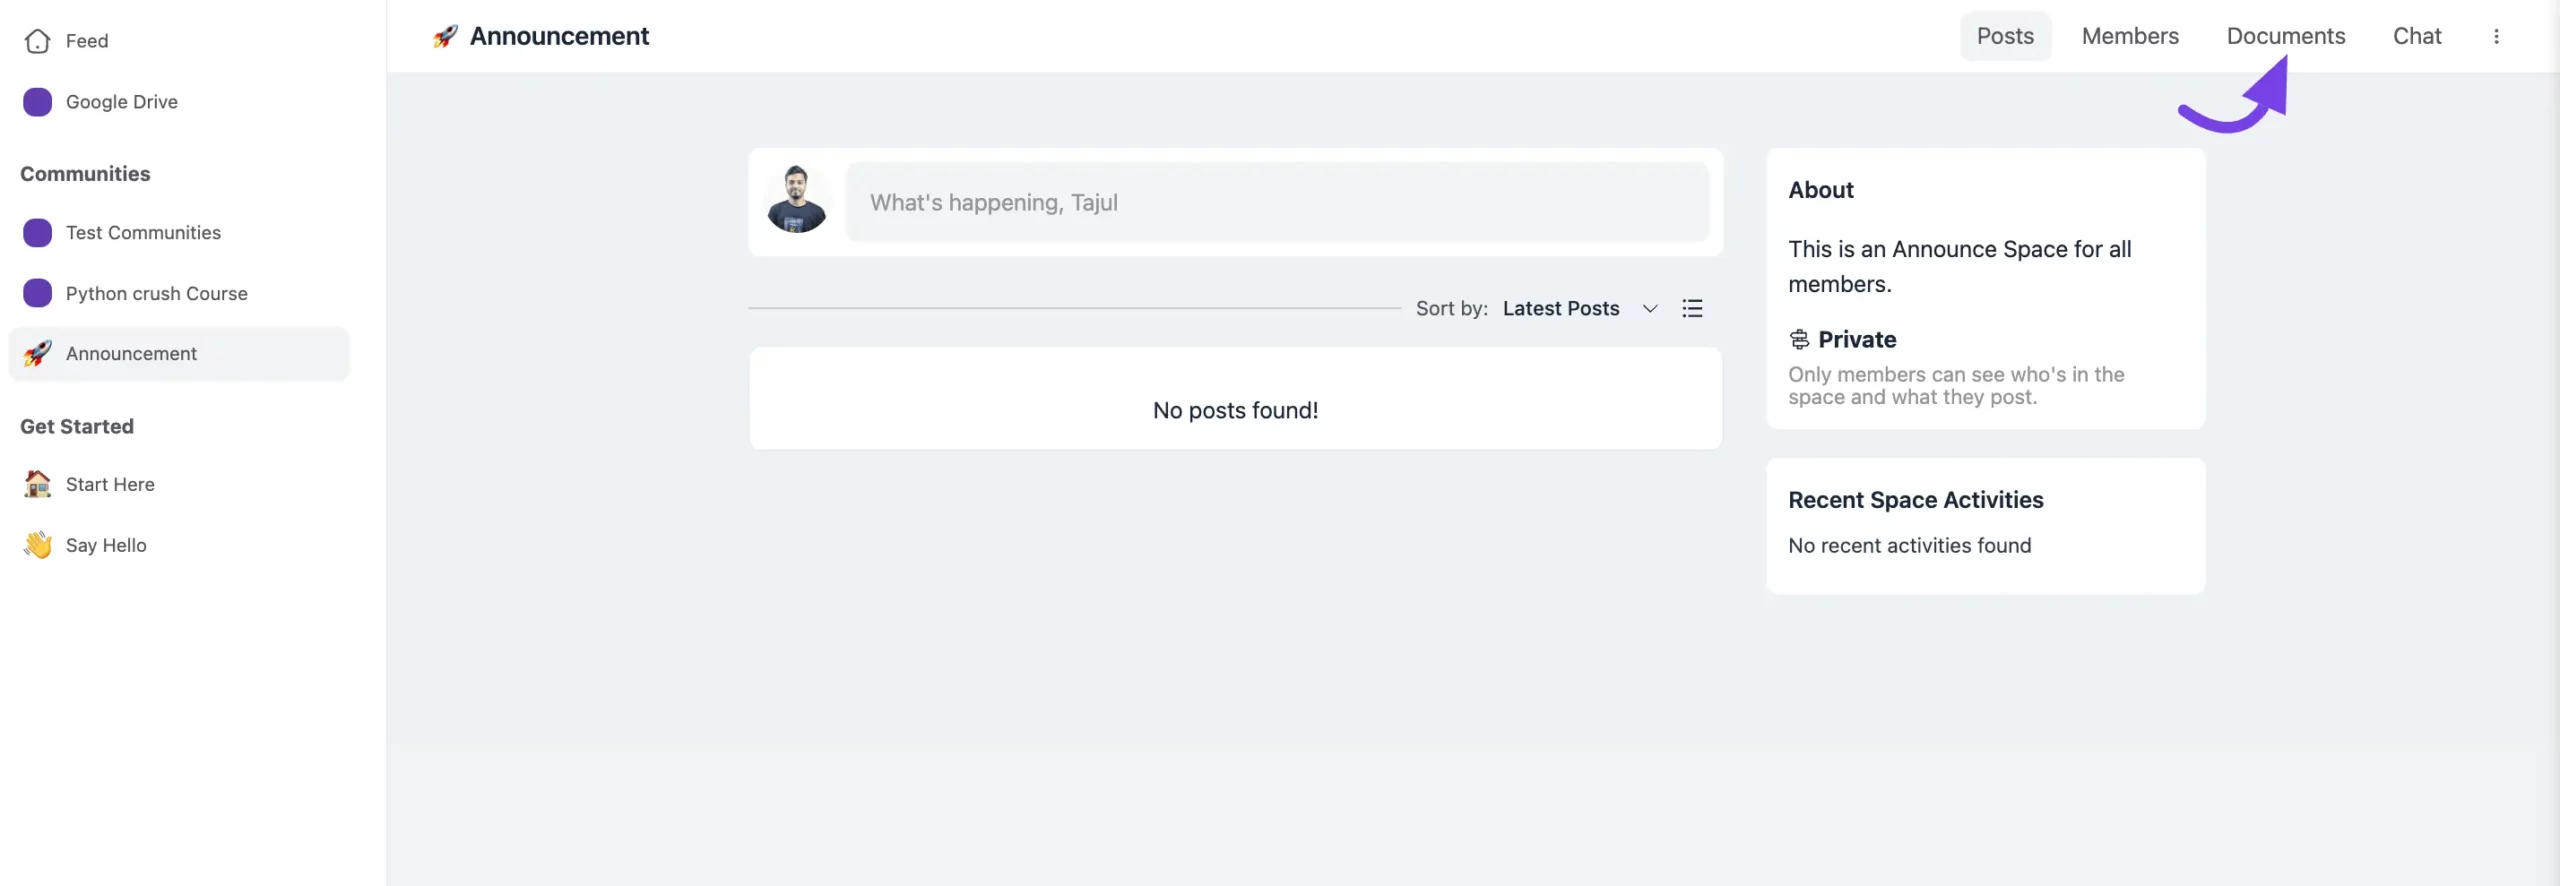
Once the document feature is enabled, you will see the Documents option on the top-left corner of the Space. Click on Documents.
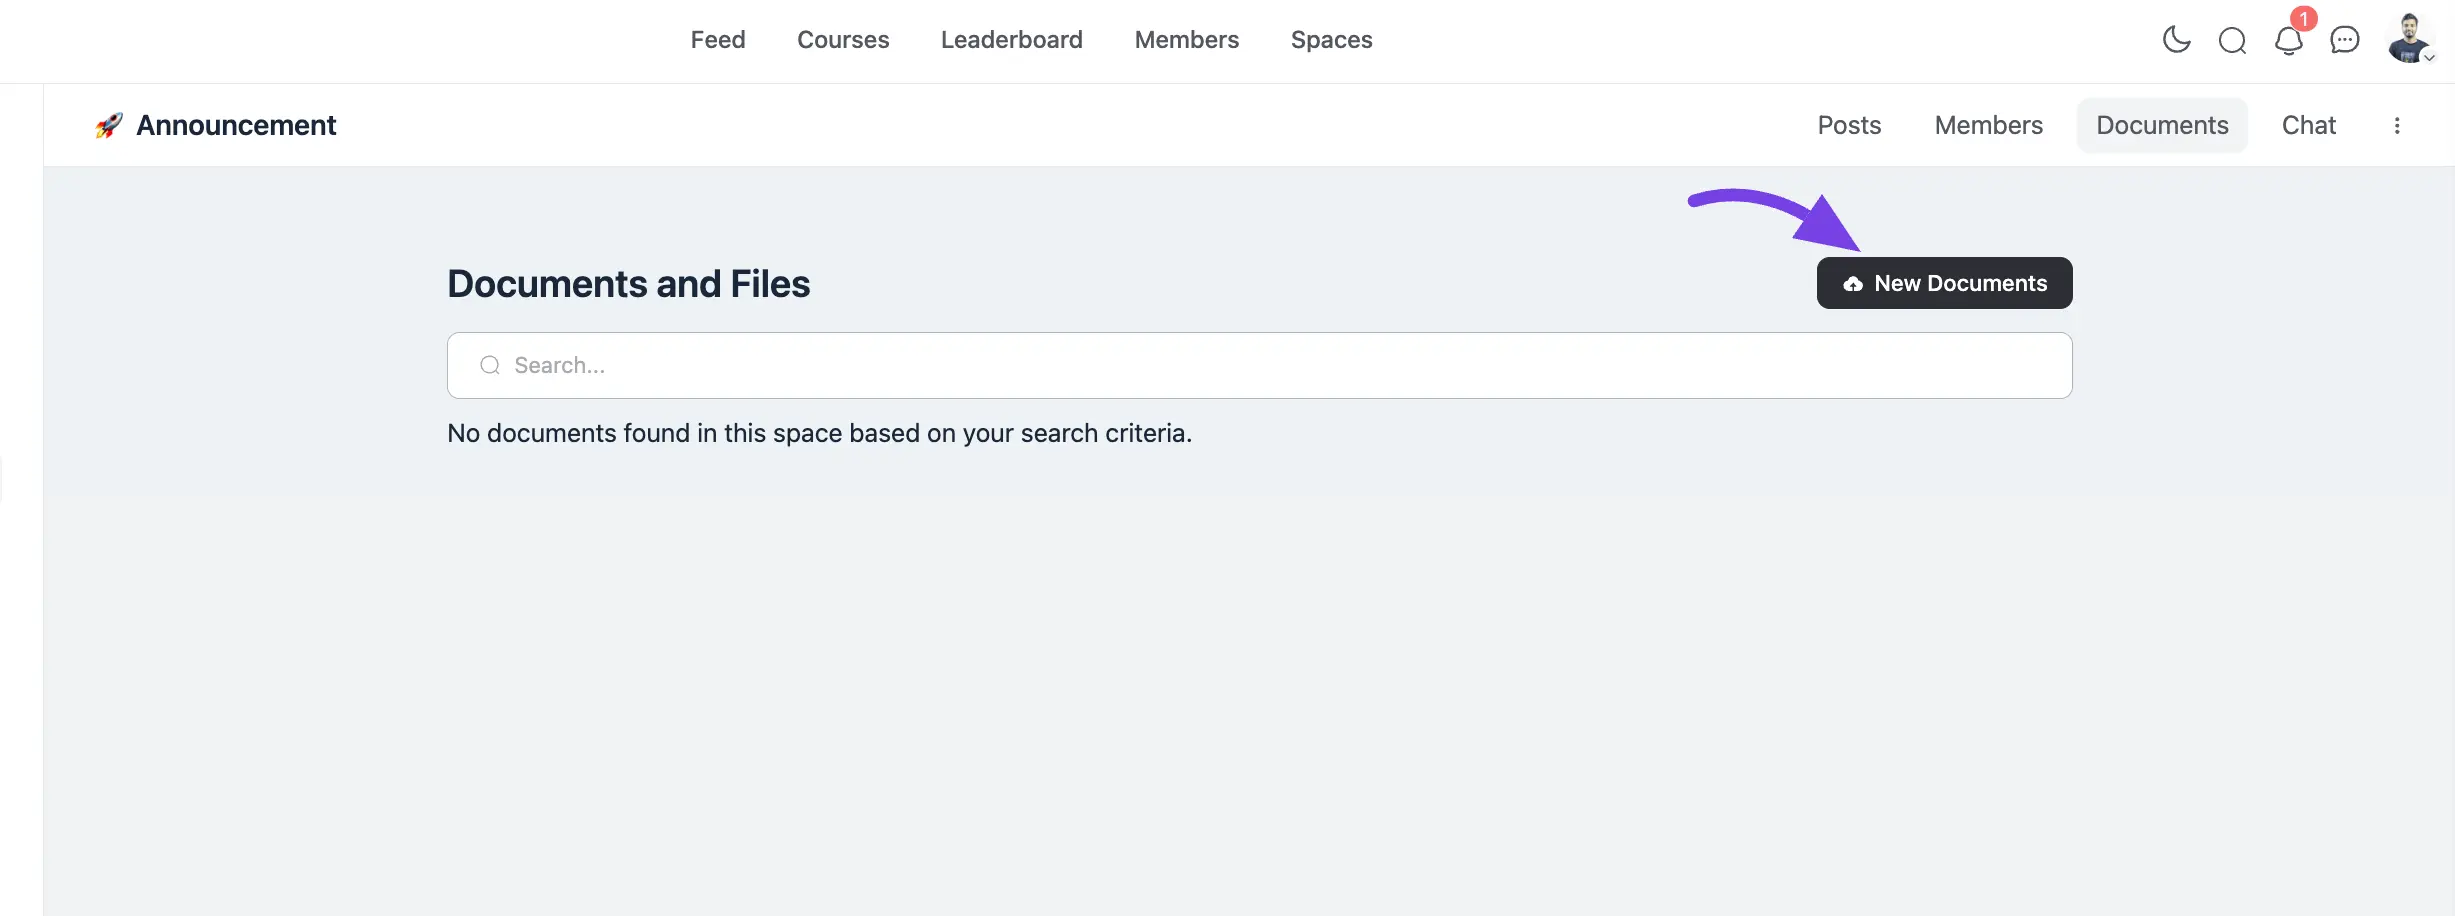
Add a New Document: Now click the New Document button.
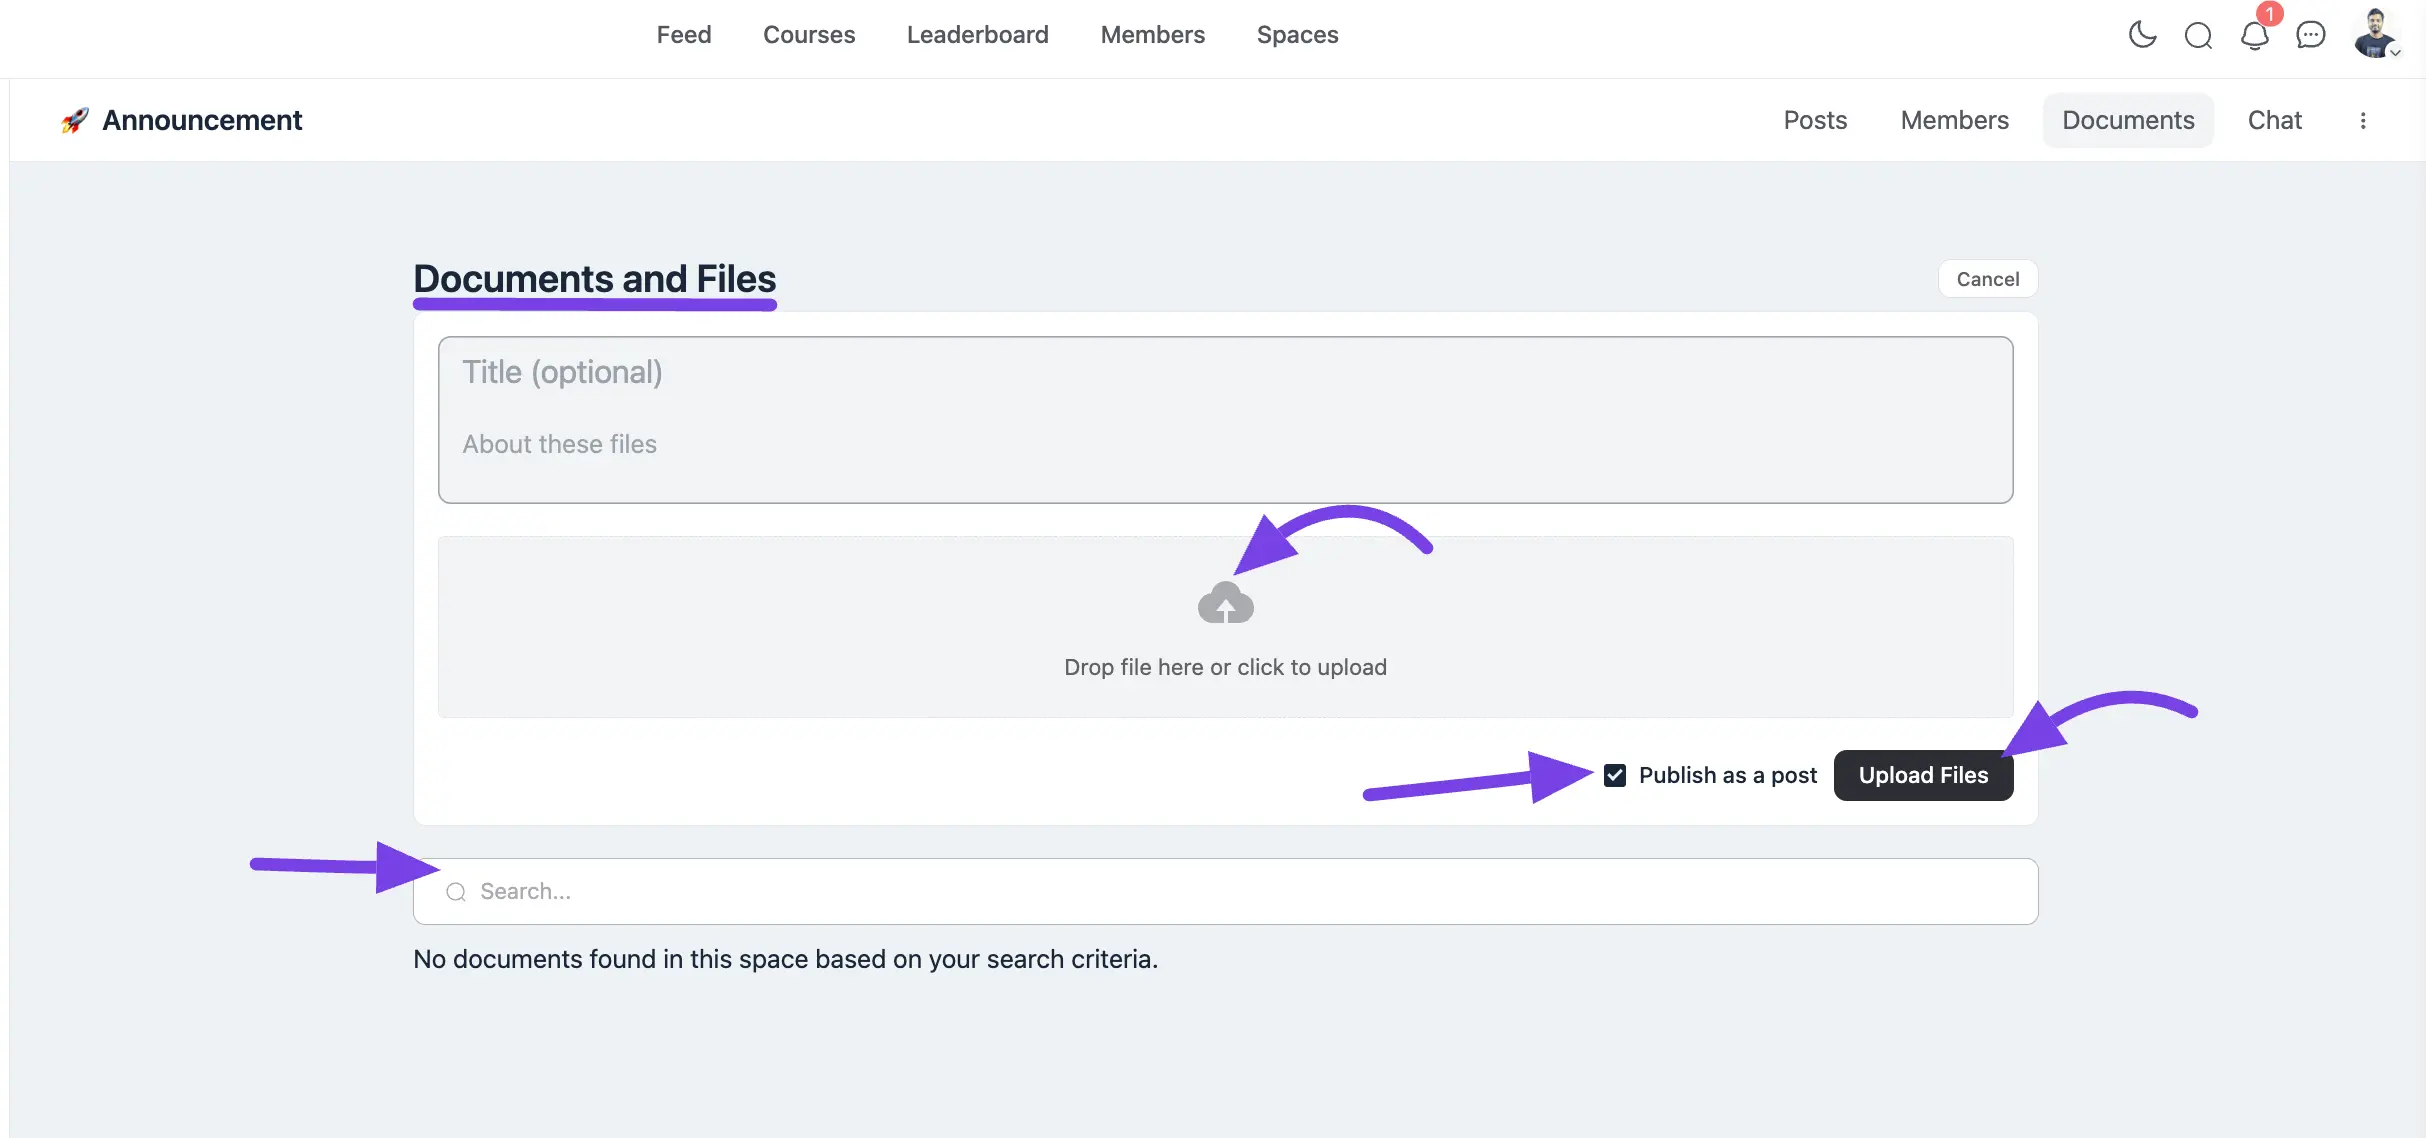
A form will appear where you can enter the following details:
Title: Provide a title for the document (optional).
Description: Add a short description (optional).
Upload the File: Drag and drop the file or click the Upload button to select files from your device. Supported file types include images, PDFs, Excel, CSV, JSON, and other standard document formats.
Publishing Options: By default, the document is published as a post in Space. If you do not want to publish it as a post, uncheck the Publish as a Post option. If you don't share the document as a post, it will be stored in the Document section, where you can access it anytime.
Search Documents: If you have many files in the document library, use the Search Bar to quickly find specific documents.
Click the Update Files button to upload the document.
Manage Uploaded Documents
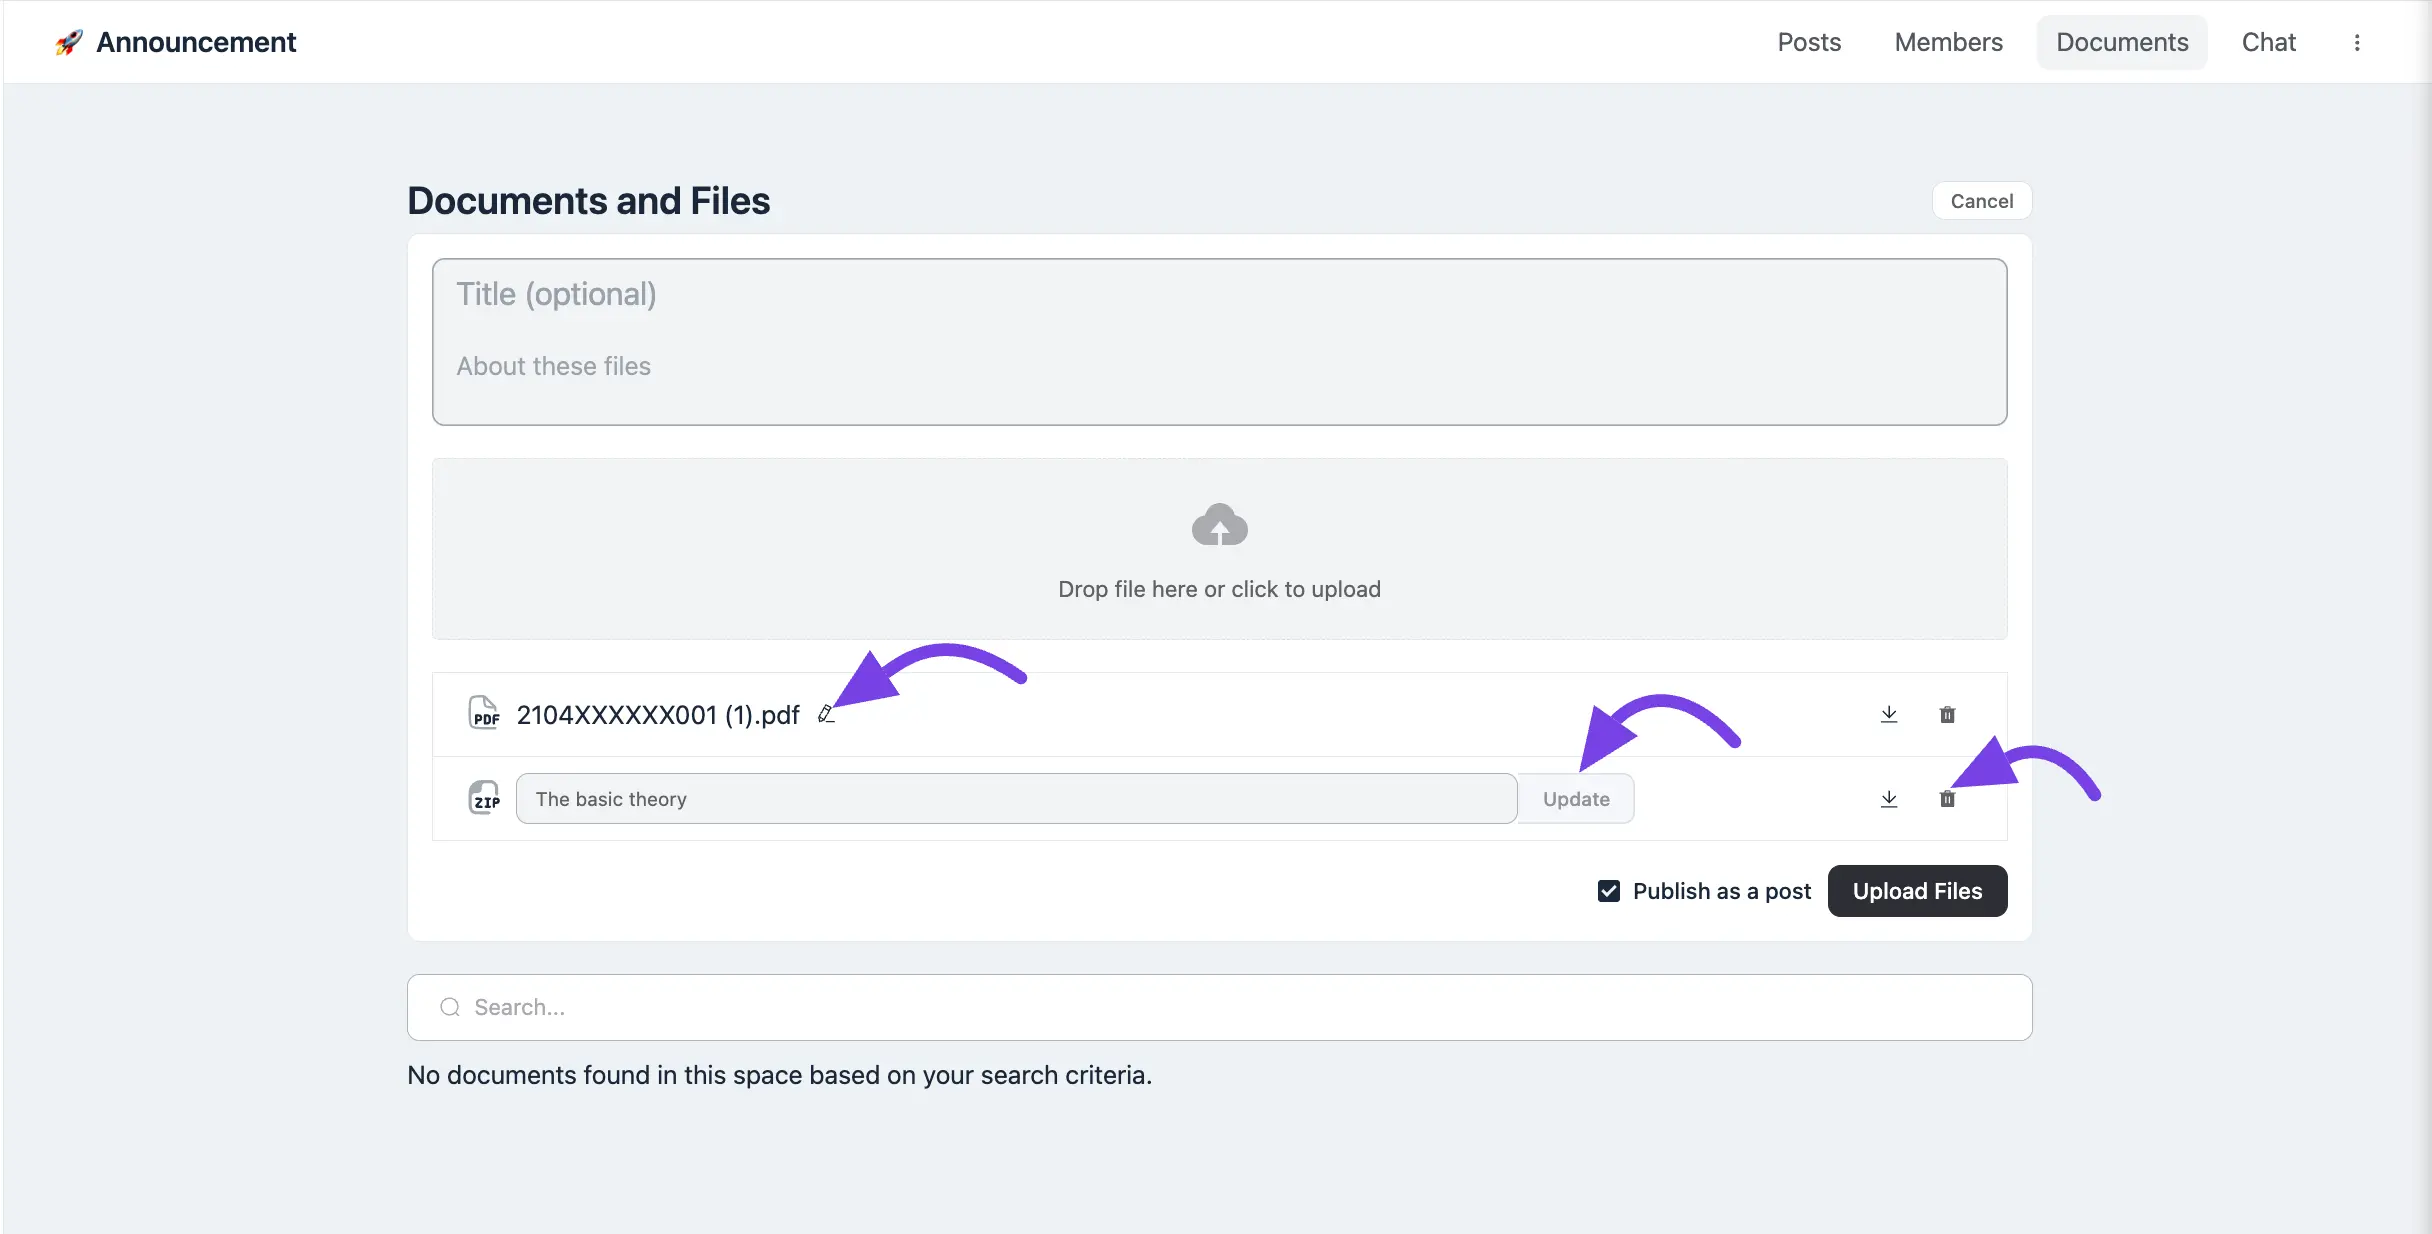
Edit Document Name: Click the Edit (Pencil Icon) next to the document you want to rename. Enter the new name for the document. Click the Update button to save the changes.
Delete a Document: Click the Delete (Trash Icon) next to the document you want to remove. Confirm the deletion when prompted.
Access Uploaded Documents
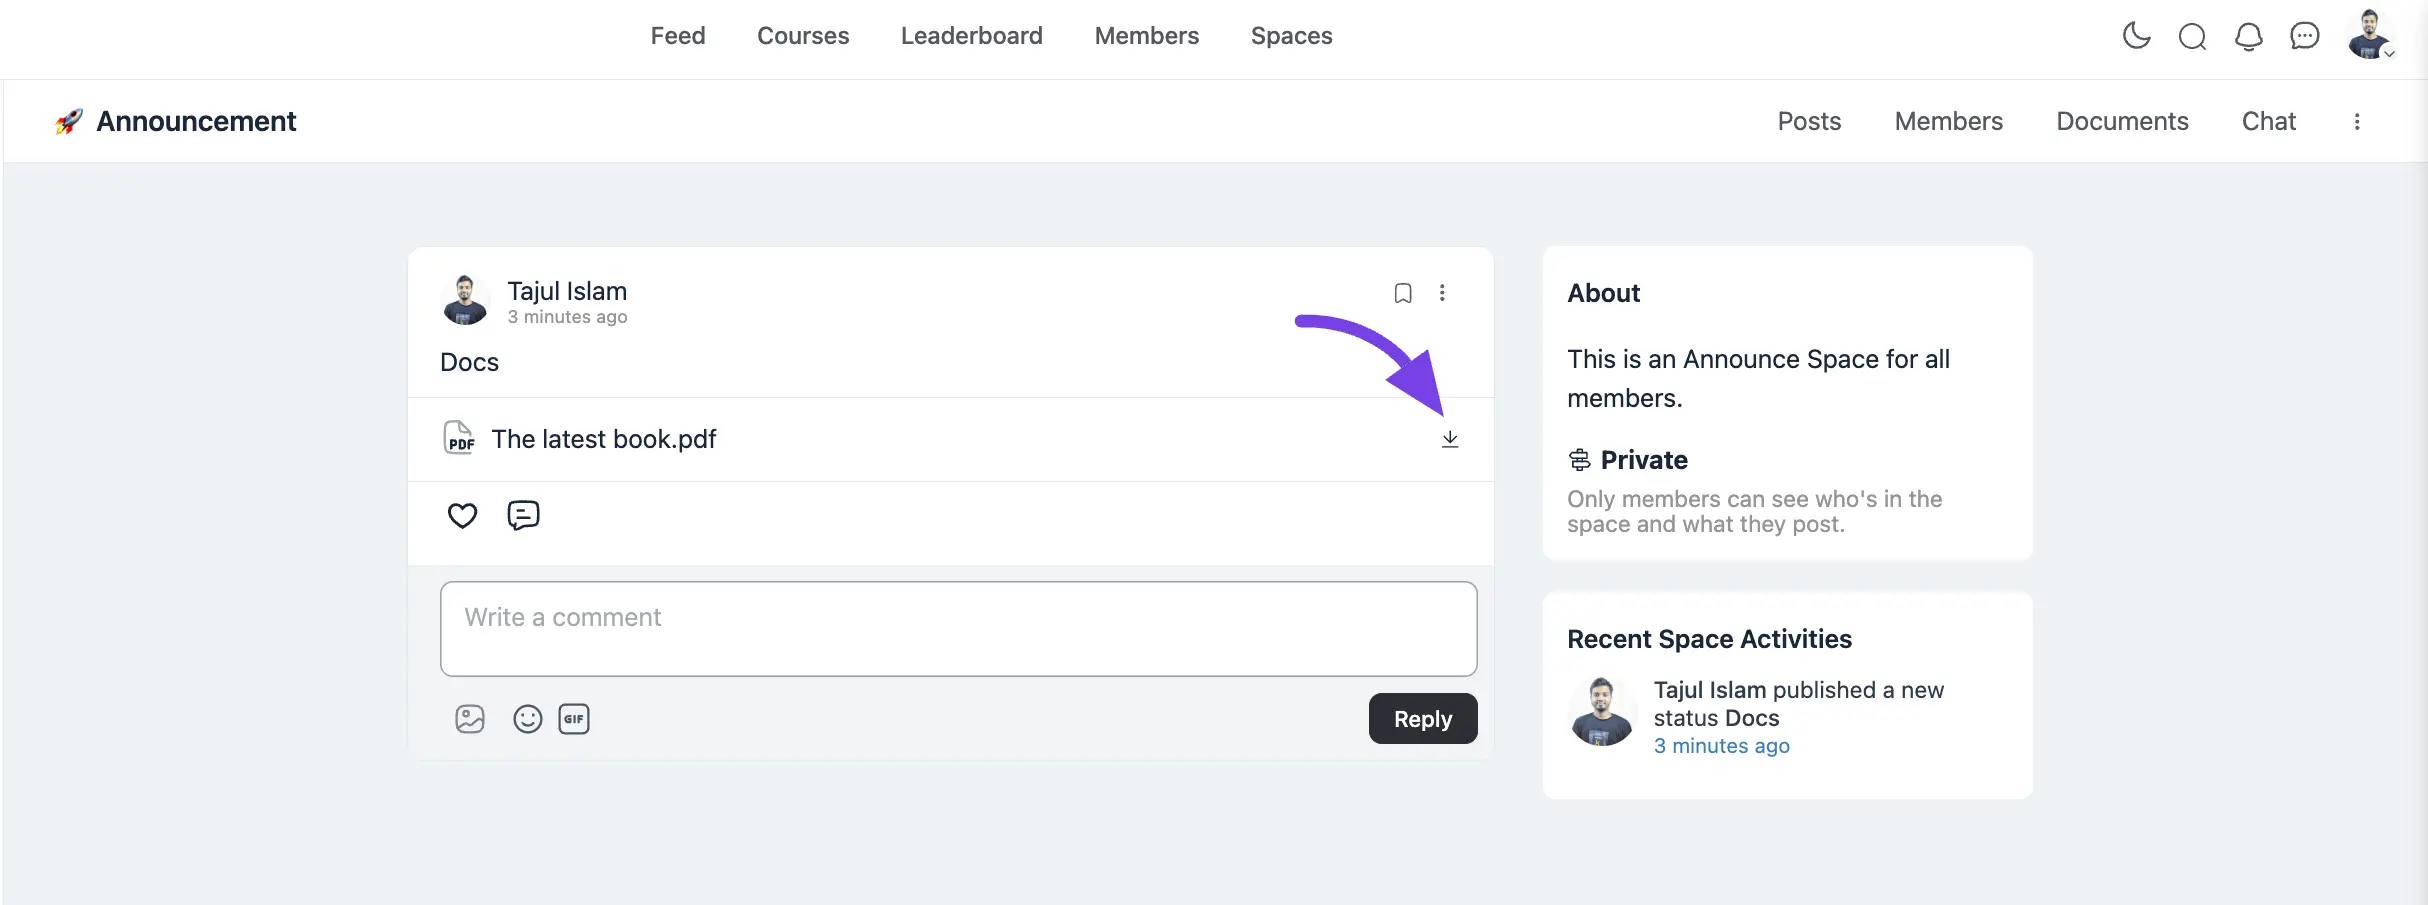
Go to the Space Post section to view uploaded files if they were published as posts. Members can download the files by clicking the Download Icon next to the document.
With the Secure Documents Feature, you can upload, manage, and share files within a Space while maintaining control over who can view or upload documents.
Part 2: Documents & Files for a Course Lesson
FluentCommunity makes it incredibly easy to share downloadable resources — like PDFs, worksheets, or reference files — directly inside your course lessons. These files are strictly protected and accessible only to enrolled students, ensuring your premium content stays secure.
Unlike Spaces
Unlike Spaces, where you need to manually enable the document feature from the Space Settings, Course Documents are enabled by default. There are no extra settings to toggle — you simply need the FluentCommunity Pro version installed and activated to start using this feature.
Step 1: Open the Course
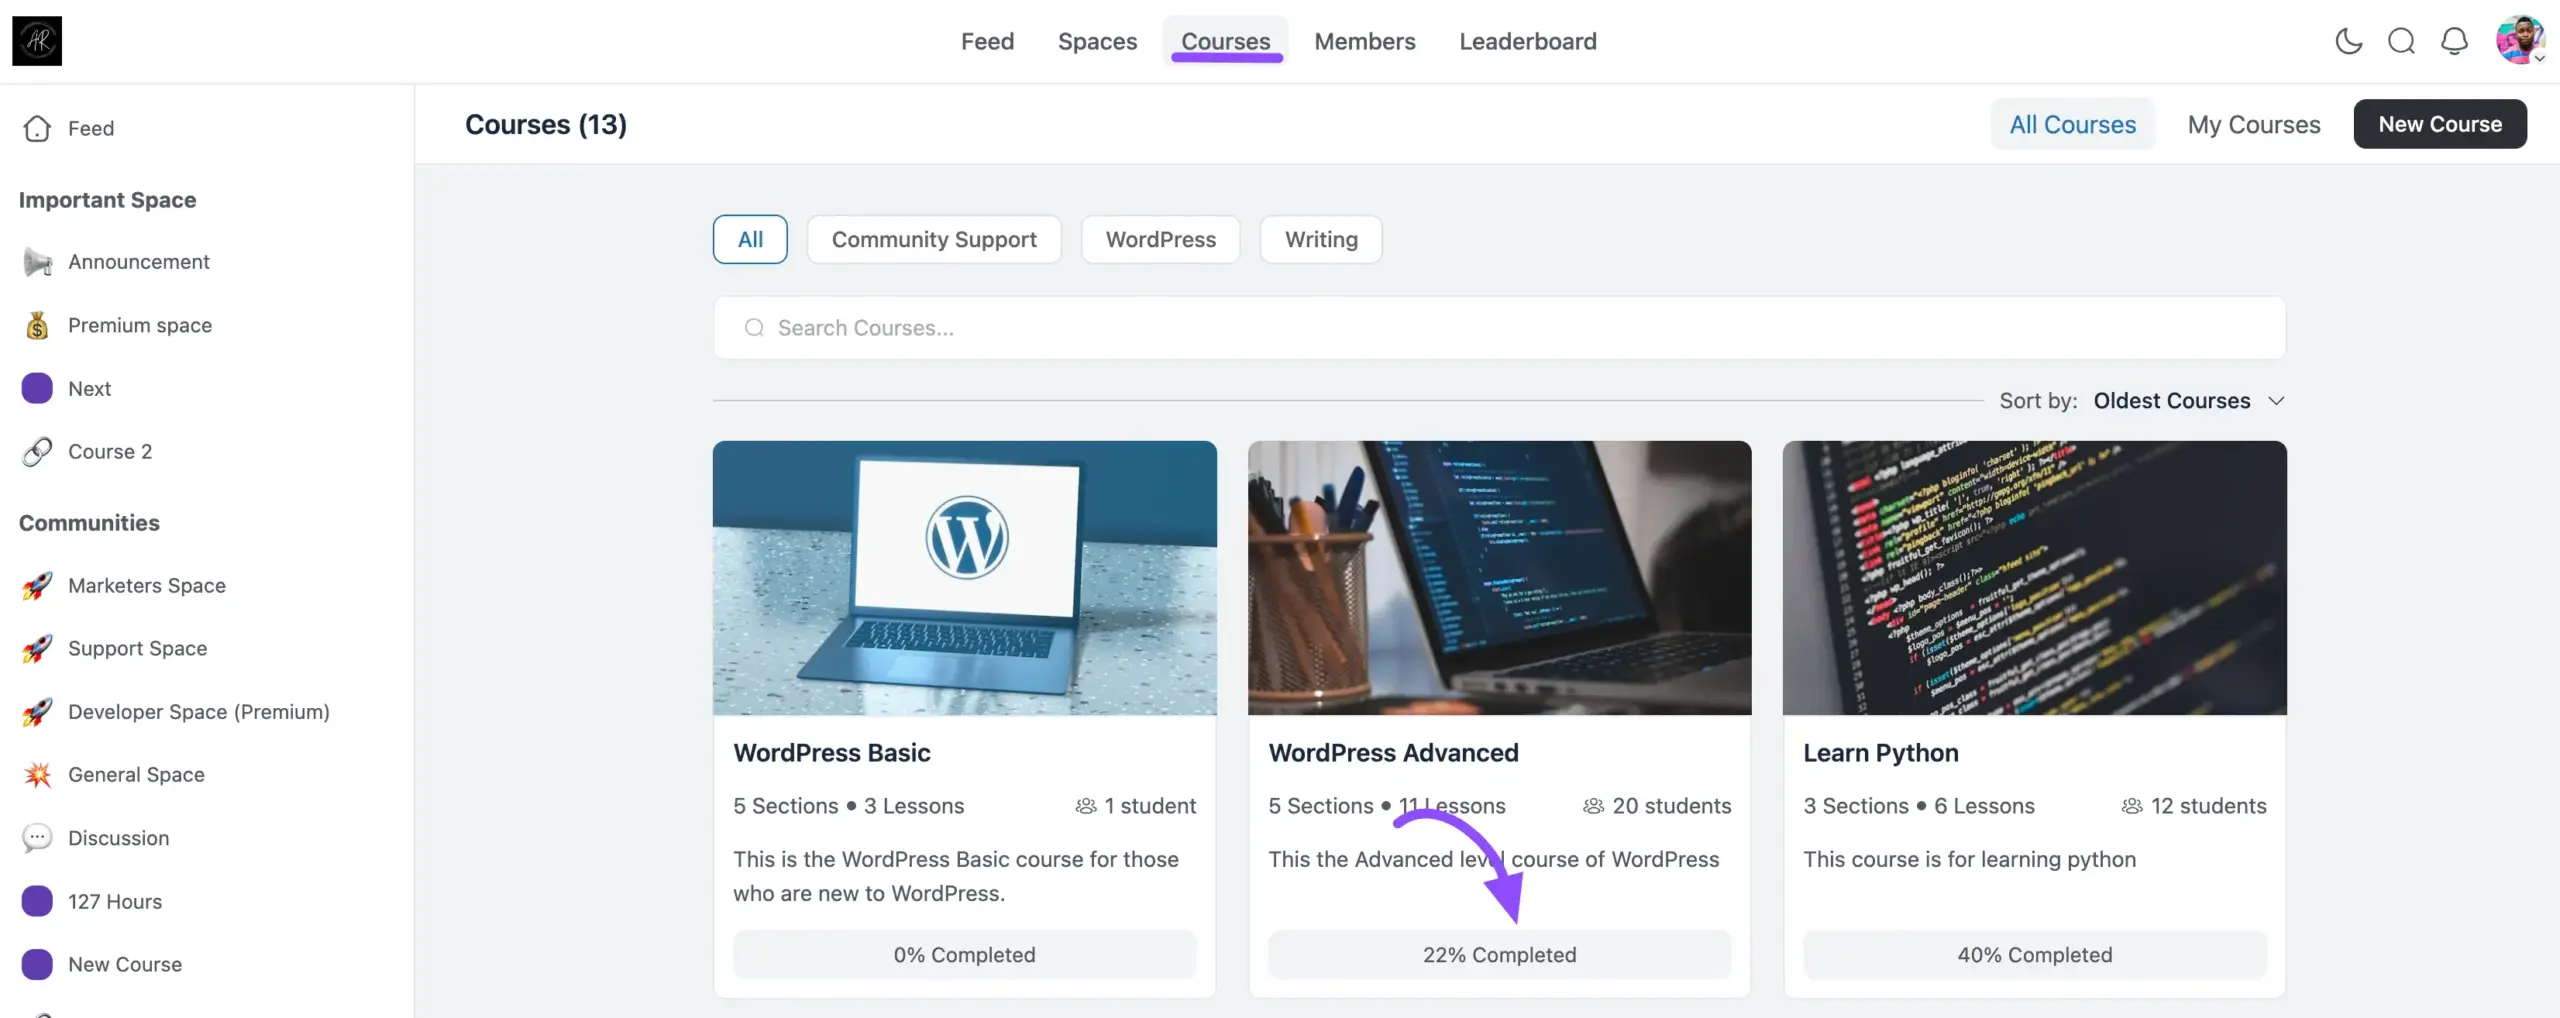
Start by navigating to the Courses section from the top navigation bar of your FluentCommunity portal. You will see all your available courses listed here.
Click on the specific course where you want to attach lesson files — for example, WordPress Advanced.
Step 2: Open the Lesson Manager
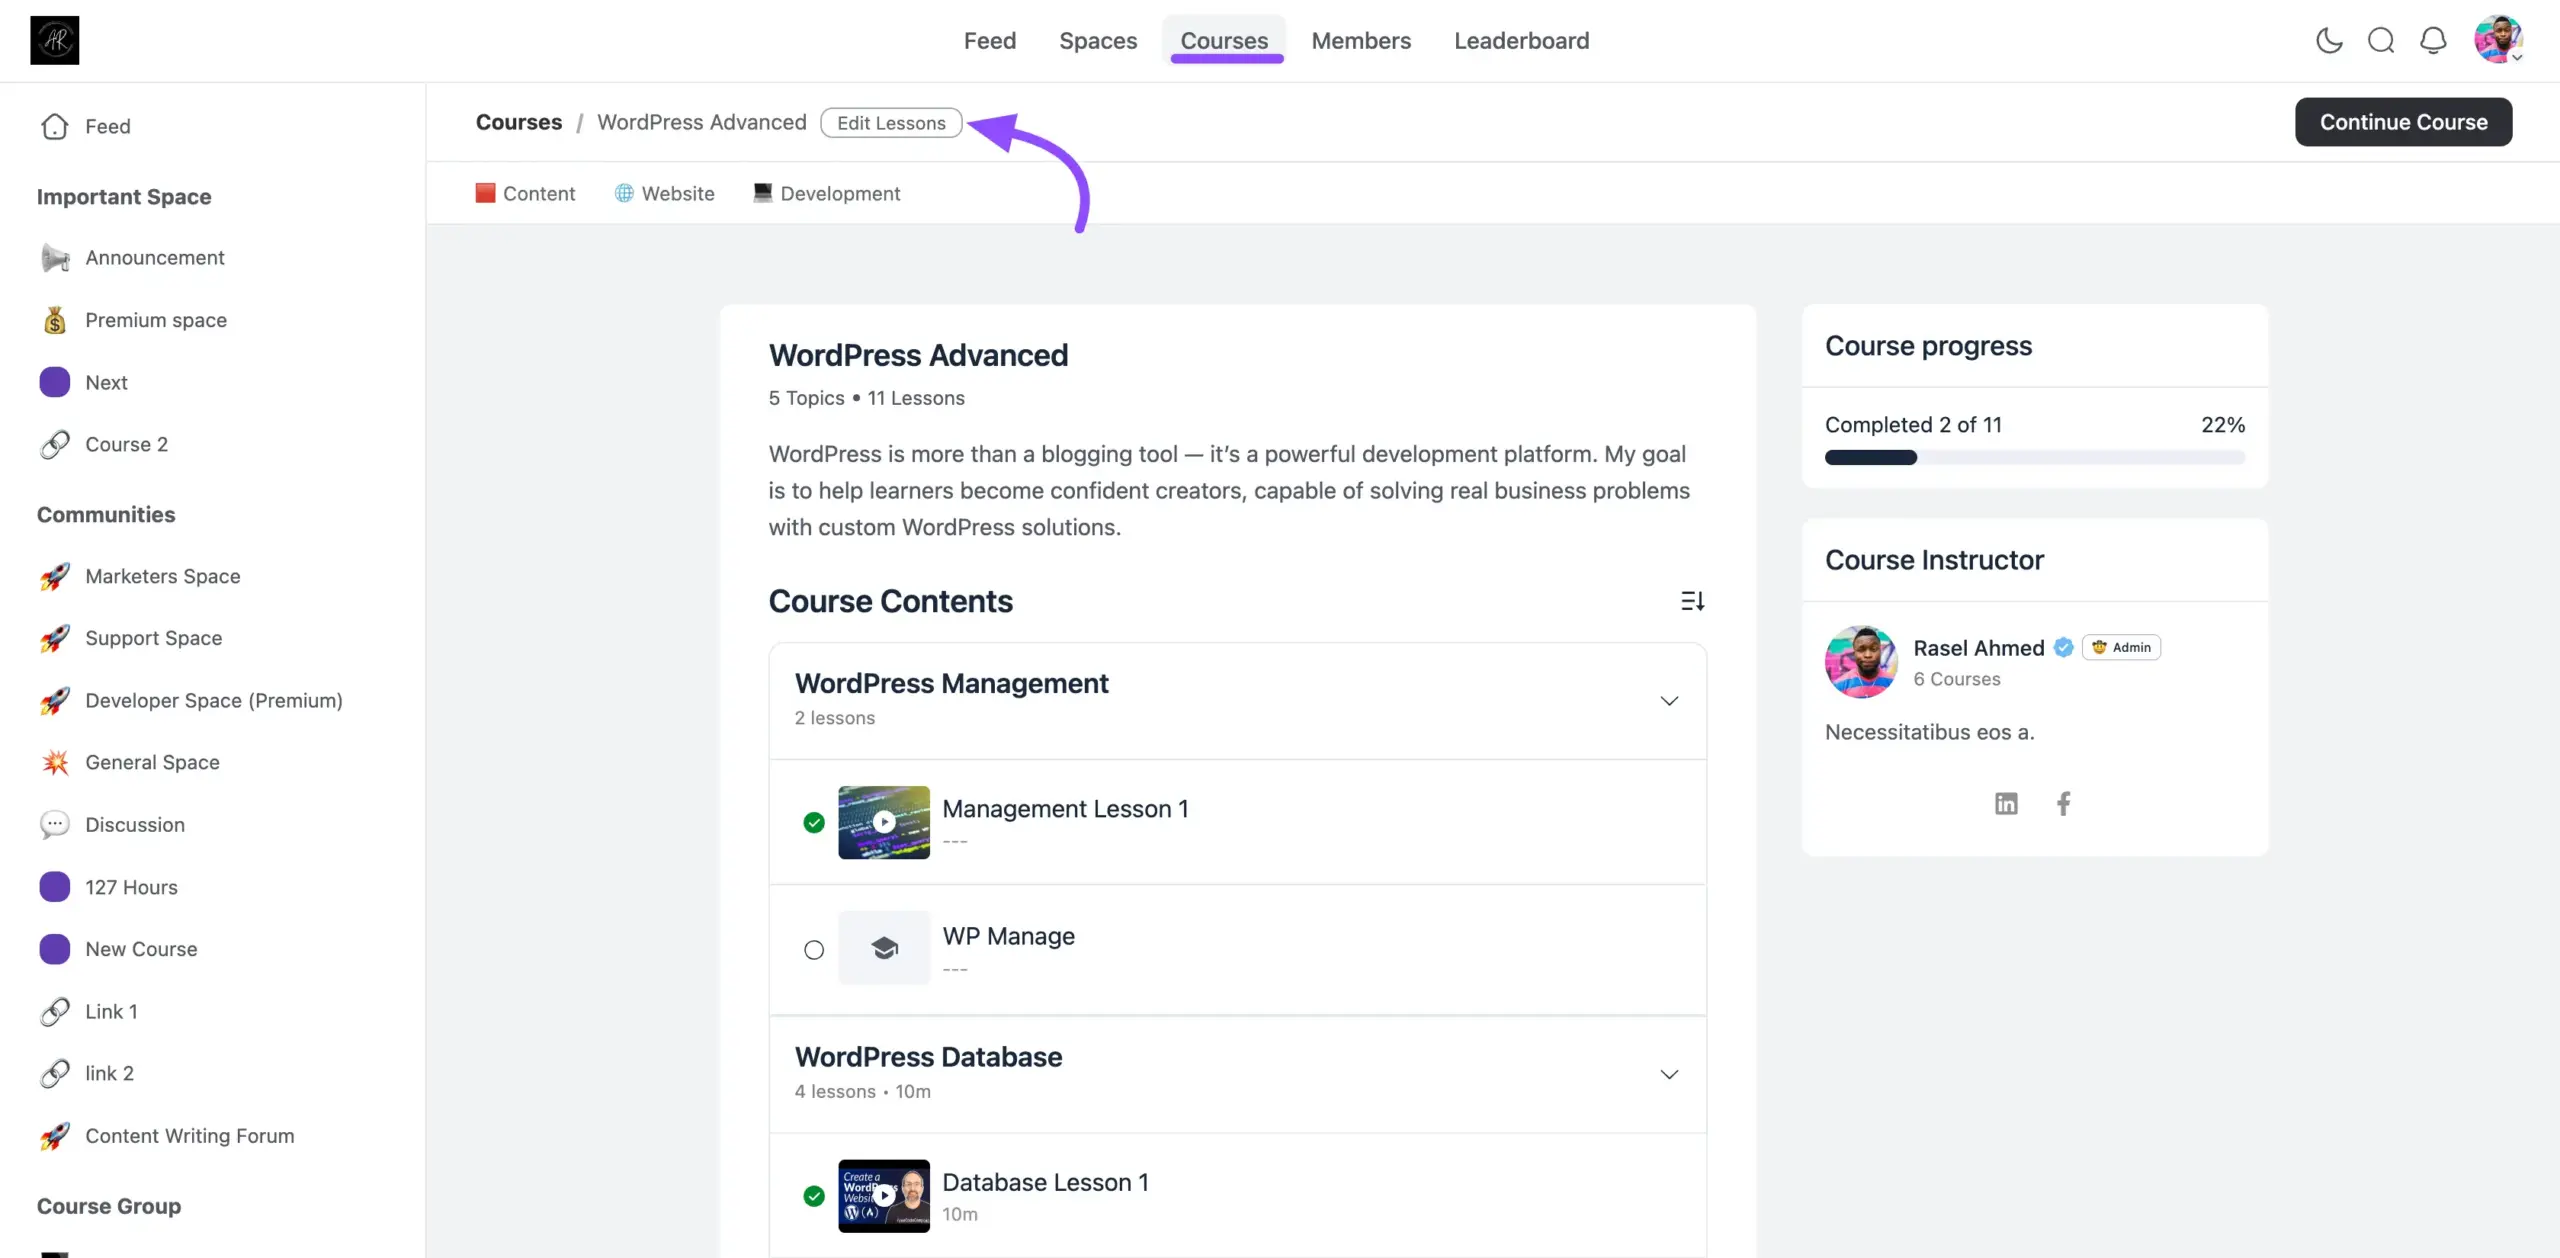
Once you are inside the course page, click the Edit Lessons button located near the top of the page.
This will take you directly to the lesson management area inside the Portal Settings, where you can see all your sections and lessons organized in one place.
Step 3: Open the Lesson Editor
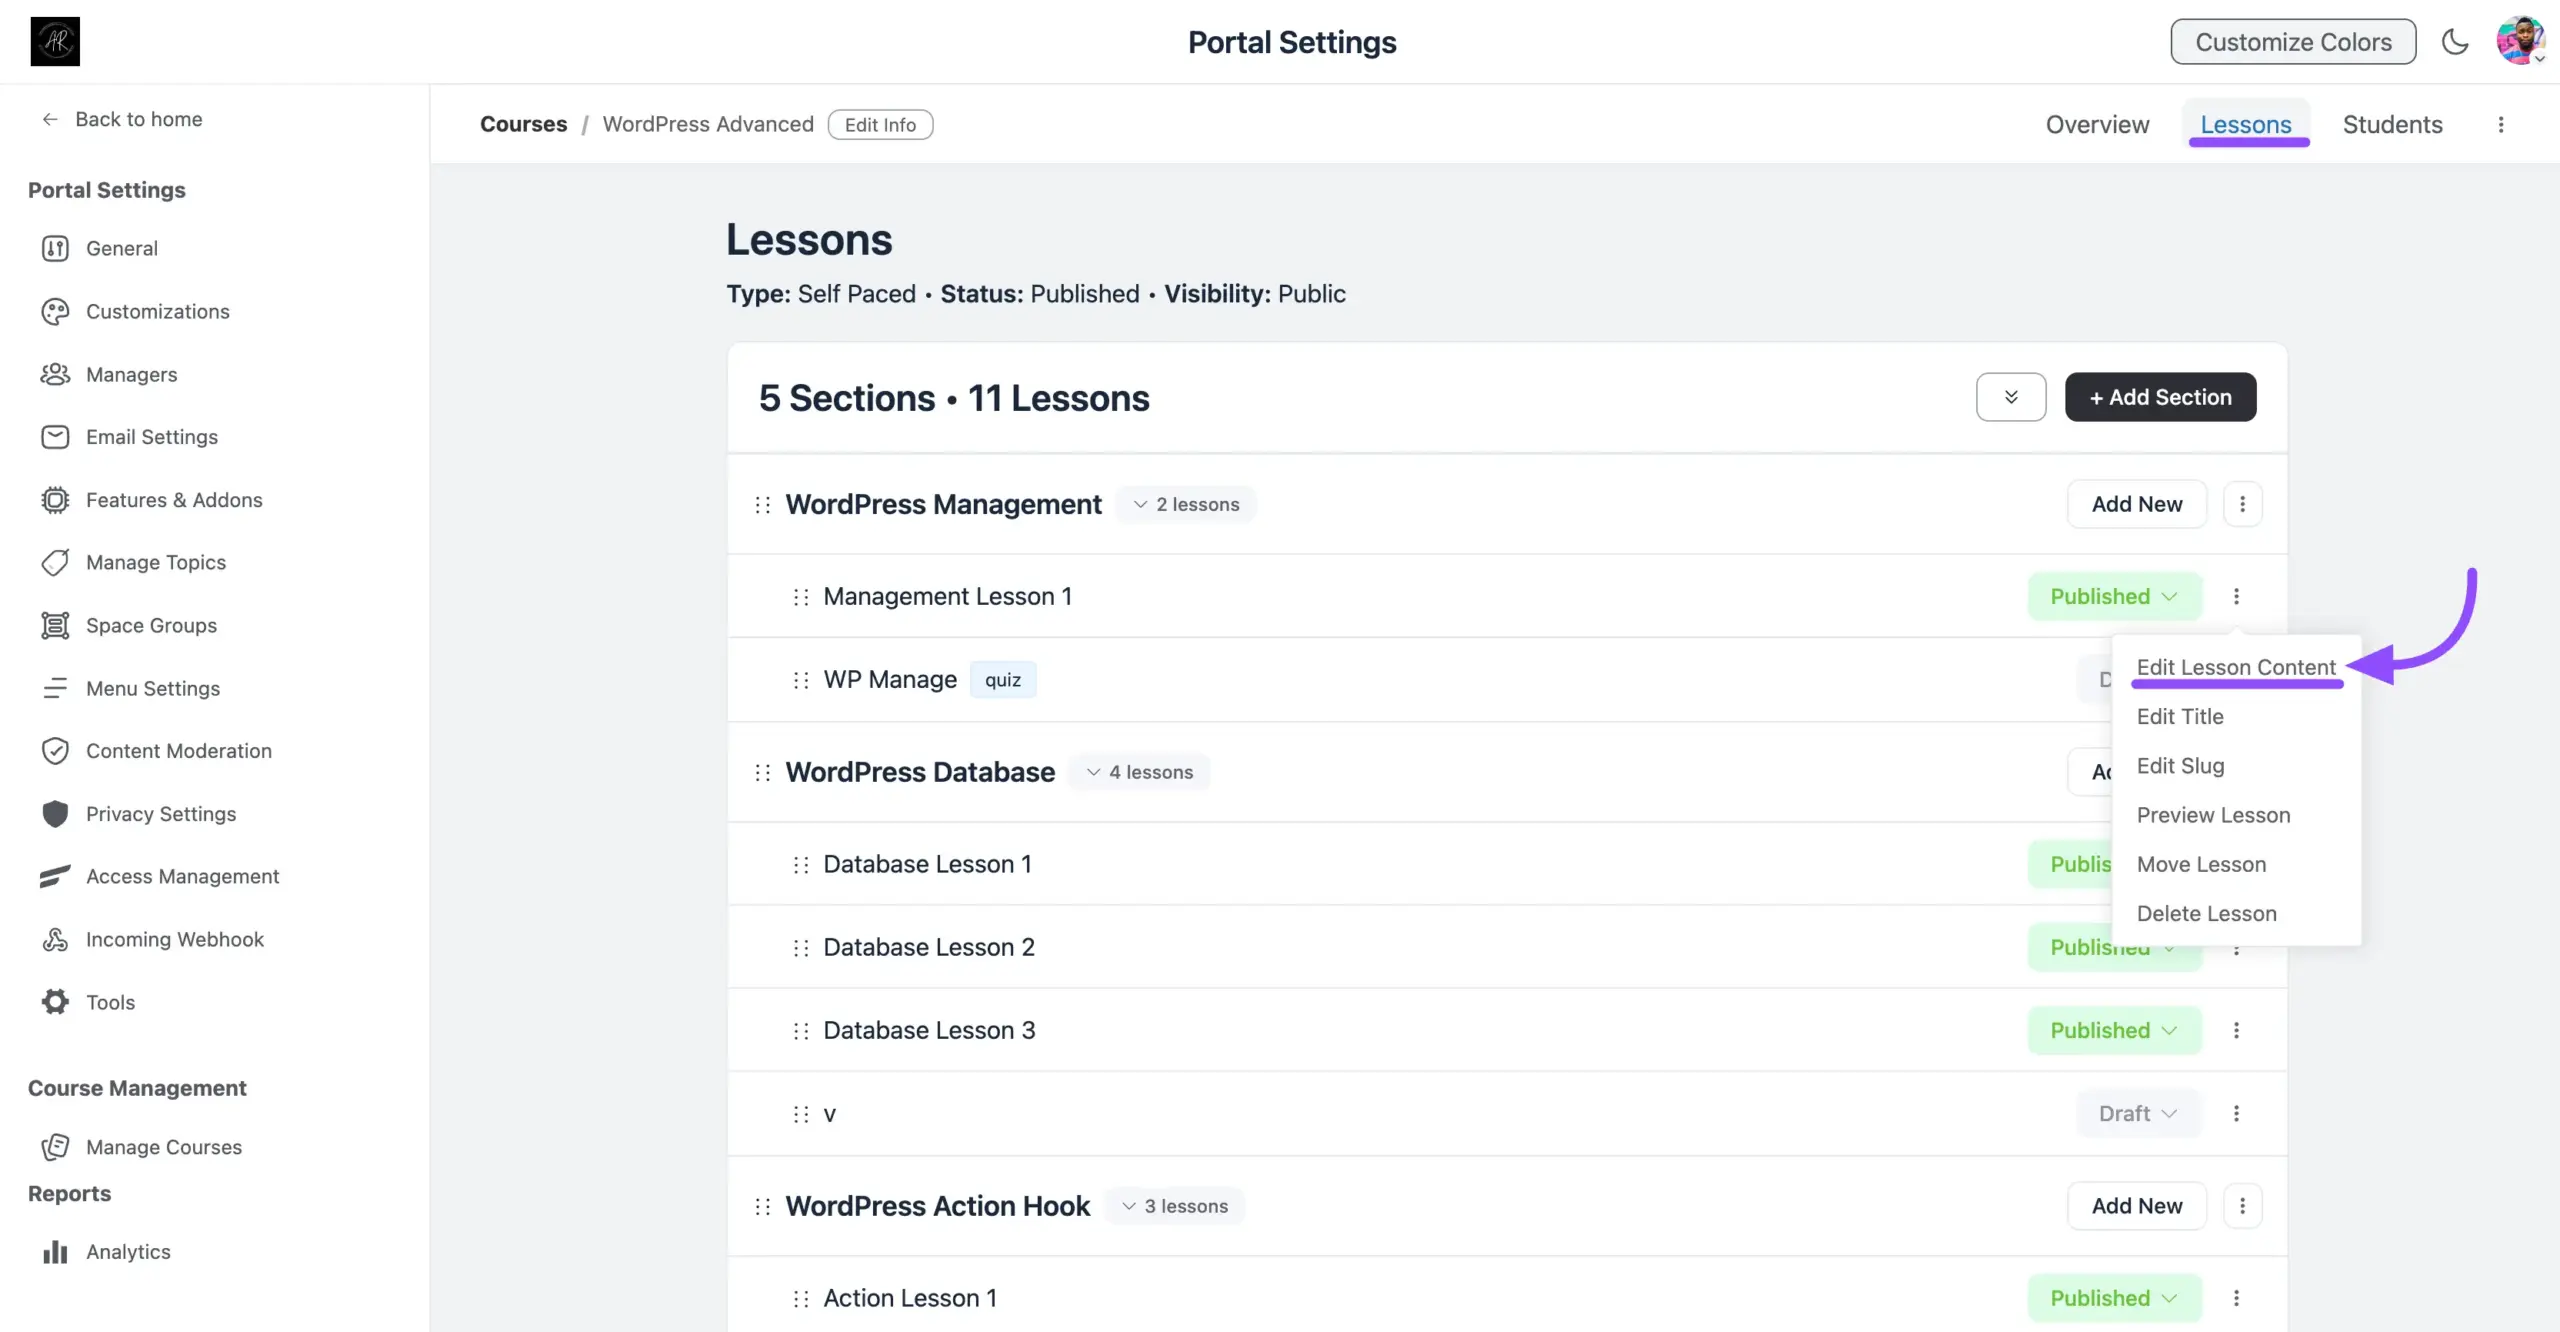
In the lesson management area, find the specific lesson you want to add files to. Click the three-dot menu (⋮) next to the lesson name to reveal a set of options, then select Edit Lesson Content from the dropdown.
Step 4: Access Documents & Files
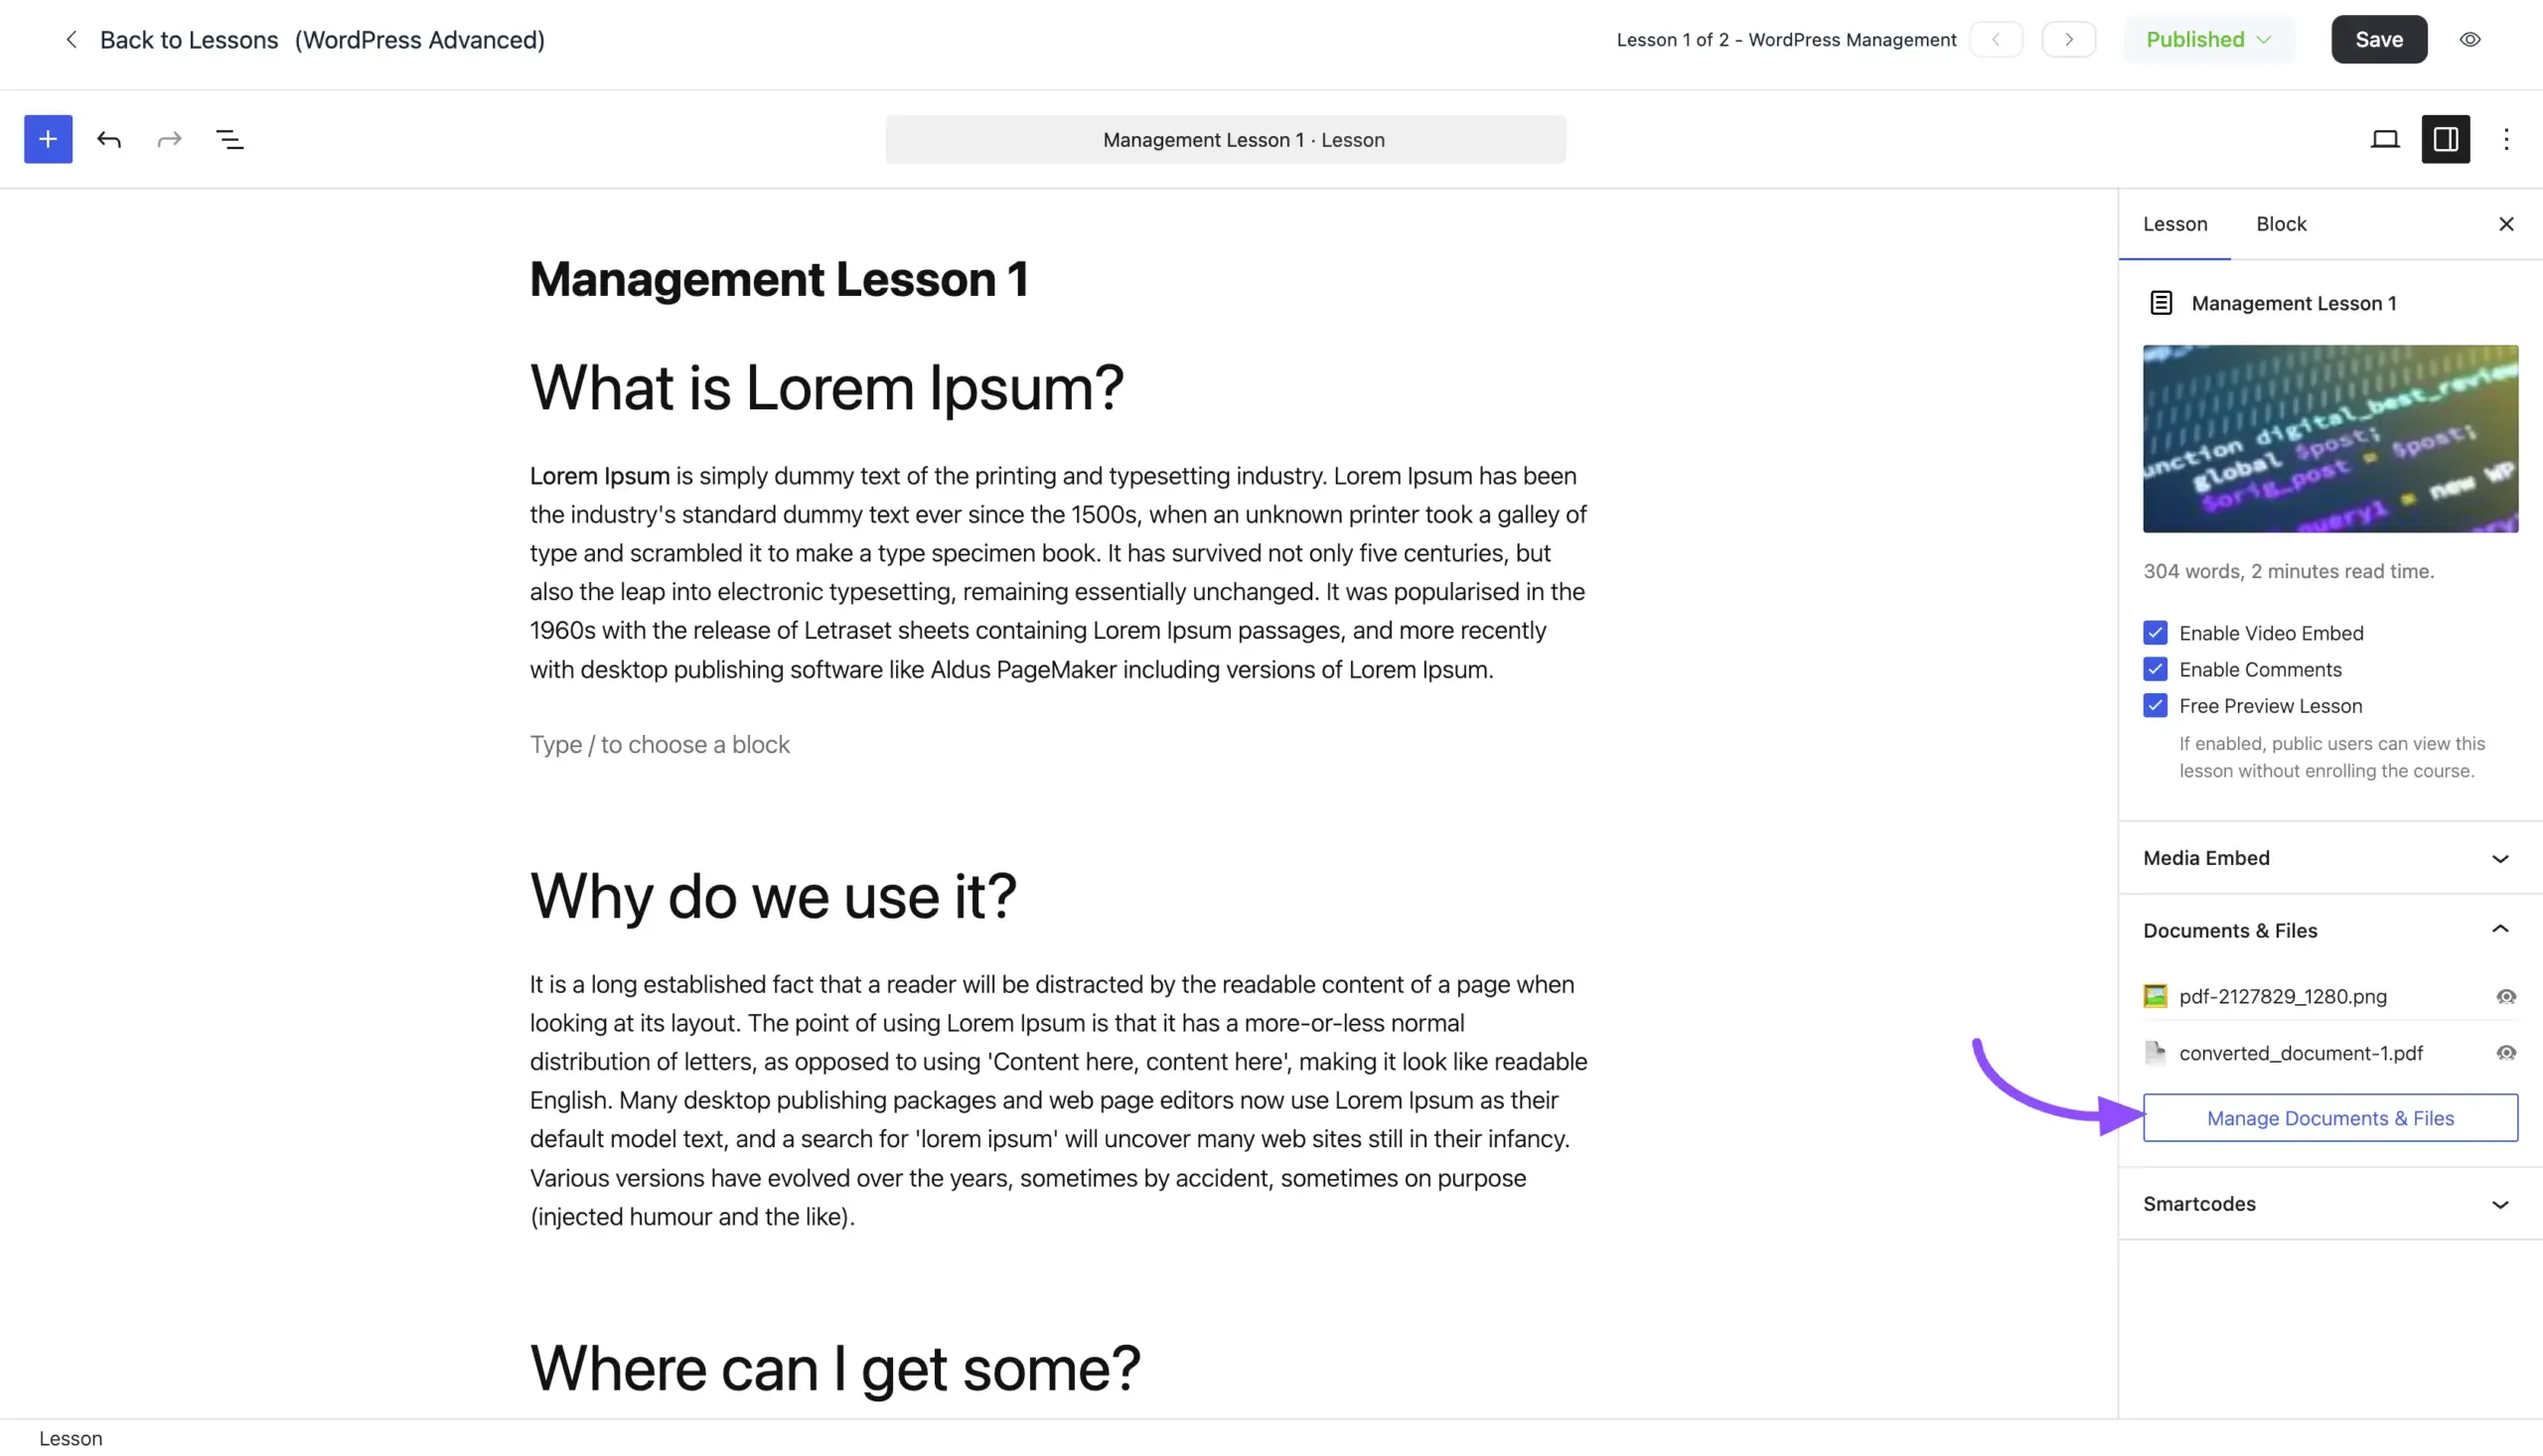
You are now inside the full lesson editor. On the right-hand sidebar, scroll down until you find the Documents & Files section. You will see any previously uploaded files already listed here.
To manage or add new files, click the Manage Documents & Files button.
Step 5: Upload Your Files
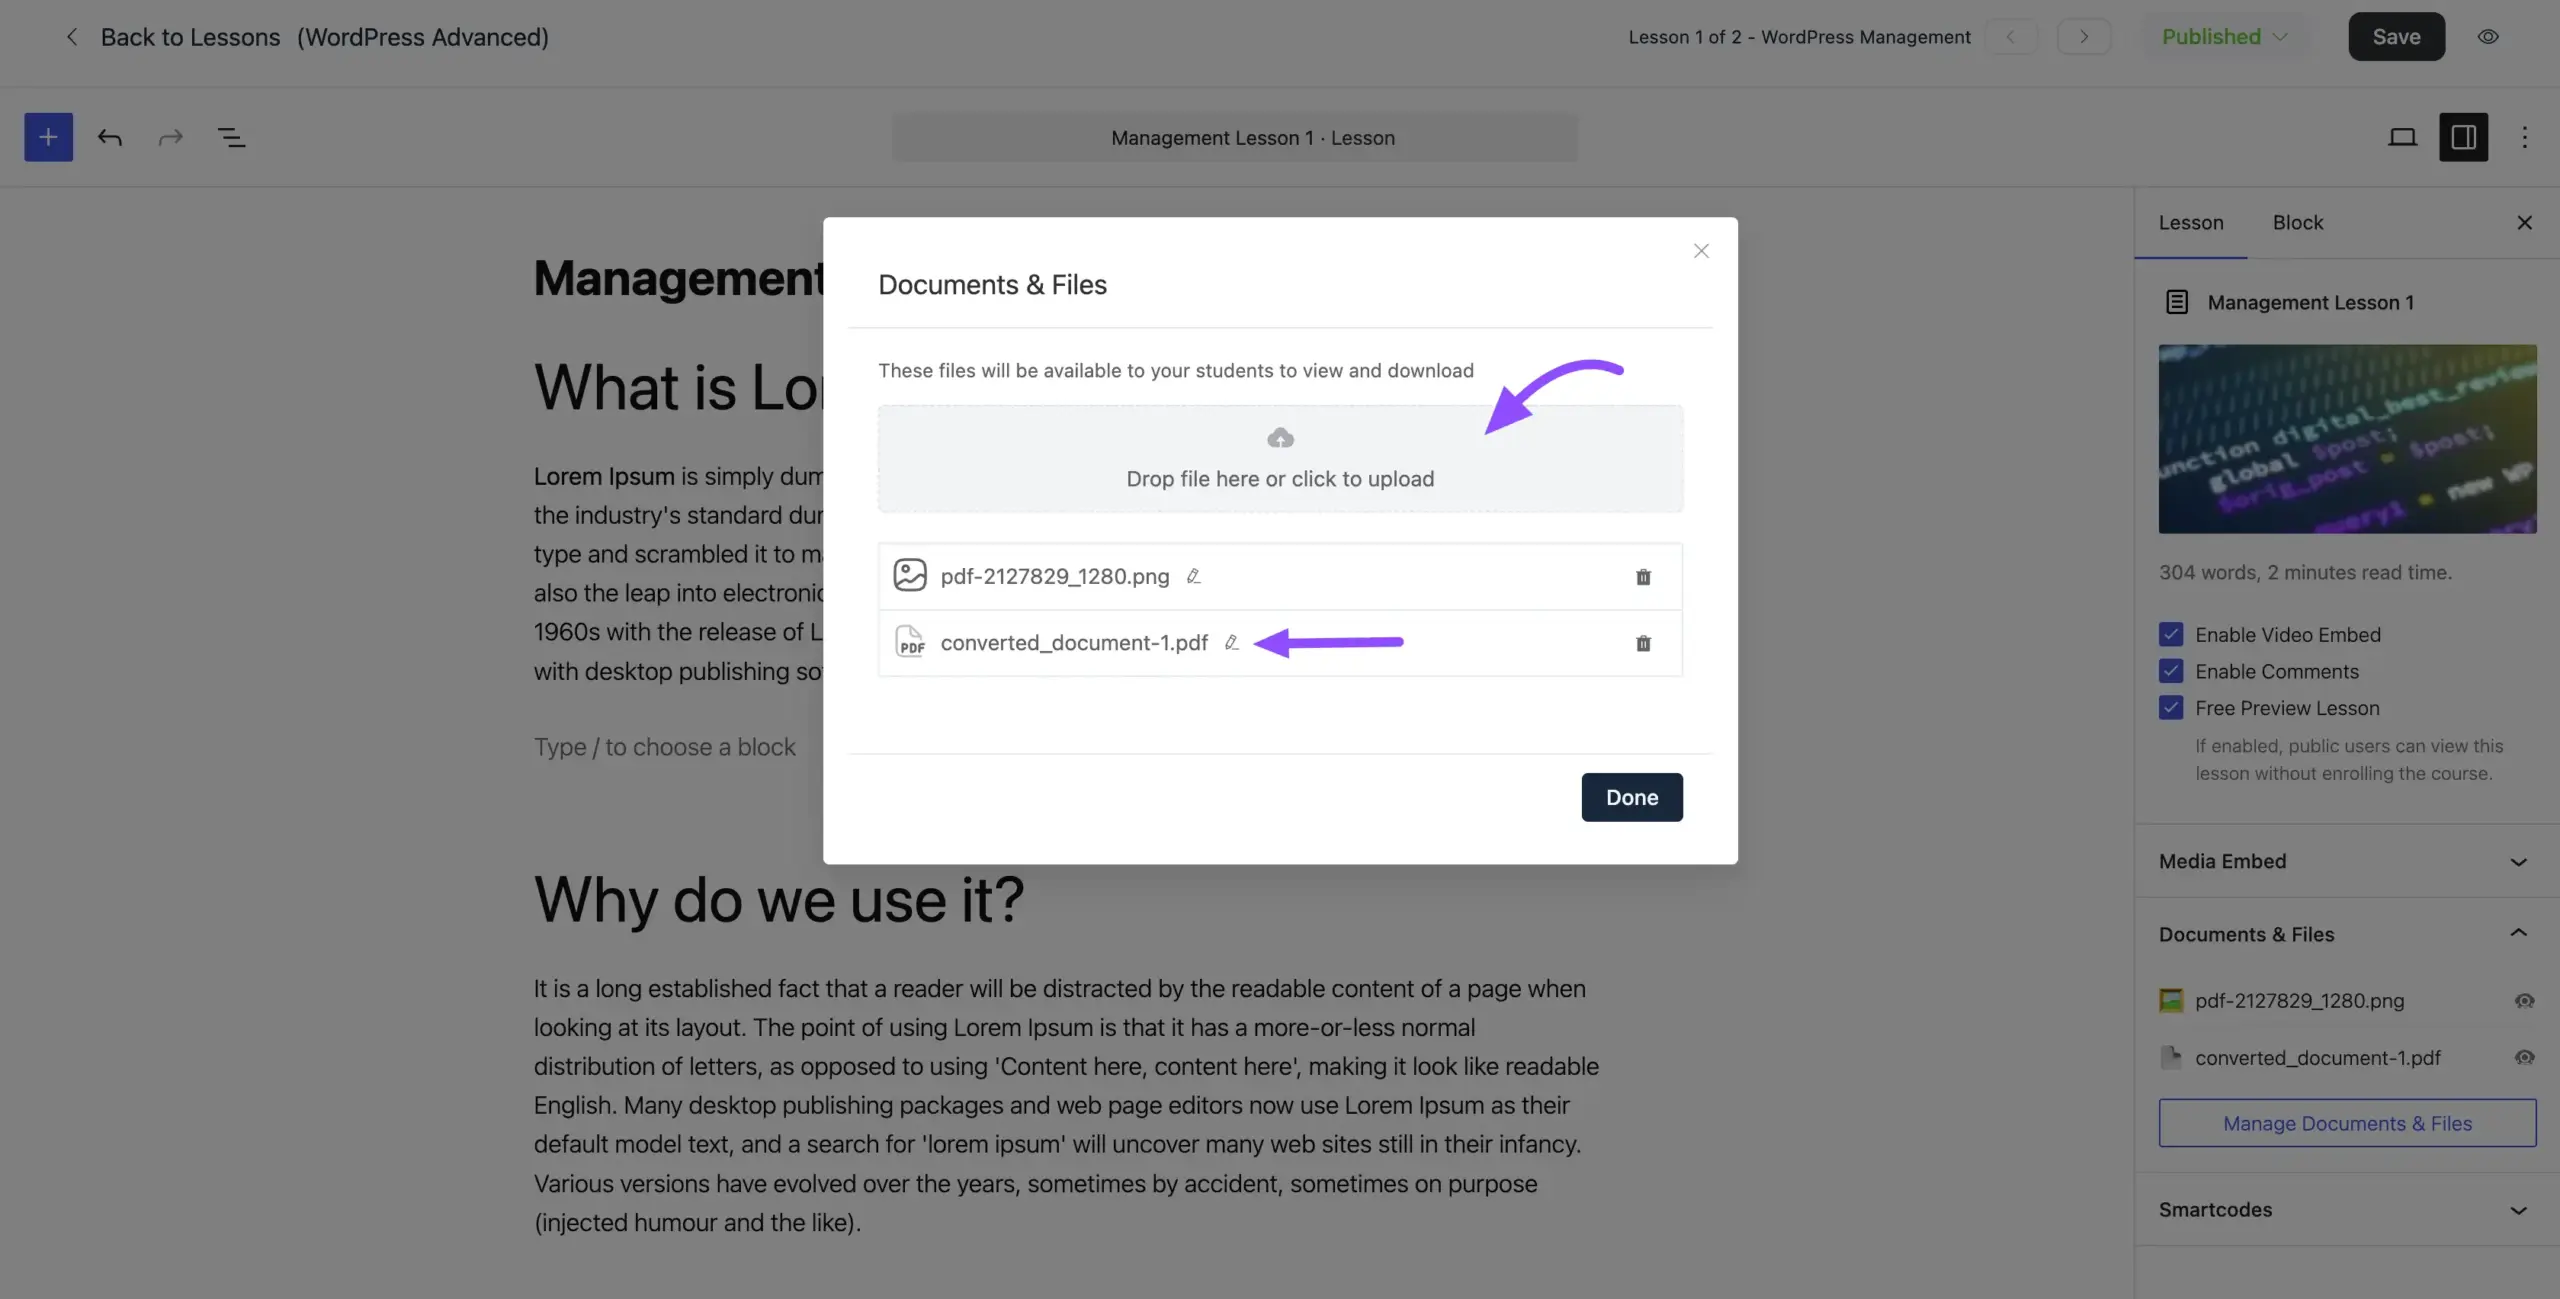
A panel will pop up showing the Documents & Files management area. Here, you can:
Drag and drop your files directly into the upload box, or click the box to browse and select files from your device.
Your uploaded files will appear in the list below the upload area as soon as they are added.
Once your files are uploaded, you have full control over how they appear. Next to each file in the list, you will find two action icons:
Pencil Icon (✏️) — Rename: Click this to give the file a clean, descriptive name that makes sense to your students.
Trash Icon (🗑️) — Delete: Click this to permanently remove the file from the lesson.
When you are happy with your files, click the Done button to close the panel.
Don't forget
Click the Save button at the top right of the lesson editor to make sure all your changes are saved.
Want to see how everything looks from a student's perspective? Click the Eye Icon in the top right corner to preview the lesson exactly as a student would see it.
The Student Experience
When your students open the lesson, they will find all your uploaded materials right there waiting for them. A dedicated Documents & Files section appears within the lesson, where students can simply click to download any file directly to their device.
The interface is fully responsive — students can easily access and download their resources whether they are on a desktop, tablet, or mobile phone.