

Appearance
Structuring Lessons & Modules
Once you have created a course, the next step is to add the learning content. FluentCommunity uses a flexible structure of Sections and Lessons to help you organize your course material in a logical and easy-to-follow way.
- Sections are like chapters or modules. They are used to group related lessons together.
- Lessons are the individual pages of content, such as a video, a piece of text, or a downloadable worksheet.
Use Case: For a course on "Website Design," you could create a "Module 1: Introduction to HTML" section, which contains individual lessons like "Lesson 1: Basic Page Structure" and "Lesson 2: Working with Text & Links."
Accessing the Course Structure Editor
- Navigate to Portal Settings → Course Management → Manage Courses.
- Click on the course you want to edit.
- On the course screen, click the Lessons tab (next to Overview and Students).
This opens the Lessons screen for that course, showing its Type, Status, and Visibility, along with a running count of sections and lessons (e.g., "5 Sections • 0 Lesson").
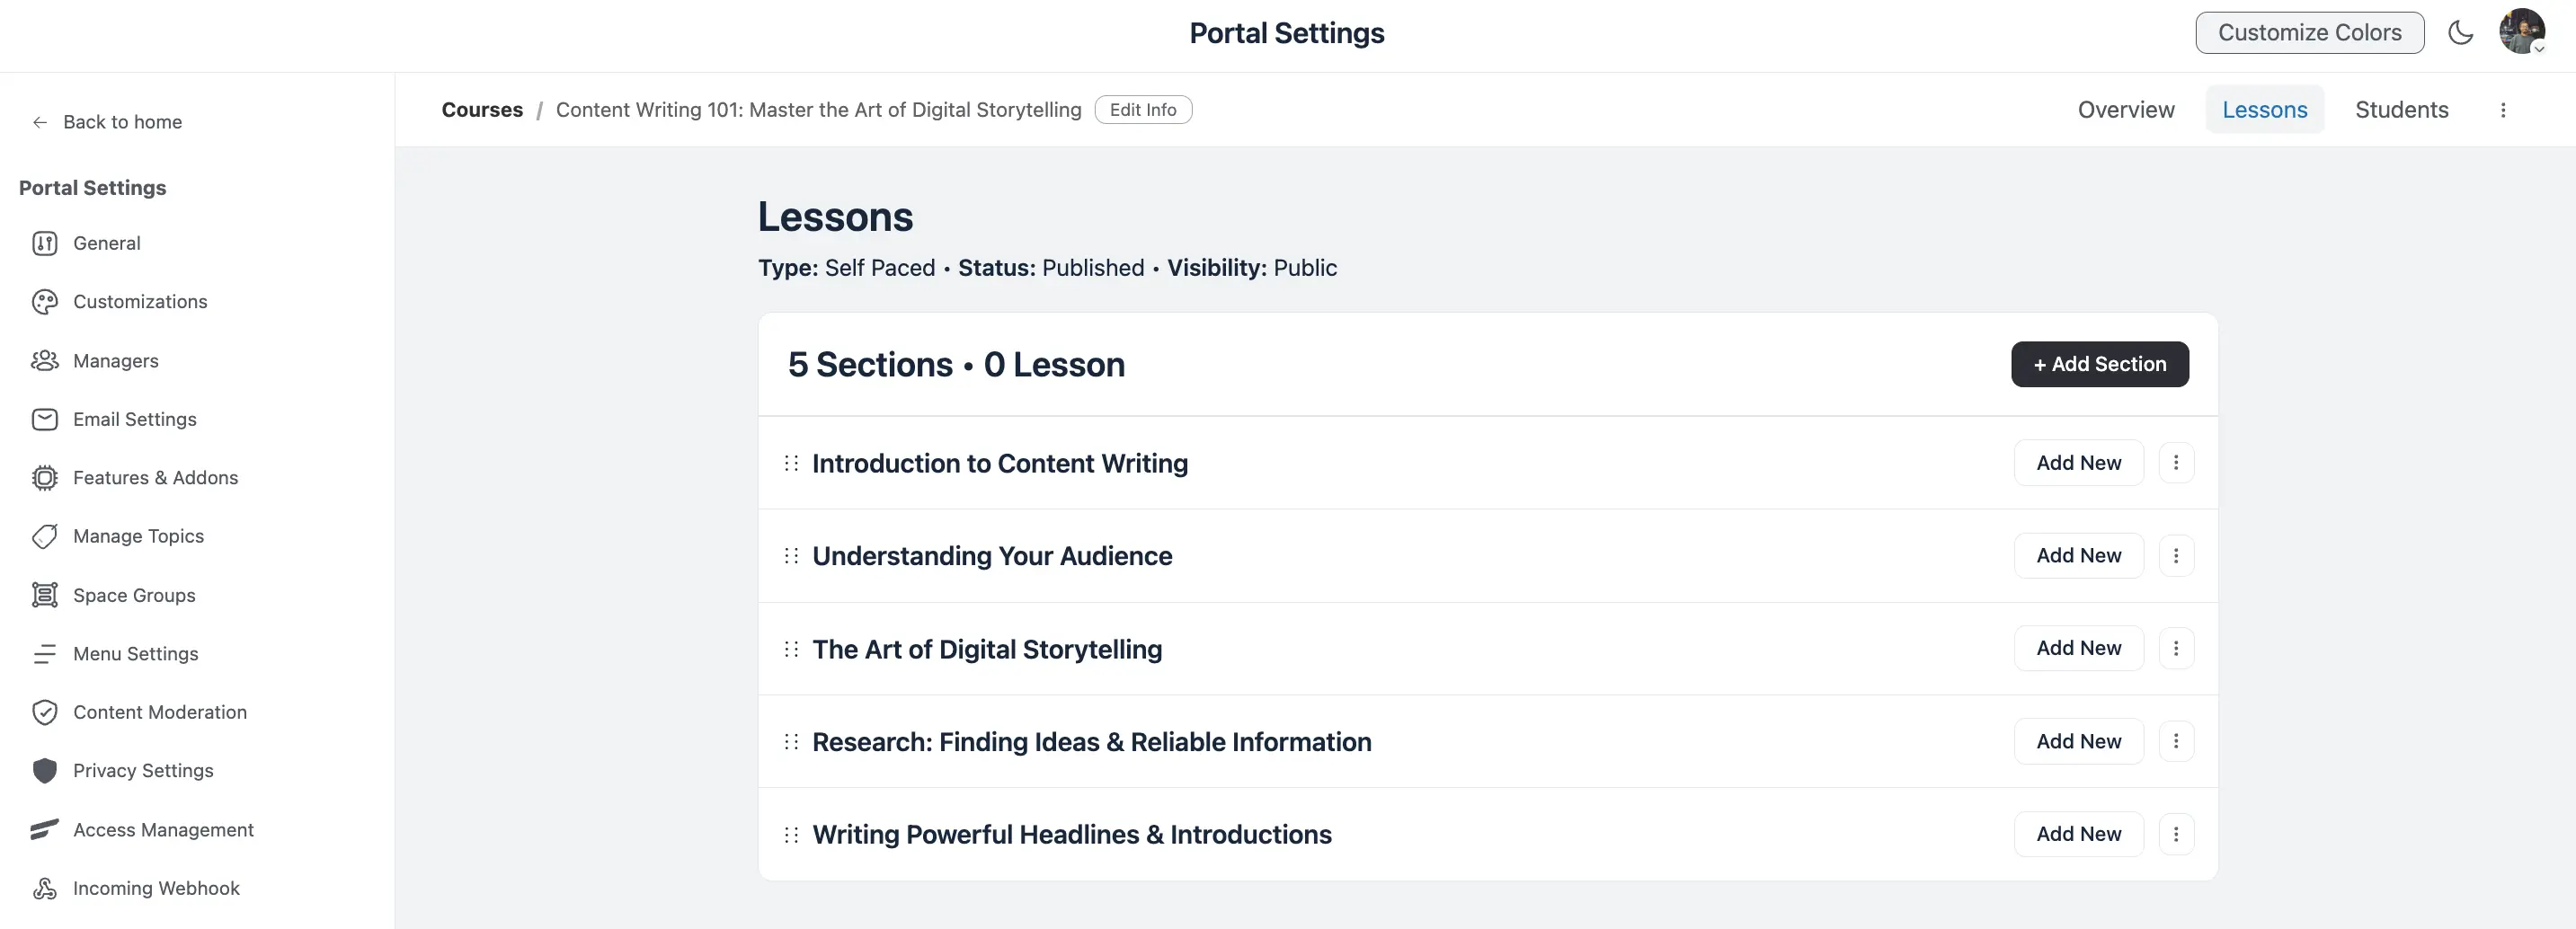
Step 1: Create a New Section
First, you need to create a section to hold your lessons.
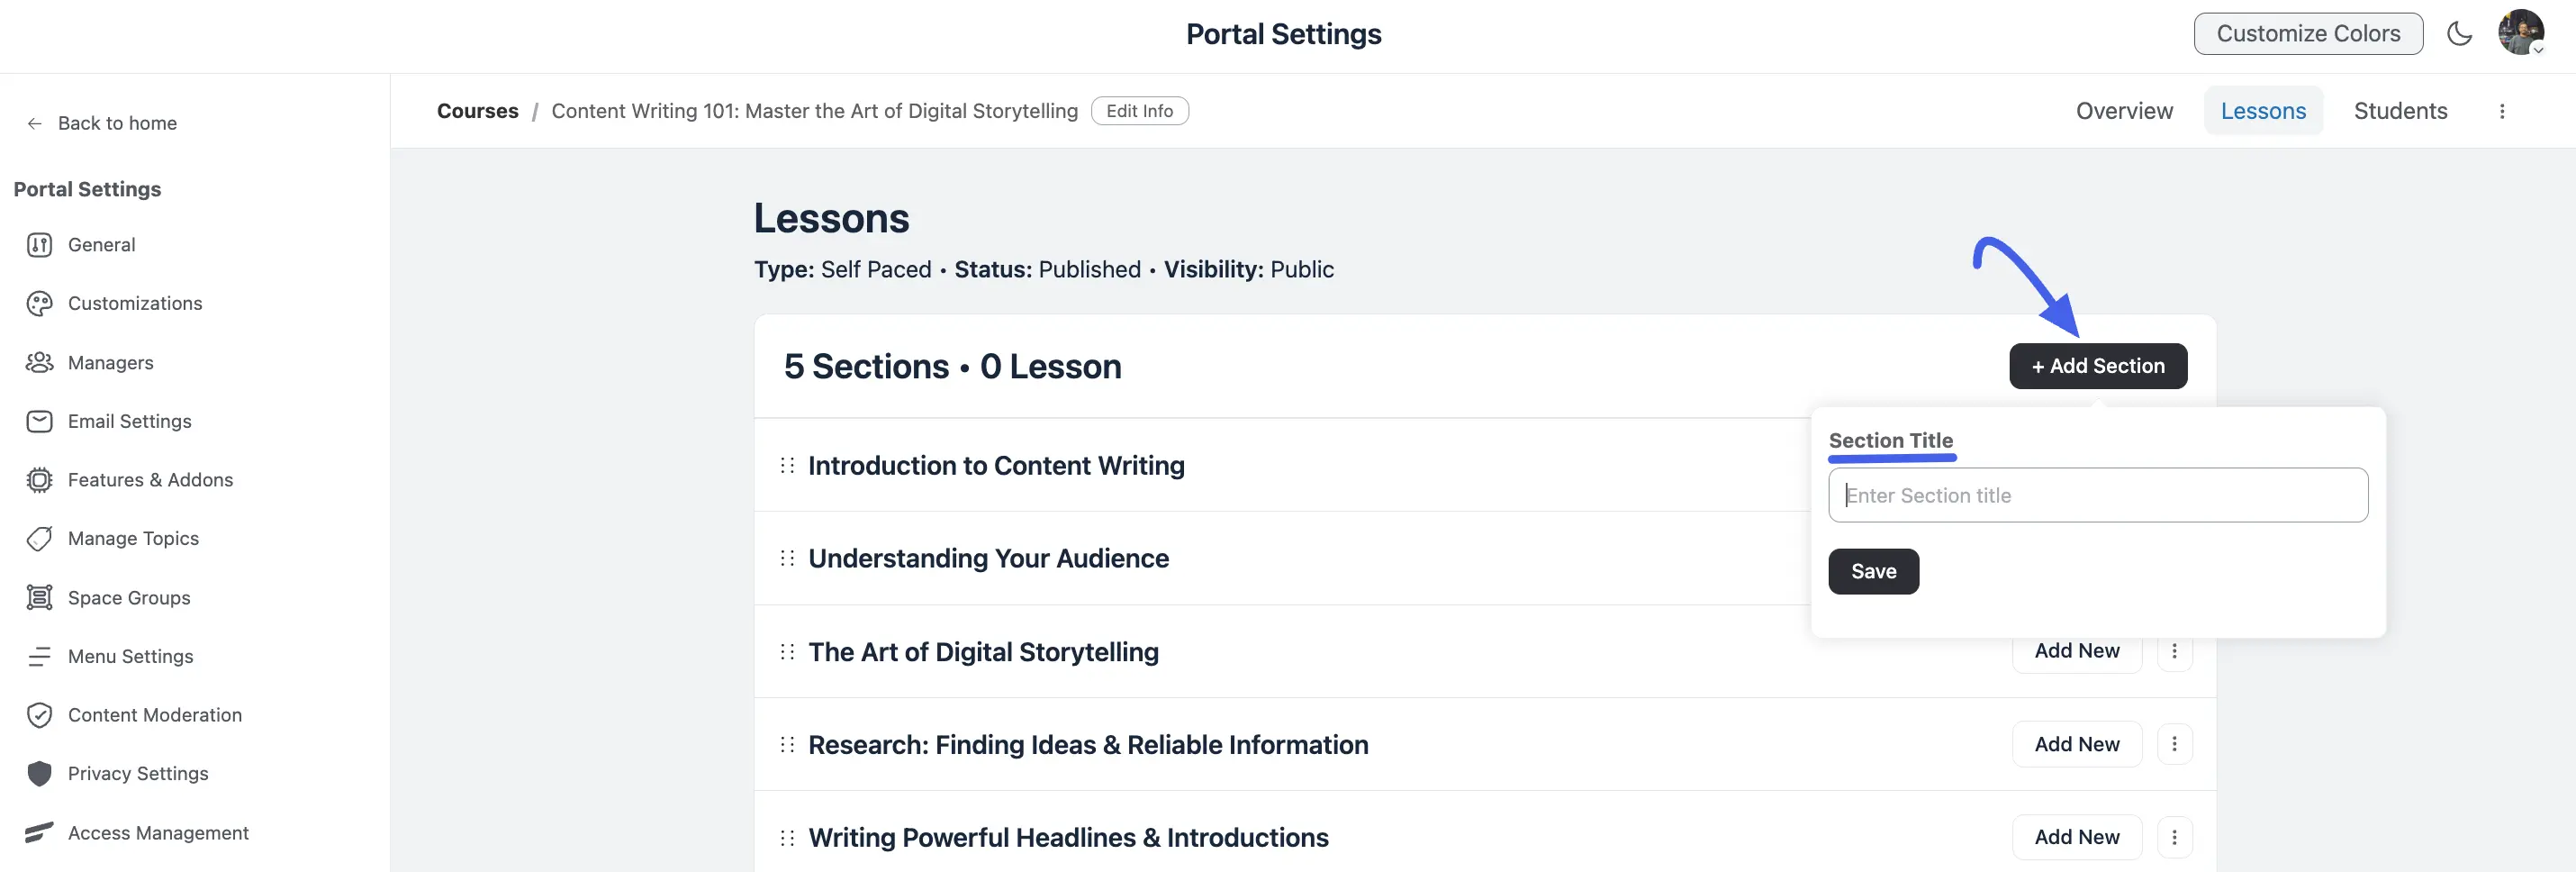
- Click the + Add Section button in the top-right corner of the Lessons panel.
- In the Section Title field that appears, enter a name for the section (e.g., "Welcome & Introduction").
- Click Save.
Your new section will appear in the list, with a drag handle on the left for reordering it later.
Step 2: Add a Lesson to the Section
Now you can add individual lessons inside the section.
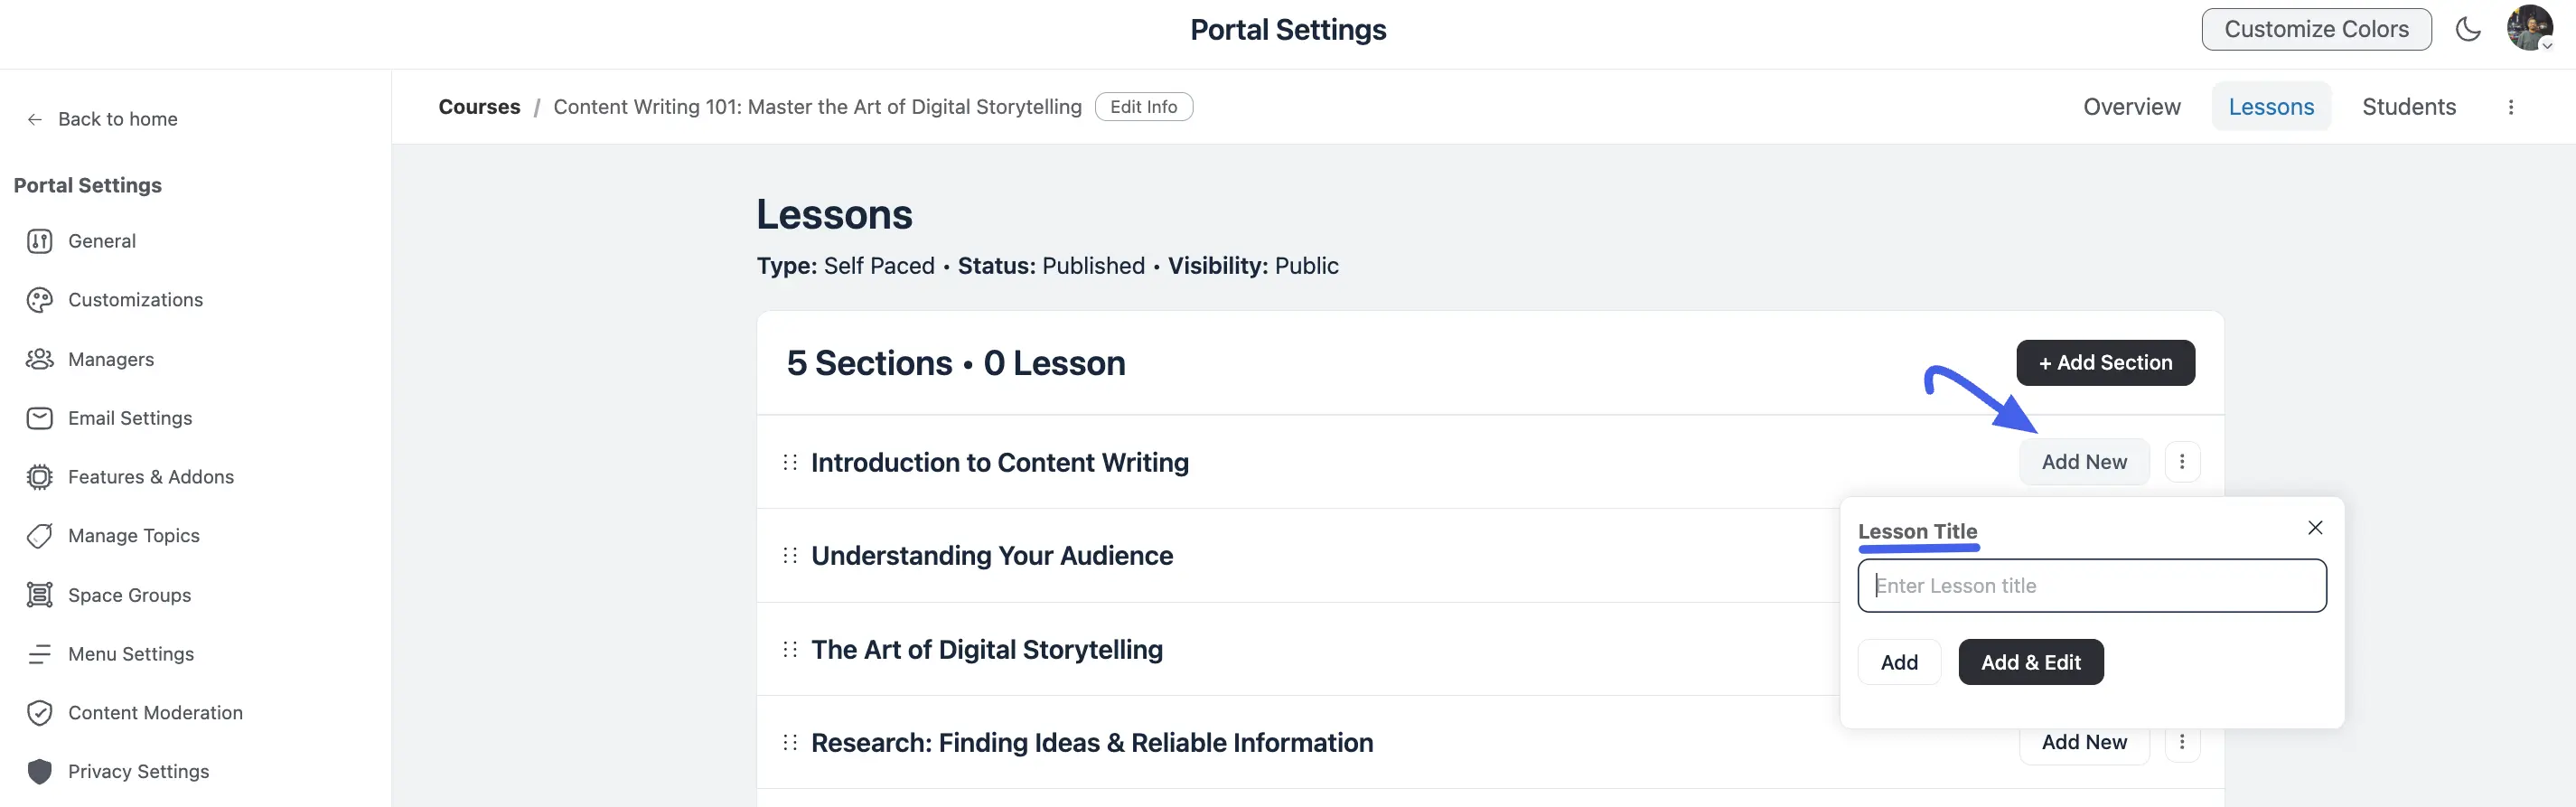
- Click the Add New button on the right-hand side of the section row.
- In the Lesson Title field, enter a title for the lesson (e.g., "Meet Your Instructor").
- Click Add to create the lesson and stay on the Lessons screen, or Add & Edit to create it and jump straight into the lesson editor.
Once a section has lessons, its row shows a lesson-count pill (e.g., "1 lesson") you can click to expand or collapse the list, and each lesson underneath shows a status badge (Published or Draft) plus its own three-dot menu.
Edit a Lesson Slug (Optional)
Each lesson gets a URL slug generated from its title, and you can change it at any time to something cleaner or more descriptive.
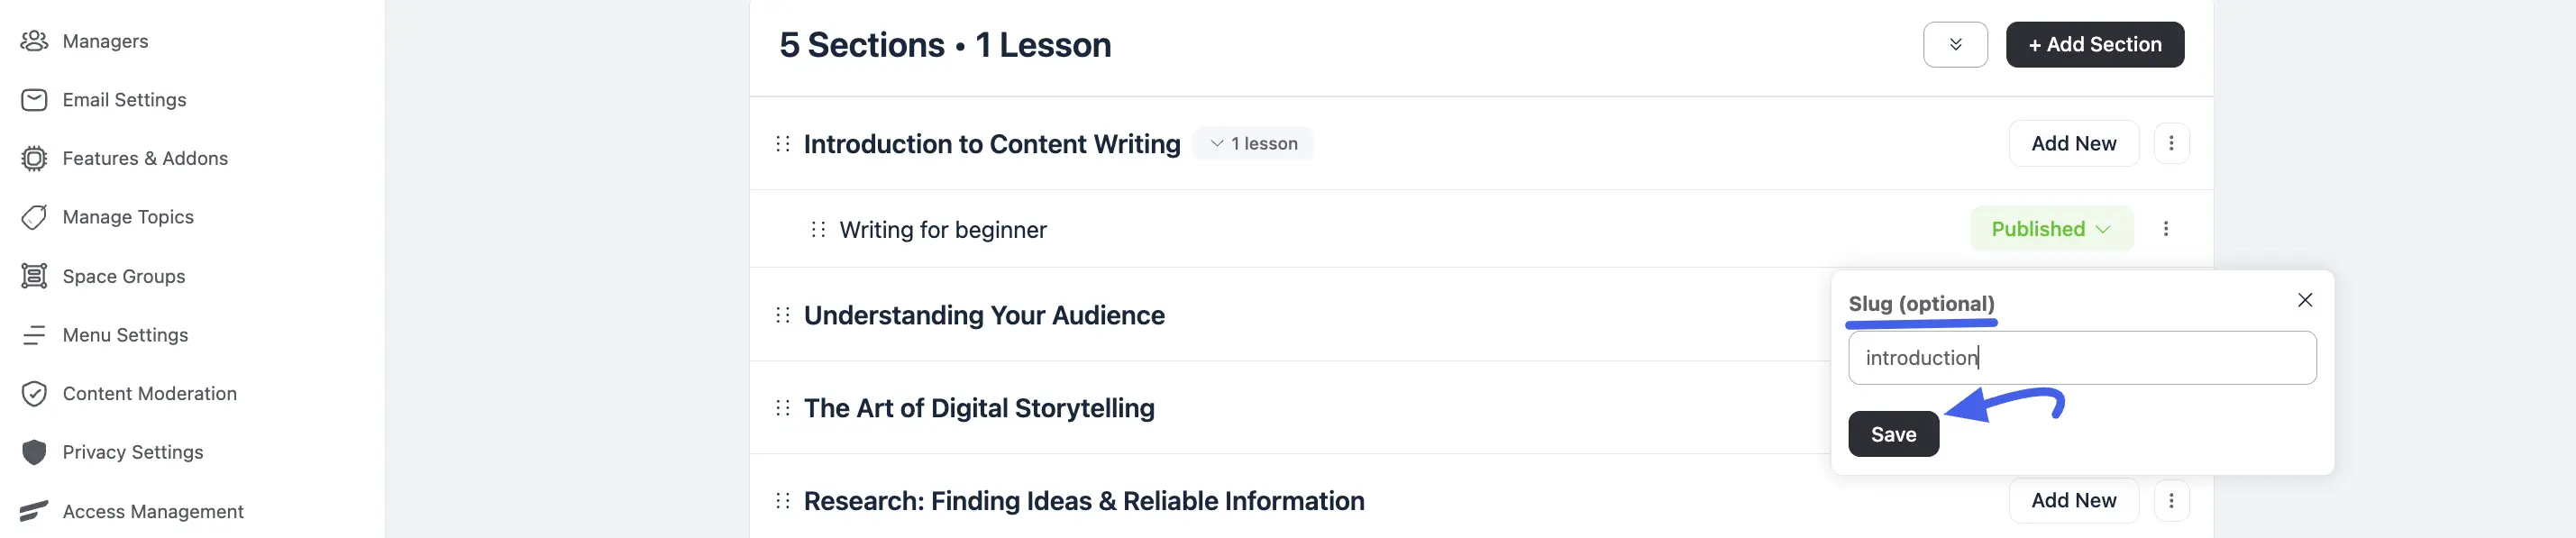
- Click the three-dot menu next to the lesson and select Edit Slug.
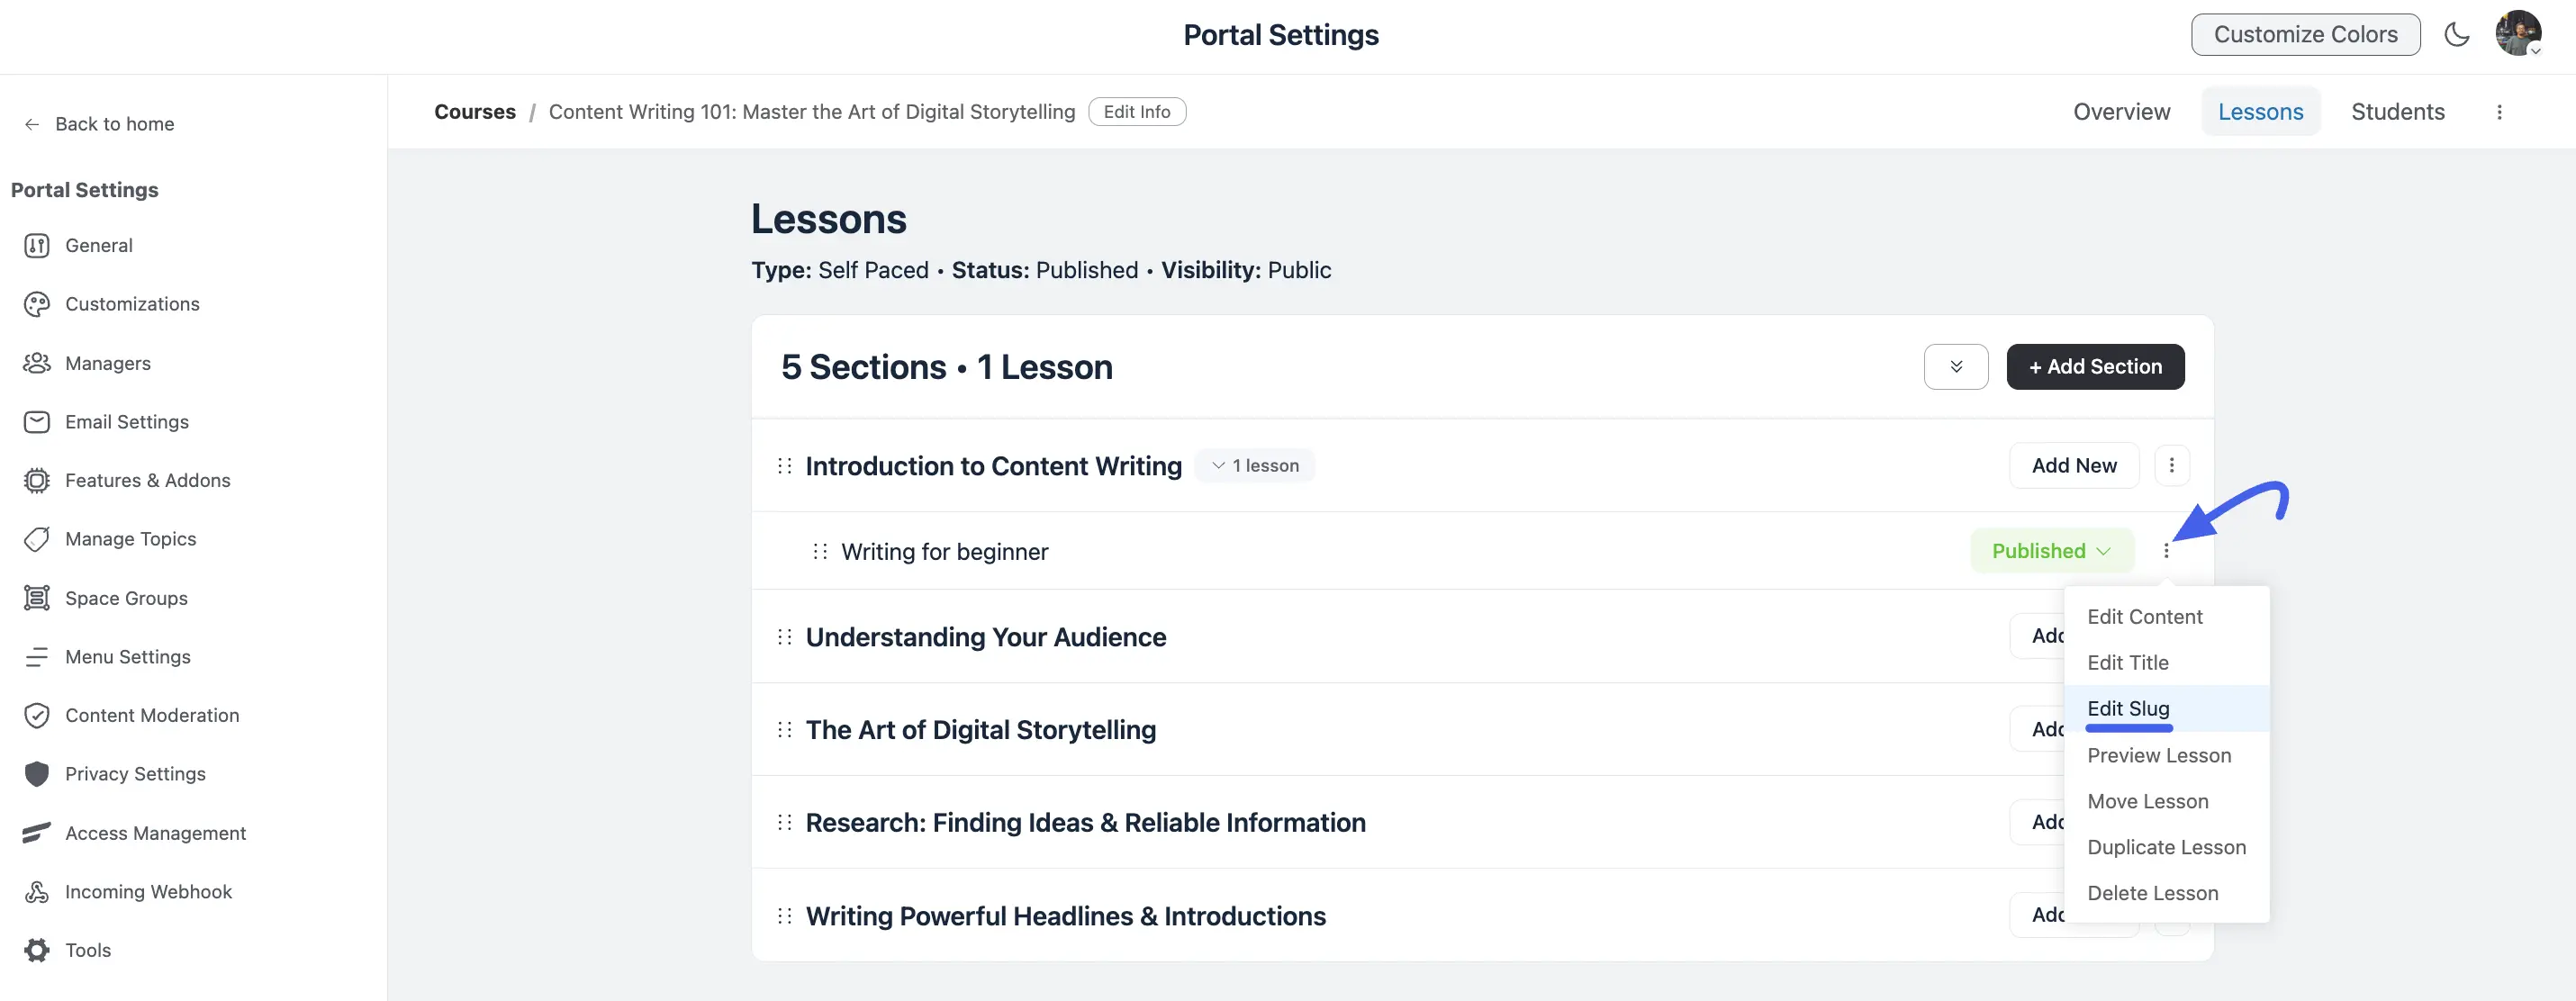
- In the Slug (optional) field, enter your preferred URL-friendly text.
- Click the Save button. The change applies immediately.
TIP
Courses have their own Slug field on the course details screen see Creating Your First Course. Keeping lesson slugs short and descriptive makes shared lesson links much easier to read.
Step 3: Add Content to Your Lesson
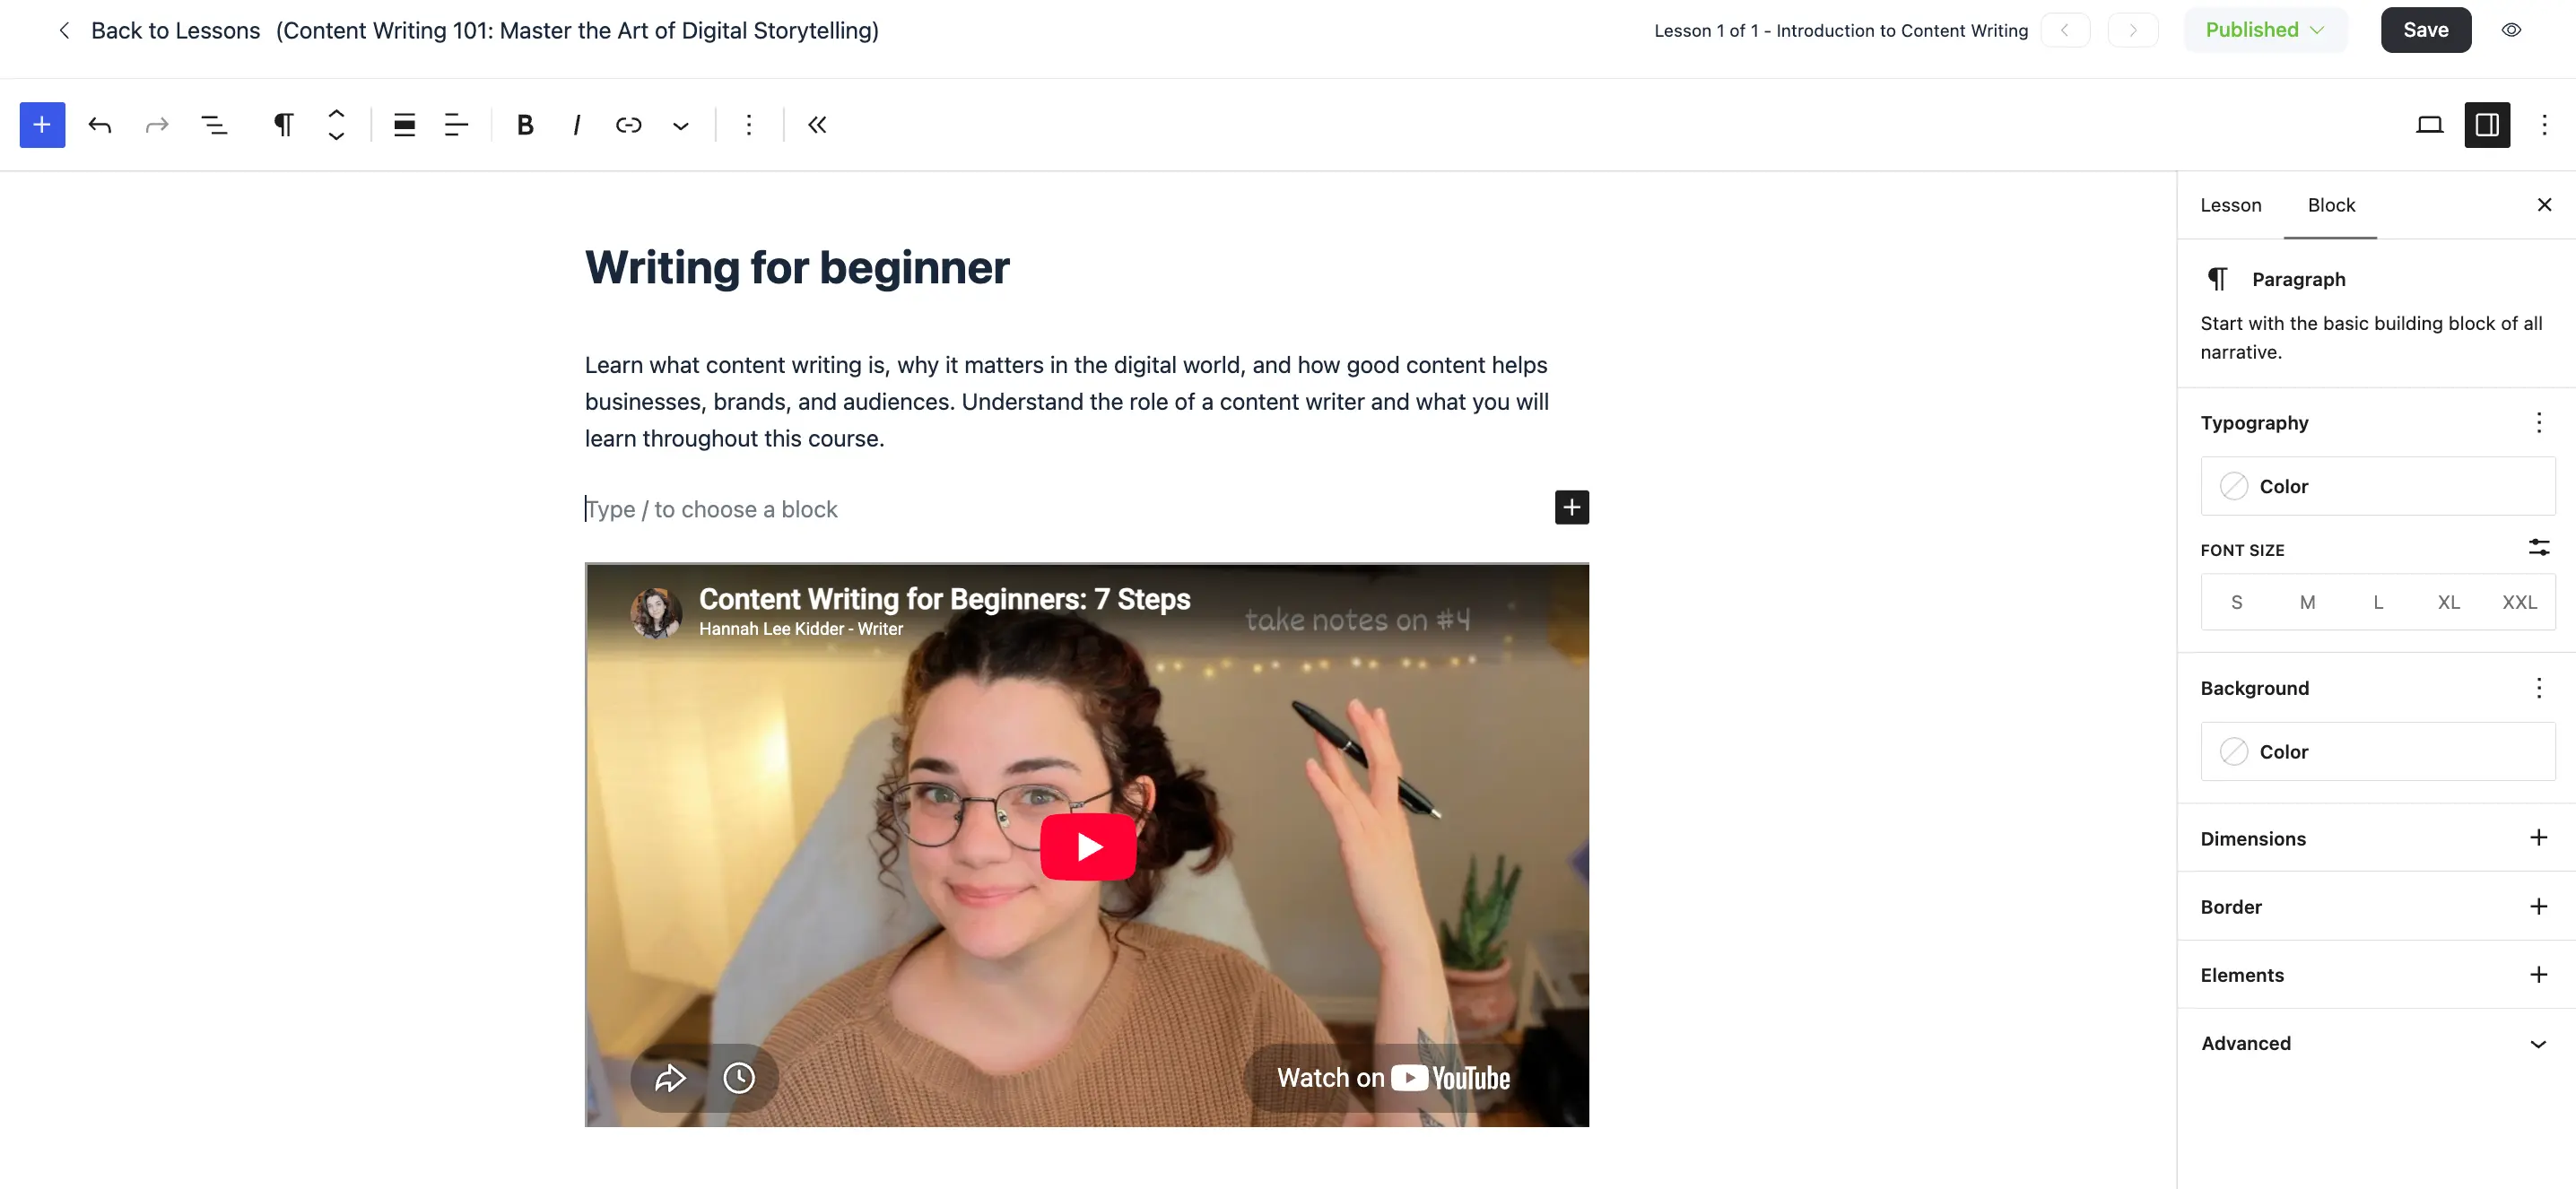
Choosing Add & Edit, or Edit Content from a lesson's three-dot menu, opens FluentCommunity's built-in lesson editor, a block-based editor similar in spirit to the WordPress block editor (Gutenberg), letting you build the lesson from individual content blocks.
- Add paragraphs of text for written instruction.
- Embed videos from services like YouTube or Vimeo, or upload your own.
- Add images, galleries, and downloadable files.
- Include lists, quotes, and other rich formatting blocks via the Type
/to choose a block prompt.
The top toolbar shows which lesson you're on (e.g., "Lesson 1 of 1"), with arrows to jump to the previous or next lesson without leaving the editor, plus the lesson's Published/Draft status and a Save button.
Selecting a block opens a settings panel on the right with Typography, Background, Dimensions, Border, Elements, and Advanced controls for fine-tuning its appearance.
Once you are finished adding content to your lesson, click Save, then Back to Lessons in the top-left corner to return to the course structure and add more lessons or sections.
NOTE
The section and lesson list students see on a course page is laid out more compactly on phones and small screens, so the module structure stays easy to scan while taking a course on mobile.