

Appearance
Installation & Activation
Let's get the plugin installed on your WordPress site so you can start building your community. This guide will walk you through the process for both the free and pro versions.
Step 1: Installing the Plugin
You can install FluentCommunity directly from your WordPress dashboard or by uploading the plugin file if you have the Pro version.
Option A: Installing the Free Version from WordPress.org
- From your WordPress dashboard, navigate to Plugins → Add New.
- In the search bar at the top right, type "FluentCommunity" and press Enter.
- You will see FluentCommunity in the search results. Click the Install Now button and then the Activate button.
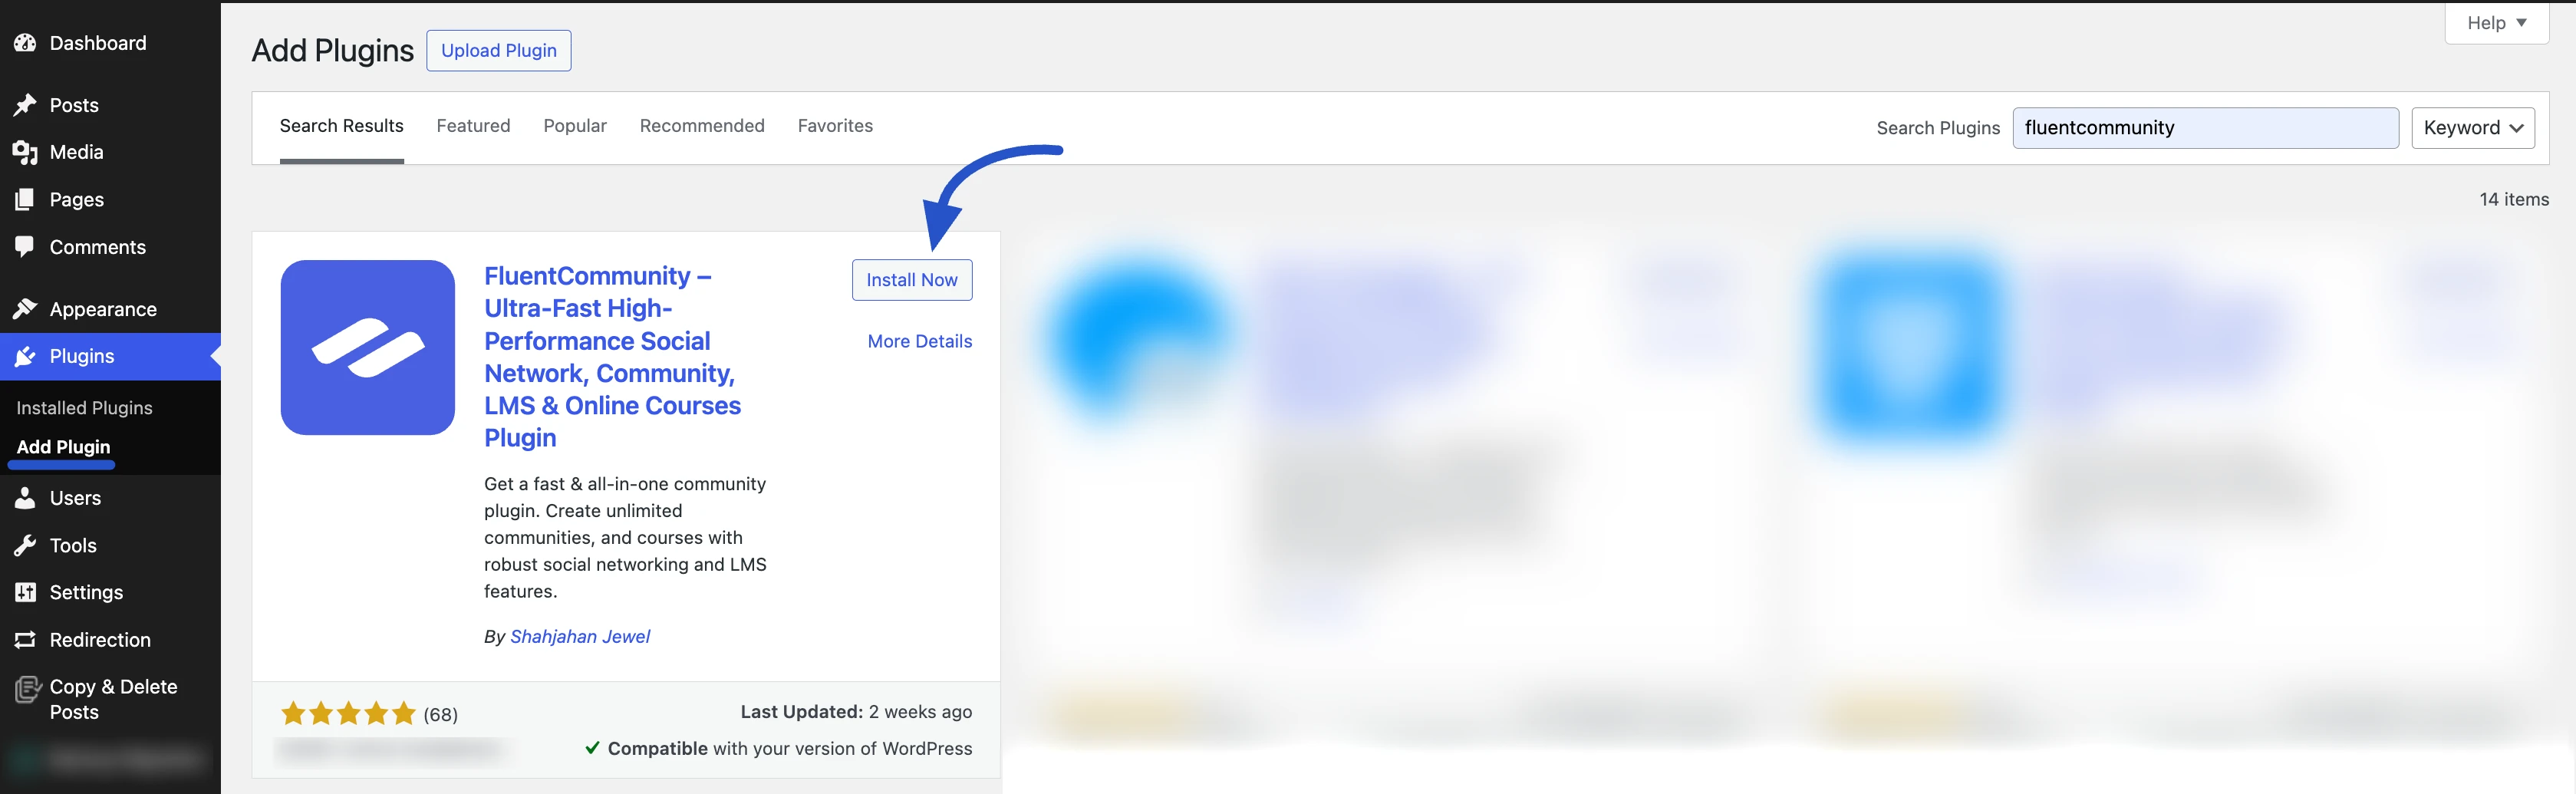
- WordPress will automatically download and install & activate the plugin.
Option B: Installing the Pro Version via Upload
If you have purchased FluentCommunity Pro, you will receive a .zip file from your WPmanageninja Account dashboard.
- From your WordPress dashboard, navigate to Plugins → Add New.
- Click the Upload Plugin button at the top of the page.
- Click Choose File and select the FluentCommunity Pro
.zipfile you downloaded. - Click Install Now and wait for the installation to complete.
Step 2: Activating the Plugin
After installation, you need to activate FluentCommunity:
- From your WordPress dashboard, navigate to Plugins → Installed Plugins.
- Find FluentCommunity Pro in the list and click Activate.
Congratulations! FluentCommunity is now installed and activated on your site.
Next Steps:
- Complete the Setup Wizard to configure your community
- Explore the Admin Dashboard to familiarize yourself with the controls