Appearance
Creating & Assigning Badges
User Badges let you recognize and reward your members for their achievements, status, or contributions. When active, these badges display alongside user names and profile sections to provide instant community distinction.
Use Case: You can create "VIP," "Moderator," or "Alpha Tester" badges to distinguish your power users from the general membership.
Enable the Badge Module
Activate the badge framework from your administrator settings dashboard to start creating rewards:
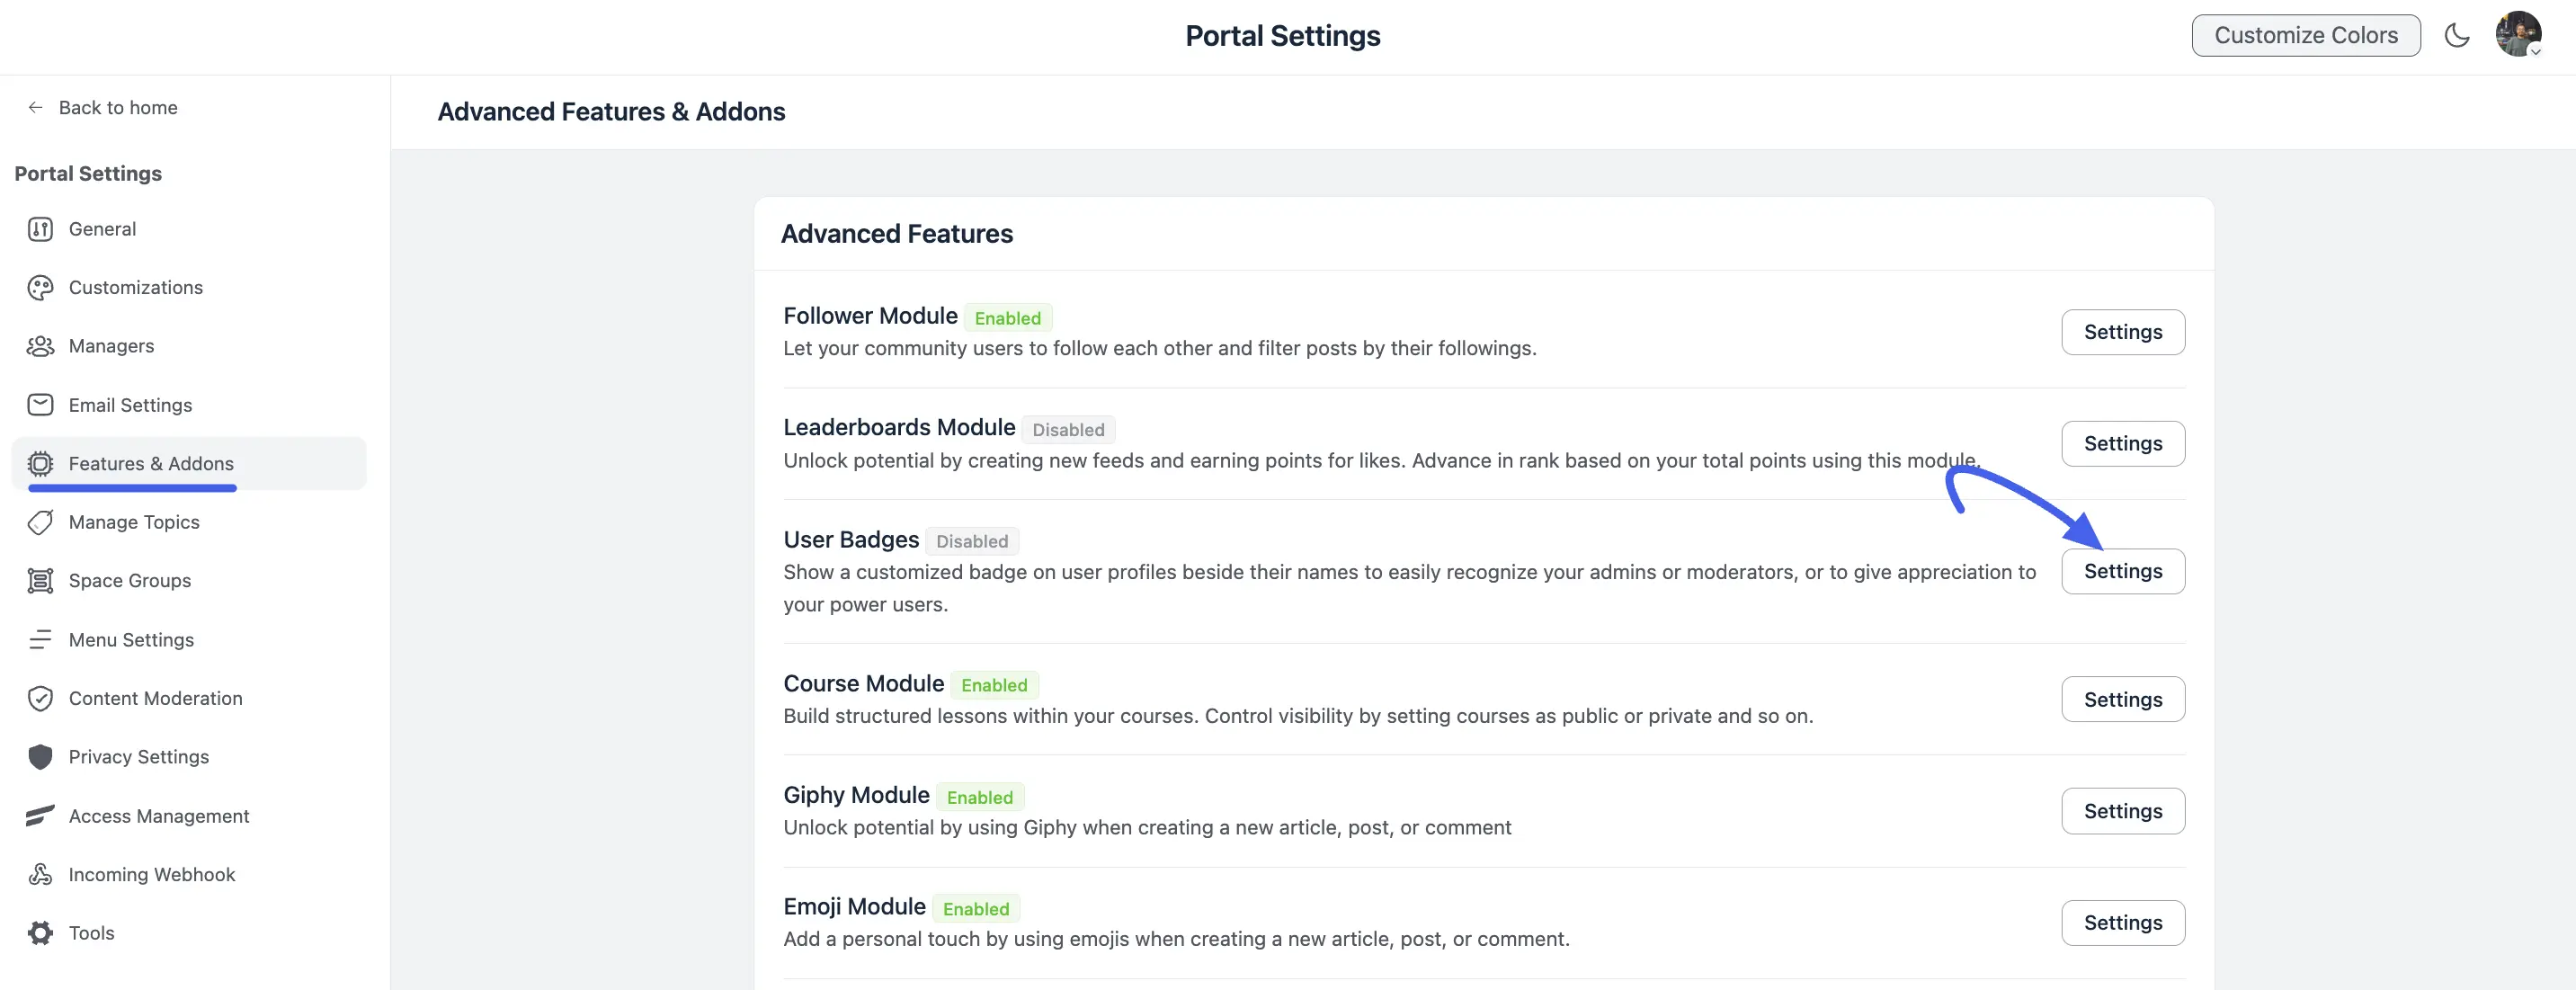
- Navigate to Portal Settings using your main community sidebar.
- Click the Features & Addons tab from the left navigation panel.
- Locate the User Badges row and click the Settings button.
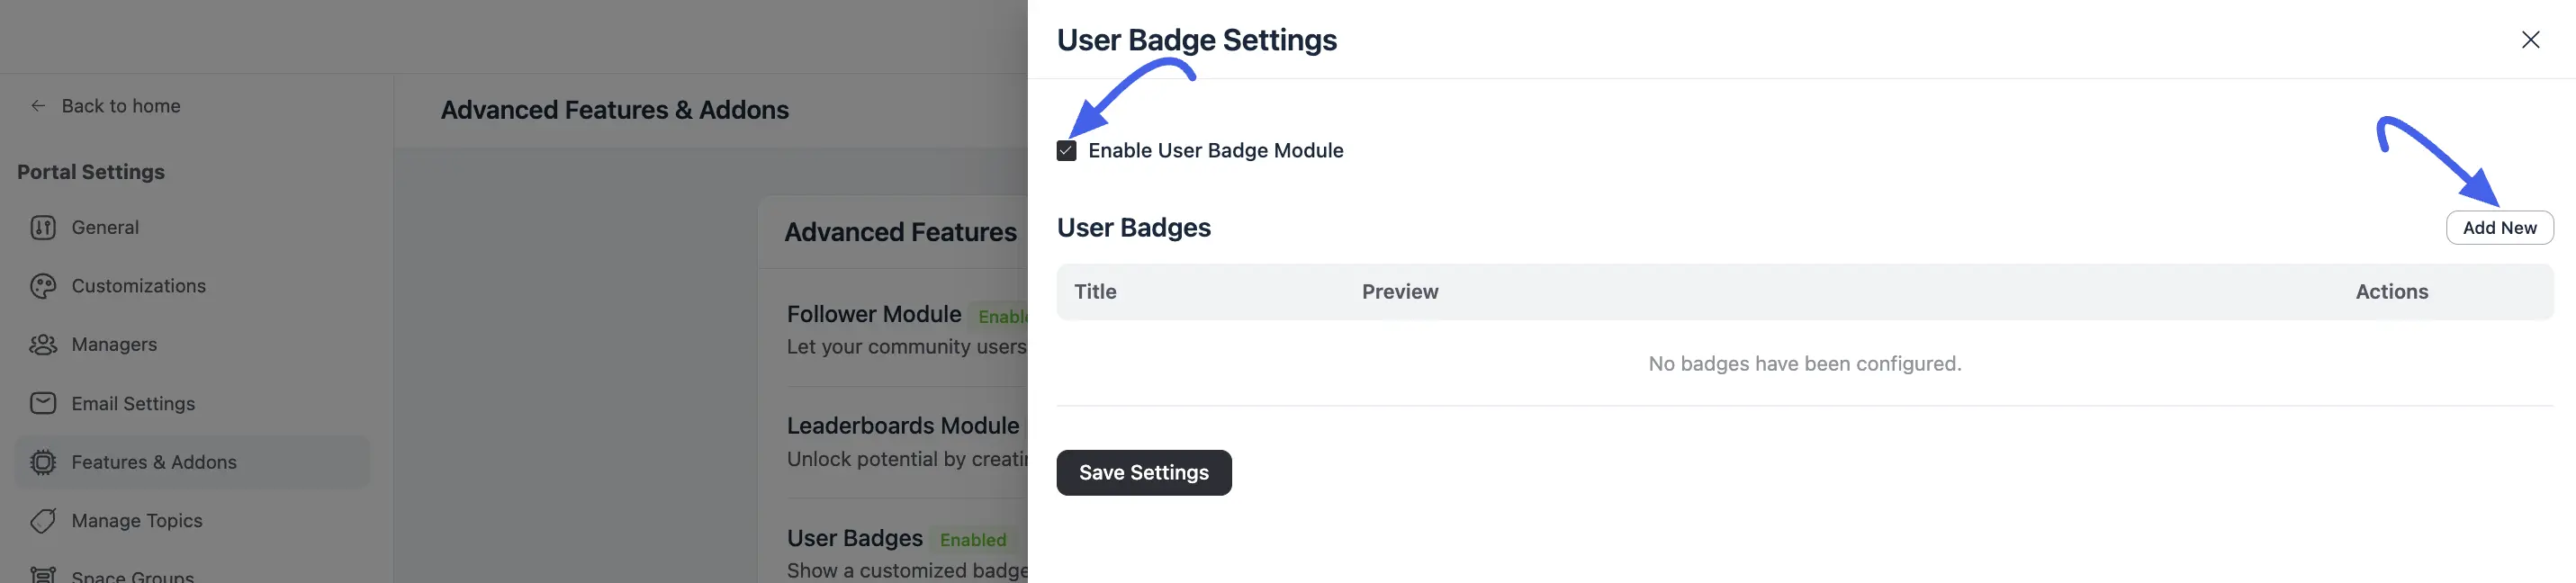
- Check the box to Enable User Badge Module inside the side panel settings drawer.
- Click Save Settings.
Create Custom Badges
Once you enable the module, you can build out your community's active badge directory using the configuration modal:
- Click the Add New button at the top right of the User Badge Settings drawer.
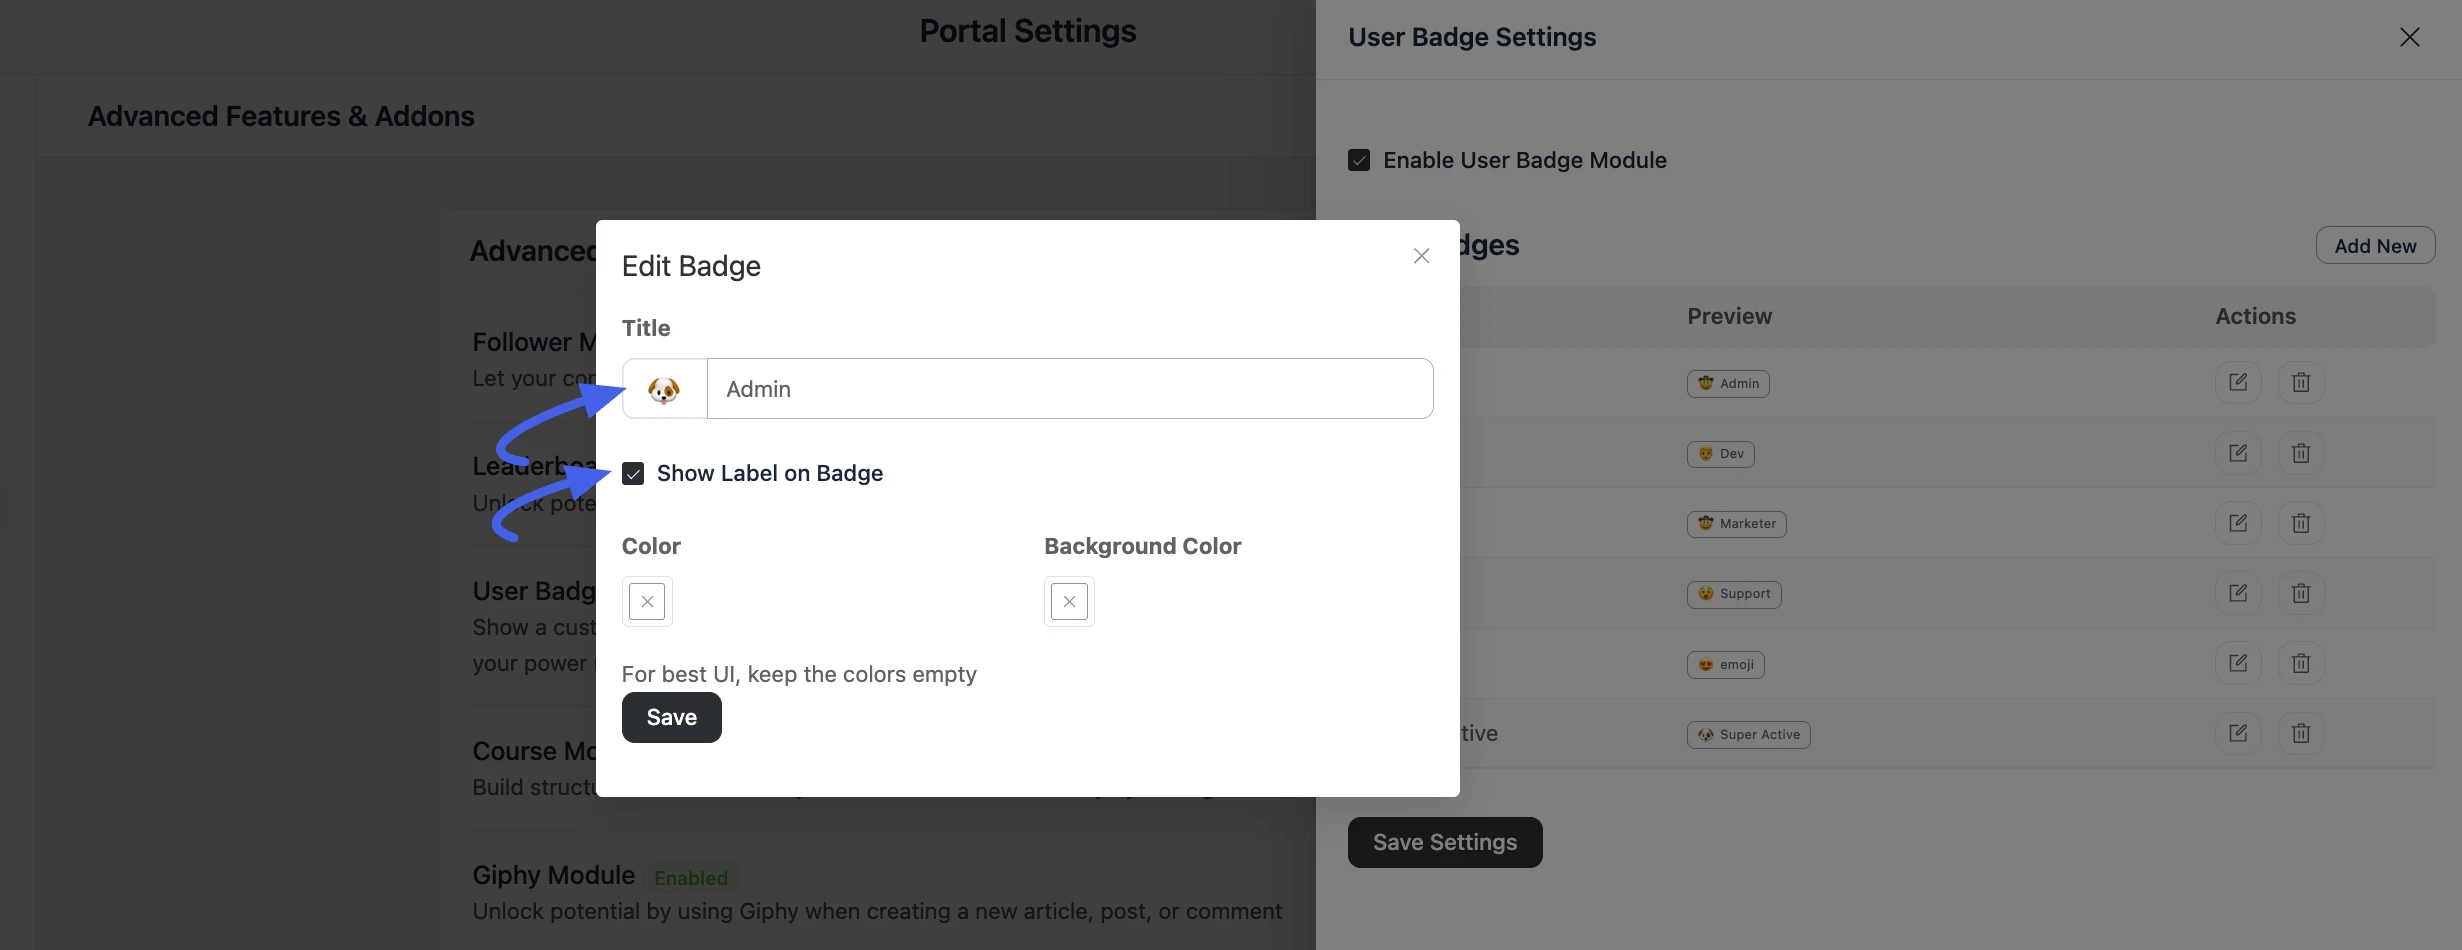
- Configure the following custom badge parameters:
- Title: Enter the public name of the badge (e.g., Admin, Dev, Marketer, or Super Active).
- Badge Graphic / Icon: Click the icon box next to the title field to select your badge visual. A popover window will appear with four tabs for selecting or uploading your design:
- Emoji: Click the smiling face icon inside the text bar to browse and insert standard emojis directly into your badge graphic slot.
- Shape: Choose from a library of pre-made geometric vector outlines.
- Custom SVG: Paste raw SVG code elements for crisp rendering of complex custom logos.
- Custom Image: Upload local raster image files directly from your computer.
- Show Label on Badge: Check this box if you want the written title text to display directly inside the stylized capsule layout.
- Color & Background Color: Click the color picker box to customize the precise text color and background block fill using the color field or the hex preset swatches.
TIP
Leave these color parameters empty if you prefer the badge to automatically inherit clean default UI styling.
- Click Save to add the reward to your permanent inventory list.
Update, Reorder, or Delete Active Badges
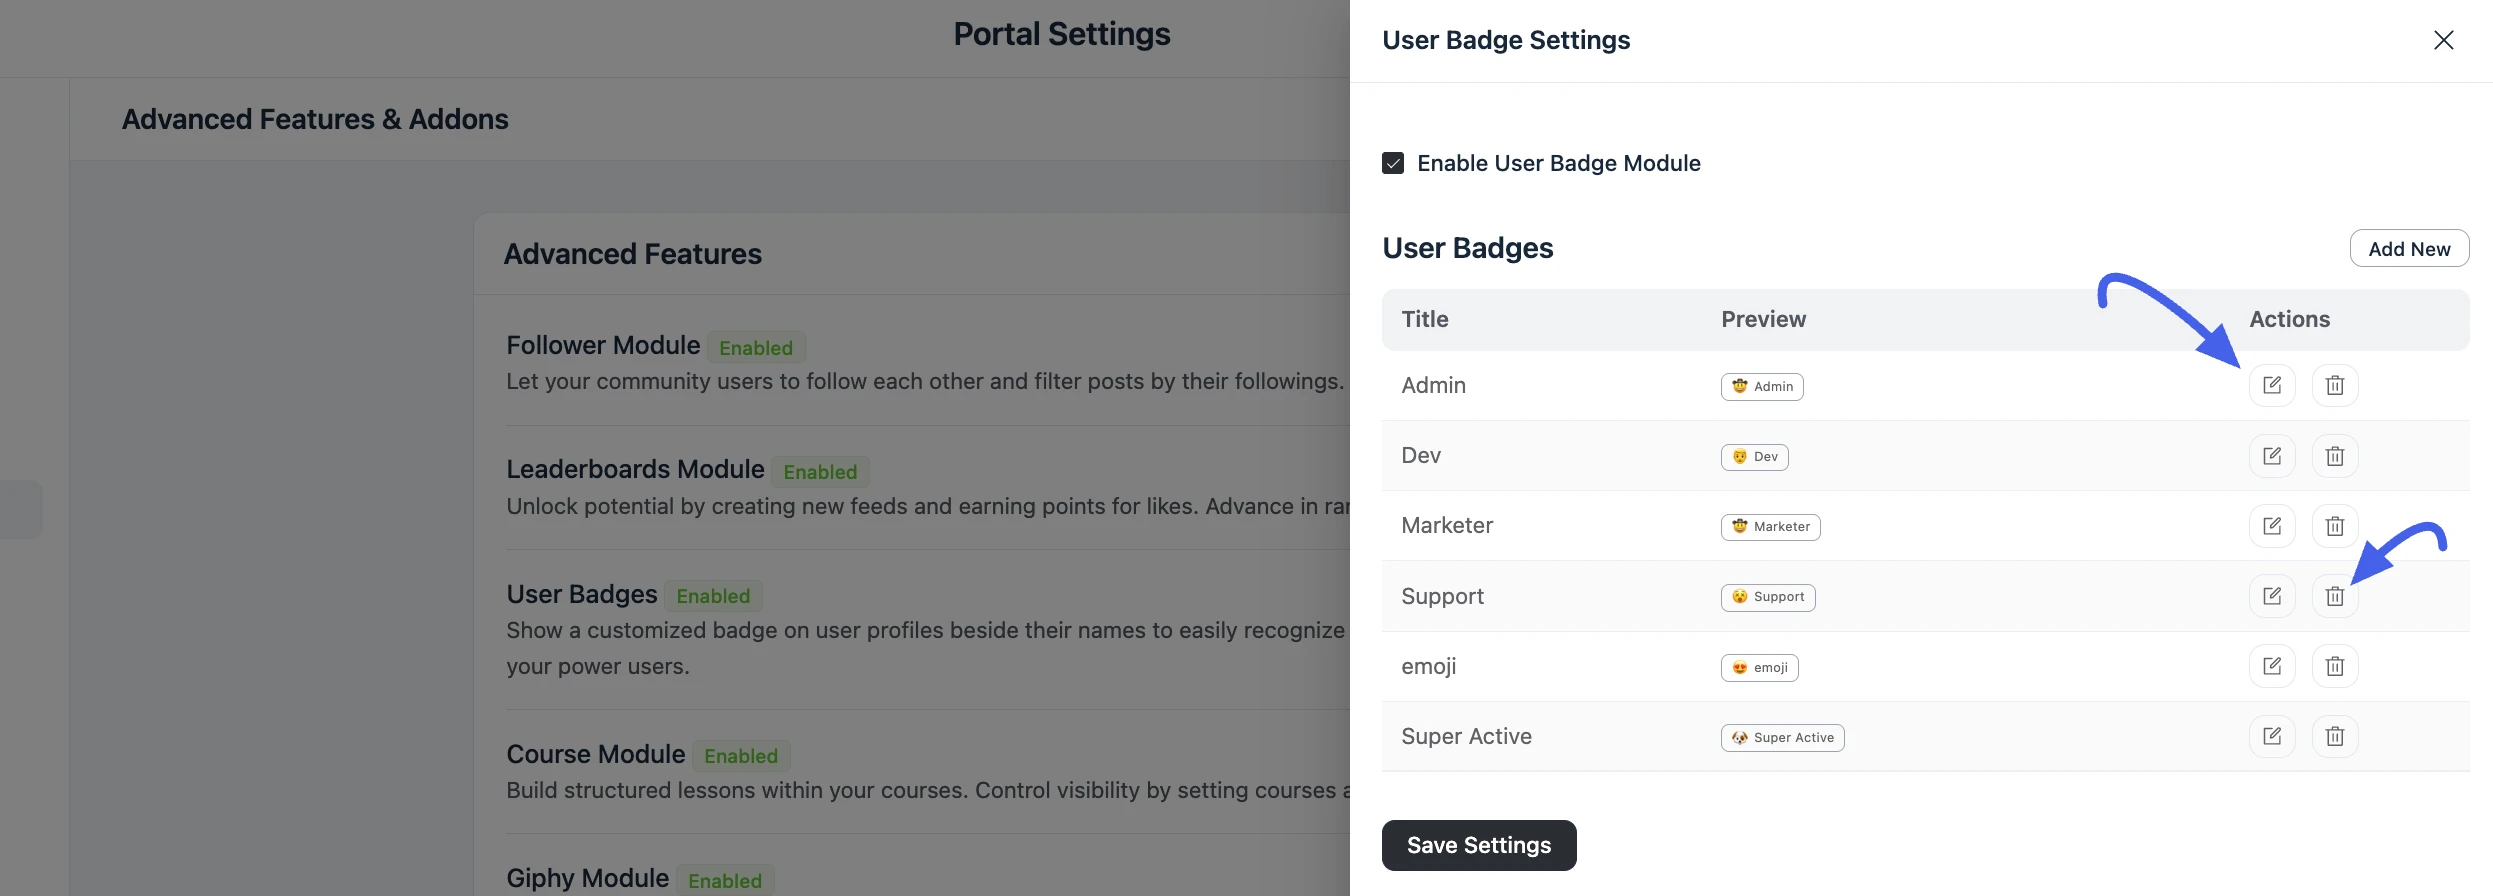
Manage your existing badge catalog directly from your master inventory table:
- Reorder Badges: Click and drag the handle (
⠿) on the left of any row to change its position in the list. Badge order here is display order, it controls the sequence badges appear in wherever a member has more than one. - Edit Existing Badges: Click the Edit (Pencil) icon next to any active badge row to open its custom styling options, update color hexes, or rename titles.
- Remove Badges: Click the Delete (Trash Can) icon next to any active badge row to permanently strip that reward option from the system directory.
Assigning Badges to Members
Currently, badges are assigned manually by administrators through the member management interface.
- Go to the Members tab in your community navigation.
- Select the specific member you wish to recognize to open their Profile → My Profile .
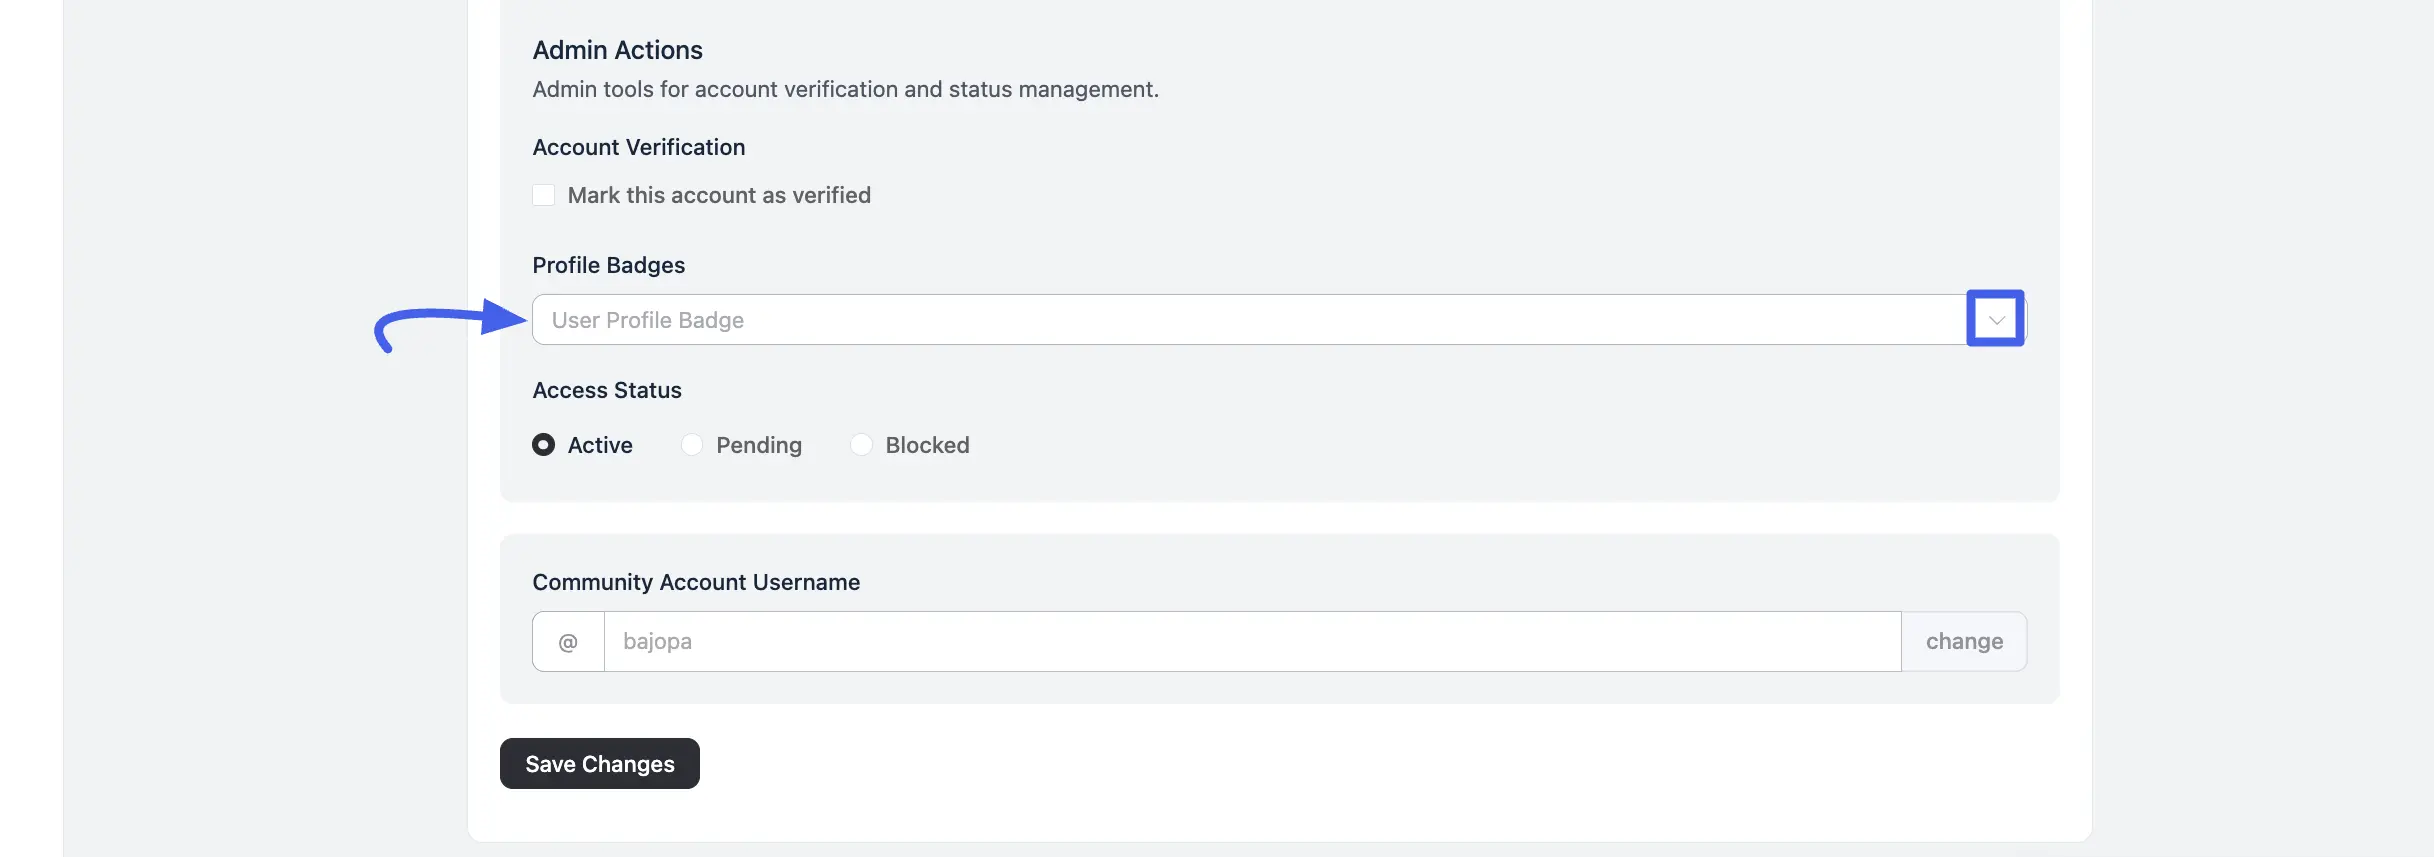
- Scroll down to the Admin Actions section.
- Locate the Profile Badges dropdown menu.
- Select the desired badge from your created list.
- Click Save Changes at the bottom of the page.
💡 Tip: Assigned badges are updated in real-time. Once saved, the badge will immediately appear on the member's profile card, highlighting their status to the rest of the community.