Appearance
Adding Videos & Attachments
A great course often includes more than just text. FluentCommunity makes it easy to add rich media like videos and provide downloadable resources like worksheets, PDFs, or source files directly within your lessons.
Adding Videos to a Lesson
Video is one of the most effective ways to teach. You can embed a video from a hosting service like YouTube directly into a lesson.
- Open the lesson you want to edit in the lesson editor.
- In the right-hand sidebar, on the Lesson tab, make sure Enable Video Embed is checked.
- Scroll to the Media Embed section and click + Add Media.
- A YouTube Embed URL card appears in the lesson content. Paste your video's URL into the Enter URL to embed here... field and click Embed.
The video is embedded directly in the lesson, with a Learn more about embeds link in the card for details on other supported providers.
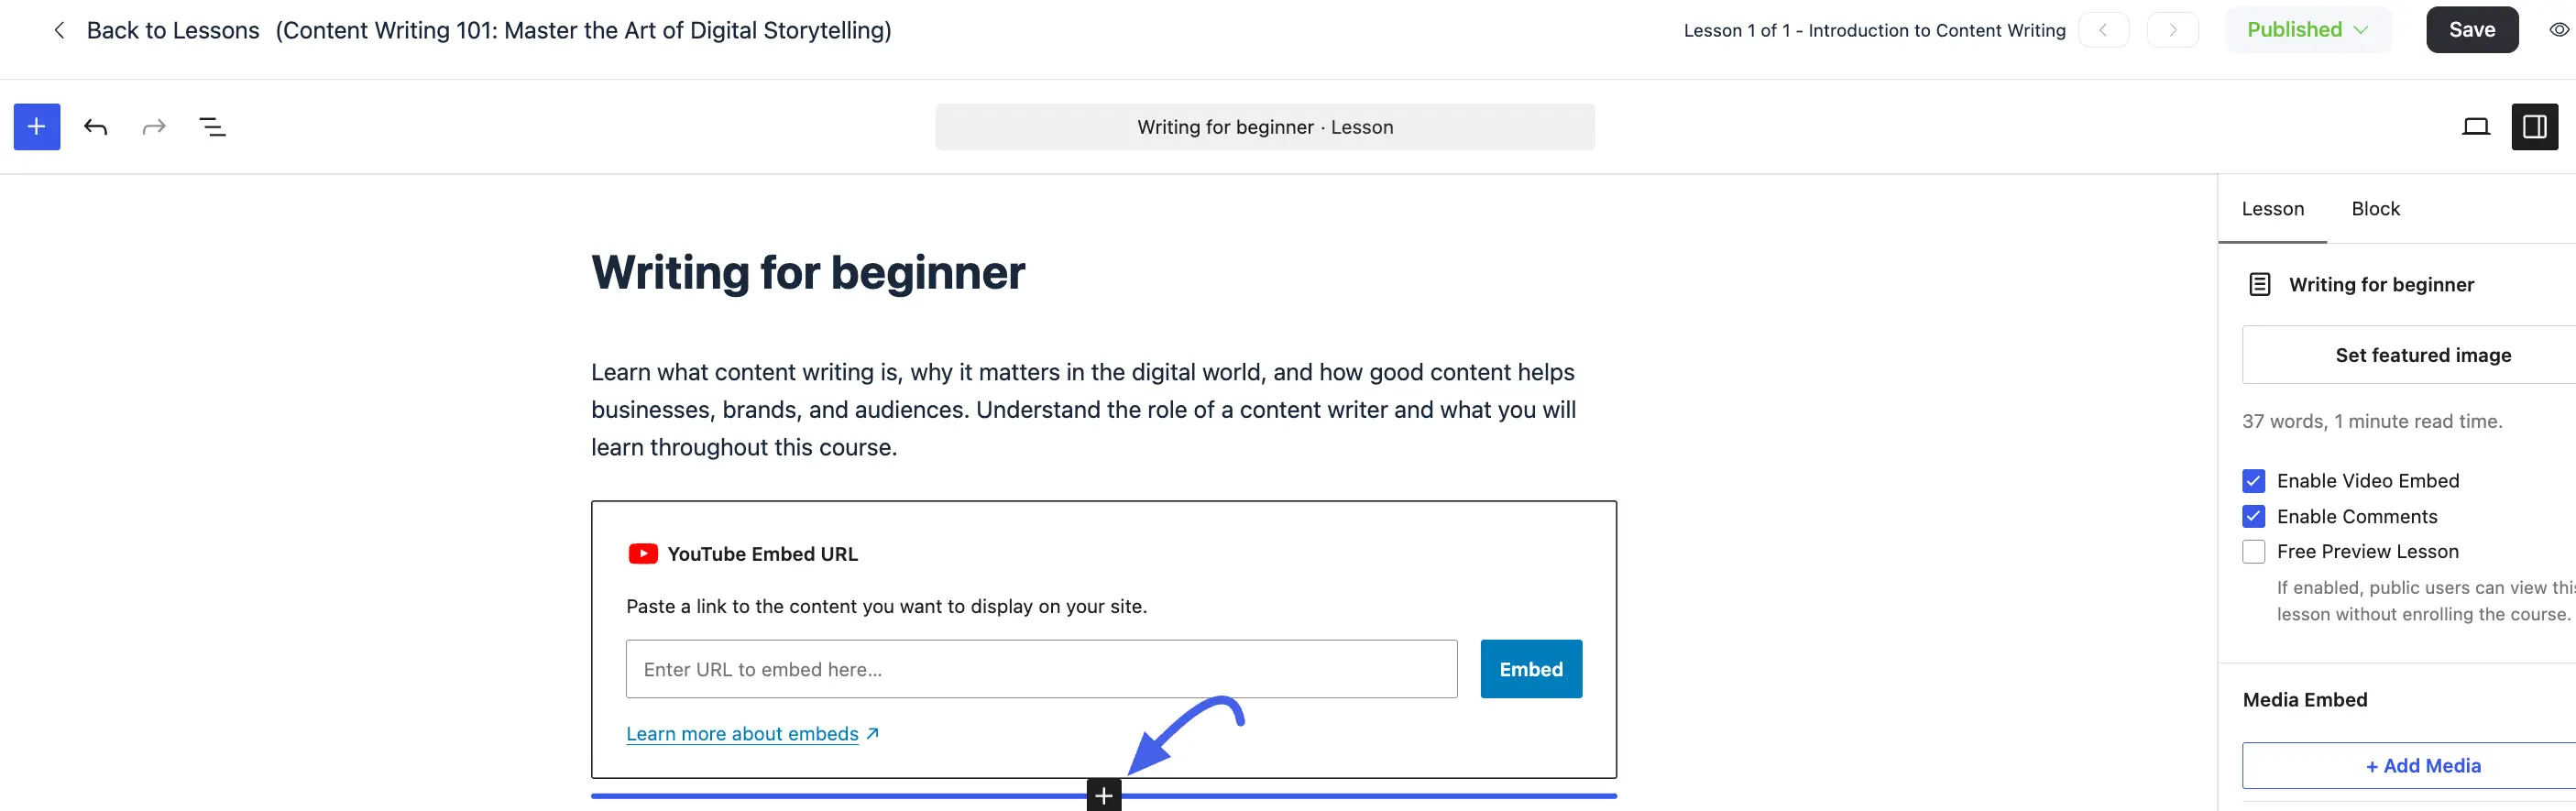
Use Case: You can embed a main lesson video from YouTube at the top of the lesson, followed by a written summary and key takeaways below it.
NOTE
The Enable Comments checkbox on the same Lesson tab controls whether students can comment on the lesson, and Free Preview Lesson lets non-enrolled visitors view it without joining the course.
If a video fails to play, for example because the URL is invalid, the provider blocks embedding, or the connection drops, the player now shows a clear error message in its place instead of a blank box or an embed that spins forever. Students see right away that something's wrong rather than assuming the lesson is broken.
Adding Documents & Files
Providing downloadable resources can significantly enhance the value of your course.
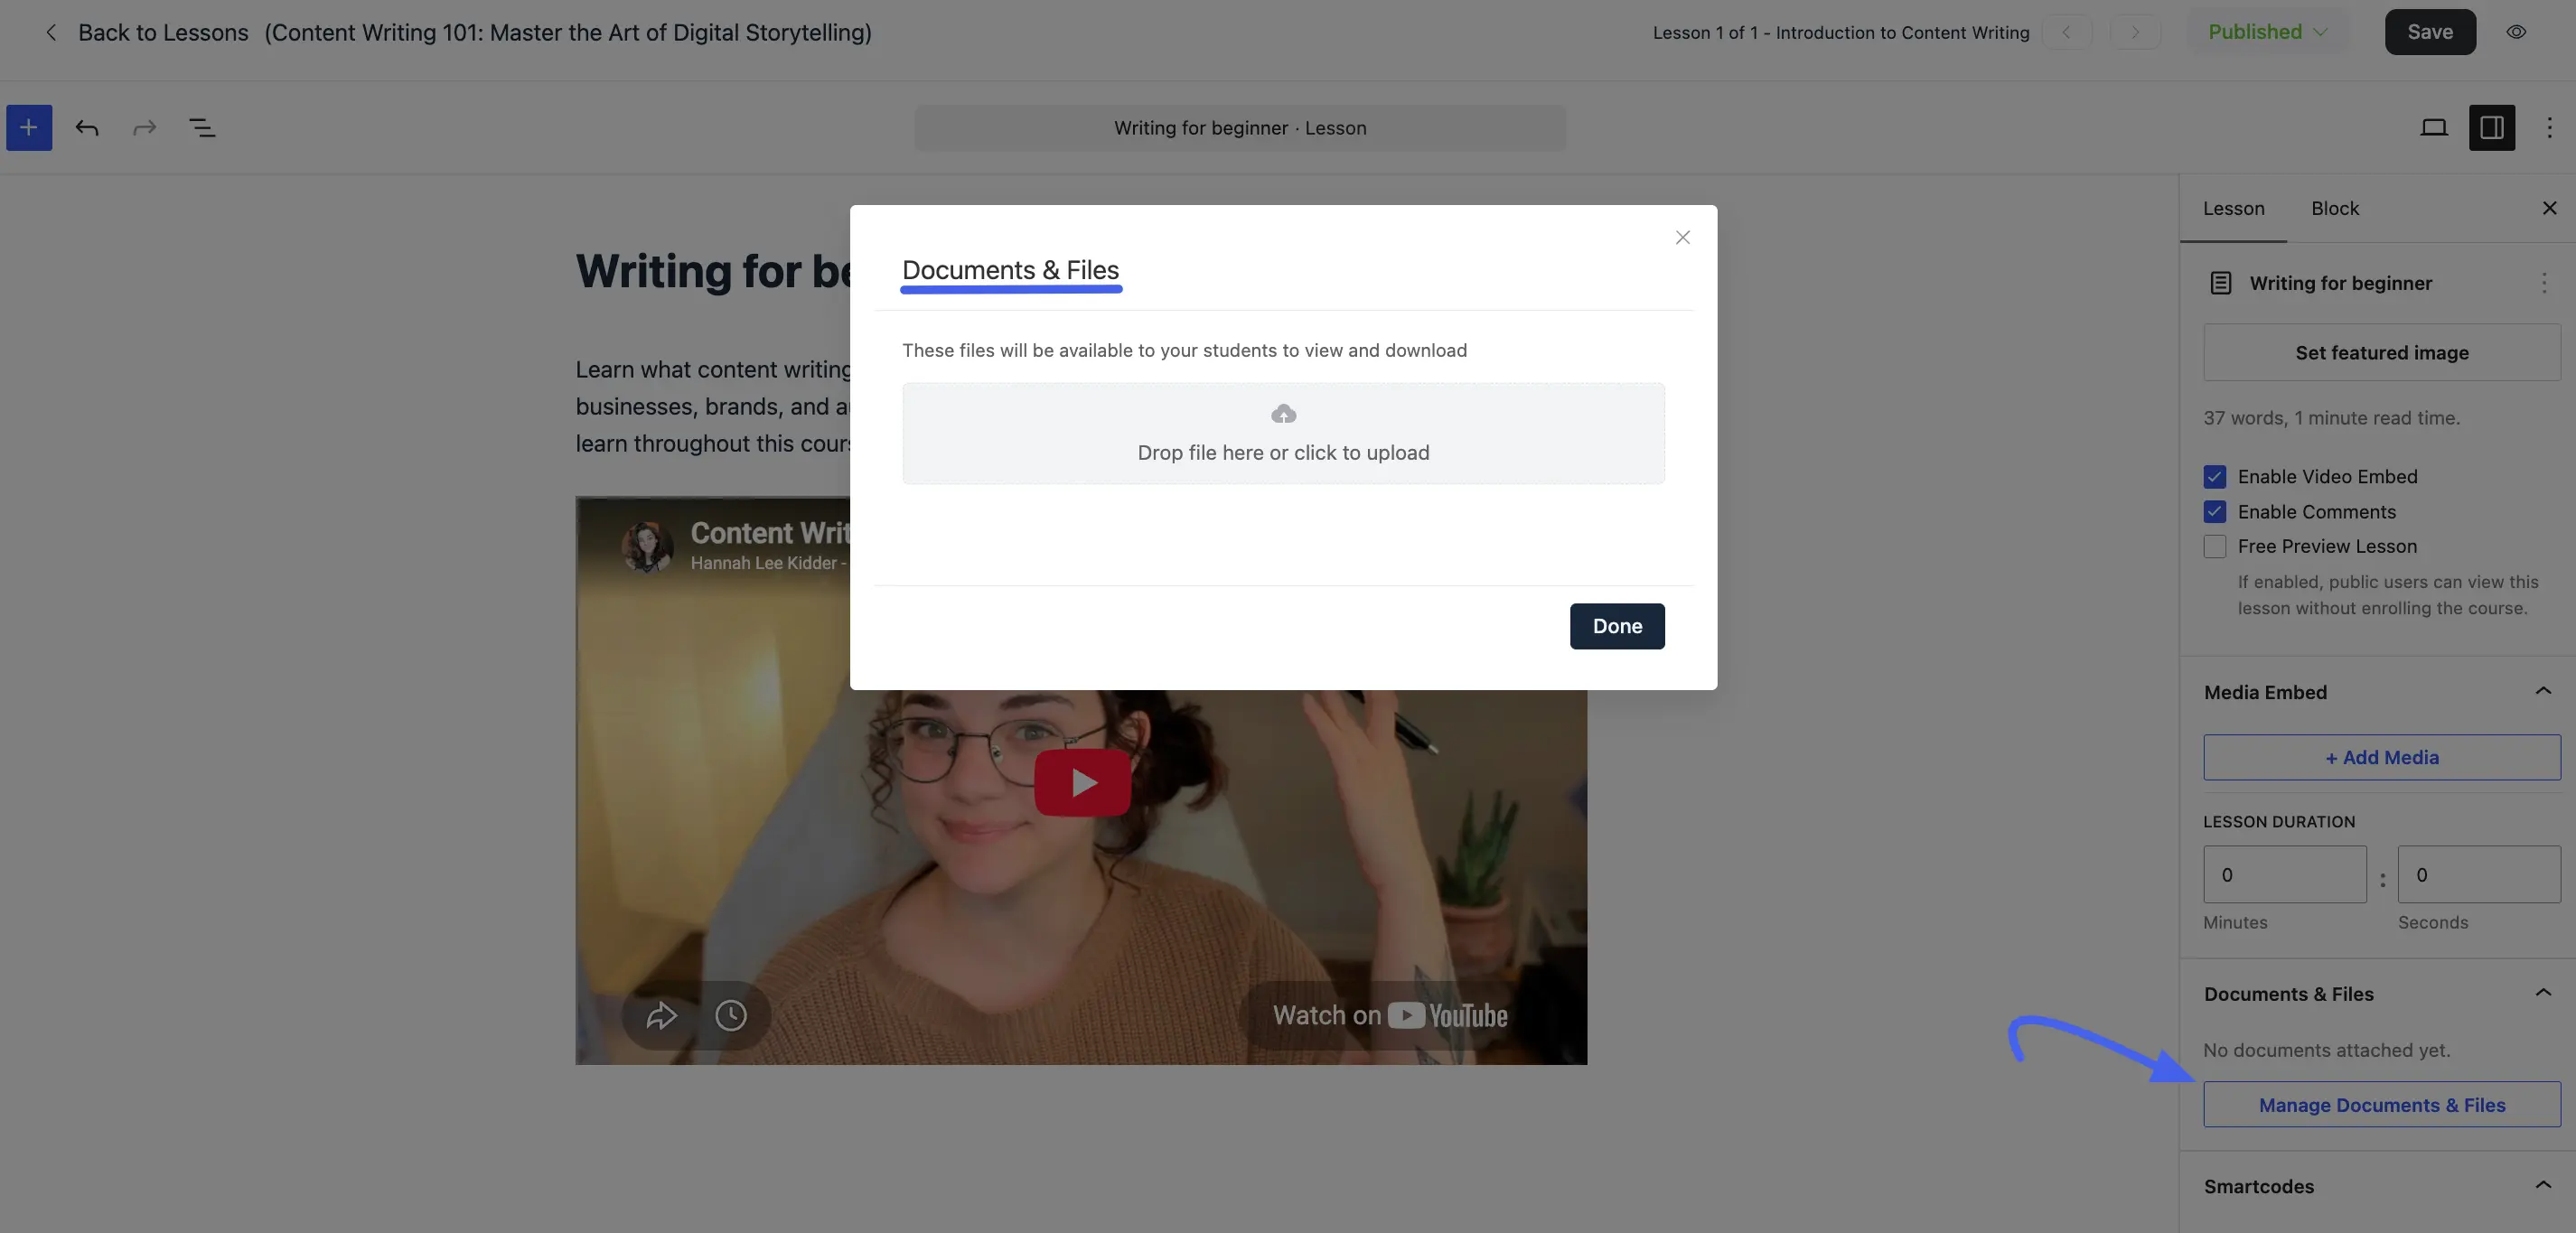
- In the lesson editor's right-hand sidebar, on the Lesson tab, scroll to the Documents & Files section.
- Click Manage Documents & Files.
- In the Documents & Files pop-up, drop a file onto the upload area or click it to select a file from your computer (e.g., a PDF worksheet, a ZIP file with code samples, or presentation slides).
- Click Done to close the pop-up.
Once uploaded, the section updates from "No documents attached yet" to list your files, and each one appears as a clickable link for your students to download at the bottom of the lesson page. You can add multiple files to a single lesson.
IMPORTANT
For larger video files, we strongly recommend using a dedicated video hosting service like YouTube or Vimeo instead of uploading them directly to WordPress. This provides a much better streaming experience for your students and saves your server's bandwidth.